
Wouldn’t it be awesome to add amazing effects to images with just a couple of clicks of the mouse? Photoshop is great, but it seems like a lot of the techniques are a several-step process to get to the final look.
Hey there, I’m Cara and I’m here to tell you that what you are looking for does exist and it is called filters. Curious? Then let’s take a look at what are filters in Photoshop and how to use them here!
Note: I use the Windows version of Photoshop. If you are using a Mac, the workspace will look slightly different from the screenshots displayed here.
Table of Contents
Where are Filters in Photoshop
Finding the filters is pretty simple. There’s literally a Filter tab up there on the menu bar that you will use to access them.
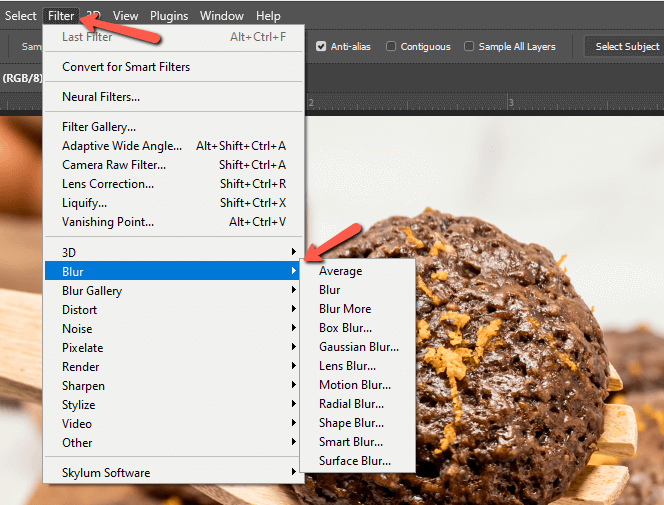
Opening this tab, you’ll see a list of filters and filter groups. When you hover over a filter group, you’ll get a secondary list of filters you can use. For example, I’ve opened the Blur group and you can see there are various options that will each blur your photo in a different way.
With filters, you can add a wide variety of effects including clouds and fire, noise (or denoise), sharpening, lens flares, pixelation, various types of distortions, and so on.
When you add a filter, it will be applied to whatever selection you have active at the time. This may be a whole layer or your active selection of a layer.
Once you add the filter, you will be presented with that filter’s adjustment options and usually a preview of the effect.
Make adjustments carefully before accepting the changes. Filters edit destructively, so once you’ve moved forward, you can only go back by undoing, which can be a big pain (or impossible) if you’ve already moved forward several steps.
However, you can turn your filters into Smart Filters, which will allow you to come back and make adjustments later. Stay tuned for more on that.
At the top of the Filter menu, you’ll see that it says Last Filter. Whichever filter you applied last to the image will show up here. I’ve just opened a new project and haven’t added any filters yet so it is grayed out with the placeholder Last Filter.
Under that, you’ll see Convert for Smart Filters. Again, we’ll look at that more closely in a moment.
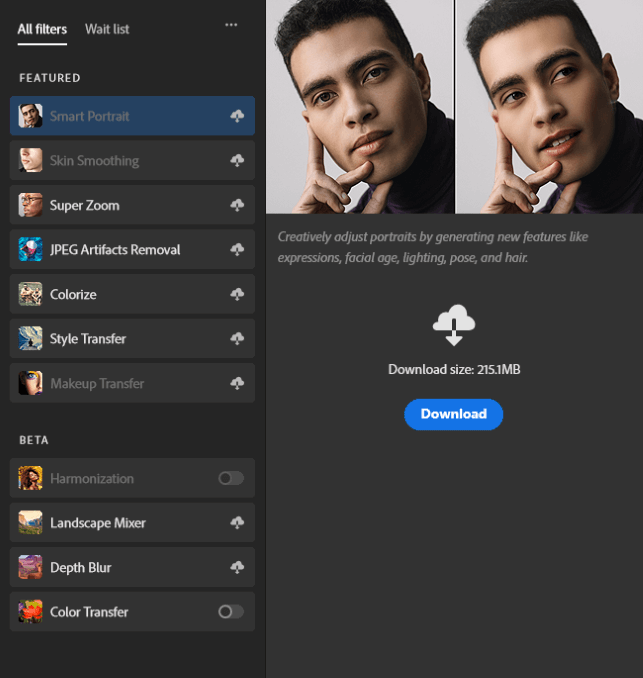
Then, you have the Neural Filters. These are powerful filters that you’ll have to download separately. When you open them, you’ll see a list of available downloads. You can use these filters to alter portraits, harmonize subjects with the background when compositing, and more.
Under that, we have a list of special filters. The first is Filter Gallery. This will open another set of filters with a preview box on the left. These are mostly artistic filters you can use to add brush strokes, textures, or distortion effects.
I use some of these filters in my tutorials for making images look like watercolor paintings or turning an image into a drawing.
Under the Filter Gallery, there is a short list of stand-alone filters. The Camera Raw Filter is basically like opening a mini-version of Lightroom inside Photoshop. Liquify allows you to push pixels around in the image. Use this for straightening a necklace or slimming a person’s body.
Other options include adaptive wide-angle, lens correction, and vanishing point.
Then we come to the filter groups, which are chock full of various effects you can apply to your image. For time’s sake, we can’t really get into them all here, but there are a number of tutorials here on Photoshop Buzz that will show you how these work. I’ll link a handful here.
- How to Add a Fire Effect in Photoshop
- How to Add Clouds to a Photo in Photoshop
- How to Add Motion Blur in Photoshop
- How to Sharpen an Image in Photoshop
- How to Create a Reflection in Photoshop
How to Use Filters in Photoshop
Now let’s look at how to use these filters. You can simply go to the Filter menu and slap whatever filter on your image and call it good. You might not get the best results with this method, though. It takes a bit of finesse to get the filters to create the exact look you want.
Let’s look at how to apply the filters to get the results you’re looking for.
Convert to Smart Filters
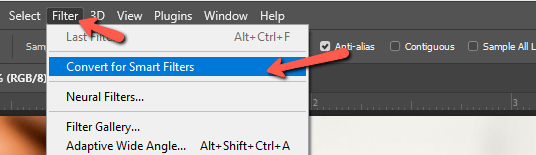
The first thing I would recommend is to use the Convert for Smart Filters option in the Filter menu or convert the active layer to a smart object. I know the suspense has been building for this feature and now it’s time to see how it works.
Turning your active layer into a smart object before adding the filter is immensely helpful. Once you do this, you can stack various filters on top of one another, change their order as you please, and re-enter any filter to adjust the settings any time you want.
Before applying any filters, go to Filter and choose Convert for Smart Filters.
If your active layer is a background layer, it will automatically be converted to a normal layer and a smart object at the same time.
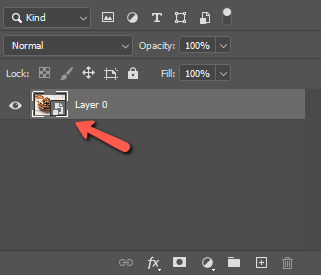
You can also do this by right-clicking on the layer you want to convert and choosing Convert to Smart Object from the menu.
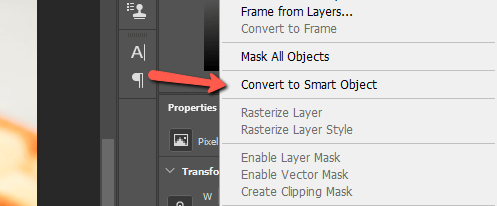
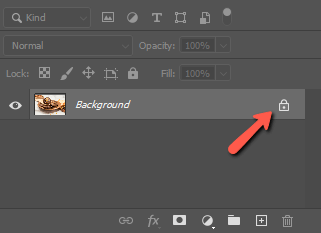
If the layer you wish to convert is a background layer, you’ll have to unlock it first by clicking the lock icon on the right side of the layer.
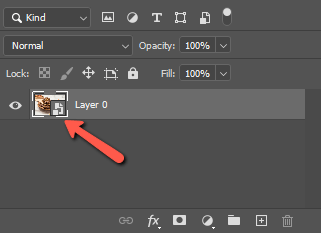
Whichever way you get there, you’ll know your layer is now a smart object because of the little icon in the lower right corner of the layer’s thumbnail.
Adding a Filter
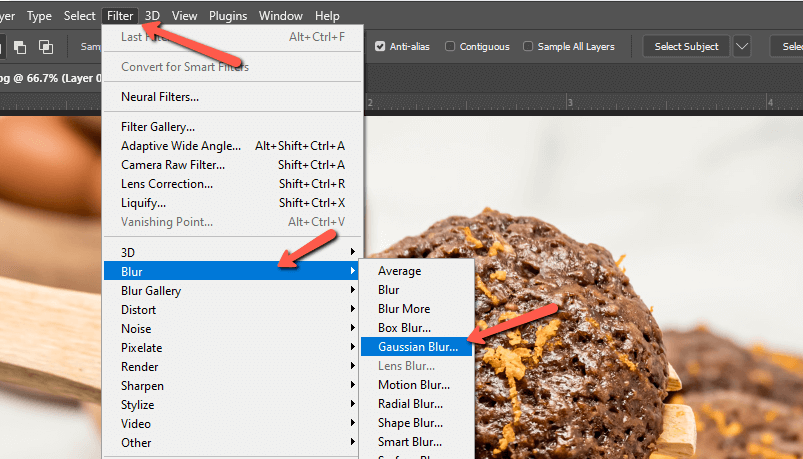
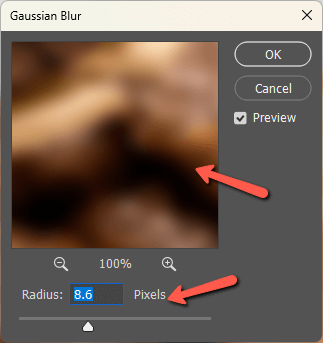
Watch what happens when we add a filter to blur an image. Let’s add a Gaussian Blur filter for this example. Go to Filter, hover over Blur, and choose Gaussian Blur.
You can adjust how much blur you want in the settings box that pops up. Make sure the Preview is toggled on so you can see how much it will affect your image.
When you press OK, let’s see what happens in the Layers panel. You get a layer mask called Smart Filters and your Gaussian Blur filter appears beneath it.
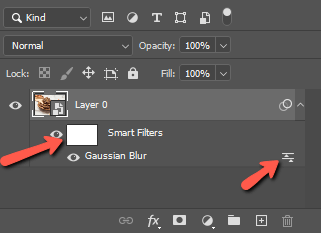
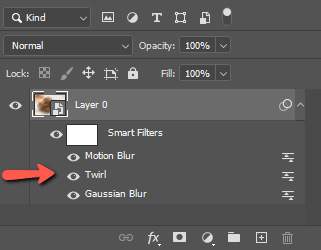
If you were to add more filters, they would continue stacking under here. You can also click and drag to change the order of the filters just as you can with any normal layer.
Making Adjustments
To make adjustments, simply double-click on the filter you want to adjust. Its adjustment panel will reopen. Keep in mind that you can’t see the cumulative effect of filters stacked on top of each other while making adjustments but once you hit OK the effects all come back.
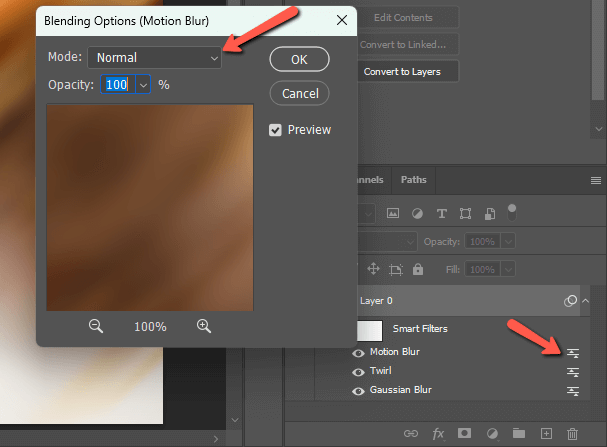
If you double-click on the little icon on the right side of the filter layer, you’ll get the option to change the filter’s blending mode and opacity.
You can also turn off a filter’s visibility temporarily with the eye icon on the left. This is helpful when you want to see how the filters work together or the effects of a specific filter.
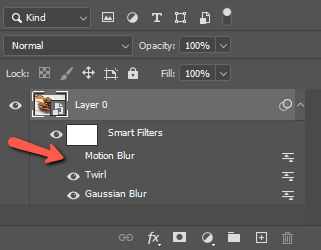
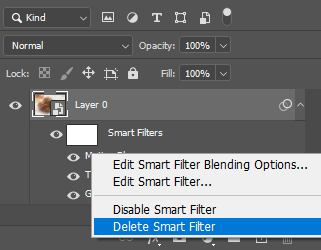
You can also access any of the editing options or delete the filter entirely by right-clicking on the filter.
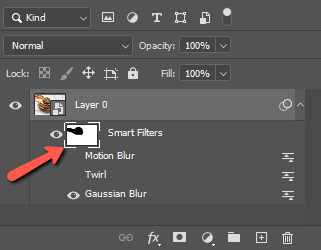
Finally, you can limit the filter’s effect to certain parts of your image with the layer mask. Make sure that the layer mask is selected in the layers panel, then paint black on the layer mask with your brush to remove the filters from wherever you paint.
In this example, I am applying Gaussian blur to the whole image, but I removed the effect from the cookie and the spoon. This gave me a nice blurred background with the nearest cookie still in sharp focus.

Here’s the original image to compare.

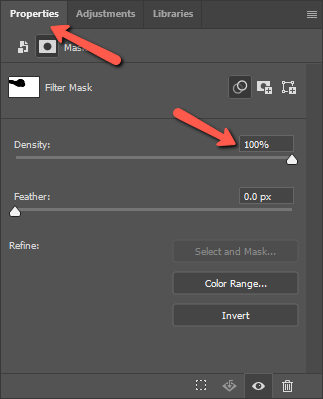
You can also reduce the effects of the filter (as opposed to removing them entirely). In the layer mask’s Properties tab, simply bring down the density of the mask. This is basically the same as the opacity of a layer. Or you can feather the effect with the Feather slider.
There are all sorts of ways to make filters work for you. With the ability to fine-tune, you can add a touch of blur here, sharpen a feature or two there, and even do crazy stuff like add flames to your images.
As always, have fun with it, and be sure to check out some of our other tutorials to see these filters in action. Here’s another one for fun, learn how to create a frosted glass effect here!
About Cara Koch