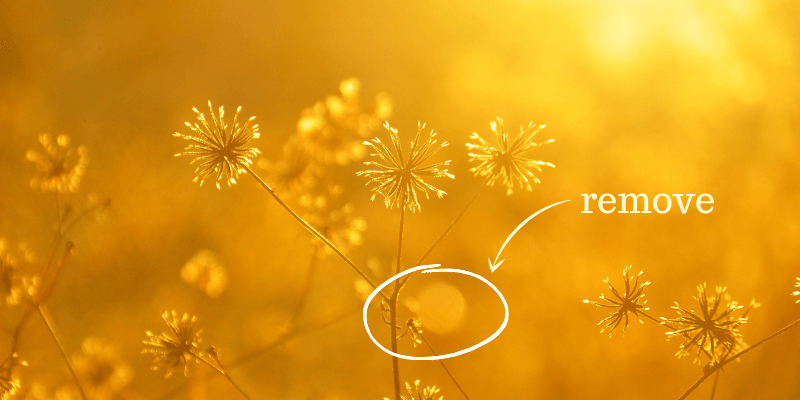
Few things are more frustrating than taking a perfect photograph, only to get back to your computer and discover that a lens flare has wrecked your shot.
It’s always a good idea to be conscious of the position of the sun when photographing, especially if you don’t have a lens hood, but sometimes lens flares are unavoidable.
With a bit of fancy Photoshop work, you can remove some of the more basic types of lens flares, but it’s important to say right away that there is no simple automatic solution specifically designed for removing lens flares from photographs.
Your best bet is to prevent them from occurring in the first place!
There are three basic methods for removing objects from an image in Photoshop, and they work just as well on a lens flare as they do on any other unwanted object in your image.
Depending on the type of flare you’ve got, you may also want to use adjustment layers to correct color issues.
The method you choose will depend on the contents of your image, but you may want to experiment with multiple methods to compare the results.
Table of Contents
Method 1: Removing Sun Flares Using Content-Aware Fill
This is as close as you’ll get to an automatic way to get rid of sun flares in Photoshop, but it will only work when the flare is positioned overtop of a fair basic background.
If the background content is too complex such as a repeating pattern or a complex structure like a face, you’ll just wind up with a blurred mess – or even something vaguely nightmarish.
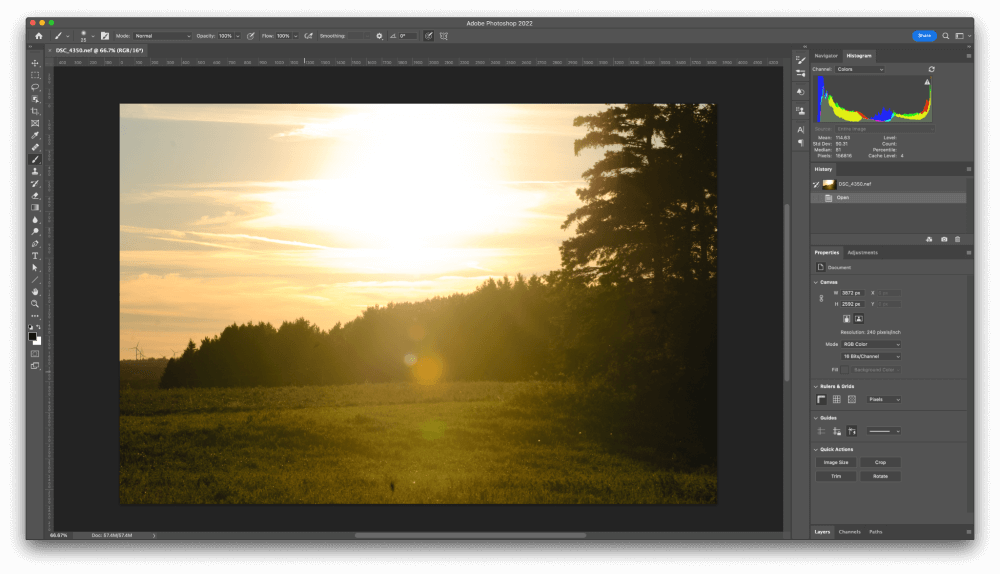
This excessively dramatic shot (give me a break, I was young!) has some promise as part of a larger panorama, but that circular red flare in the middle of the horizon line is a bit distracting.
To remove a sun flare with Content-Aware Fill, the first step is to make a selection around your flare. Since this one is circular, the Elliptical Marquee tool is the simplest option, but you can use any of Photoshop’s selection tools.
If you have multiple flares, hold down the Shift key as you create new selections to add them together into a single selection so they can be corrected at the same time, although you can also handle them individually if you want by repeating these steps as necessary.
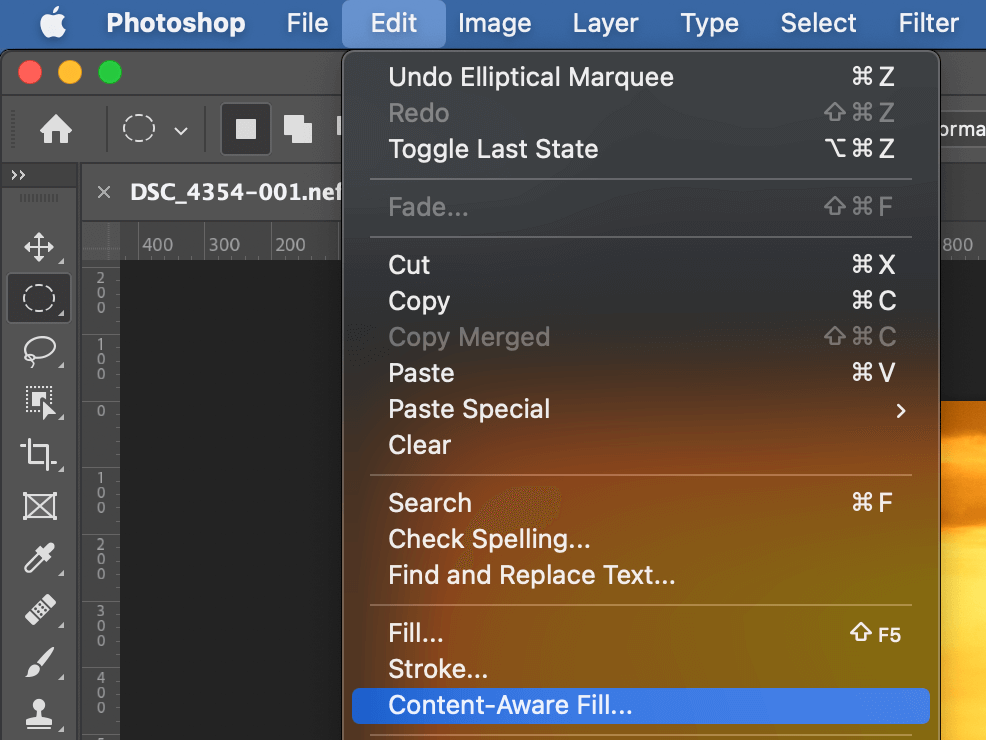
Once that’s done, open the Edit menu and select Content-Aware Fill. Photoshop will open the CAF workspace, which gives you a preview of the result as well as allows you to control which sections of the image are used as source material for creating the fill.
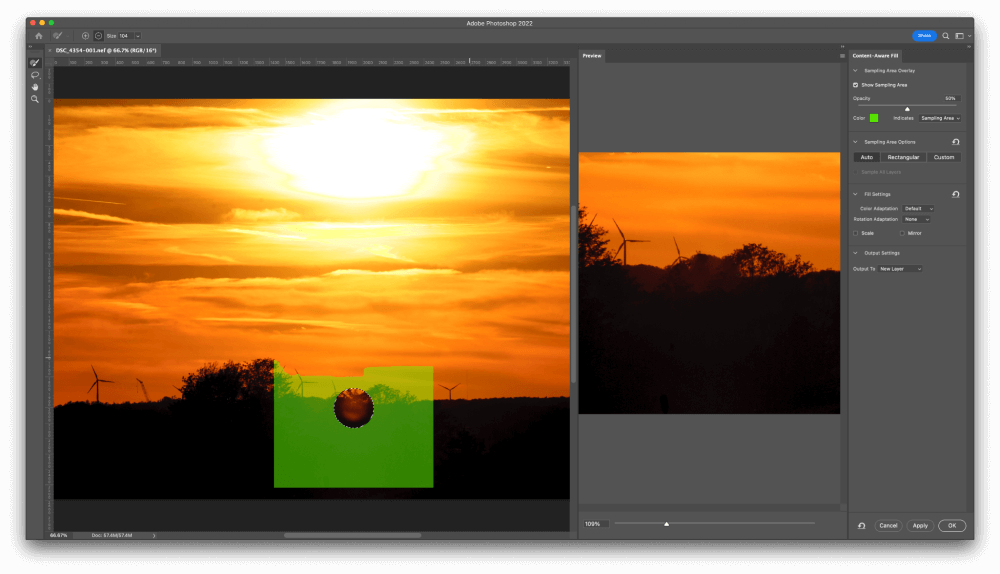
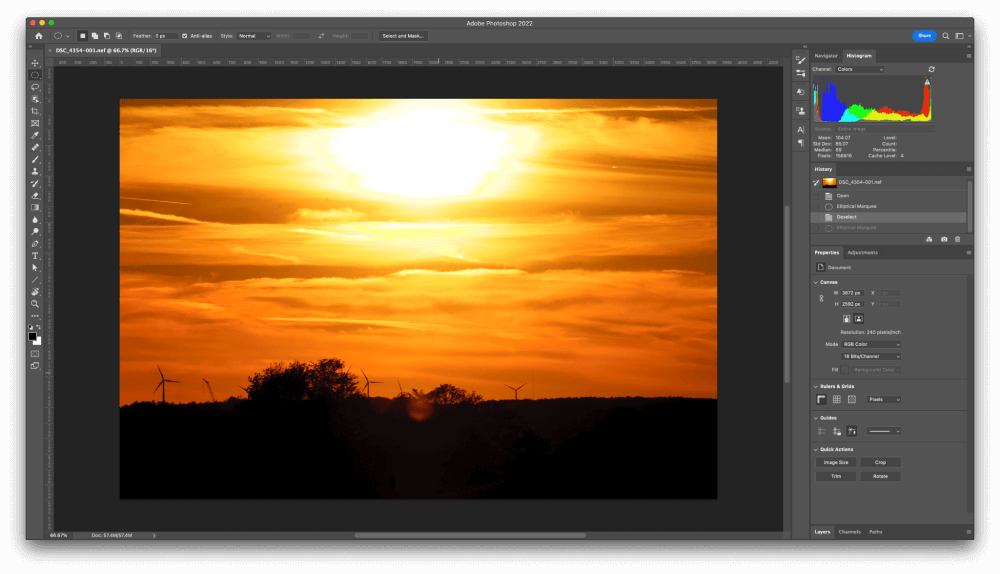
Considering that took no manual effort except for a few clicks, I’d call that a successful result! It doesn’t look amazing, but it stops the flare from being a distracting visual element in the overall image.
Make sure the Output To option is set to New Layer and click OK. Your patch will appear on a new layer over top of the existing image, allowing you to edit it later on if necessary without starting all your other edits from scratch.
Method 2: Removing Flares Using Cloning and Healing
If you don’t have any luck with the Content-Aware Fill tool, you may want to try using the Clone Stamp tool and the Healing Brush tool to remove lens flare artifacts manually. This can be much more time-consuming than using CAF, but it can also give better results in complex situations.
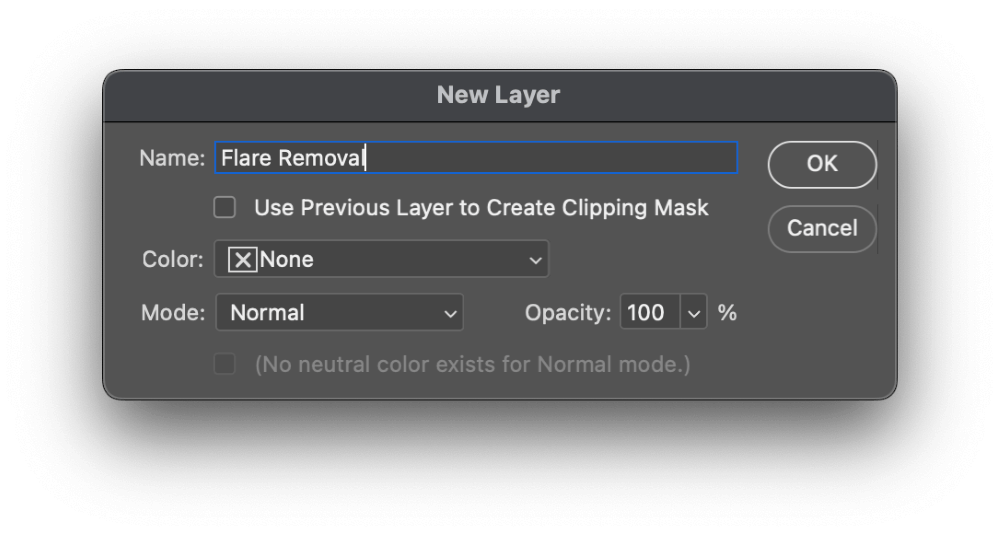
To get started, create a new layer to hold all the cloned pixels that will act as a patch to cover up your flares. You can do this via the Layer menu, or use the keyboard shortcut Command + Shift + N (use Ctrl + Shift + N if you’re on a PC).
Give your layer a descriptive name and click OK.
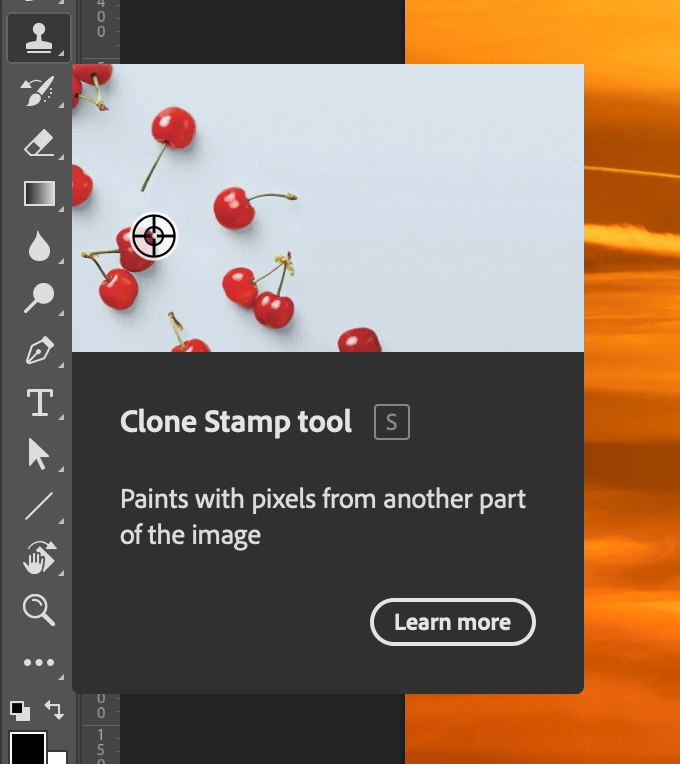
Switch to the Clone Stamp tool using the toolbox or the keyboard shortcut S.
In the tool options panel at the top of the document window, make sure that the Sample option is set to Current & Below.
Select a suitable section of the image to use as your clone source, hold down the Option key (use Alt on PC), and click the area. This area will be used as the patch to cover up your lens flare artifacts.
Make sure your new blank layer is selected, and begin to clone out your flare artifacts!
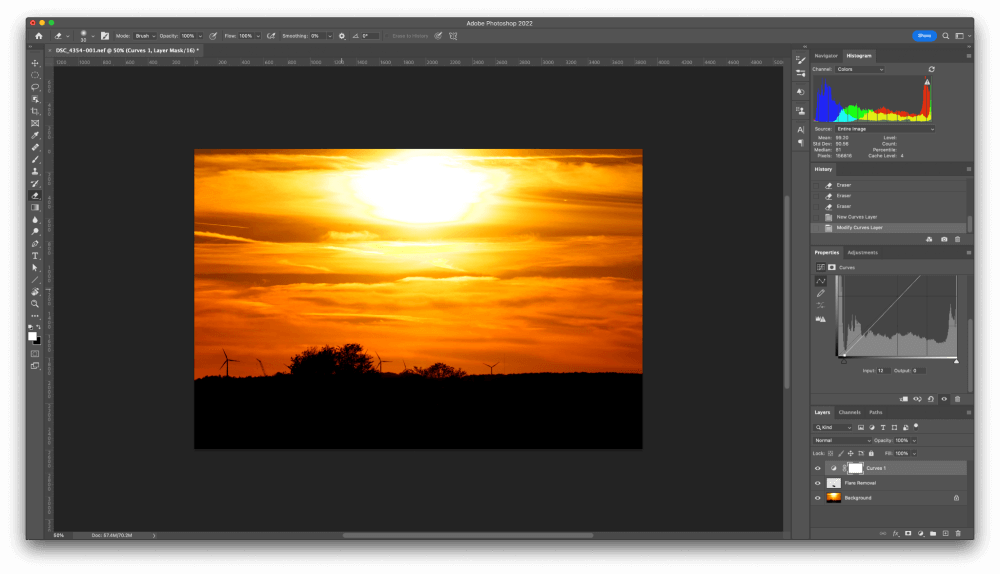
It’s hard to decide if this is a better result than I got from using the Content-Aware Fill tool, but it certainly took longer to create!
Method 3: Removing Color Tints Using Adjustment Layers
If your lens flare presents itself as a strange color aberration, then you may be able to use a Hue/Saturation adjustment layer to remove the color tint.
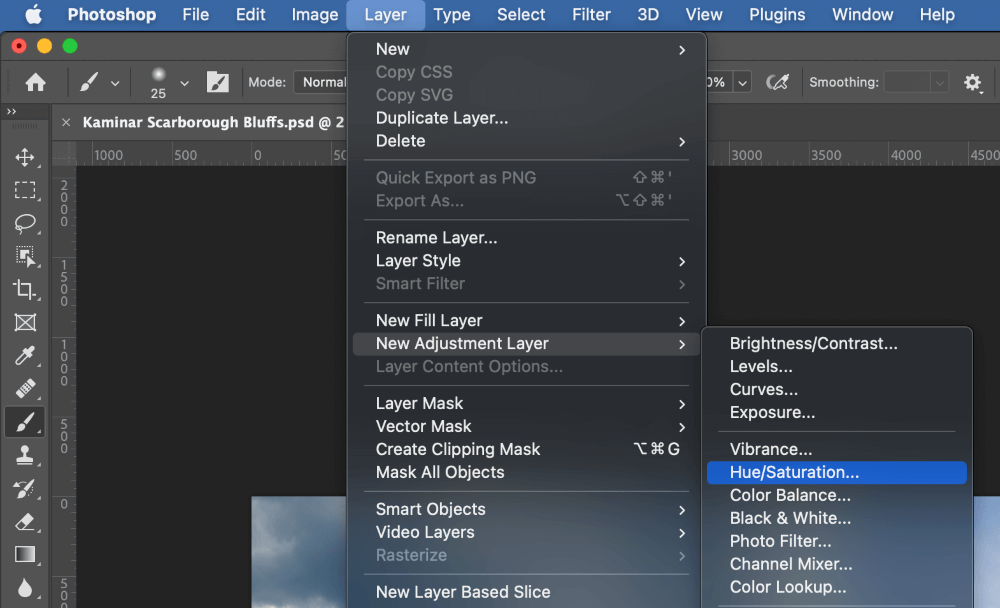
With your image open in Photoshop, open the Layer menu, select the New Adjustment Layer submenu, and click Hue/Saturation. Give your new layer a descriptive name, and click OK.
In the Properties panel, open the color selection dropdown and choose the color range that corresponds with your lens flare color distortion.
In my example, the flare is quite purple, so I’ve selected the Magentas color range, but you may have to experiment with your options and even adjust the color ranges manually to apply your proper color correction.
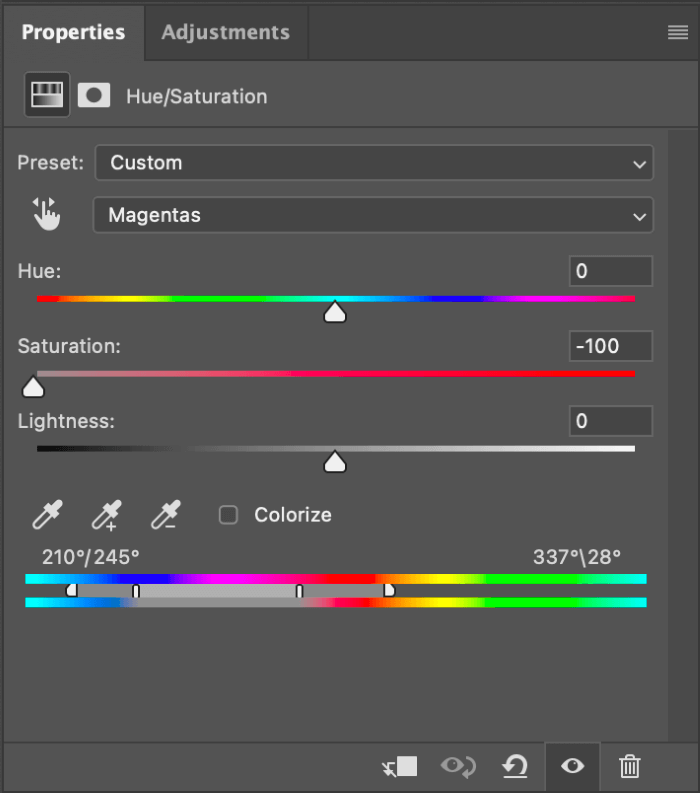
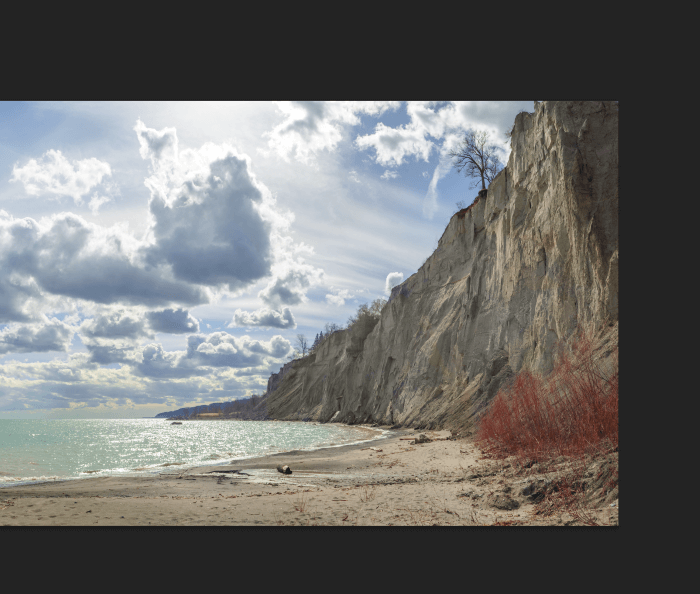
Once you’ve isolated the correct color areas, adjust the Hue, Saturation, and Lightness sliders until the unwanted lens flare color is removed.
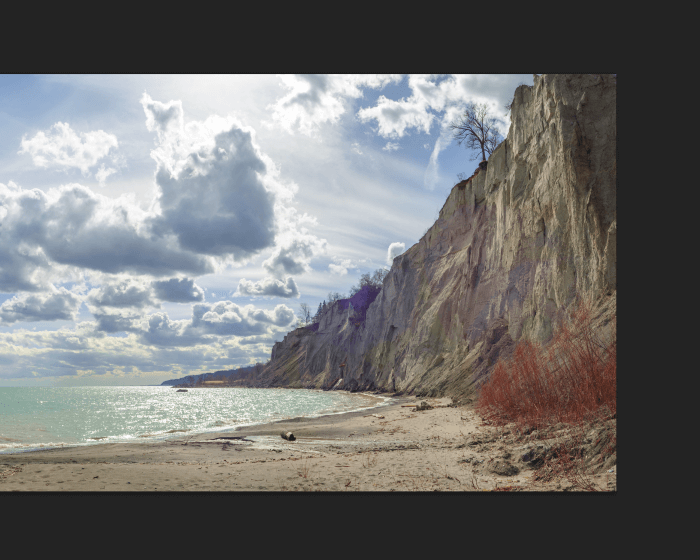
My example is a simple tweak because the background is the light grey clay soil that forms the Scarborough Bluffs (which you may also recognize as First Officer Saru’s homeworld Kaminar in Star Trek: Discovery, though they applied a few color tweaks of their own to that scene).
Remember, no lens flare removal is guaranteed!
Bonus Tip: Combining Images
If you’re preparing for your next shoot and you know that lens flares could be a problem, you may be able to shoot a few extra frames and combine them in Photoshop to remove lens flares. This technique won’t work for every situation, but it’s worth mentioning if you shoot with a tripod.
Take your first photo, and pay close attention to where the flares are visible in your image. Then take another photo, but use your hand or another reflector to physically block the edge of the frame closest to the sun’s location.
Your hand or reflector will appear in the image, but the flares should no longer be visible, and the magic of Photoshop will do the rest.
Once you’re back in the studio, open up both images in Photoshop and place them in the same document as separate layers, with your flared image at the top of the layer stack.
Add a layer mask to your flared image, switch to your Brush tool, and paint the layer mask with black pixels over the areas of the lens flare. They will become transparent, allowing the unflared version of your image to show through.
A Final Word
That’s just about everything there is to know about how to remove lens flares in Photoshop, as well as an interesting in-camera strategy that you might be able to use on your next shoot. If you can’t quite successfully remove your lens flare using these techniques, there is another option: embrace the flare!
As you may remember from the J. J. Abrams blockbuster Star Trek movies, lens flares featured quite heavily in the overall aesthetic – to such a degree that it briefly spawned memes and other more serious assessments from film critics.
You don’t have to take it that far, you just have to use lens flares intentionally instead of accidentally!
Happy editing!
About Thomas Boldt