A proper diet and plenty of exercise is the only road to being thin. We all know this, right? There is no magic pill to make someone skinny. Or is there?
Hey there! I’m Cara and I can tell you that there is no magic pill to become skinny. However, the magic of Photoshop can make people look skinny in photos. Honestly, diet and exercise would probably be easier than doctoring all your photos, but it’s nice for a special few photos, right?
So, without further ado let’s look at how to make someone thinner in Photoshop!
Note: the screenshots and tutorial below are based on the Windows version of Adobe Photoshop CC, other versions might look different.
Table of Contents
The Liquify Tool
The liquify tool is your very impressive magical friend when it comes to making people look skinny in Photoshop. It’s pretty amazing what this tool can do!
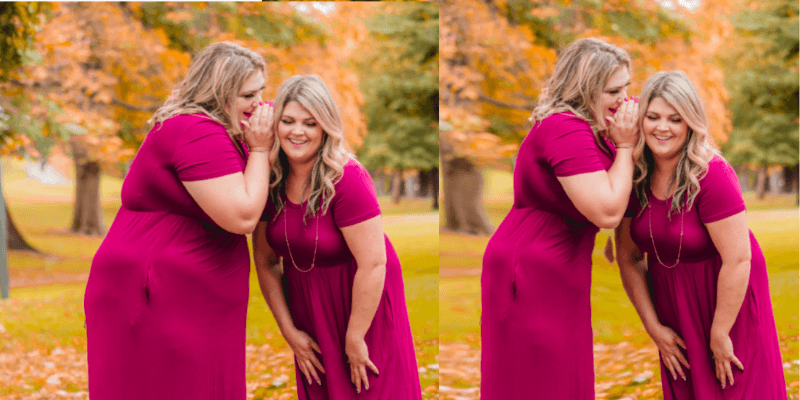
Of course, you’ve got to know how to use it. Let’s see what we can do with this image.
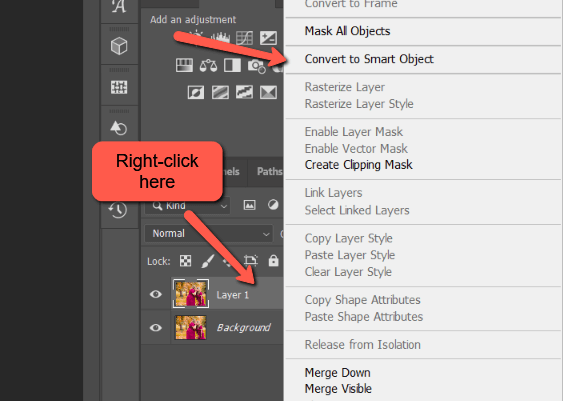
To start, make a copy of your original image. As you work, it helps to be able to reference how the person looked at the beginning. Press Ctrl + J or Command + J to duplicate the image.
If you want to keep the filter editable, it’s a good idea to change your image to a smart object. Right-click on the duplicated layer and choose Convert to Smart Object from the menu.
Using the Liquify Tool
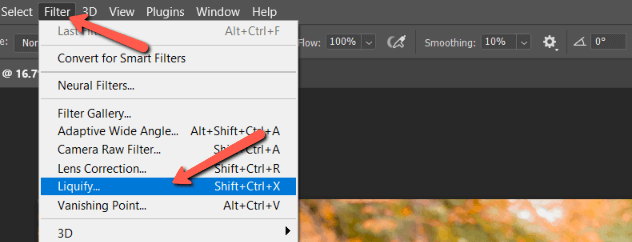
Open the Liquify tool. Go to Filter in the menu bar and choose Liquify from the filter options.
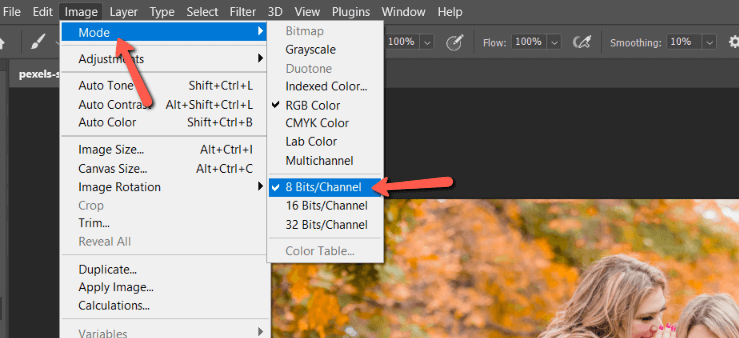
What if Liquify is grayed out? Your image is probably in the wrong mode. To fix this, go to Image and hover over Mode. Choose 8 Bits/Channel. Then go back to the Liquify tool, which should now be accessible.
Choose the Forward Warp Tool from the top left corner. To keep the changes gradual, choose a low-pressure amount (I picked 14). Then, with a large brush, click and push in the areas you want to pull in.
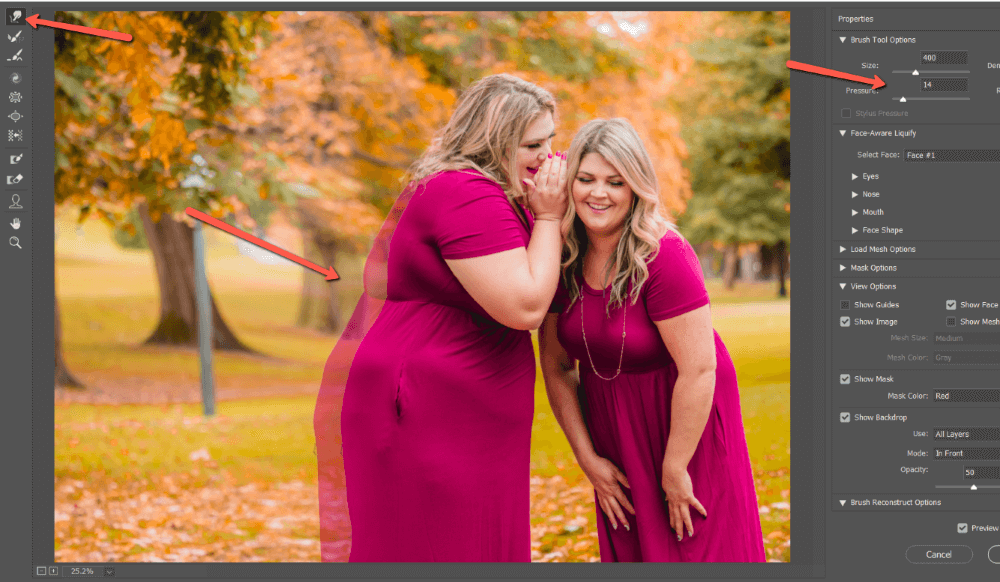
A shadow of the original image will stay, helping you to see what is changing. Plus, you can use it to make sure you’re keeping a natural curve of the body.
As you can see, the leaves on the tree to the left of our subject are starting to look distended. This isn’t a huge problem on the left side, but on the right side, this warping will severely affect the other subject.
Using the Freeze Mask
To avoid this problem, we need to apply a freeze mask. With the freeze mask, we can ensure that other sections of the image stay put.
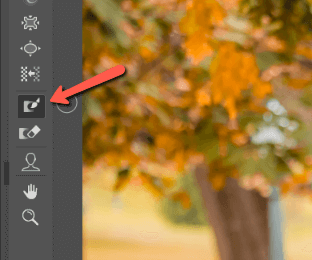
Choose the Freeze Mask tool from the toolbar on the left.
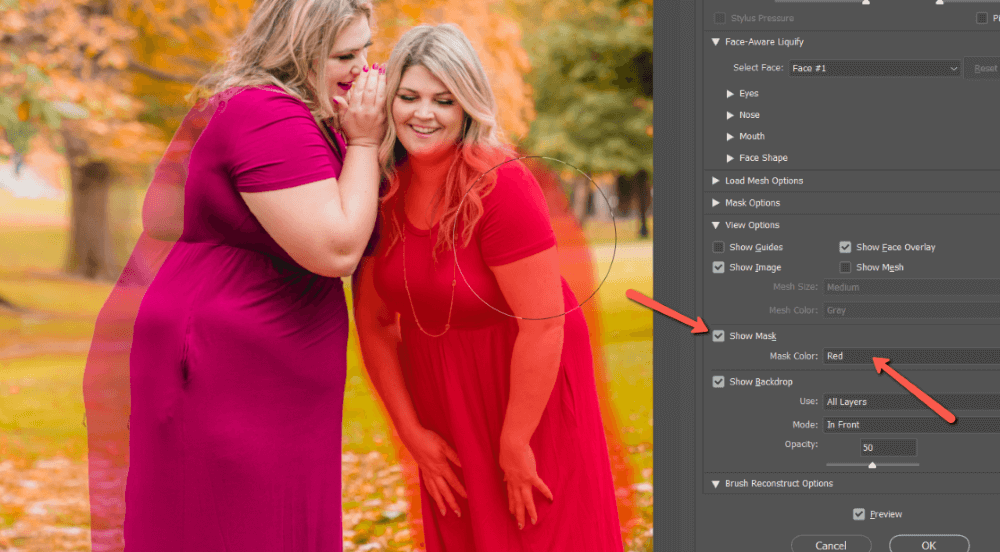
Paint over the areas that you want to stay put. The default red highlighter will mark the areas you are masking off. You can change the color of the highlighter in the options on the right. There is also a check box for showing the mask. Uncheck it to hide the mask.
Now as you work, the frozen area stays put.
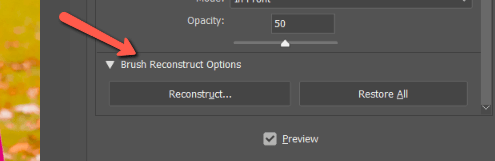
Brush Reconstruct Options
If you make a mistake, you can use the Brush Reconstruct Options to fix the problem. Press Reconstruct then paint over the areas you want to revert back. If you want to start all over, press the Restore All button.
Liquifying Details
That’s pretty much all there is to it. Depending on your image you might need slightly different settings or to experiment with placing your freeze mask. As you practice you’ll get a better feel for how to make it more realistic.
Though being skinny is mostly focused on the waistline, don’t forget about other parts of the body. You may need to thin the face or arms, depending on the image, to get a more natural result.
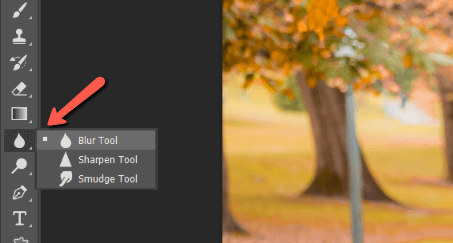
Blur the Edges
Now, notice how she seems to kind of pop out of the background? Liquifying leaves a sharp edge around her body whereas in a real picture the edges are soft. To fix this, we need to blur the edges slightly.
Choose the Blur tool from the toolbar on the left. Pick an appropriate-sized brush for your image.
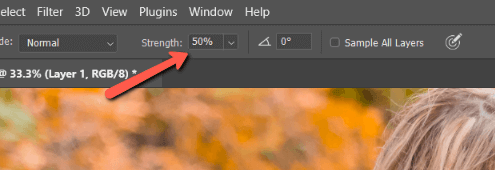
Because you can’t use the Blur tool on a smart object, you’ll get a warning asking if you want to rasterize the image. Make sure you’ve made all your adjustments to the liquify layer, then rasterize your image.
In the Options bar, set the Strength to 50%. Paint around the edges of your subject’s body until they more closely match a natural edge in the image.
Clean Up Details
You’ll also notice that adjusting her body in this image messed up the background a little bit.
If you plan to make a person look skinnier, it will help to photograph them against a solid color background so the stretching isn’t so obvious. You can also experiment with placing the freeze mask as you work.
If you have any odd details, you can use the Stamp tool to clean up these areas. For this image, I’ll clean up that odd spot between the two women as well as smooth out the fat rolls on the subject’s hips.
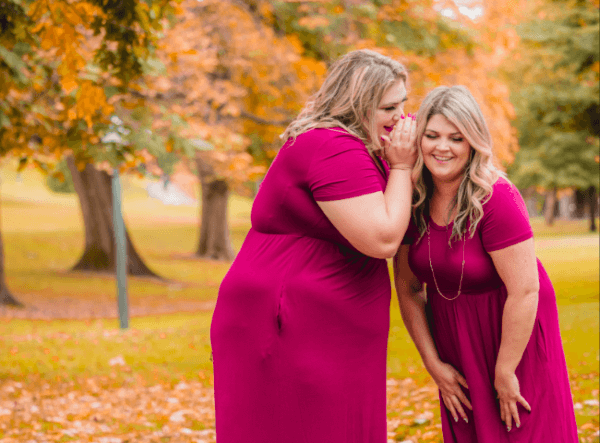
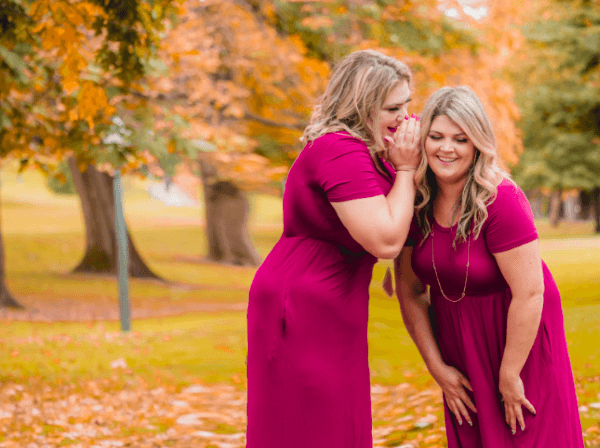
If I were going to use this image, I would clean up the details and work on the stretched background a bit. But for this demonstration, you can see how it works. Here’s what we end up with!
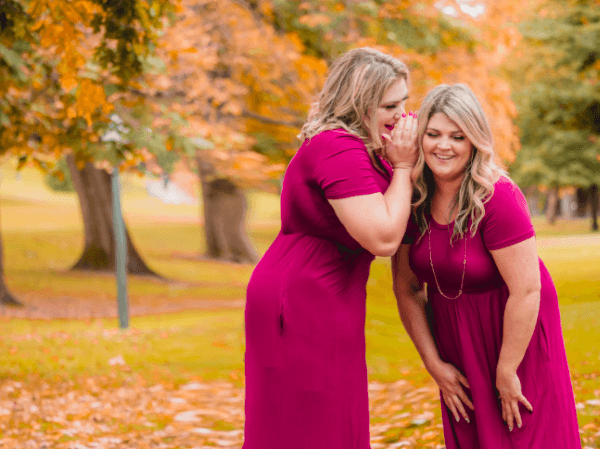
And for comparison…
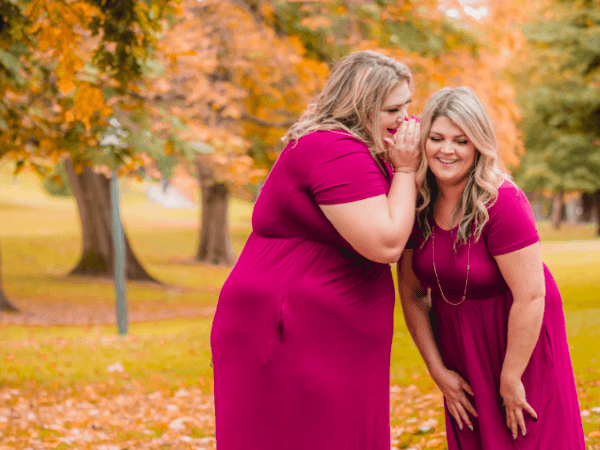
What a difference!
Have fun performing your own Photoshop liposuction. Curious about other things you can do in Photoshop? Check out how to use the warp tool here!
About Cara Koch