Most of the time, you’re fighting against your pictures being blurry. But blur has its place and can be a powerful creative tool when used correctly.
Hey there! I’m Cara and as a professional photographer, I can tell you that blur is often underrated by amateurs and laypeople. While you usually want your subject to tack sharp, other parts of the image being blurry support the subject and make your image more impactful.
Most of the time, I do that in-camera by choosing a narrow depth of field and carefully placing my focus point. But sometimes you might want to add blur later. For example, perhaps you’d like to blur edges of a selection or an image in Photoshop to draw more attention to your subject and create a dreamy effect.
Let’s look at how you can do that!
Note: the screenshots below are taken from Photoshop CC for Windows, if you are using the Mac version, they can look different but the steps should be similar.
Table of Contents
Method 1: Blur All Edges of an Image
This method yields a nice, soft blur around the edges with an in-focus center of the image. Getting there is a bit of a work-around and there is more than one application method you can use. Let me show you what I mean.
Step 1: Convert to Smart Object
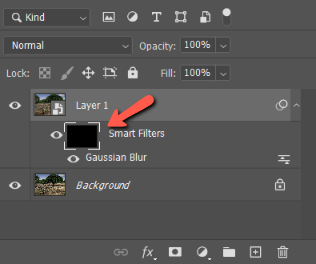
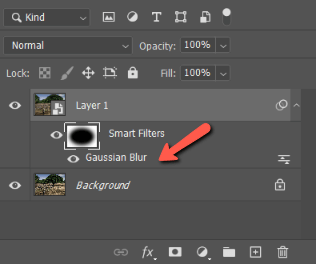
Start by duplicating your layer with Ctrl + J or Command + J. Then, convert to a smart object by right-clicking on the layer and choosing Convert to Smart Object.
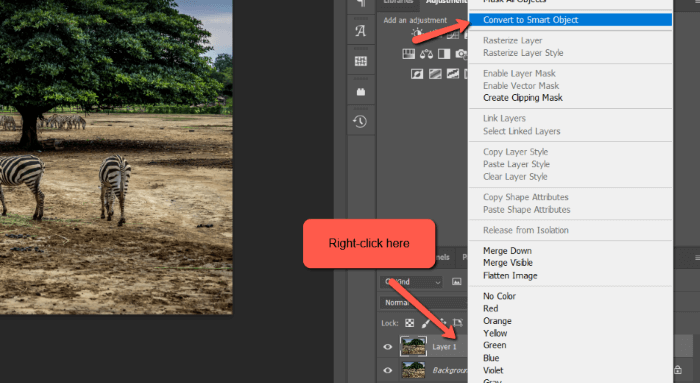
Converting to a smart object allows you to add a blur filter with an editable mask. This is what allows us to confine the blur to only a part of the image.
Step 2: Add a Blur Filter
Go to Filter in the menu bar, hover over Blur, and choose Gaussian Blur.
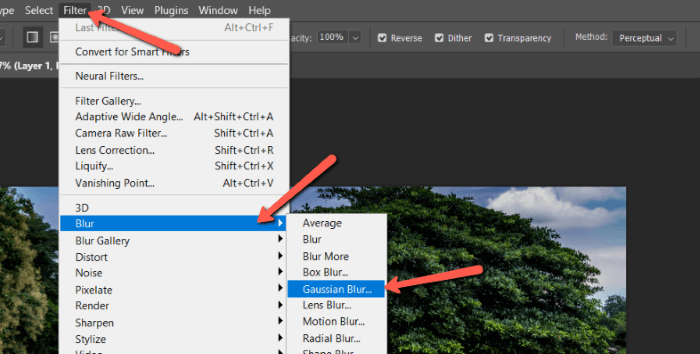
In the box that opens, choose how heavy you want the blur to be. I’m going to choose a radius of 25 pixels for my image.
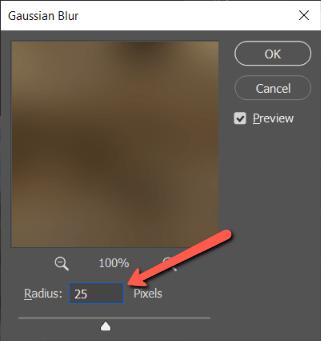
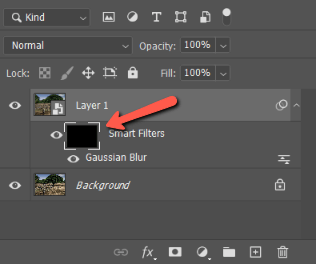
Press OK. You’ll notice that the whole image is blurred out, but that’s okay. In the Layers panel, you’ll notice that because you turned your image into a smart object, the filter is applied as a layer mask titled Smart Filters.
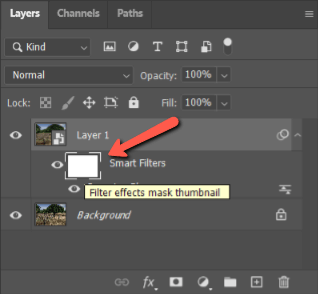
Press Ctrl + I or Command + I to invert the layer mask. You’ll see the layer mask change from black to white.
Step 3A: Add a Radial Gradient
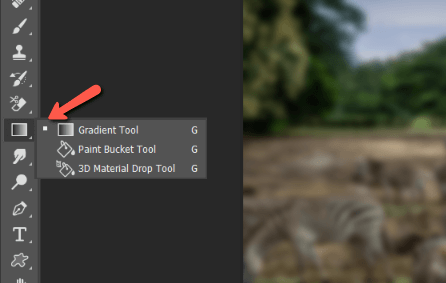
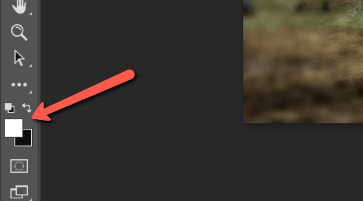
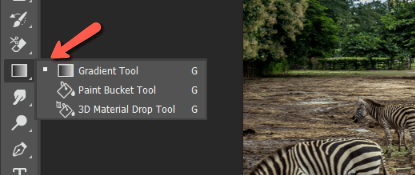
Click on the Smart Filters thumbnail to select the layer mask. Then choose the Gradient Tool from the toolbar on the left.
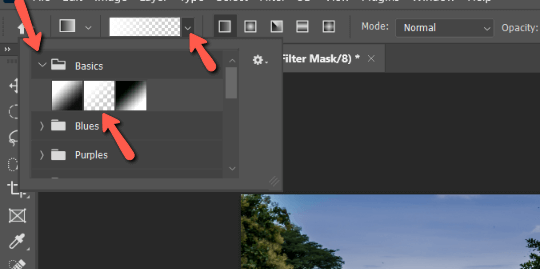
Up in the Options bar, set the colors of the gradient by clicking on the arrow to open the gradient options. Open the Basics folder and choose “foreground to transparent,” which is the middle one for me.
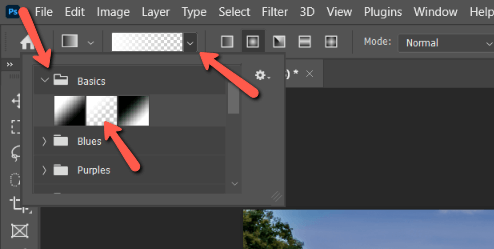
This may appear as black to transparent, white to transparent, or whatever color you have your foreground set to. You’ll want white so change that now if needed.
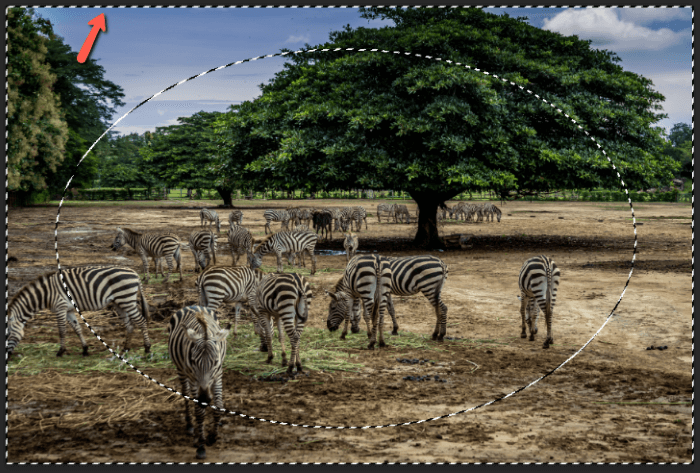
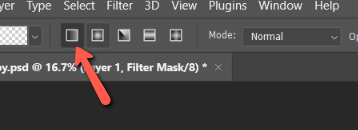
Back up in the Options bar, you’ll see a set of boxes that control the shape of the gradient. Choose the second one that looks like a circle. This is the radial gradient.

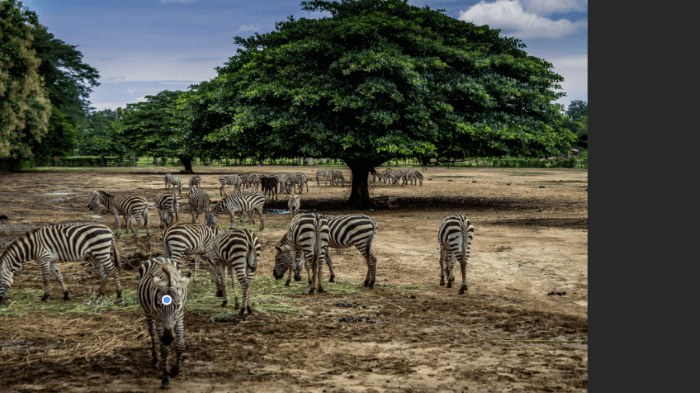
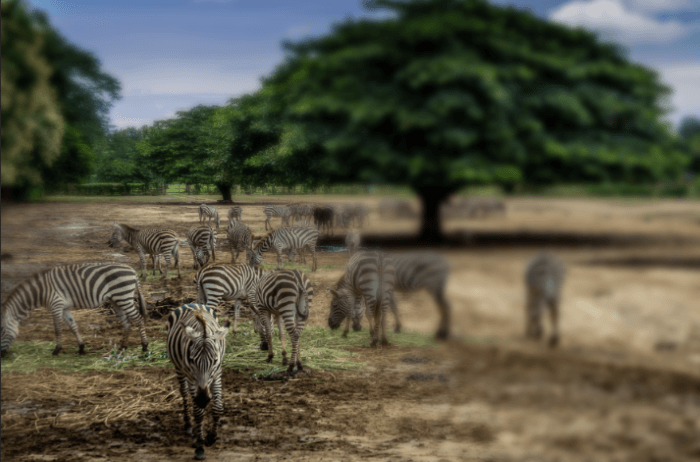
Now, starting in the middle of the image (or wherever you want to emphasize, click and drag out to one side. I’m going to hone in on the one zebra that is facing us.
When you let go, voila!

However, the radial gradient tool only allows you to create an in-focus circle. If you want more control over the shape, try using one of the marquee tools.
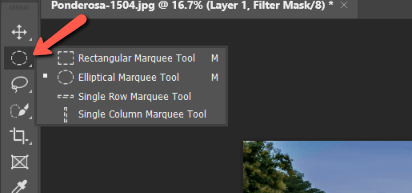
Step 3B: Marquee Tool
You can use either the elliptical or rectangular marquee tools, depending on the shape you want. We’ll use the elliptical tool for this example. Choose your weapon from the toolbar on the left.
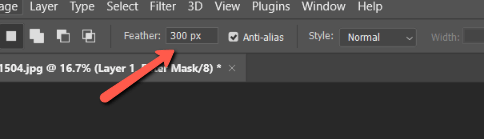
If you want a feathered edge (not a hard line between blurry and not blurry), choose a value for feathering in the Options bar. My image is large so I need a large value to make a smooth transition.
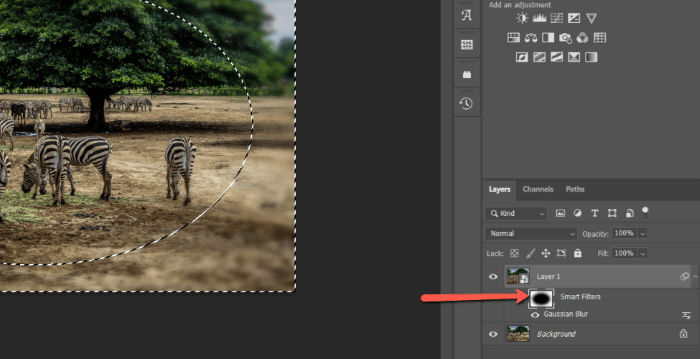
Make sure you have the layer mask selected.
Then, draw the shape on your image where you want the change to happen. Press Ctrl + Shift + I or Command + Shift + I to invert the selection so that everything outside the shape is selected. You’ll see the marching ants appear around the edge of the image as well.
Switch to the Paint Bucket tool and fill in the selection with white.

Notice the white area that appears on the layer mask.
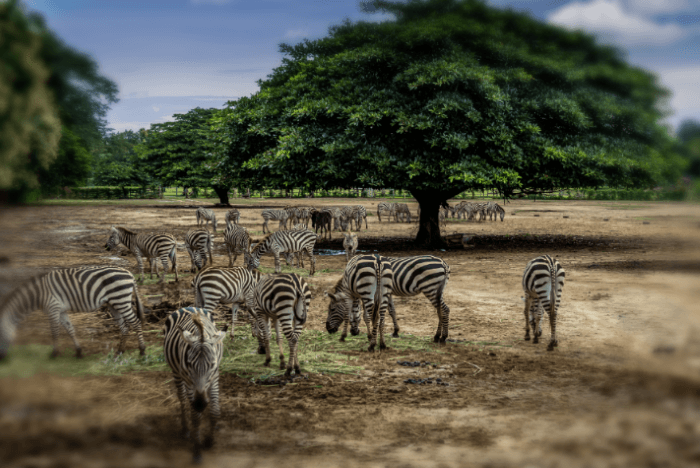
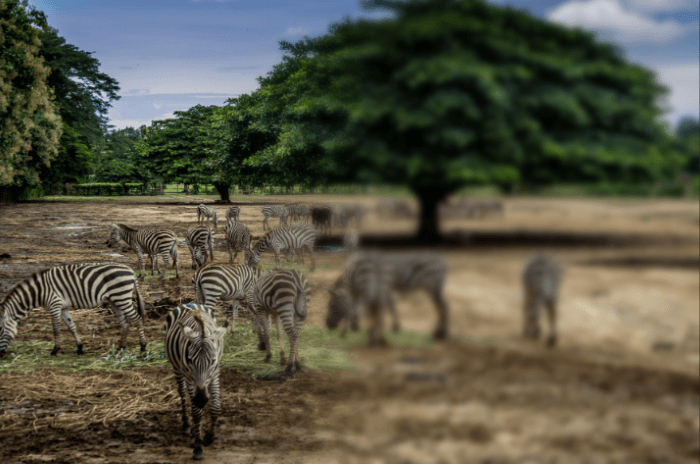
Press Ctrl + D or Command + D to deselect the selection and see how it turned out.
If you want to adjust the strength of the blur, simply double-click on the Gaussian Blur filter to change the value.
Method 2: Blur One Edge of an Image
What if you don’t want to blur all the edges of an image? You might want to direct the viewer’s attention toward an off-center subject or obscure/downplay an undesirable element of the image.
You can easily do this with the Gradient tool.
This method starts out just like the last one. Convert your image to a smart object and add a Gaussian blur filter as described in steps 1 and 2.
Then, select the Gradient tool from the toolbar.
In the Options bar, click on the dropdown arrow to edit the gradient. Open the Basics folder and choose the foreground to transparent.
Set the gradient type to Linear Gradient.
Now click on the point you would like to keep in focus and drag away in the direction you want the blur to go. Drawing a longer line will create a more gradual gradient while a shorter one will be more abrupt.

Have fun with the effects you can create! Here, I blurred out most of the image with two gradients, leaving the one zebra facing toward the camera in focus in a triangular shape.
I can also just blur one side of the image or whatever works.
There’s a lot you can do with this effect. Let us know how it goes in the comments!
Curious to learn about more effects? Check out this tutorial on fading a photo into a color here!
About Cara Koch