Sometimes you need elements in your images to be flexible. Maybe you’re trying to nudge an object into a different position or just create a cool effect. Regardless, Photoshop makes it easy with the warp tool.
Hey there! I’m Cara and I appreciate how the warp tool helps me to get my images just the way I want. For example, I once used the warp tool to turn a top-down image of a butterfly into a flying one to add to a composite!
Do you want the same flexibility with your images? Let me show you how to use the warp tool in Photoshop!
Quick Note: the screenshots below are based on the Windows version of Adobe Photoshop CC.
Table of Contents
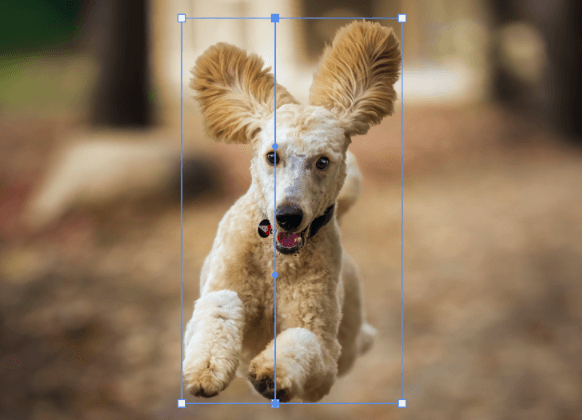
Step 1: Make a Selection
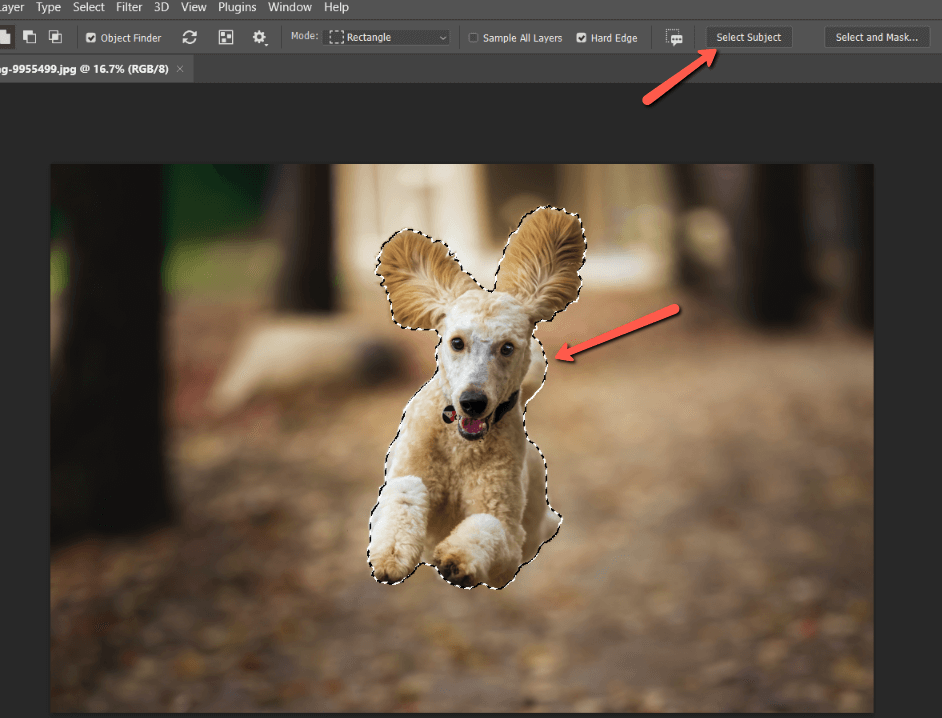
First, you need to tell Photoshop what part of the image you want to affect. Make a selection around your subject. I’m going to use the Select Subject button in the Options bar for this image. One of the selection tools must be active for the button to appear.
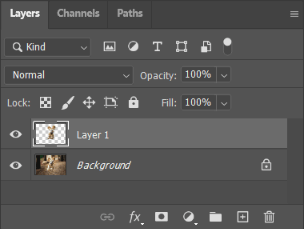
Press Ctrl + J or Command + J to copy the selection onto a new layer.
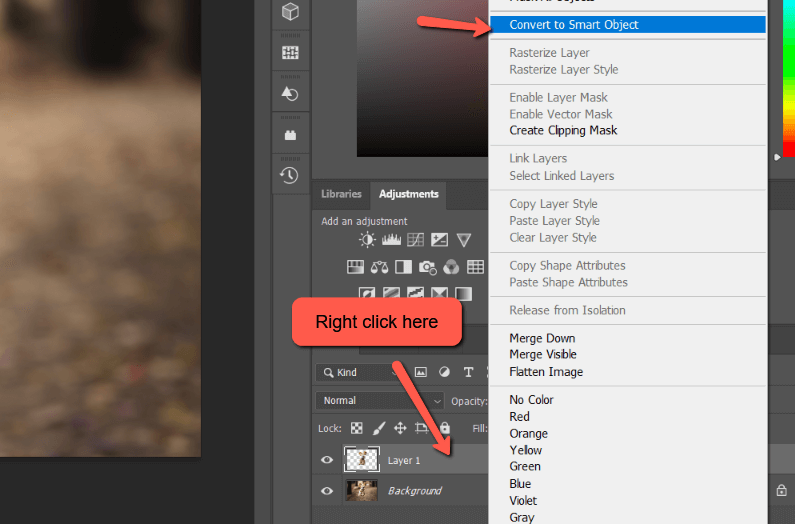
Before you start warping, it’s a good idea to turn your layer into a smart object. This allows you to change the object size without losing quality. Right-click on the layer and choose Convert to Smart Object from the menu.
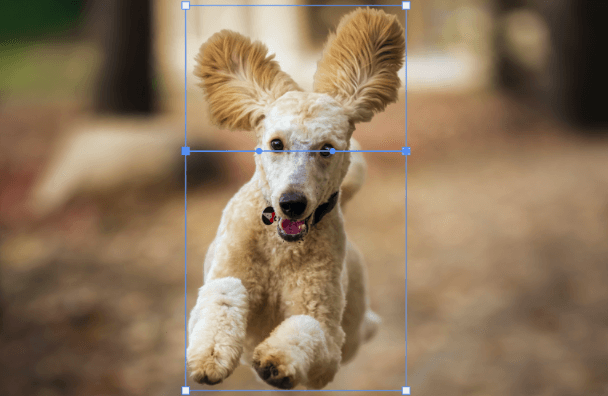
Step 2: Open the Warp Tool
There are two ways to get to the warp tool. The first is to go to Edit, hover over Transform, and choose Warp from the menu.
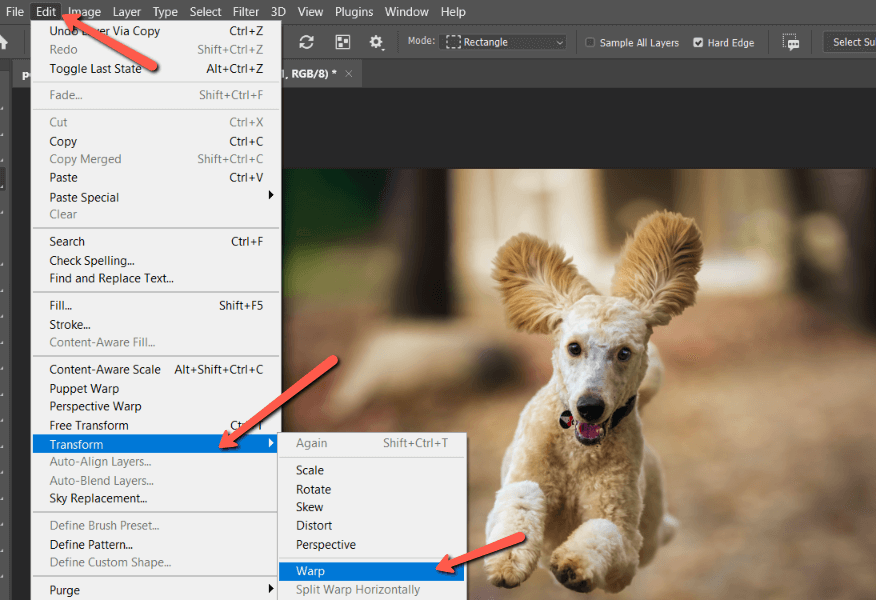
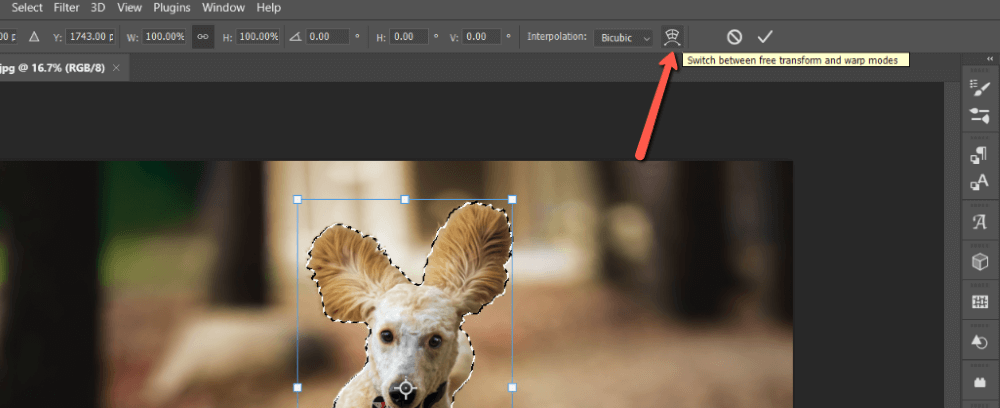
The other way is to open the Transform tool with the keyboard shortcut Ctrl + T or Command + T. Then select the warp tool by clicking on the icon on the Options bar.
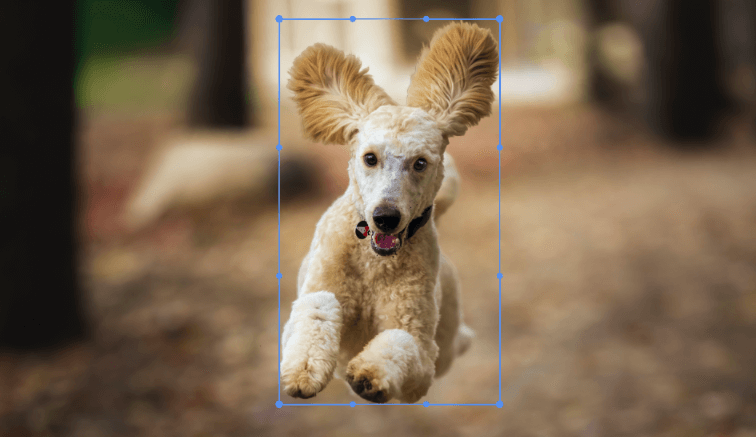
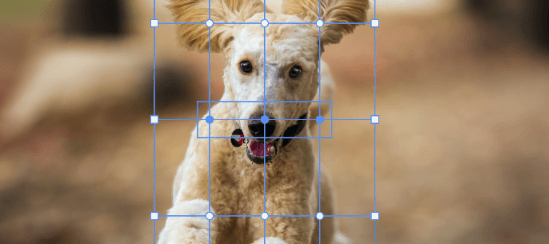
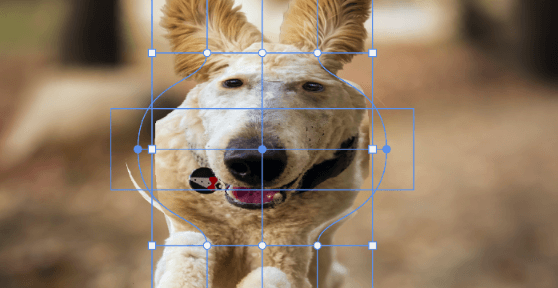
Whichever way you do it, you’ll end up with a box that looks like this.
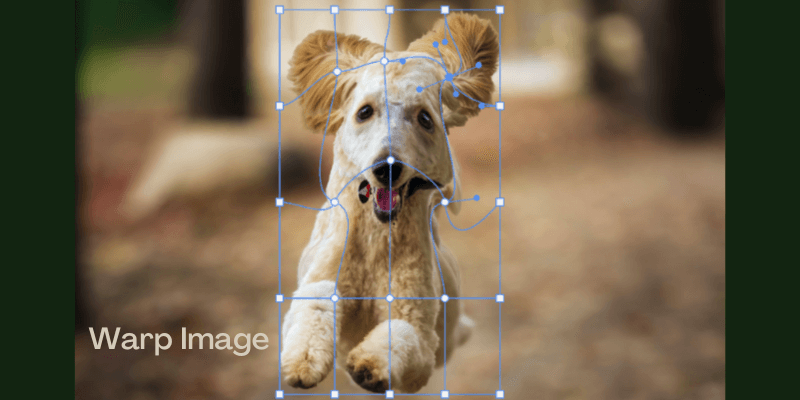
Step 3: Warp the Image
Each of the little blue circles is a control point you can use to warp the image in different directions. Click and drag on a control point to move the image.

You can also click and drag at any point on the gridlines. This will make large changes.
Experiment with moving these control points in different directions to change your object’s position and proportions.
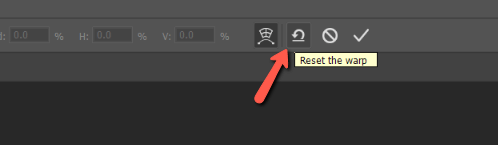
If you mess up, you can always press Ctrl + Z or Command + Z to undo. If you end up with a complete mess and want to start over, press the Reset button in the Options bar.
Warp Grids
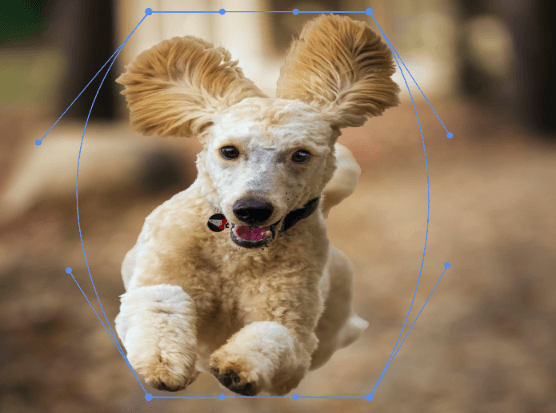
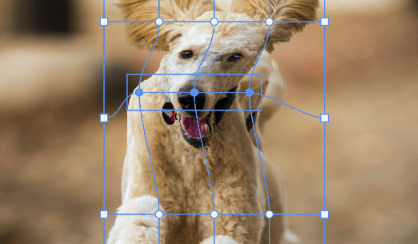
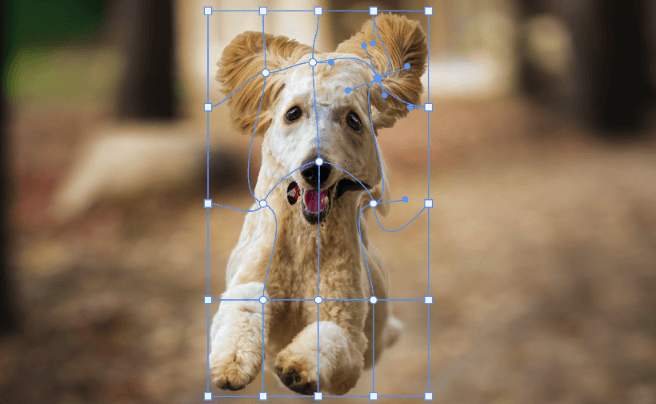
What if you need the warp tool to be more precise? You only get 12 control points around the edges with none in the middle. You have no precise control over any point within the image.
So let’s open a warp grid. You can use a warp grid to put more control points within the image as well.
Go to the Grid box in the Options bar. By default, it will say Default. Open the dropdown menu and choose one of the three grid options. The 5×5 size will give you the most control points.
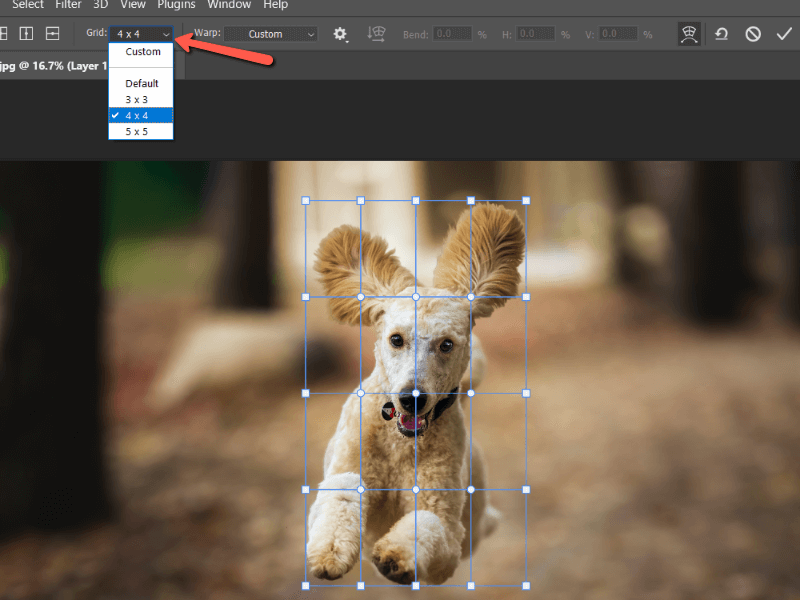
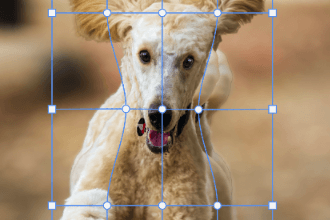
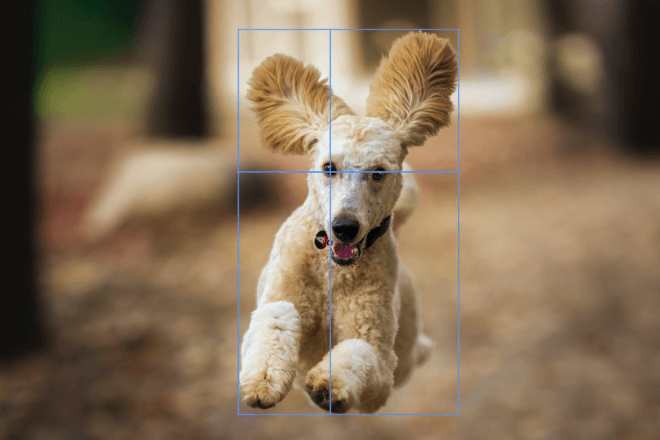
If that’s still not working for you, choose the Custom option. This will let you pick how many rows and columns for your grid and a control point will emerge at every intersection.
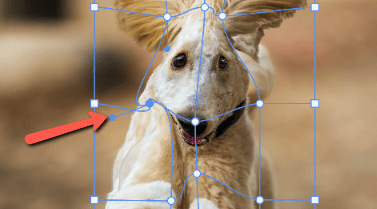
As before, click and drag the control points to warp the image.
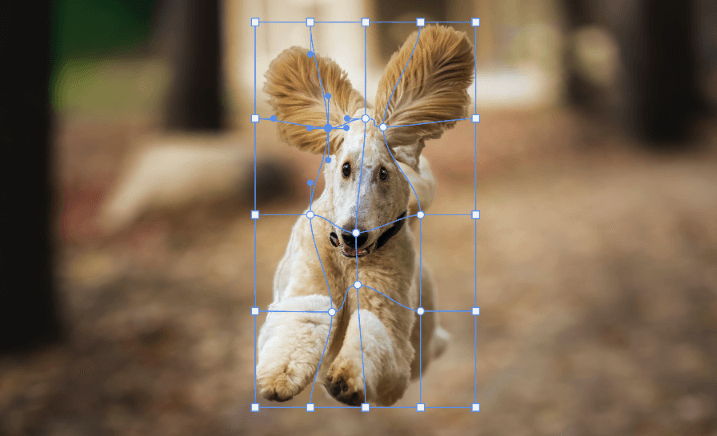
Once you activate a control point by clicking on it, you’ll notice that control handles appear. You can use these handles to further fine-tune the direction of your warp. You can also rotate your warp by pulling the handles around the control point.
Selecting Multiple Points
You can also select and manipulate multiple points at once. Simply hold down the Shift key while clicking on points or click and drag your mouse around the points you want to select. If you select one by accident, hold down Shift and click on it to deselect.
As you move your cursor around over the selected points, you’ll notice that it changes. When you see a four-headed arrow, you can click and drag the selected points in any direction.
When the cursor turns to a horizontal double-headed arrow on one of the endpoints, you can slide the points inward or outward in opposition to one another.
Hover just outside the selected points and the cursor will turn to a double-headed 90-degree arrow. Click and drag in a circular motion to rotate the points.
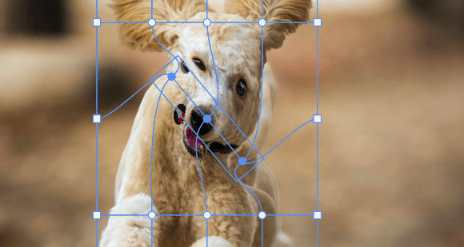
Hover over the corner of the box around the selected points to scale the selected area. When the cursor turns to a diagonal double-headed arrow, click and drag to make it larger or smaller.
There’s a lot you can do, so experiment and have fun!
Making Your Own Gridlines
What if you still can’t get a control point exactly where you want it? We mentioned creating a custom grid, but the gridlines will still be an equal distance away from one another. Plus, you might have trouble getting a control point on the exact spot you want.
In that case, you need to make your own grid lines with the controls in the Options bar.
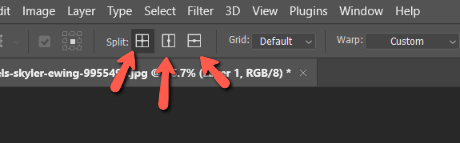
The first box will allow you to pick a spot and place both a horizontal and vertical gridline to get a precise point.
The second box allows you to place a vertical line.
And the third lets you place a horizontal line.
Now you can warp anything, any way you want!
Curious about warping text? Check out our text warp tutorial here!
About Cara Koch