Have you ever wondered how photographers get those pristine reflections in their images? If the conditions are right, you can get reflections in puddles of water or lakes when taking a photo. But a lot of times, the secret is…Photoshop.
Hello, I’m Cara! Now you might be thinking with how amazing the final result looks that this technique must be complicated. I’m going to let you in on a secret…it’s not complicated at all. It’s quite easy.
So, come along with me while I show you how to create a reflection in Photoshop following the five essential steps below!
Note: I use the Windows version of Photoshop. If you are using a Mac, the workspace will look slightly different from the screenshots displayed here.
Table of Contents
Step 1: Create Space
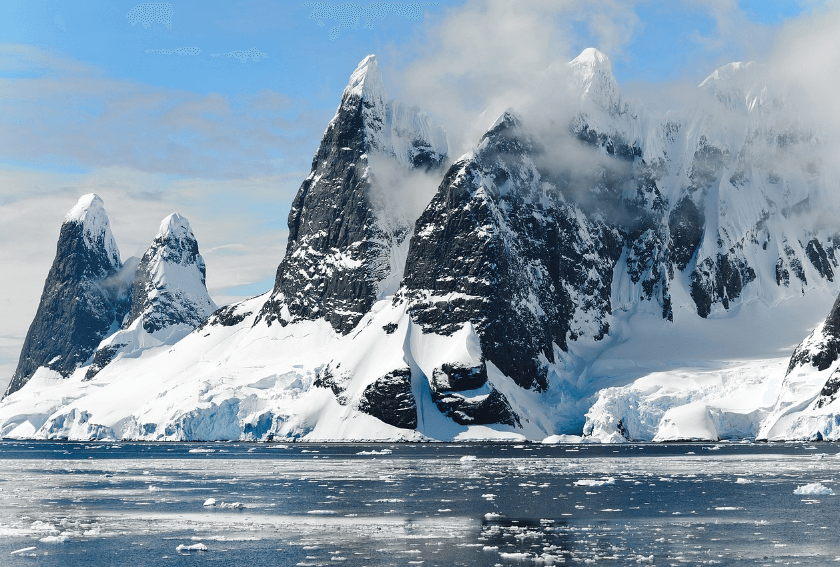
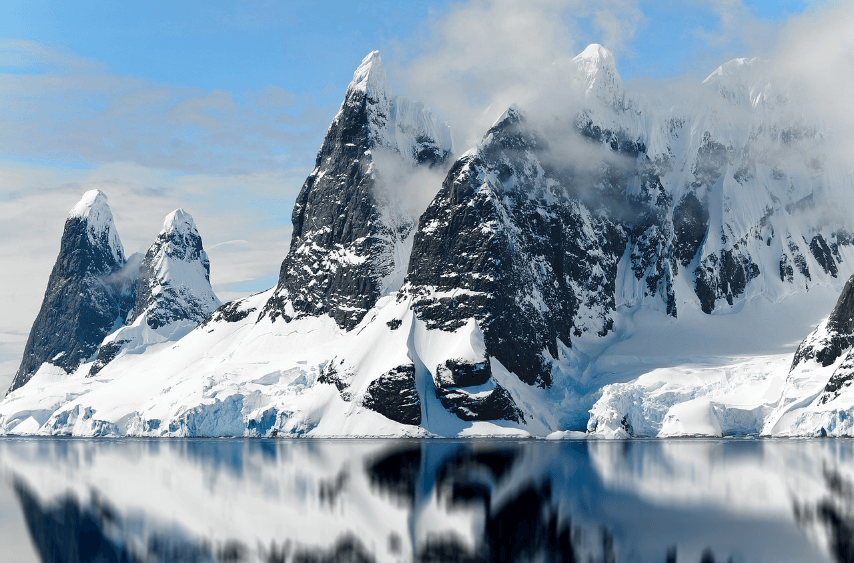
I’m going to use this image as my example image.
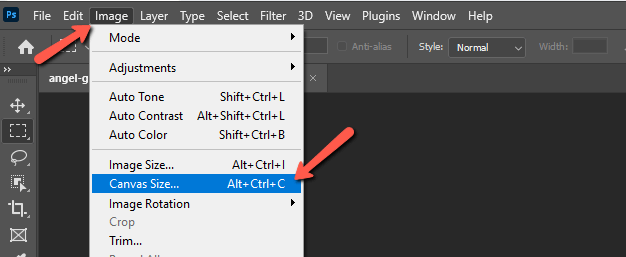
This image doesn’t necessarily need it, but sometimes you’ll need more space at the bottom of your image. If you need to create space, go to Image in the menu bar and choose Canvas Size.
Add however much height you want to the image. In this example, I’m changing the height of my image from 15 to 20 inches.
Also, click the top middle arrow pointing directly upward in the Anchor box. This will keep your image hugging the top of the canvas and add space at the bottom.
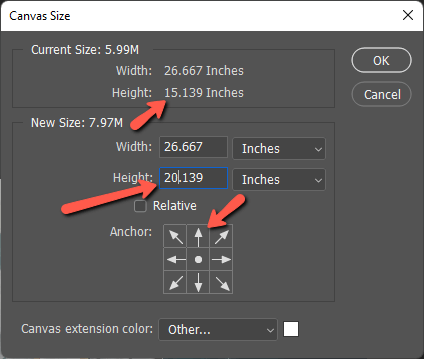
Press OK when finished.
Step 2: Create the Reflection
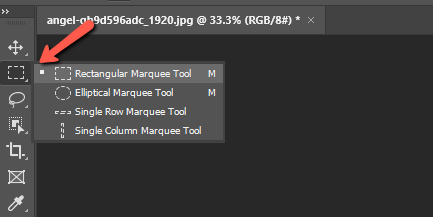
Now press M on the keyboard or choose the Rectangular Marquee tool from the toolbar on the left.
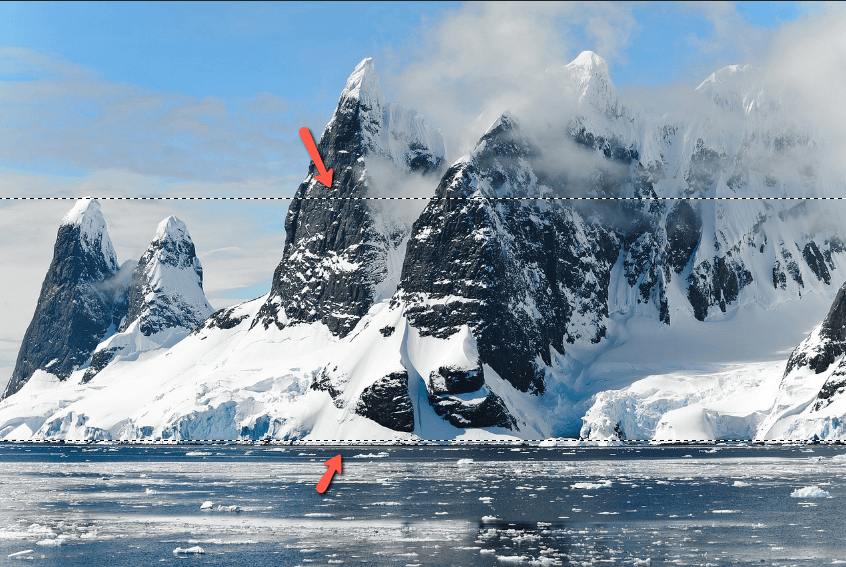
Make a selection of the bottom of the image. Make sure to go tall enough to cover the space entire bottom section.
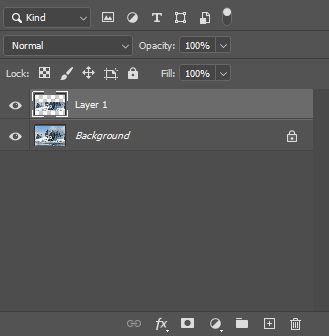
Press Ctrl + J or Command + J to duplicate the selection. A new layer will appear in the layers panel with only the selected portion of the image.
Press Ctrl + T or Command + T to activate the Transform tool. Right-click to open the menu and choose Flip Vertical. Check out this tutorial to learn more about the Transform tool.
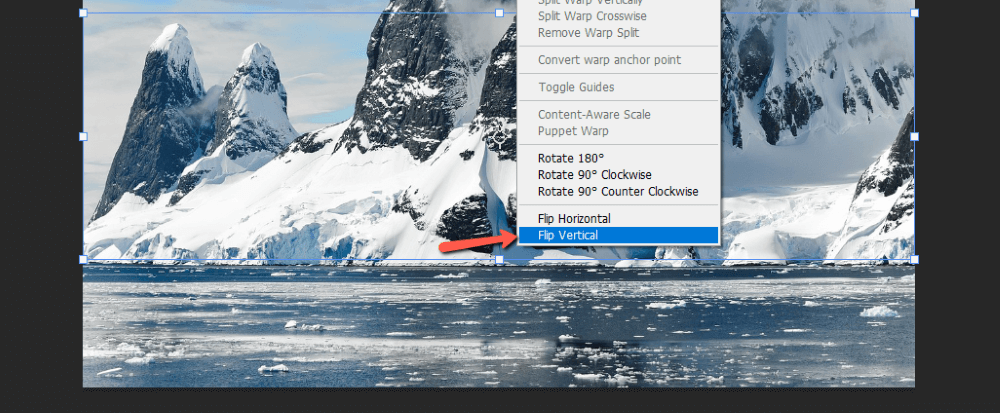
Click and drag to reposition the flipped portion at the bottom of the image.
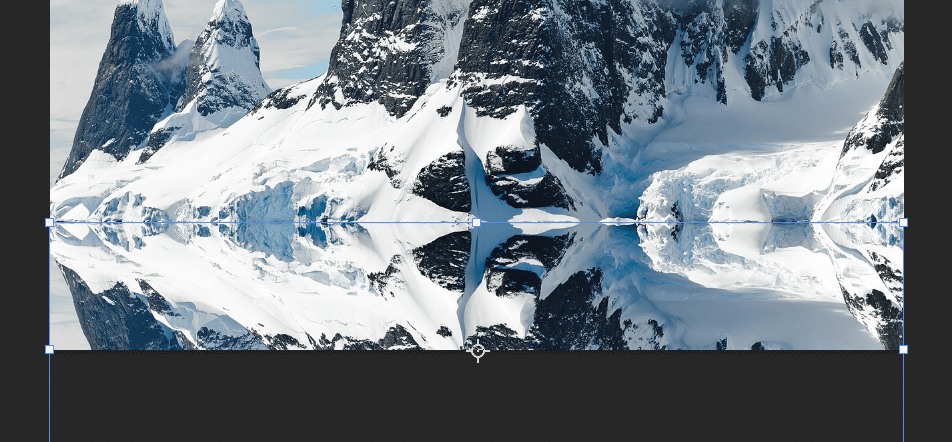
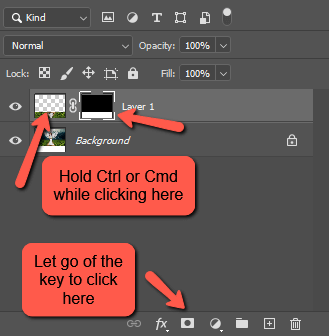
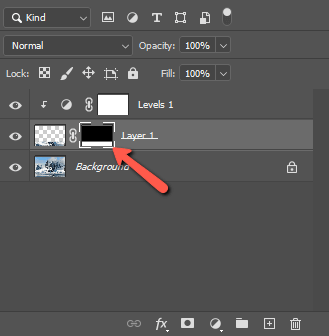
Once the reflection is in place, hold the Ctrl or Command key while clicking on the thumbnail for the reflection layer. Let go of the key and click the mask button that looks like a rectangle with a circle in the center at the bottom of the layers panel.
You should end up with a layer mask that is black on top and white on the bottom.
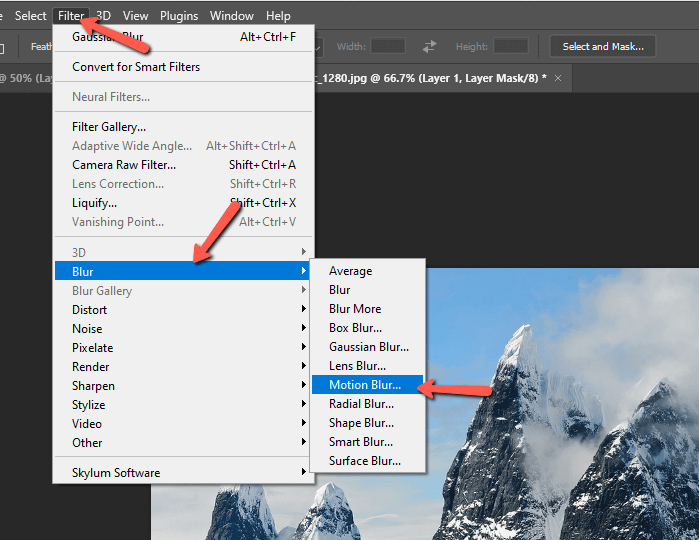
Step 3: Add Blur
Obviously, real-life reflections are not quite so pristine, so let’s add some blur. Make sure the reflection thumbnail is selected (not the mask). Then go to Filter in the menu bar, hover over Blur and choose Motion Blur.
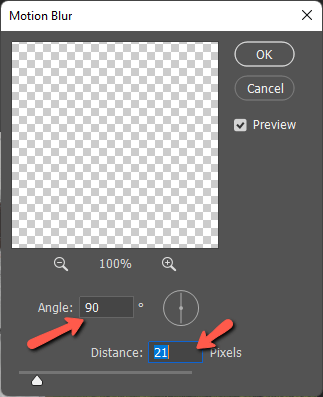
In the box that opens, set the Angle to 90 degrees. Slide the Distance slider until it looks right for your image. Press OK when finished.
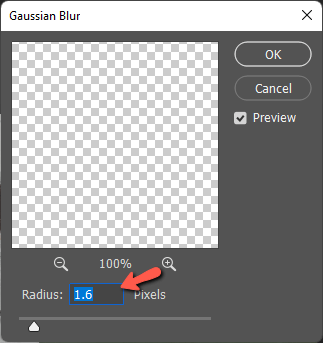
To really give it the look we want, we need to add a touch more blur. So go to Filter again, hover over Blur, and choose Gaussian Blur.
Choose a Radius that looks good for your image and press OK.
It’s looking good!
Step 4: Darken the “Water”
Reflections in water are usually more shadowy than the scene they are reflecting. So let’s deepen the shadows a bit to add more realism.
Press the half-filled circle icon at the bottom of the Layers panel to open the adjustment layers menu. Choose Levels.

We’ll use a clipping mask, to ensure the changes only affect the reflection layer. Hover between the Levels and reflection layers while holding the Alt or Option key. Your cursor will change to a square with a 90-degree arrow. Click to clip.
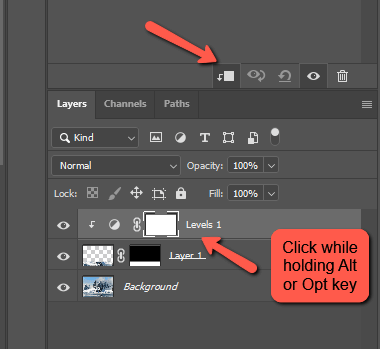
You can also click the clipping mask icon at the bottom of the Properties panel for the Levels layer. The little 90-degree arrow on the left of your Levels layer will notify you of your success.
Now, make adjustments to the shadows and bring down the highlights in the Properties > Levels panel.
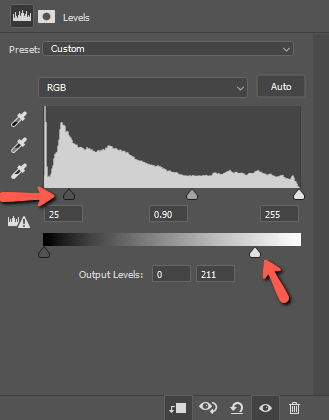
Play with the sliders until you get something you like. Here’s my result.
Step 5: Feather the Reflection
At this point, it looks pretty good! The only trouble is that hard line where the layers meet. So let’s soften that up.
Remember that layer mask we created? Here’s why. Click on the layer mask.
In the Properties panel, you’ll see a Feather slider. Bring that up until your image looks perfect!

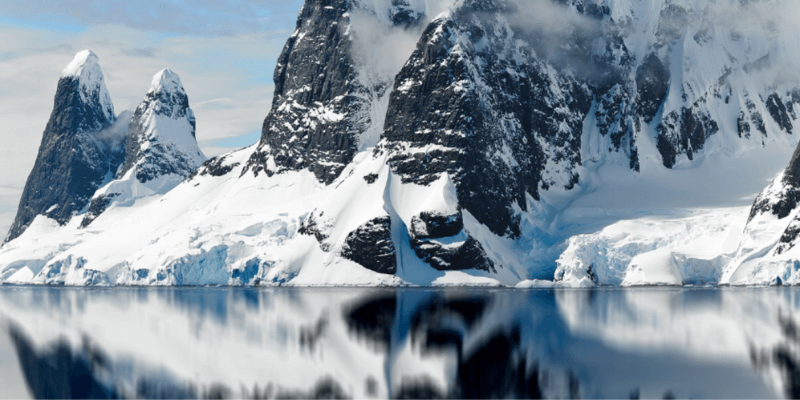
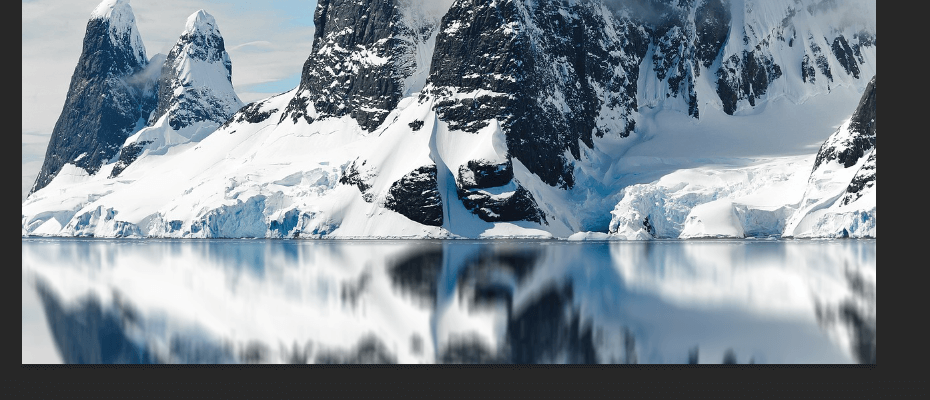
I love how this transforms a somewhat ho-hum image of these snowy mountains into something a little more epic. Have fun playing with your own images. I bet you never knew an effect like this could be so easy.
Ready to tackle adding stars in Photoshop? Check out that tutorial here!
About Cara Koch
Roland Charles Diga
Great stuff Carah