Taking pictures at night can be a bear, to say the least. Photographing involves a lot of light and at night there is a general lack of light. So how do people get those awesome nighttime images with details even in the shadows?
A lot of nighttime images and movie scenes are shot during the day and turned into night scenes later. The cool thing is that you can do this pretty easily in Photoshop.
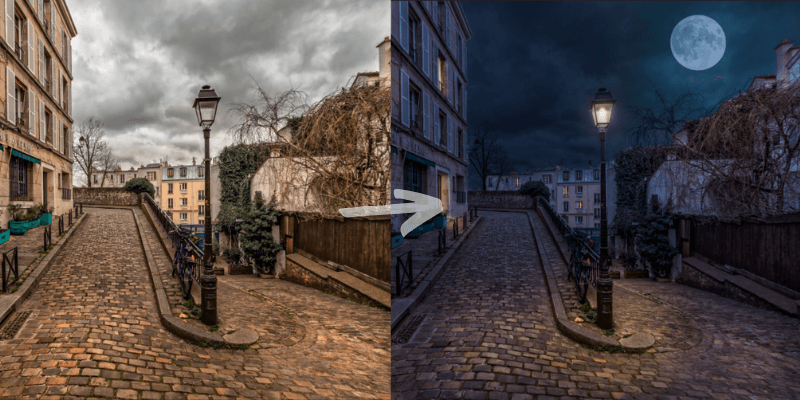
Hey there! It’s Cara! In this tutorial, I will show you how to turn day into night in Photoshop! I’m going to explain the process in three essential steps with details.
Note: I use the Windows version of Photoshop. If you are using a Mac, the workspace will look slightly different from the screenshots displayed here.
Table of Contents
Step 1: Replace the Sky
This step won’t always be necessary but it does help to add some realism. The sky in your original image will probably be bright or even overblown, so it helps to have a night sky in place.
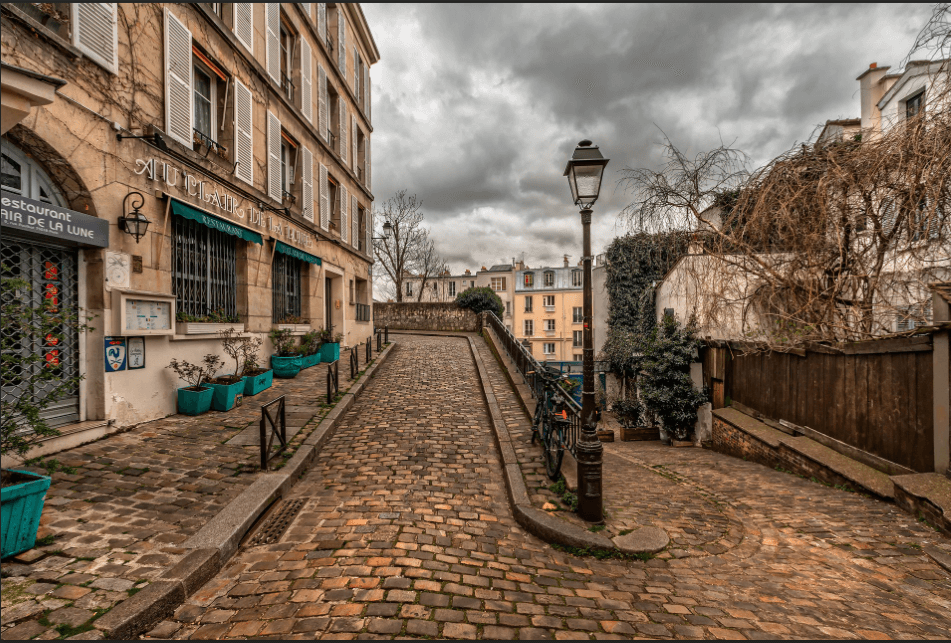
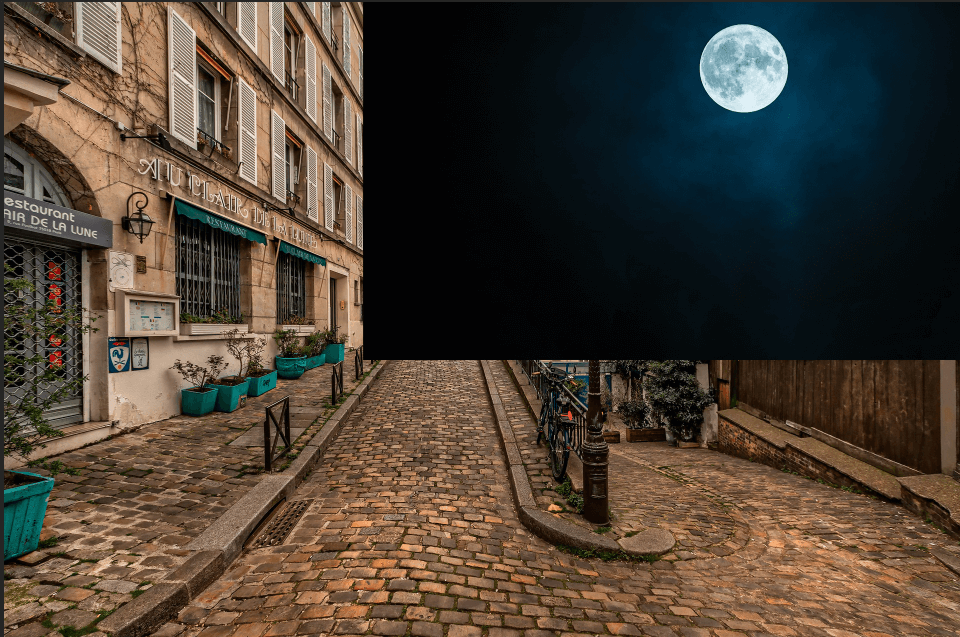
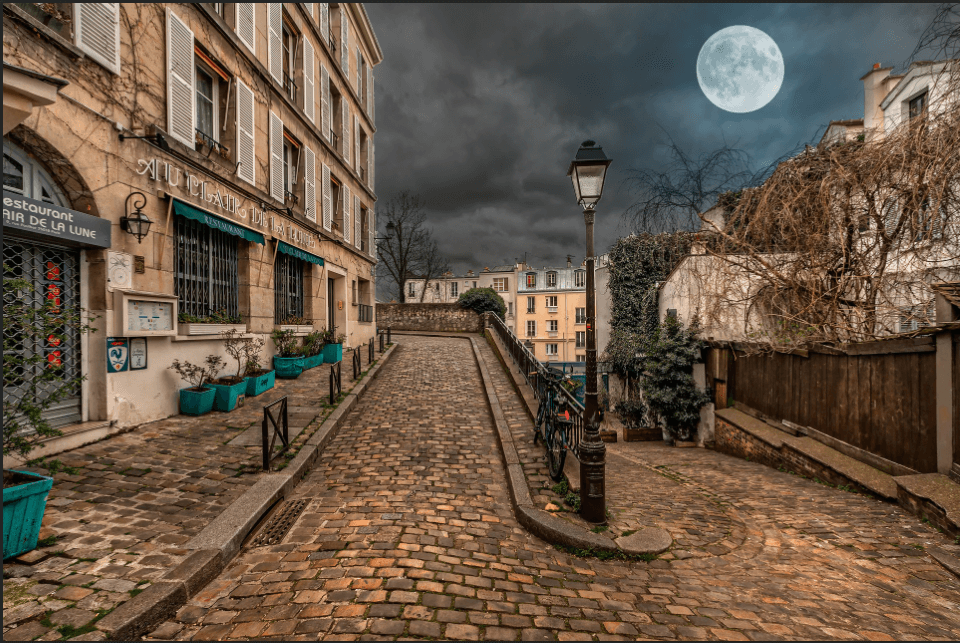
Let’s begin by looking at this image.
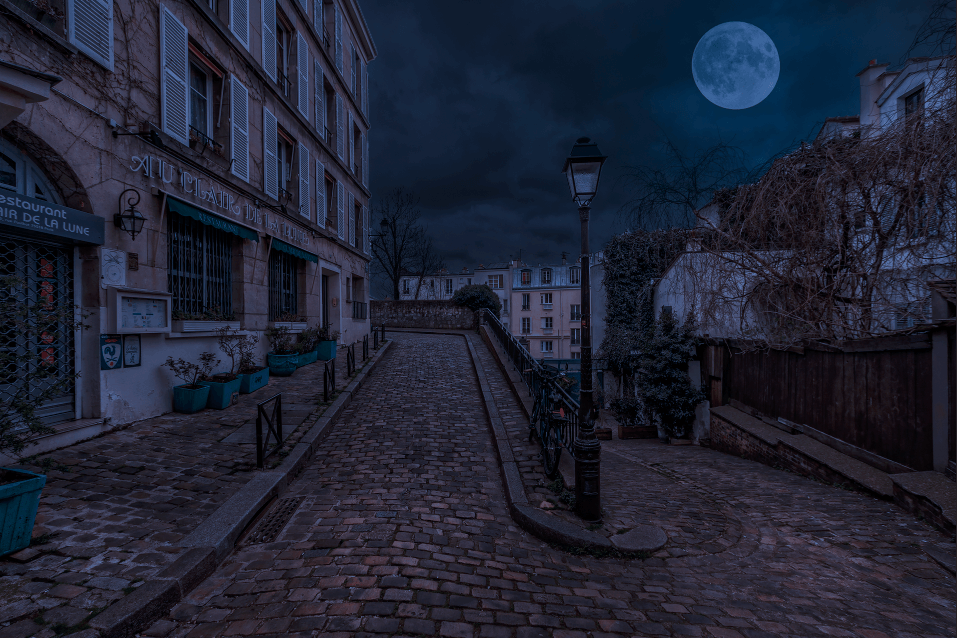
The cloudy sky is quite dramatic already, but we’re going to take it a step further by adding a night sky with a moon up in the corner like in this photo.
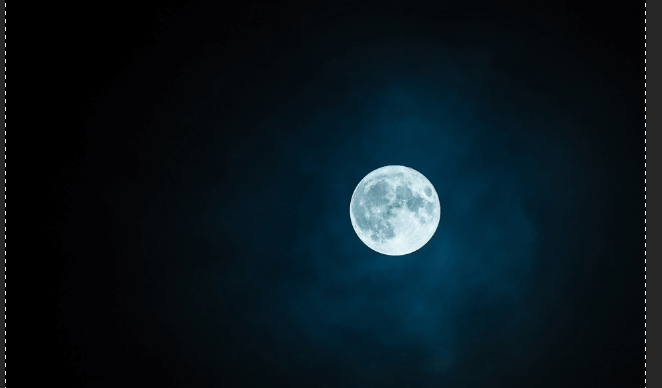
To prep this image, I extended the image background to add more sky around the moon, otherwise, the moon would have been too big in relation to the buildings in my street scene.
Make a Selection and Copy It
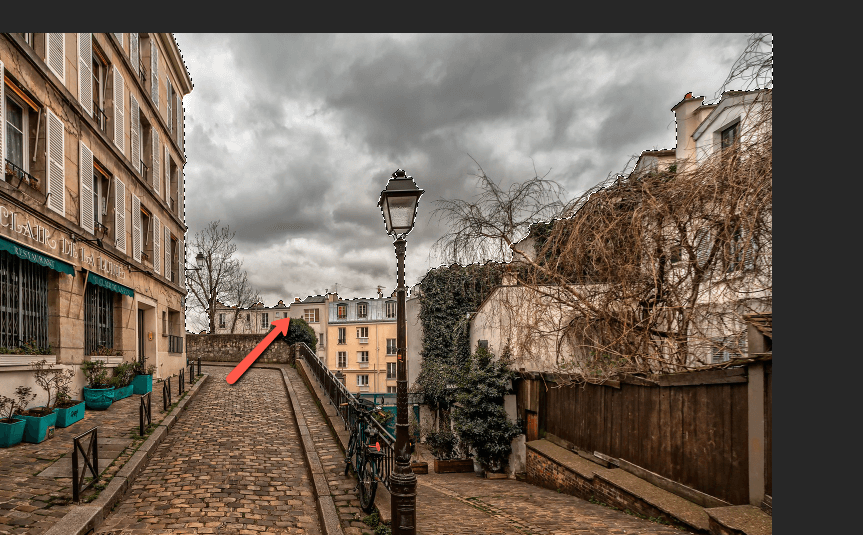
Back in the street image, we’re going to make a selection around the sky.
I used the Quick Selection Tool for this, though any selection tool that works for your image will work. The Magic Wand tool can often be useful since your sky will often be a different color than other elements in the image.
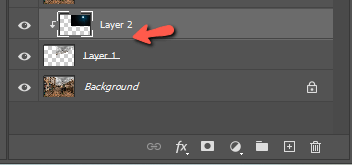
Press Ctrl + J or Command + J to make a copy of the selected area.
Bring in the New Sky
Now let’s bring in the moon sky image. Open it in Photoshop and make any extensions that you might need. Then press Ctrl + A or Command + A to select the entire image and Ctrl + C or Command + C to copy it.
Come back to the street image and press Ctrl + V or Command + V to paste it on top. Press Ctrl + T or Command + T to activate the Transform Tool. Drag the corners to resize and drag the image to reposition until you’re satisfied with the size and placement.
Over in the Layers panel, let’s clip the moon image to the sky selection we created. Hold Alt while hovering between the two layers until the little box with the right-angle arrow appears. Click to clip them together. Learn more about clipping masks here.
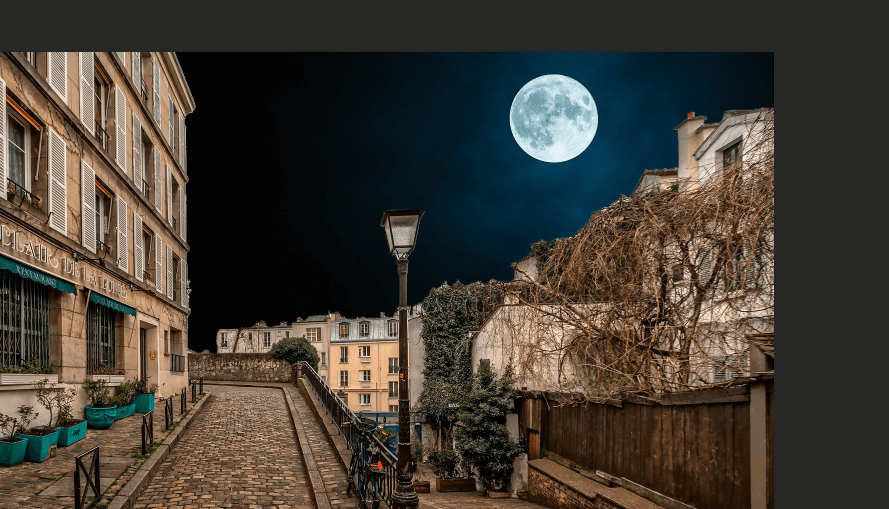
It obviously doesn’t look real, but now the new sky is nestled in the image nicely.
Blend the Skies Together (Optional)
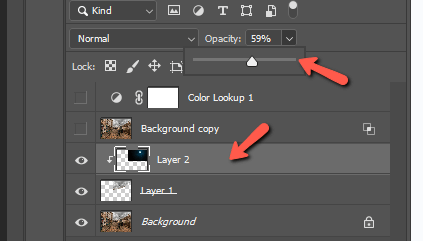
We’ll be changing the colors anyway in a minute, but I actually want some of the clouds to peek through in this case. So I’m going to lower the opacity on the moon sky layer using the slider in the Layers panel.
Now we get some of the original clouds peeking through with that ghostly moon. It looks pretty cool, though not realistic, but don’t worry that’s coming.
Step 2: Change the Color Lookup Filter
All right, now that we’ve got a more adequate sky in place, it’s time to change our scene from day to night. You’ll be happy to know that this part is considerably easier than replacing the sky in Photoshop.
In fact, it’s only one adjustment!
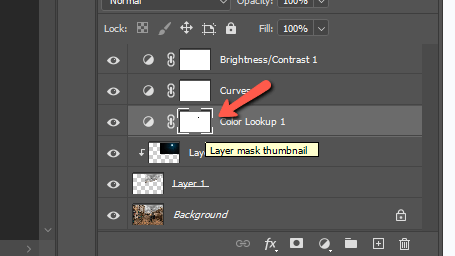
Click on the Adjustment Layer icon at the bottom of the Layers panel. Choose Color Lookup from the list.
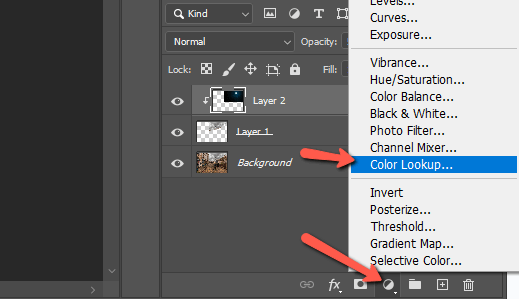
In the adjustment panel, click the box that says Load 3D LUT and you’ll get a list of options. These are basically color profiles that you can add to your image.
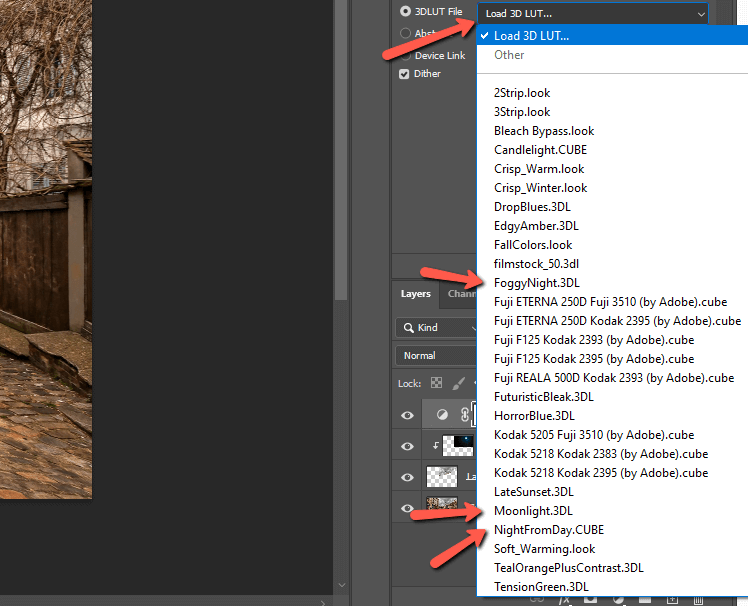
There are three that are designed for changing day images into night ones. You can test all three to see which works for your image. I went with the Moonlight one.
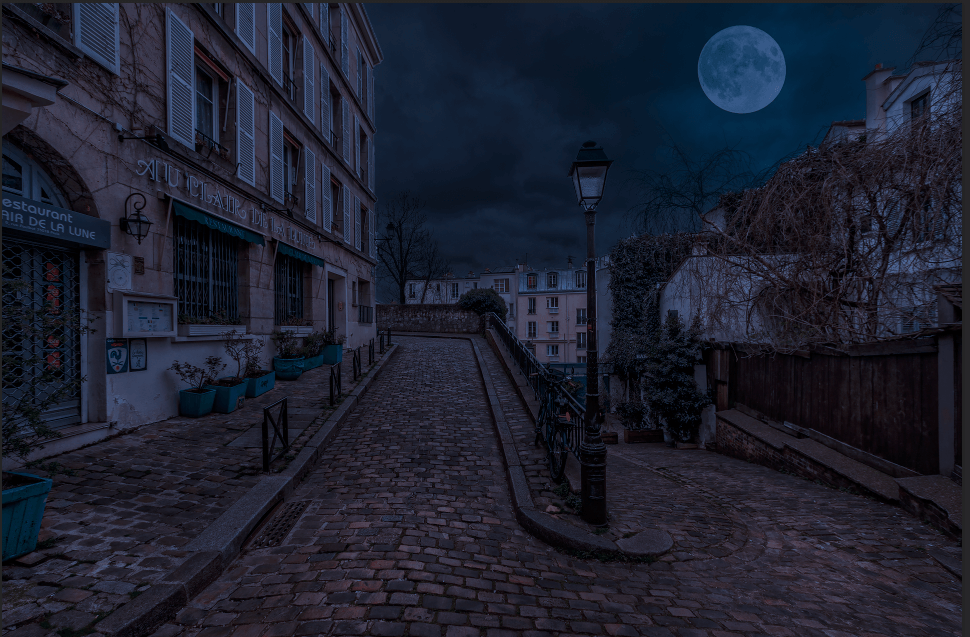
Wow! What a difference!
You can, of course, make some adjustments as you see fit for your image. I added both Curves and a Brightness/Contrast layer to adjust the look slightly to end up with this.
And now we’re going to make some adjustments that will really bring this image to life.
Step 3: Add Lights
City streets won’t normally be completely dark so we need to add some illumination. To do this, we’re actually going to paint on the Color Lookup layer mask and remove areas so that the original image peeks through.
Thus, if you want to adjust the color or how the illumination looks, just go back to the original image and make your adjustments there.
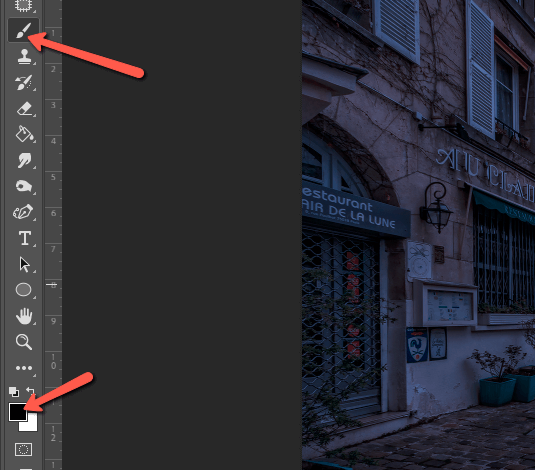
To paint the illumination, make sure you’ve selected the Color Lookup layer mask in the Layers panel.
Now, choose the Brush Tool from the toolbar on the left or press B on the keyboard. Make sure that Black is set as your foreground color.
Choose a soft, round brush and bring the opacity down considerably. I’m working with about 30%.
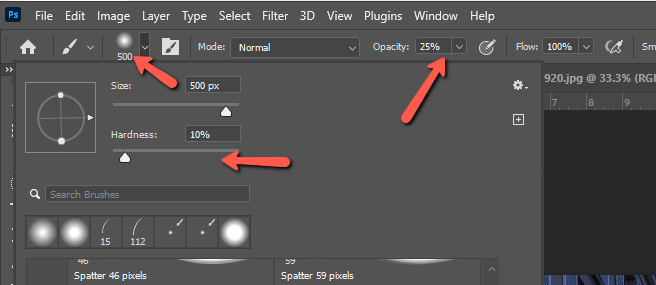
Now, paint over areas of the image where you want to add some illumination. If you need help adjusting the hardness, opacity, size, and other aspects of your brush, check out our tutorial on how to use the brush tool.
As you paint, think about where the lights would naturally be. Turn on the lights in a few windows, light up the street lamp, and add some light spilling around the base. Put a big soft circle around the moon to illuminate the clouds around it slightly as well as the tops of the buildings.
Have fun with it and don’t forget about small details
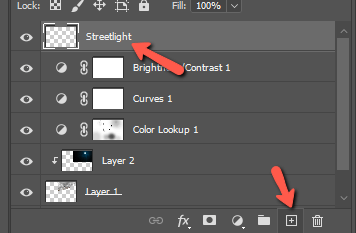
There’s one final thing I’d like to show you. The streetlight is illuminated, but it would look so much more realistic with an actual light bulb. So let’s add that.
Click the New Layer button at the bottom of the layers panels. We’ll call this streetlight.
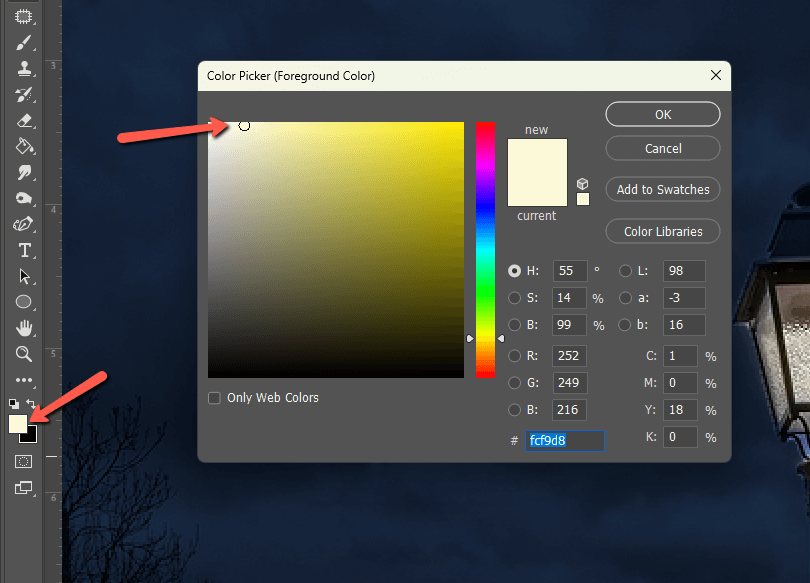
Then, click the foreground color near the bottom of the toolbar on the left. This will open the Color Picker where you can choose a yellow color. It should be pretty bright, so keep it close to white with just a hint of yellow. Click OK when finished.
We’re going for an intense lightbulb look here, so we’ll grab the brush and turn up the opacity and flow. Resize to be just a tiny bit bigger than the lightbulb and click.
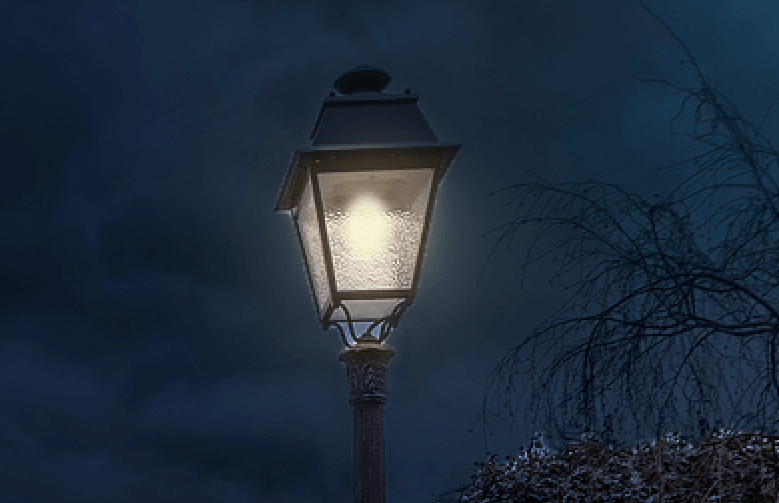
You can also do a big soft brush around the whole light with a low flow and opacity to give it a glow.
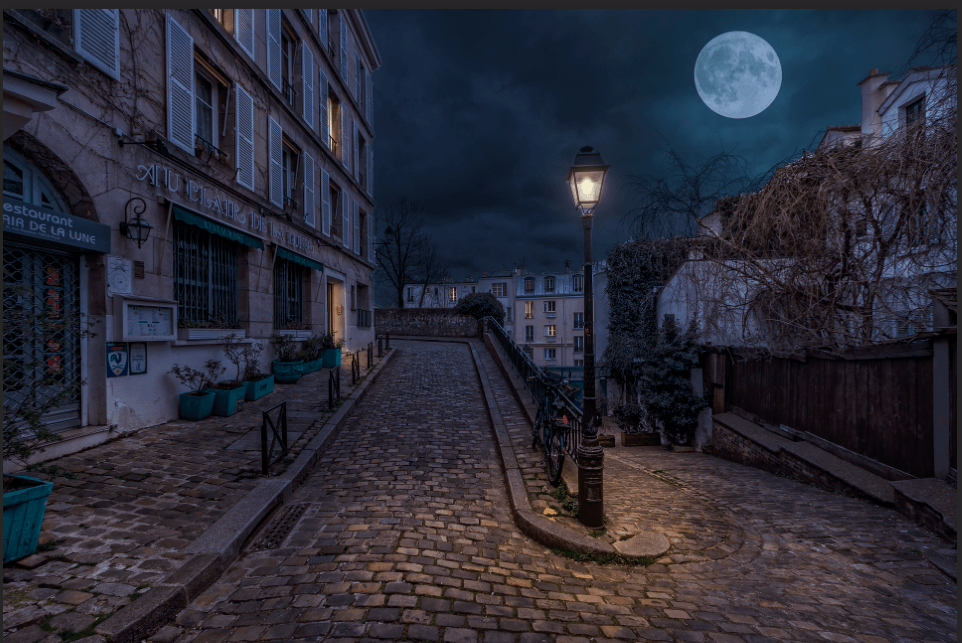
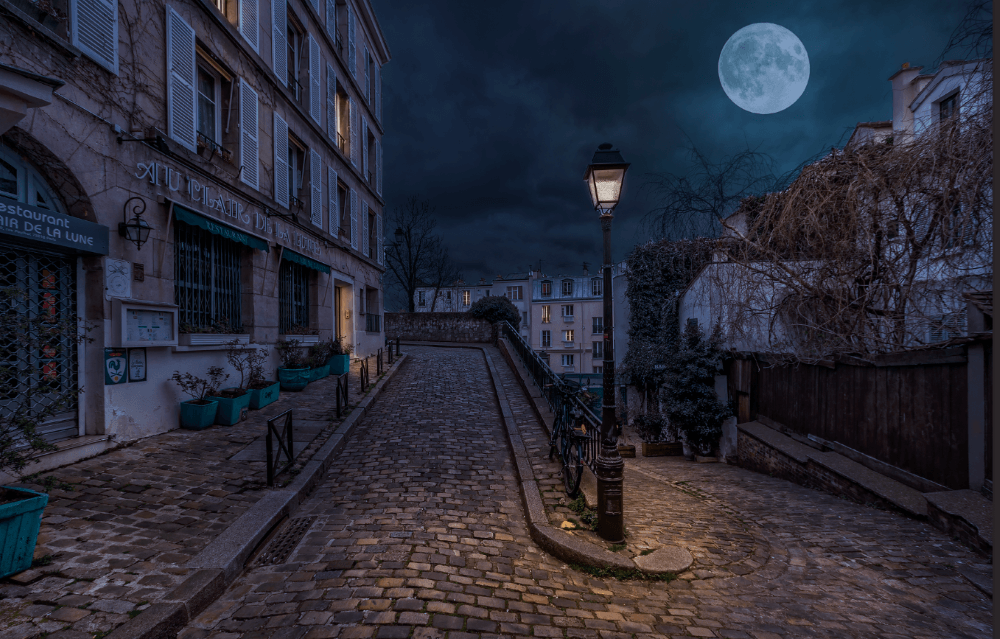
And that is that, a pretty convincing night scene! Curious about adding other cool effects to your images? Check out how to add fog here!
About Cara Koch