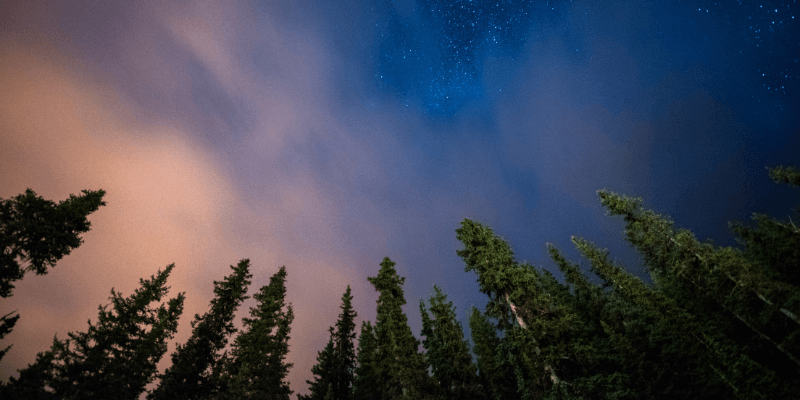
When the weather isn’t exactly right, Photoshop’s sky replacement feature can come in handy. This is a good tool to learn since the sky will not always look the best in certain images, or if you want to replace the sky with a different type of background, this tool would be very helpful to you.
The good news is that the Sky Replacement was a feature that was made available by Adobe with the release of Adobe Photoshop 22.0 in October 2020. This enables designers to alter the sky to give it a more dramatic appearance.
I have over five years of Adobe Photoshop experience and am Adobe Photoshop certified. In this article, I’ll teach you how to replace the sky in Adobe Photoshop.
How to Use the Sky Replacement Tool in Photoshop
You can use the Sky Replacement tool to quickly change the sky of a photo.
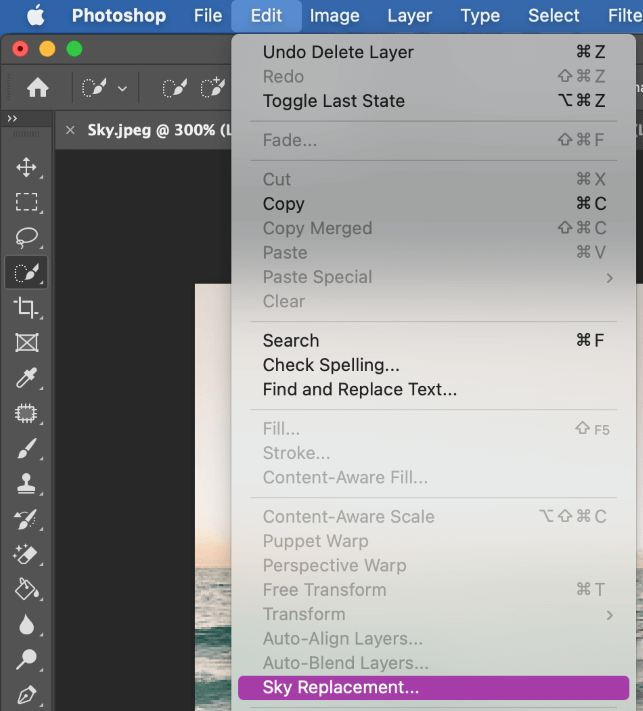
Step 1: Go to Edit > Sky Replacement in Adobe Photoshop while the image is open. By doing so, a new panel will appear on the right side of the window.
Step 2: The top of the Sky Replacement panel will have a sky that will take the place of the current sky. You can create new skies to use or choose one from the list of pre-made skies using the dropdown arrow.
You can see that the sky will be automatically added to your chosen image the moment you click on a sky. Unbelievably smooth, the rendering even modifies the foreground colors to match the selected sky.
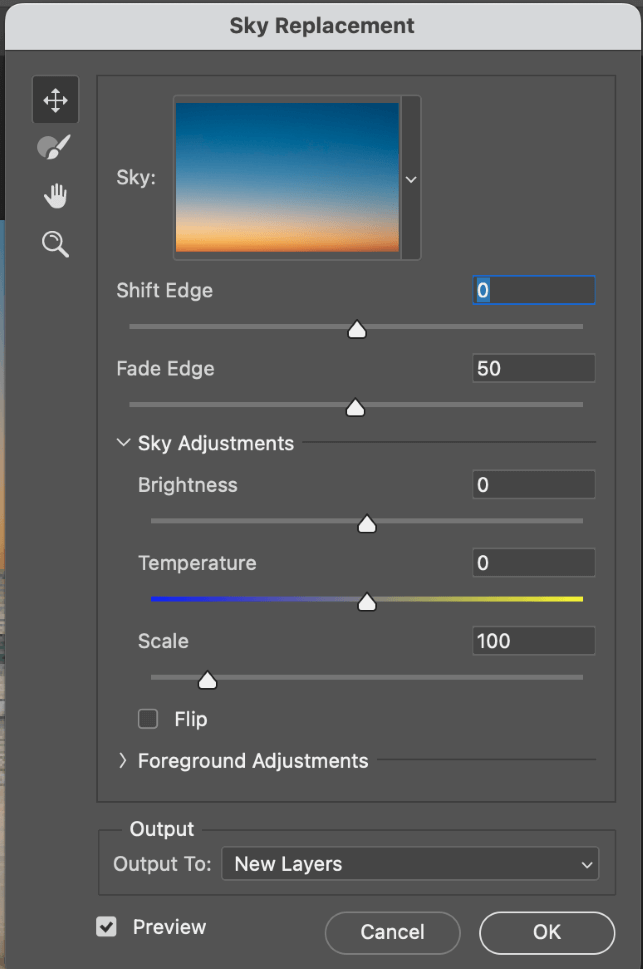
Step 3: Configure the settings, the Adobe Sensei system automatically chooses, masks, and replaces the original sky with the new selection, however, it is not always accurate.
This occasion calls for a little bit more adjusting. As you can see from the sky replacement window you have a handful of settings. You will want to manually adjust them to what you see fit for your image.
Perhaps you might move the sky to make it resemble the foreground. Make sure to click the “move” icon. After that, click and drag the sky to the location you like. The foreground is chosen and masked by the sky replacement AI.
Most of the time it works wonderfully, but if you think the selection isn’t right, you can utilize the sky brush option. Once it has been chosen, click and drag to include or remove any portion of the sky from the mask by clicking and dragging while holding down the Alt or Option keys. If the default foreground selection in Photoshop doesn’t look just right, you can use this to adjust it.
Mess around and try different replacement skies, it is fun to see which one looks the best!
Final Thoughts
The Sky Replacement function in Adobe Photoshop is a wonderful addition. The lengthy process of blending and selection is eliminated by the Sensei system. Changing the sky in pictures can give them a more dramatic appearance and improve unfavorable lighting.
It’s simple to replace the sky in your images with Photoshop’s sky replacement feature. To make your new sky appear as natural as possible, the application masks the sky and offers blending and lighting choices.
But you have a lot of options if you don’t like Photoshop’s outcomes. You can, for instance, import sky files and alter the hue and lighting of the sky as well as the foreground. The sky replacement feature is exclusive to Photoshop.
If you wish to alter a sky, you must round-trip files from Lightroom into Photoshop. There is a background replacement option in Photoshop Elements. This, however, does not operate as smoothly as Photoshop’s Sky Replacement tool.
Any questions about How to replace the sky in a photo in Photoshop? Leave a comment and let me know.
About Aly Walters