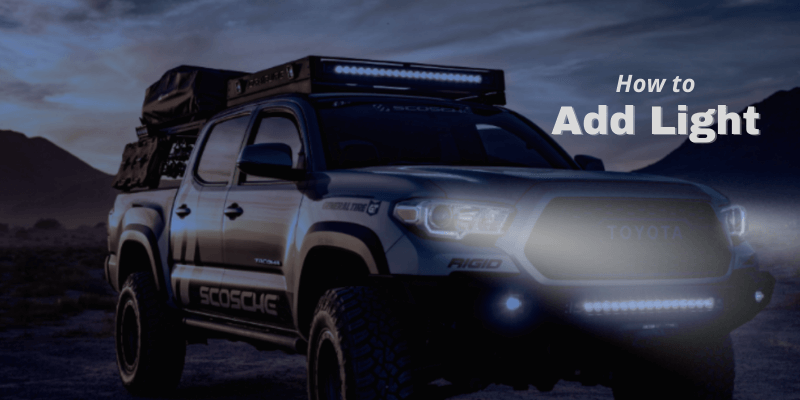
Car headlights, streetlamps, beams of light from the sky for an alien abduction – there are all kinds of reasons why we might want to add light to images in Photoshop.
Hey there! I’m Cara and I adore playing with images in Photoshop to create something completely new.
As with many techniques, there is more than one way to add light in Photoshop. Today let’s walk through a simple technique that will work for most images when you want to add light.
Table of Contents
Step 1: Prepare Your Image
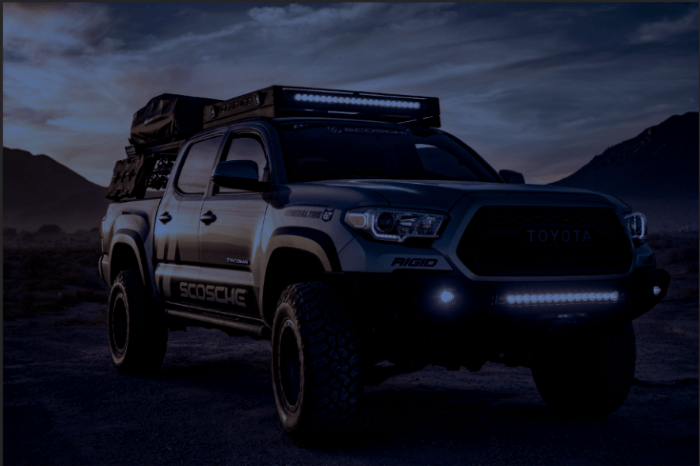
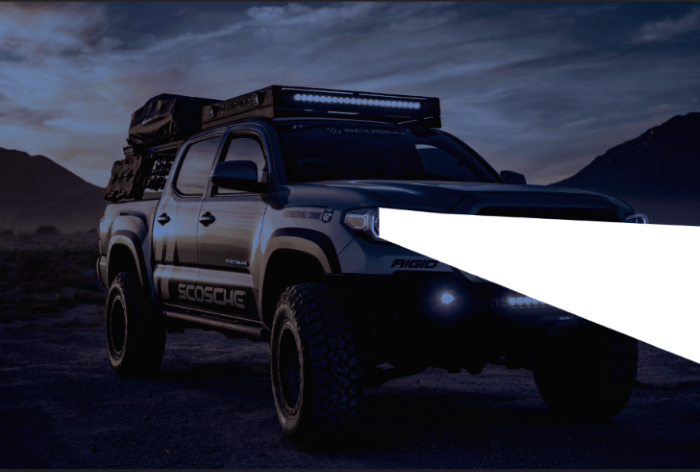
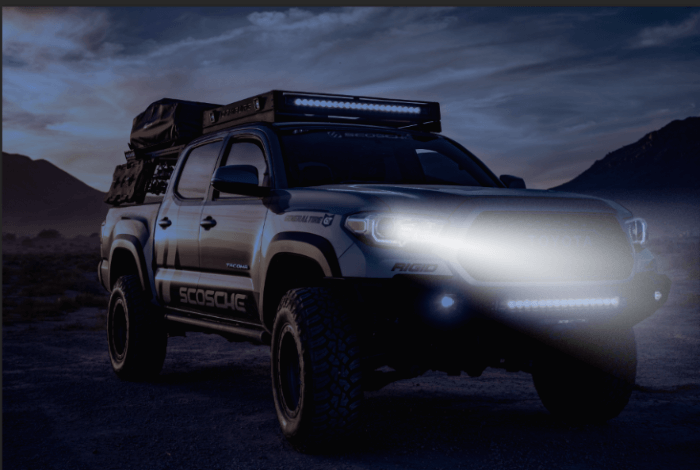
Today, I’m going to demonstrate using this image.
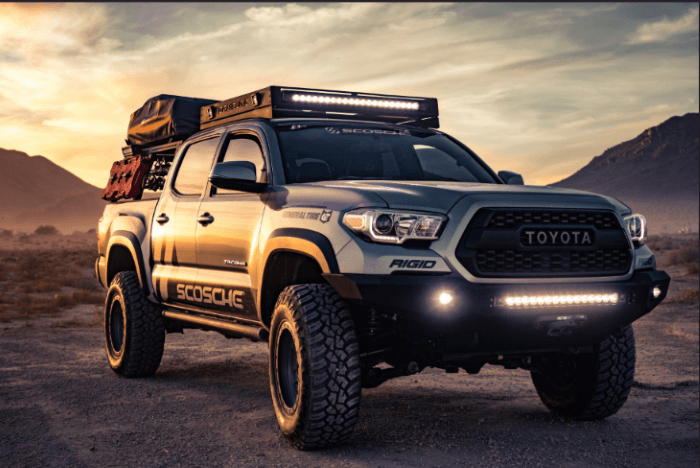
In order to see lights, the image needs to have been taken at night, or when it is at least partially dark. You can make daytime images look like nighttime images quite easily.
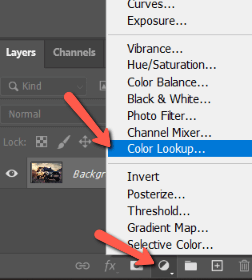
Head to the Adjustment Layers icon at the bottom of the Layers panel. It looks like a half-filled circle. Choose Color Lookup from the menu that opens.
Click on the Load 3D LUT box to open the options. Choose NightFromDay.
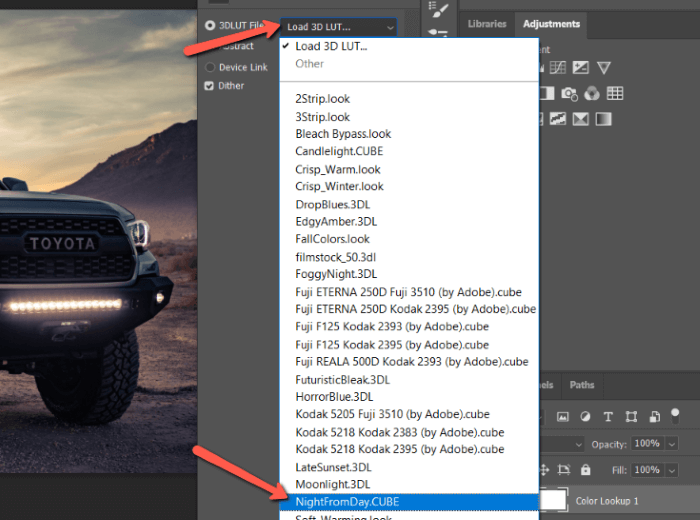
This will do a pretty good job with most photos. If you want to further adjust, you can use a levels or curves adjustment layer to finish the adjustments.
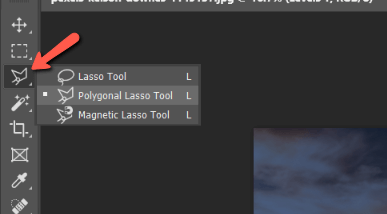
Step 2: Draw the Light Shape
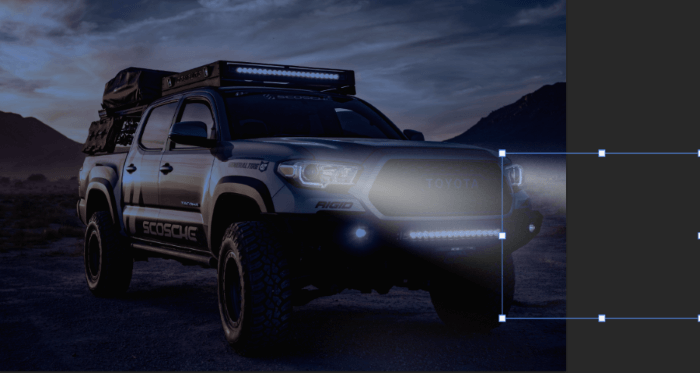
To create a beam of lighting effect in Photoshop, you’ll need to draw in the shape of the light. To do that, choose the Polygonal Lasso tool. It may be hidden behind the Lasso tool on the toolbar. Right-click to make the tool options appear and select the polygonal tool from there.
Click and drop points where you want to make your shape. Remember that the light will spread out as it moves away from the car.

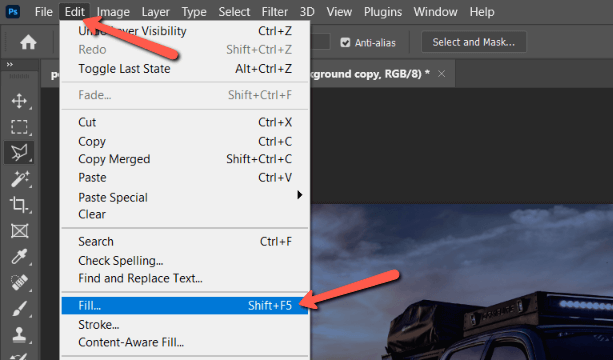
Step 3: Fill With White
Fill the shape with white by going to Edit in the menu bar and choosing Fill.
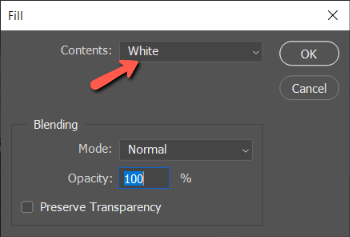
Choose White for the contents and hit OK.
Press Ctrl + J or Command + J to get the light on its own layer. If you don’t do this, the effects we’re going to apply to soften it will apply to the whole image.
Step 4: Blur the Effect
Let’s add some blur to disperse the light. With the light layer selected, go to Filter, hover over Blur Gallery, and pick Field Blur. This blur filter will allow you to vary the strength of the blur effect across the shape.
To do this, drop a point on the headlight itself and a second point at the edge of the photo. Then you can adjust the strength for each end individually.
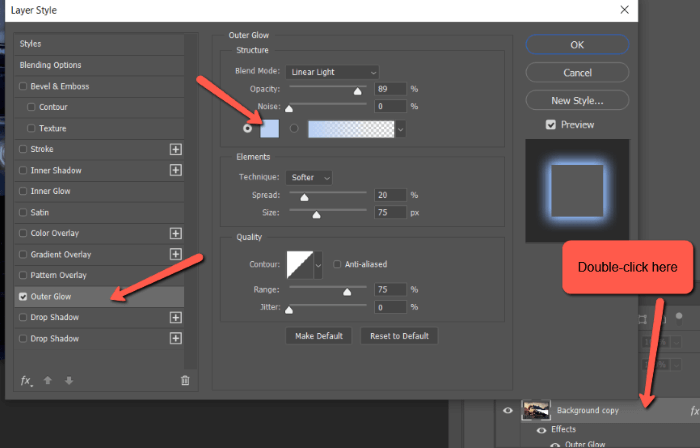
Step 5: Add an Outer Glow
Let’s add an outer glow to soften the light up a touch more and add a color cast. You can go with blue or yellow depending on what color lights you want.
Double-click on the layer in the Layers panel to open the Layer Style box. Choose Outer Glow from the styles list. Double-click on the color swatch to open the color picker and choose your color.
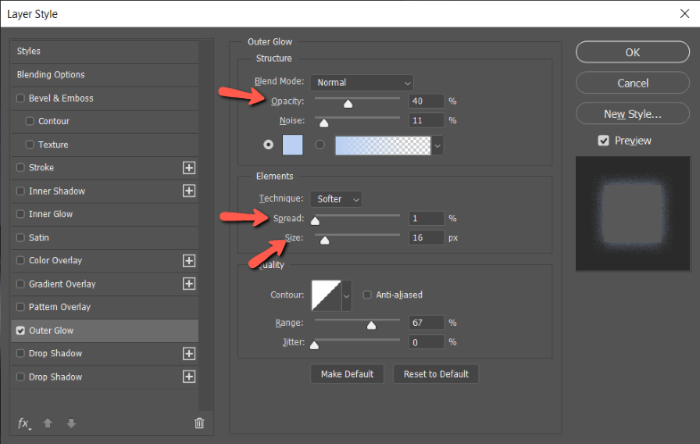
Adjust the Opacity, Spread, and Size to fit your image as appropriate.
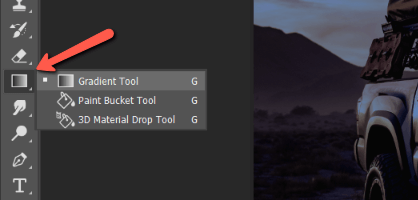
Step 6: Add a Gradient
Next, let’s add a gradient to get the light fall-off that we would see naturally.
Add a layer mask by clicking on the Layer Mask button at the bottom of the Layers panel.

Choose the Gradient tool from the toolbar on the left.
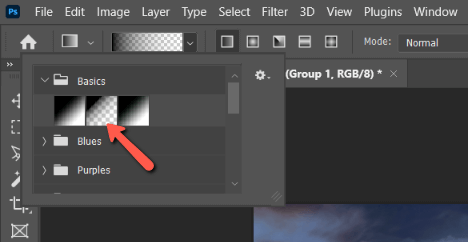
Now, select the Foreground to Transparent.
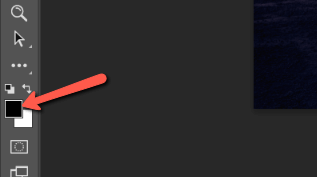
Then set the foreground to black.
Starting on the headlight, draw your gradient line outward along the light. How far you go will affect the strength of the effect. You might have to draw it a few times to get it how you like it.
Remember, if the overall effect is too strong, you can bring down the Opacity of the layer in the layers panel.
Step 7: Copy and Paste to the Other Light
Once you’re happy with the look you need to copy and paste the effect on the other light. With the light layer selected, hit Ctrl + J or Command + J to copy the layer. Press V to select the move tool. Then you can grab the copied light and move it.
Since the other light is farther away, you’ll probably have to make it smaller. Hit Ctrl + T or Command + T to open the Transform tool. Drag the corners to make the light smaller. You might also have to reduce the Opacity of this layer even more.
Step 8: Add the Light Spill
A little bit of light would spill onto the floor in this image so let’s add that with a brush. Choose the Brush tool from the toolbar.
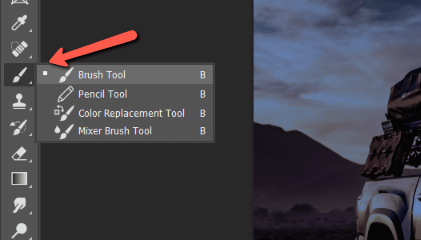
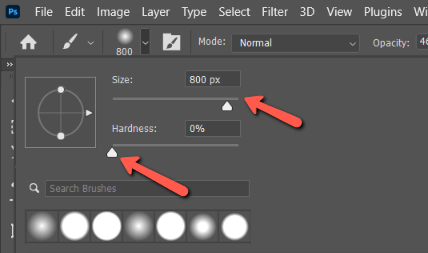
Choose a fairly large, soft brush by clicking on the tiny arrow next to the brush type in the Options menu. Set the Hardness to 0% and pick a size that works with your image.
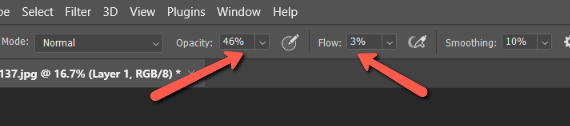
We just barely want the effect to show up so reduce the Flow really low, between 3-5%. You can also bring the Opacity down.
Now, slowly paint the image with white wherever you want the light to spill.
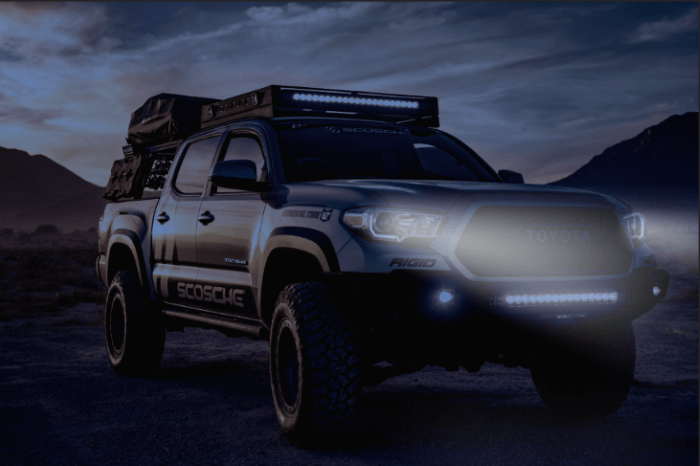
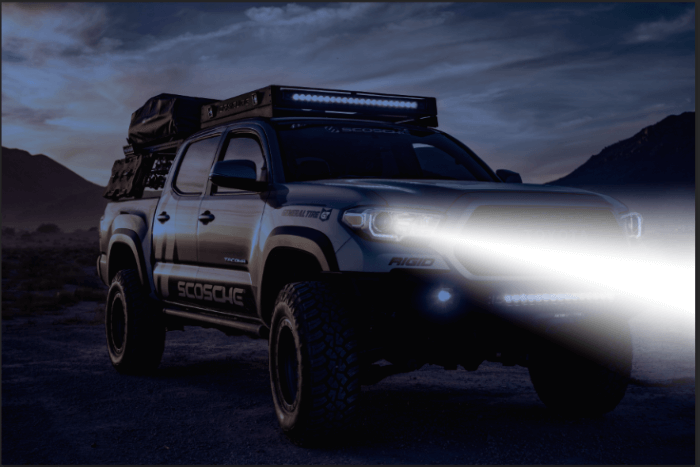
I added a tiny bit on the ground in front of the truck. The effect is barely visible, but makes a world of difference when tricking the eye into believing that the lights are real!
Have fun with this effect, there are a lot of cool things you can do with it!
Interested in learning more fun effects? Check out this tutorial on how to make fog in Photoshop!
About Cara Koch