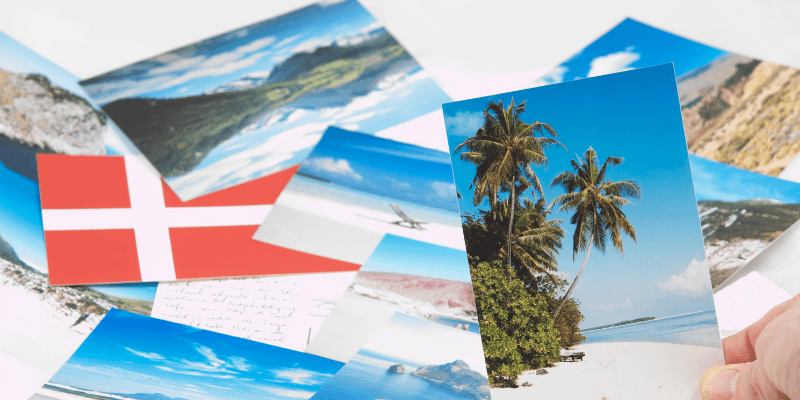
The days of snail mail are numbered, but there is still something nostalgic about sending each other handwritten notes on physical paper. Sending someone a postcard from your travels is a fun way to connect with one another, but those postcards aren’t as easy to find anymore.
Hey there! It’s me again, Cara, back with another fun Photoshop tutorial. This time we’re going to look at creating your very own version of the famous “greetings from” travel postcards.
There are quite a few steps here, but if you’ve been following my tutorials for a while you’ll already know how to do a lot of this. It’s just a matter of putting it all together. If not, no worries, I’ve linked to other tutorials to explain further if you’re feeling lost at any point.
Let’s get started!
Note: I use the Windows version of Photoshop. If you are using a Mac, the workspace will look slightly different from the screenshots displayed here.
Table of Contents
Step 1: Open a Postcard Template
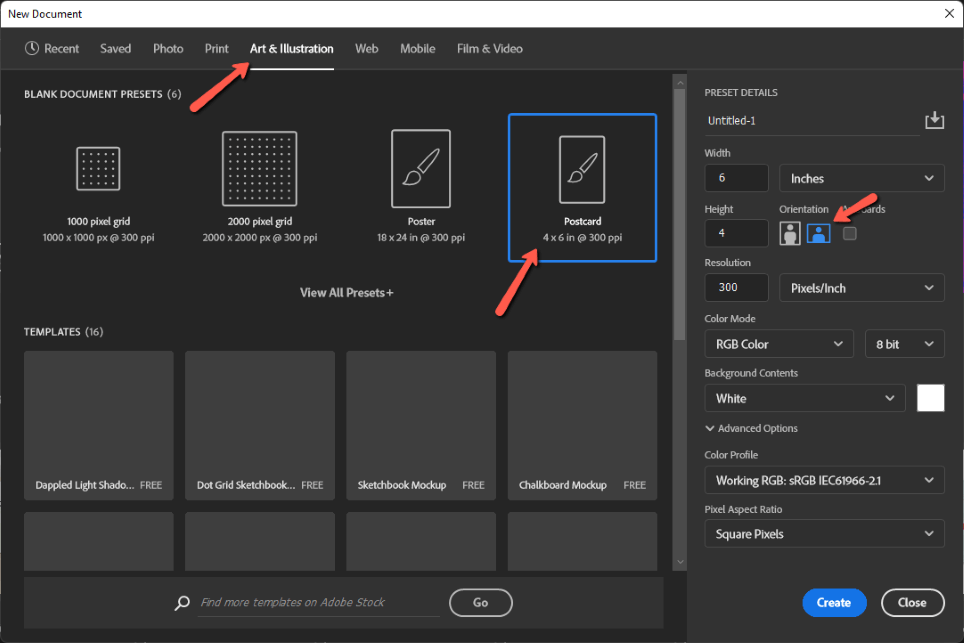
We’ll start by opening a new document in Photoshop. You can set your own size or use Photoshop’s postcard template. Just go to File and click New.
In the box that opens, go to the Art & Illustration tab and choose Postcard from the listed templates. On the left, click the Horizontal Orientation icon to switch the width and height. Click Create.
Step 2: Add a Background Image
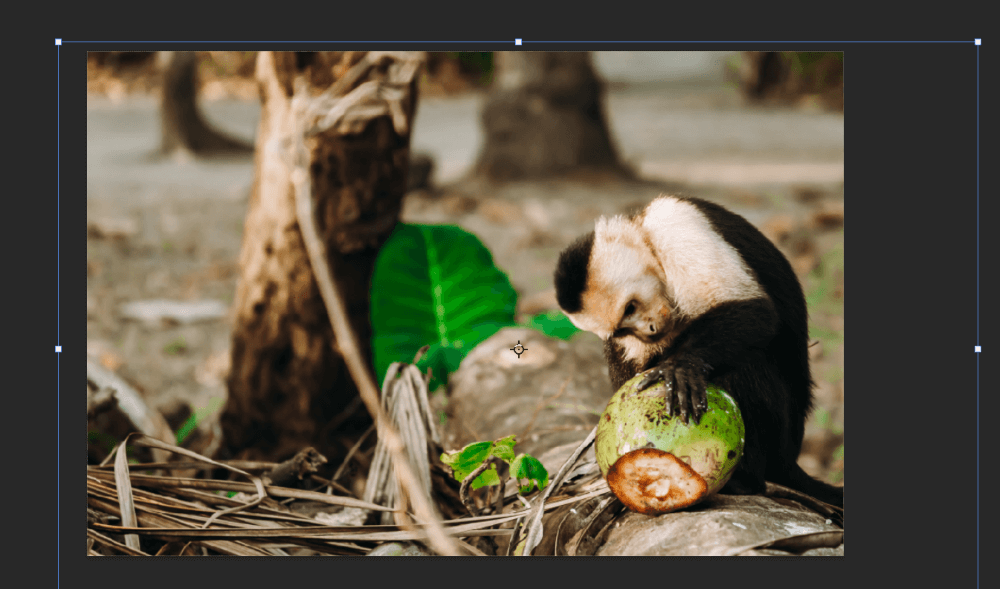
The foundation of our postcard is the background image. Postcards typically show off iconic sights and attractions of the place you’re visiting. So since I live in Costa Rica and have a bunch of jungle wildlife photos at my disposal, that’s what I’ll use for this example.
Place your background image on your project. You can go to File, choose Place Embedded, then navigate to your image.
Or open the image in Photoshop like normal, press Ctrl + A or Command + A to select it. Then press Ctrl + C or Command + C to copy it. Click over to your postcard and press Ctrl + V or Command + V to paste it.
Resize the image and reposition it as needed with the Transform tool, which you can access by pressing Ctrl + T or Command + T. The blue box shows the actual outline of my image, but I want the monkey down in the corner, so we’ll just let the excess part of the image extend out of the canvas.
Step 3: Add Text
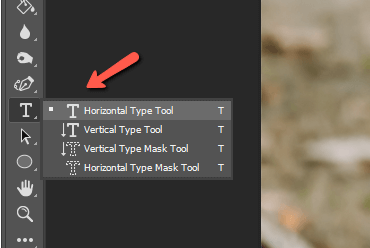
Now we need our text. Press T on the keyboard or choose the Horizontal Type Tool from the toolbar on the left.
The font you choose will have a huge impact on the look of your postcard. To mimic the old-style postcards, you may want a font with a retro feel. Regardless, if you want to fill the letters with images as I’m going to be doing here, you’ll need a thick font.
Click the font menu in the Options Bar to peruse your available options.
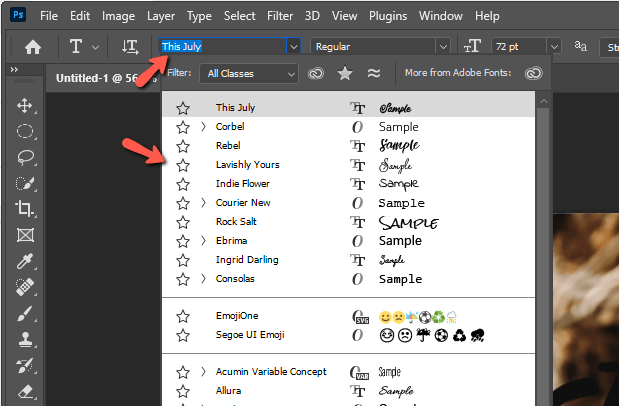
If you don’t see one you like, go to Type and choose More from Adobe Fonts.
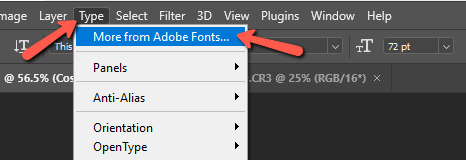
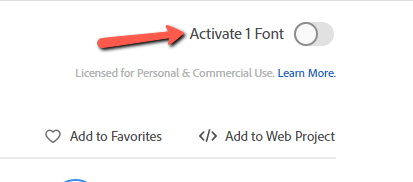
This will open a window in your browser for Adobe Fonts where you can search and download all sorts of fonts. To use the font, simply click the toggle button in the top right corner of the font description page to activate the font.
As long as you have Creative Cloud installed and signed in, the font will appear in your font list, like magic!
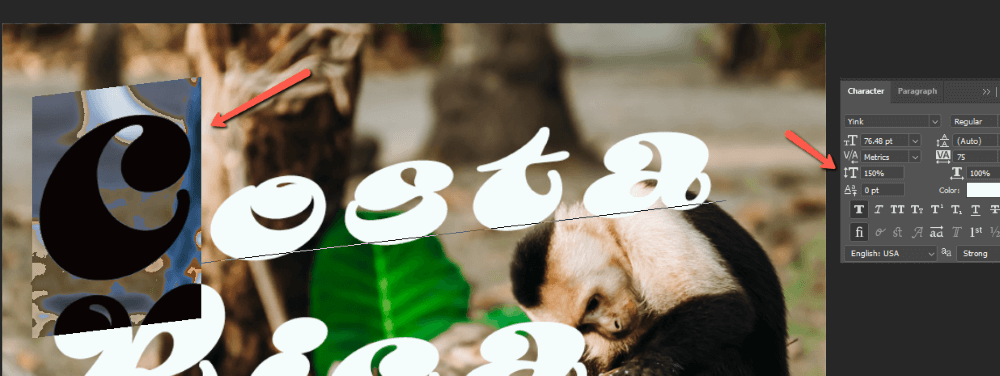
Choose your font, then add text to your image. In the Options bar, let’s line the text up on the left. When you have the Type tool active, hold down the Ctrl or Command key. A box appears around the text which allows you to resize, reposition, and even distort the text.
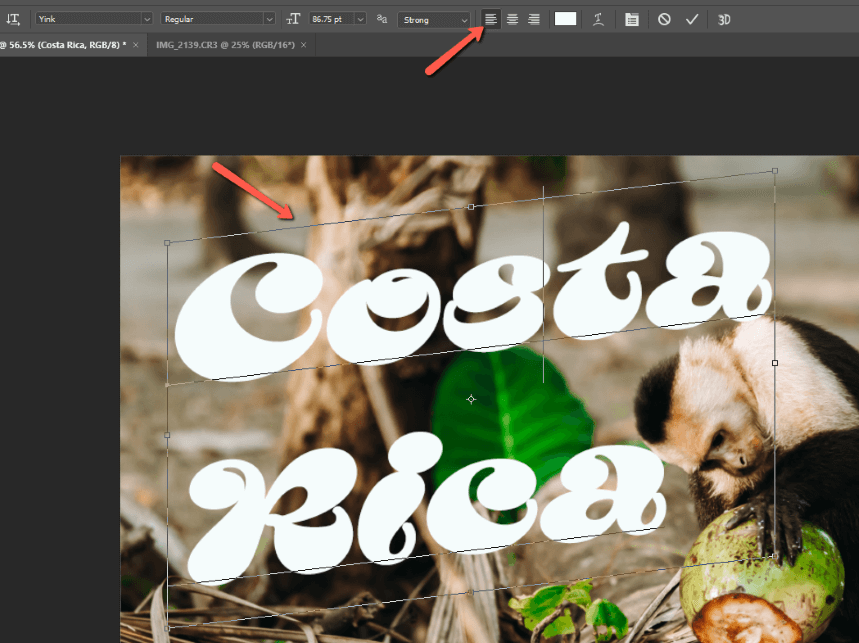
To get a little more space between the letters, I dragged my text out to the right. I also pulled it up a little to get the slant. Click and drag to position the text until you’re happy with the placement.
Make any additional adjustments to the look of the letters in the Character panel. If the panel isn’t active, go to Window and click Character and make sure there is a checkmark next to it.

Here I’ve spaced the letters out a bit more by selecting all the text and putting a positive value of 75 in the VA box.

I also selected only the first letter in each word and put a value of 150% in the box with a capital T and an up and down arrow. This makes them 50% bigger.
If you want to warp the text for the final touch, go up to the Options panel and choose Warp. In the box that opens you can choose different warp styles and make modifications to customize the look. I will stick with the slant I have for this font.
Step 4: Fill in the Text
Those old-style postcards usually filled the letters with one or more other iconic images of the area. Let’s look at how to create that effect next.
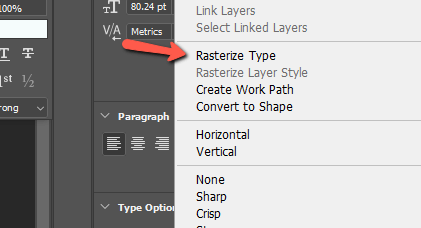
Rasterize the Text
We first need to rasterize the text or transform it to pixels rather than editable text. Right-click on the text layer and choose Rasterize type.
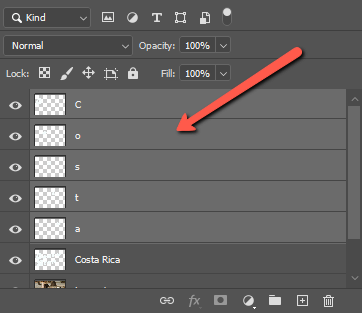
Put Each Letter on its Own Layer
If you want to fill all the text with one image, you don’t have to do this part. But if you want to fill each letter with a different image, you’ll need to separate the letters each onto its own layer.
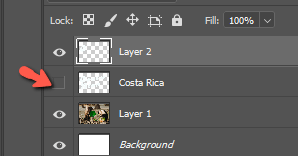
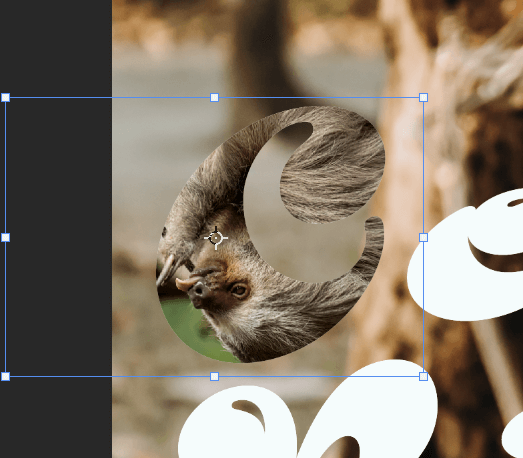
To do this, select the Magic Wand tool. Make sure that the Continguous box is checked in the Options bar so Photoshop will only select pixels of the same color that are touching.

Then click on a letter to make a selection.

Press Ctrl + J or Command + J to copy the letter and put it on a new layer. Notice that when I turn off the Costa Rica layer, I still have the C showing as there is now a copy of it on a separate layer.

I suggest renaming the layer to keep track of it more easily. Double-click on the layer name to make it editable and change it to C. Remember to press Ctrl + D or Command + D to remove the selection before making a new one with the next letter.
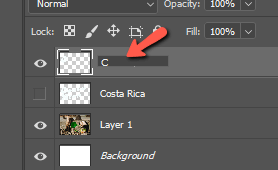
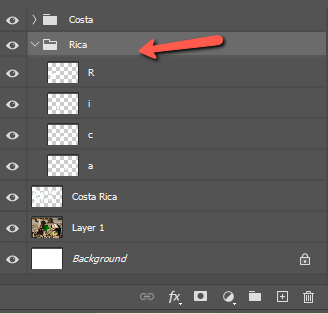
Repeat for all the letters. I also suggest using the group feature to help keep things organized. To do this, select multiple letter layers by holding Shift while clicking on the first and last layer in the lineup.
Then press Ctrl + G or Command + G to group the layers in a folder. Or click the folder icon at the bottom of the layers panel. Rename your folder to reflect what’s inside.
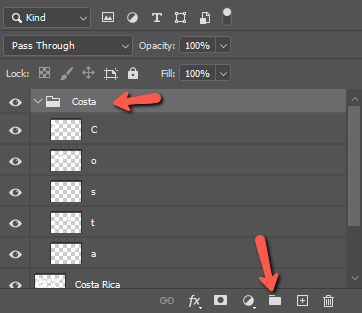
Now let’s do the same with the other word.
Add Images with Clipping Masks
Now we’ll add our images and use clipping masks to place them in individual letters. Bring your image into the project by using the Place Embedded command or opening the image and copying and pasting as we described earlier.
To make it easier, select the letter layer you want to link the image to before bringing it into the project. This will make the new image layer appear right above the letter. Then, just click between the two layers while holding the Alt key to activate the clipping mask.
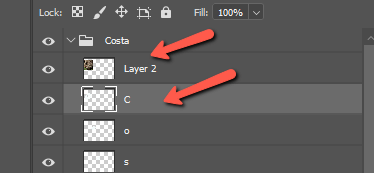
Resize and reposition the image as needed with the Transform tool.
Repeat for the other letters.
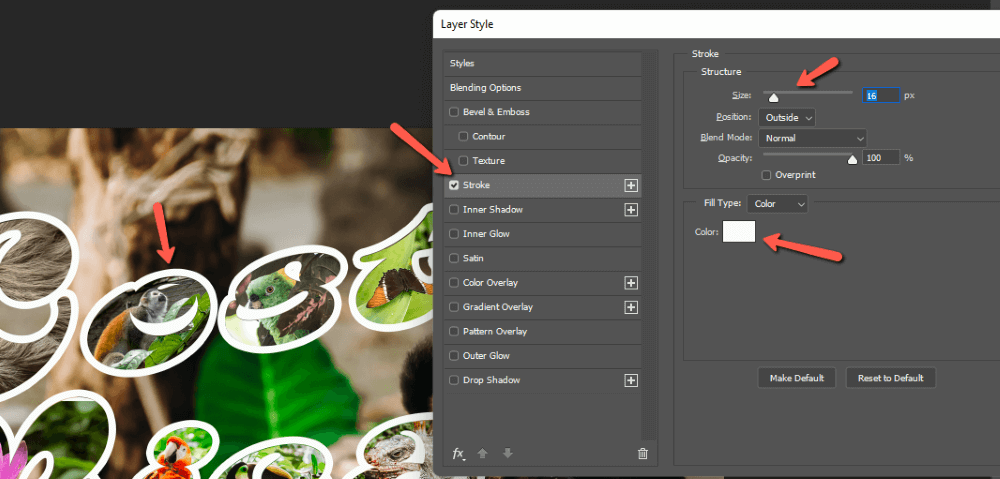
Step 5: Add a Stroke and Shadow
Now that we’ve filled in all the letters, we need to define them. Close your group folders (organization is key!) and drag the original Costa Rica text layer to the top of your project.
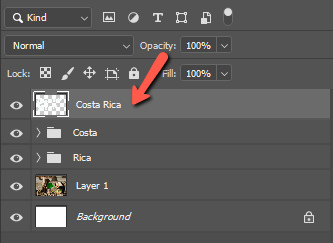
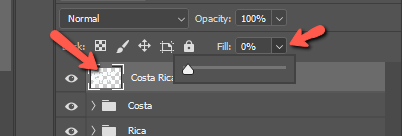
All your hard work will disappear as the letters come back on top of your images, but don’t worry. Bring the Fill percentage of the text layer to zero and everything comes back.
Now, Double-click on the text layer to open the Layer Style menu. Click the Stroke tab to add a stroke around the letters. On the right, you can adjust the look by choosing the position of the stroke, the size, and the color.
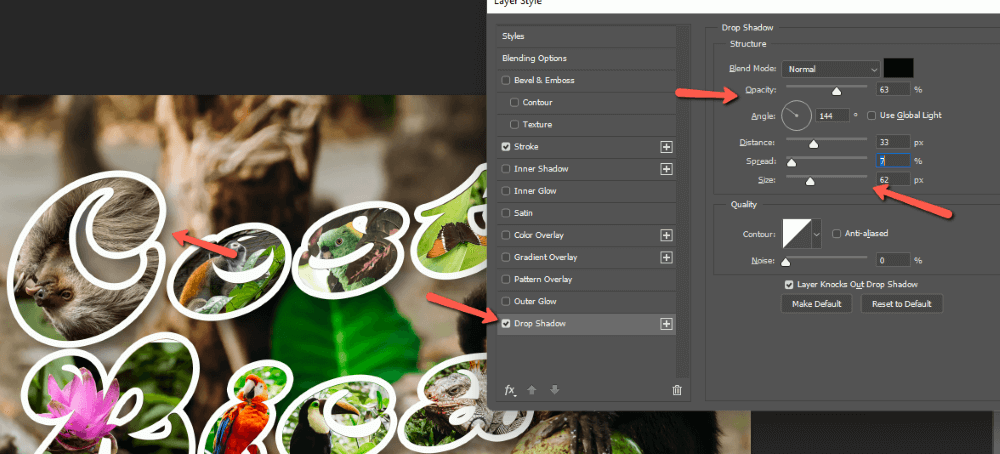
Let’s also use this menu to add a drop shadow, giving the letters some dimension. Click the Drop Shadow tab. Again, you can make adjustments on the right to the angle, color, size, distance, spread, and opacity of the shadow until you get the look you like.
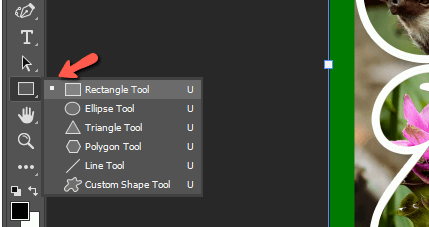
Step 6: Add a Border
To give it more of a postcard look, let’s add a border. Do this by choosing the Rectangle shape tool.
Click and drag to draw a rectangle over your project. In the Options bar, turn the Fill to Transparent and adjust the stroke to the thickness and color you want.
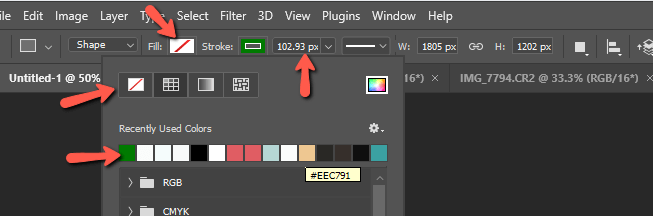
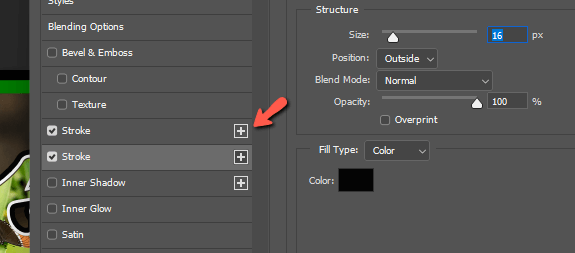
I’m going to do this a second time and use a different color on a thinner stroke to get a double border effect. To finish up, add the classic “greetings from” text. And I decided to add a second stroke around the letters to better define them.
To do that, double-click on the text layer to open the Layer Style window again. Click the Plus button next to the stroke to add a second stroke. Then adjust the settings how you want them.
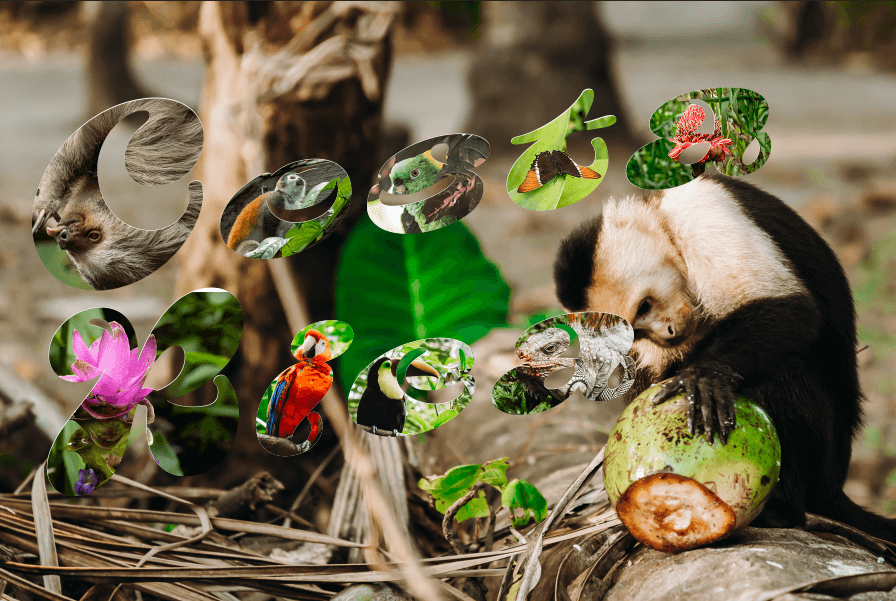
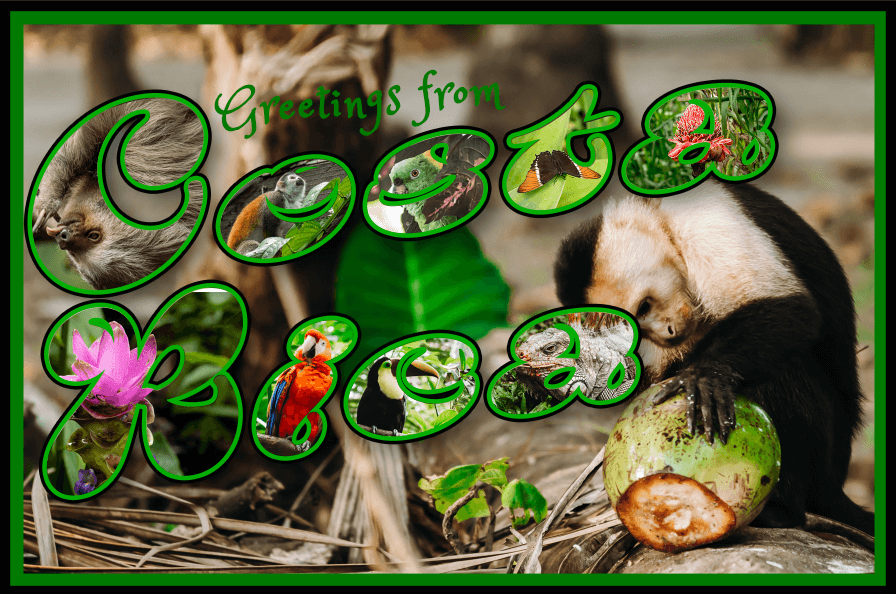
And here’s my final postcard!
What kind of postcard might you create? The sky’s the limit! Interested in other cool photo projects? Check out how to create a photo collage or a photo mosaic.
About Cara Koch