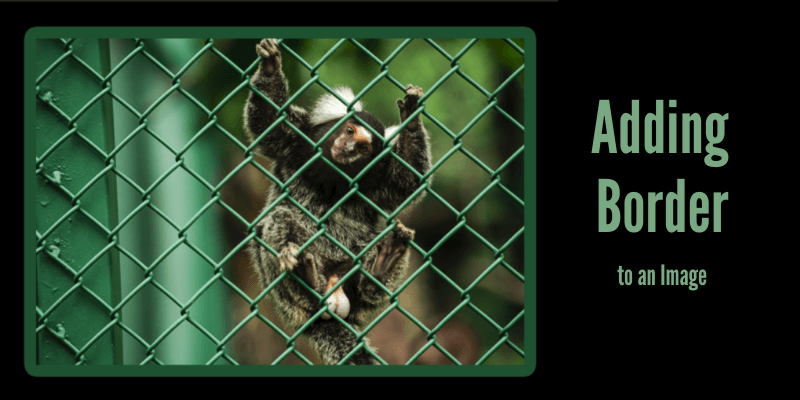
How can I make this image pop?
What if you make a border around it? Or a double border with different thicknesses and colors? Putting a border around an image in Photoshop is quite straightforward and super easy to do!
Hey there! I’m Cara and as a photographer, I enjoy looking for ways to display my images in a more intriguing way. Let me show you how to add a border to an image in Photoshop!
Table of Contents
Step 1: Open Your Image and Zoom Out
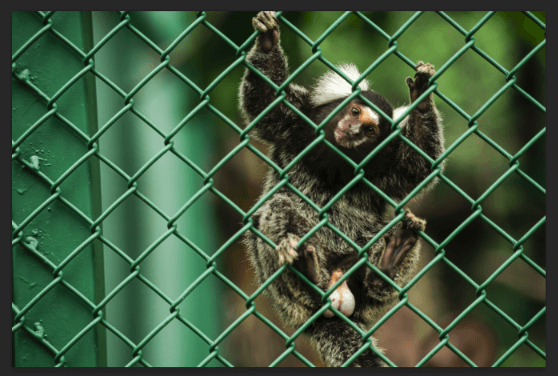
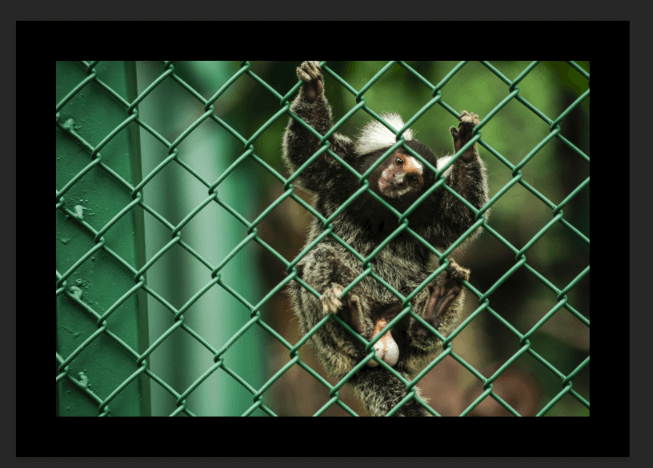
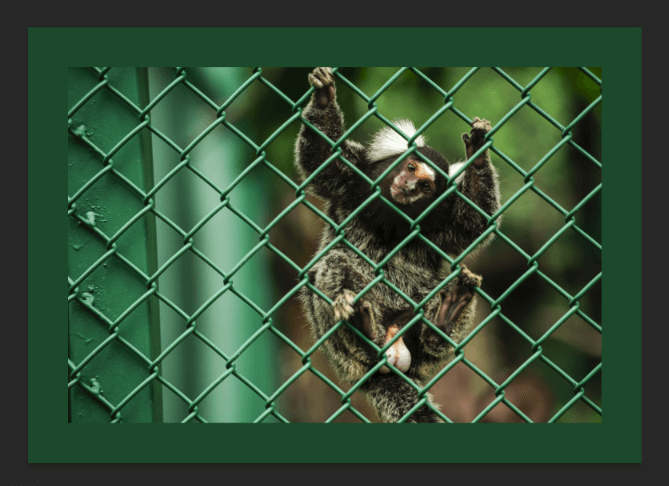
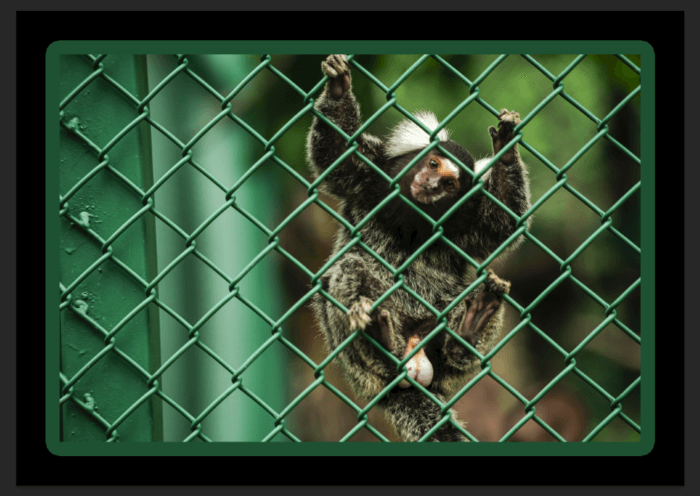
Choose the image to which you want to add a border and open it in Photoshop. I’m going to work with this image of a marmoset monkey I took at the Natuwa Wildlife Sanctuary in Costa Rica.
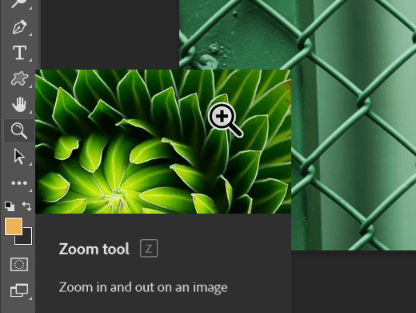
Zoom out so you can see some space around the image. Do this by selecting the Zoom tool from the toolbar, hitting Z on the keyboard, or using the shortcut Ctrl + - or Command + - (minus key).
Step 2: Add a Canvas
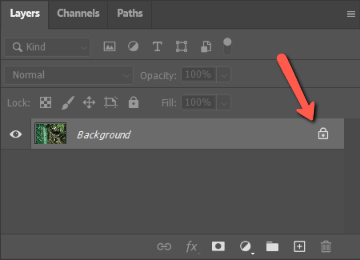
Now we need to add a canvas behind the image to act as the border. To do this, let’s unlock the background layer by clicking the padlock icon on the right side of the background layer in the Layers panel.
Now, go to Image in the menu bar and choose Canvas size.
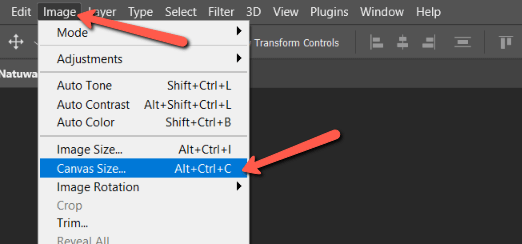
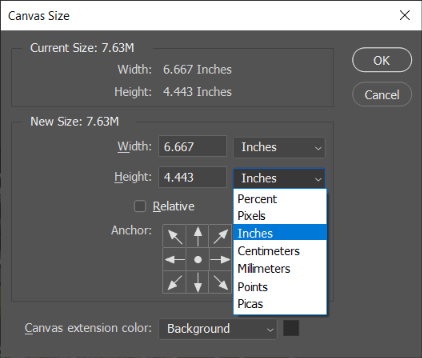
In the box that opens, you’ll be able to see your photo’s current dimensions. The default setting shows inches, but you can click the dropdown to select pixels, centimeters, or another option.
Check the Relative box to zero out the width and height boxes. Now the values that you add will appear as a border around the image.
Decide how big of a border you want and then double it. For my example, I want a ½ inch border all the way around. Input 1 inch into the width and height boxes and it will add ½ inch on each side of the image.
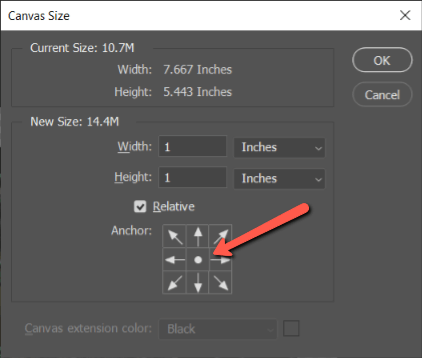
Make sure to set your anchor point in the center so the image appears centered in the new canvas.
If you unlocked the background layer as suggested, the Canvas Extension Color at the bottom section will be grayed out.
If you didn’t unlock the background layer, this section allows you to choose the border color. You can choose the background, foreground, white, black, gray, or click other to access the color picker and choose a color. Use this method when you’re sure of the color you want.
If you want the ability to change the color later, stick with unlocking the background layer first and choosing the color later. Either way, click OK when you’re ready.
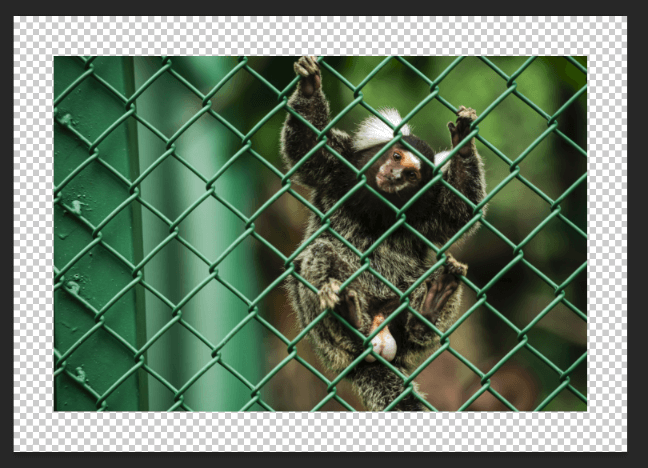
Now, we’ve got a transparent border around the image.
Step 3: Choose a Color
Time to color it in with a solid color fill adjustment layer. Click on the Adjustment Layer icon at the bottom of the Layers panel. It looks like a half-filled circle. Choose Solid Color from the menu that pops open.
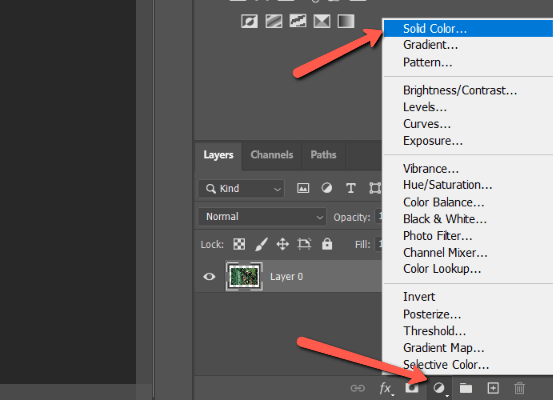
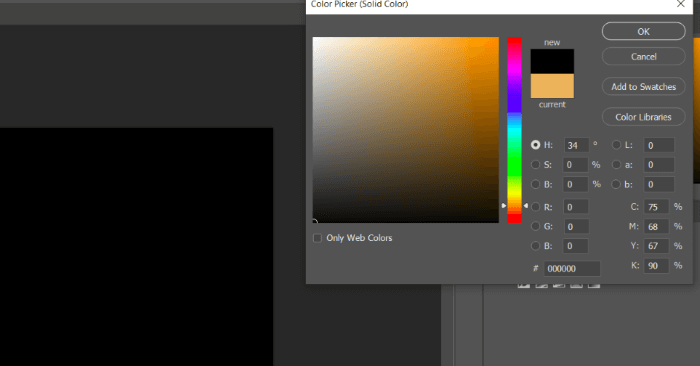
The color picker will open and you can choose whatever color you like.
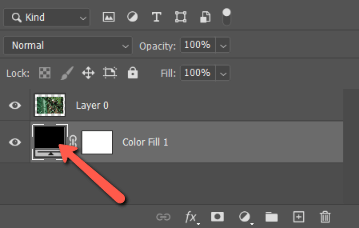
There’s a problem, though. You’ll notice that the fill layer is covering the top of your image. That’s because the fill layer is on top. Click and drag the fill layer beneath the image layer in the Layers panel.
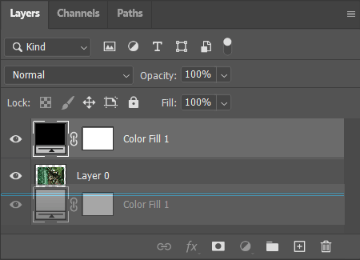
Then the color will pop behind the photo as it is supposed to.
Didn’t get the result you want? See what else you can do in the section below.
Adjusting the Border
What if you want to change the color of the border after you’ve placed it? This is super easy. Simply double-click on the fill layer’s thumbnail and the color picker will open again. Choose the new color you want and hit OK.
You can also choose to match a color from the image itself. With the color picker open, hover over the image and you’ll notice the cursor turns into an eyedropper. Click anywhere on the image where you would like to match the color.
What if the eyedropper isn’t working?
If you click with the eyedropper and nothing happens, the settings for the eyedropper tool are probably incorrect. Check the options bar for the box labeled Sample.
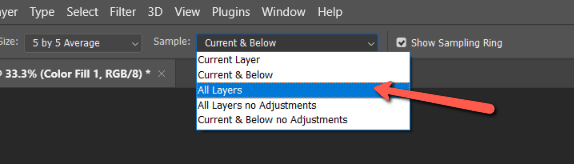
Right now, the tool is set to Current & Below. The color fill layer that I have selected is the bottom layer, so that is the only color I’m sampling. That’s why the color won’t change.
Switch the sampling method to All Layers. Now you should be able to sample the color you want.
Add a Second Border
We can’t make a second border using the same method as before. If we change the canvas size the original border will just get larger (or smaller). However, we can add a second little border by using a layer style.
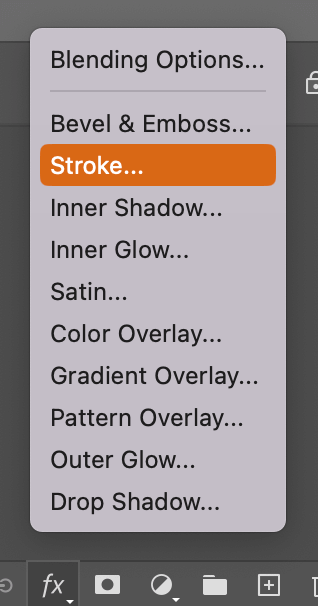
Make sure your image layer is highlighted, then click the Layer Style button (fx) at the bottom of the Layers panel. Choose Stroke from the menu.
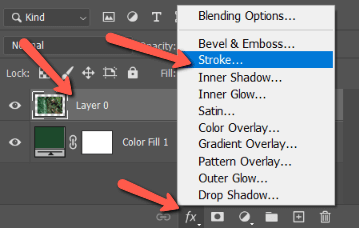
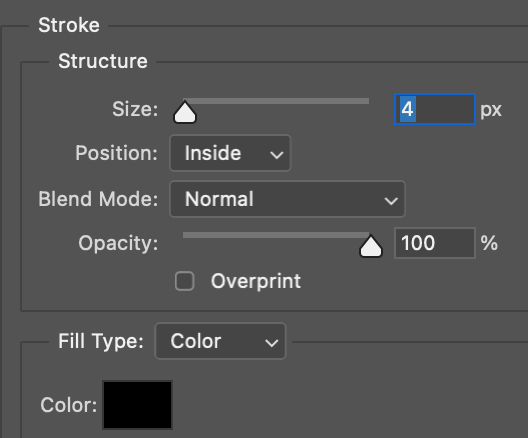
In the dialog box that pops up, you have a lot of options for customizing the border. The Size slider allows you to pick the thickness in pixels. Position lets you put the border inside, outside, or in the center.

You can also change the blend mode and adjust the opacity. Finally, you can pick a color, gradient, or pattern as a fill type, and the color you want to use at the bottom.
There are a lot of fun possibilities here. Have fun playing with it to see what you come up with!
Now what if you want to add a border to an object or shape in Photoshop?
In this case, you don’t have a create a new layer or new shape, you can simply add a stroke to your shape.
How to Add a Stroke/Border to an Object in Photoshop
Adding a border to a shape or object is even easier! By adding a stroke to the shape, you’re already putting a border around it. All you need to do is increase the stroke weight and it will look like a border.
With your shape/object selected, go to the Properties > Appearance panel and increase the stroke weight. You can also choose the stroke style and change the stroke color.

Alternatively, you can also add a stroke/border by adding a layer style. Go to the Layers panel, select the shape layer, click Add a layer style (the fx icon), and choose Stroke.
It will open the layer style setting window where you can add a stroke, change the stroke weight, choose the position of the stroke/border, etc.
Have we whetted your appetite to learn more about Photoshop? Check out more of our tutorials such as how to add textures in Photoshop here!
About Cara Koch