
How do you make a ho-hum image more exciting? Photoshop gives us many ways to do this and one of them is to add texture to images.
Hey there! I’m Cara and as a product photographer, I’m always looking for ways to add extra punch to my images. Adding texture is a great way to make your design fancier and it is super easy with the right images. Let me show you!
Table of Contents
Choosing Your Image
Keep in mind that adding texture won’t work well with all images. Textures will get lost in busy backgrounds and may look funny if the original background is too dark or too light.
Thus, choose your image with care. Be intentional when shooting the image if you are planning to add texture later.
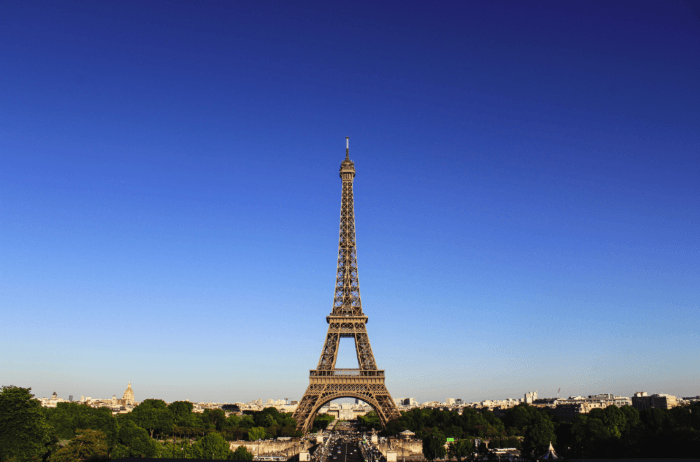
For this tutorial, we’re going to spice up this simple, somewhat bland photo of the Eiffel Tower from Pexels.com.
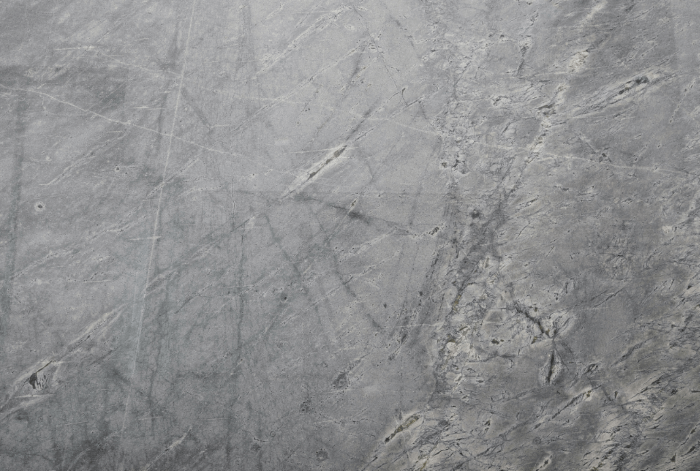
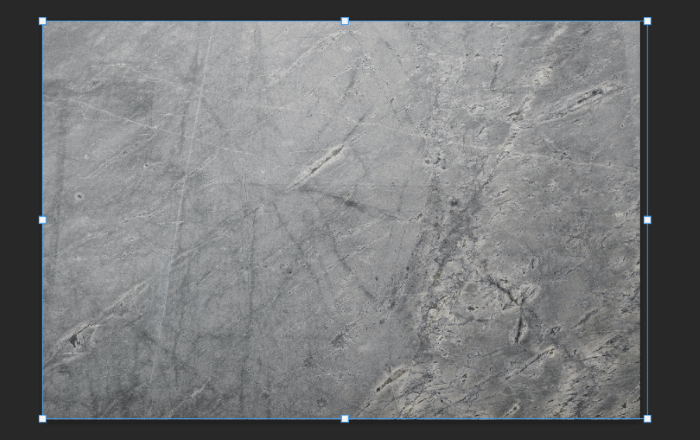
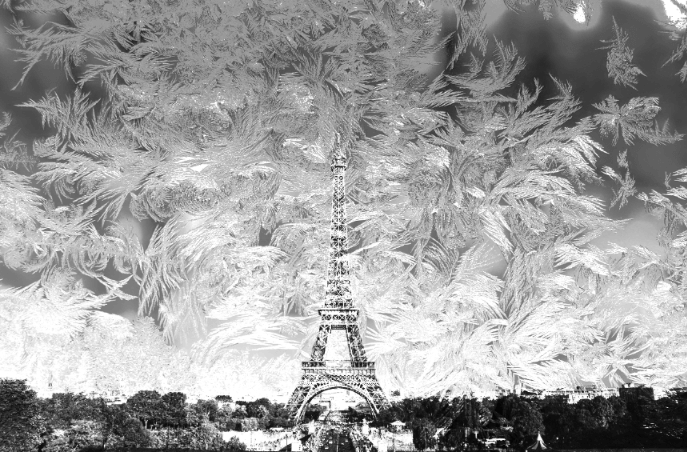
We’ll do this by adding this texture.
Let’s get started!
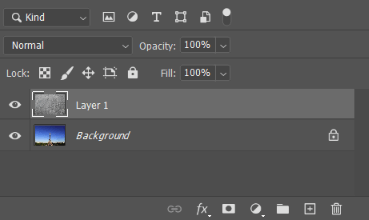
Step 1: Open Your Images in the Same Document
Open both your images in Photoshop. With the texture image open, hit V on the keyboard to select the Move tool.
Click anywhere in the image and drag up to the tabs. Without letting go of the mouse, hover over the tab for your base image. When the image appears, drag the mouse down into the image and you’ll see the cursor turn into an arrow with a plus sign.
Now you can let go and the texture image will appear as a new layer on top of the base image.
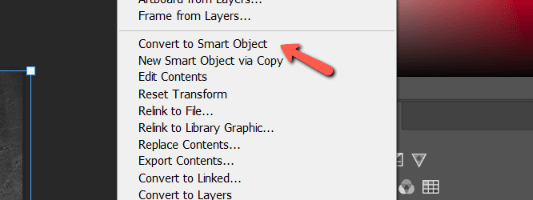
At this point, I suggest converting the texture image to a smart object. This will allow you to swap out the texture image for a different one will all the same settings. If that doesn’t make sense, I’ll show you how that’s helpful in a minute.
To convert to a smart object, right-click in a blank space on the layer that you want to convert. Select Convert to Smart Object.
Step 2: Resize the Image
When you use this method to stack the images on top of one another, the Transform tool is automatically activated. Click and drag the handles to resize the image as needed. Hold Shift while resizing if you don’t want to keep the same aspect ratio.
Note: if the transform tool doesn’t appear automatically, hit Ctrl + T (Command + T) on the keyboard to open the tool.
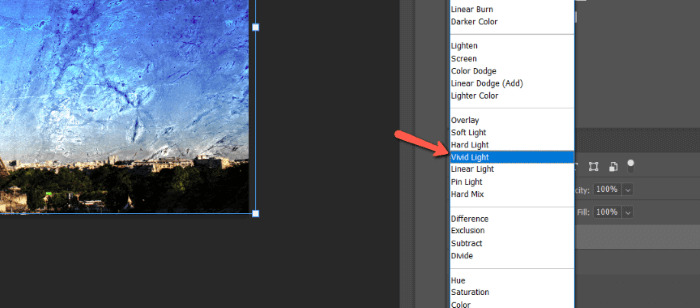
Step 3: Change the Blend Mode
Right now, we can’t see the bottom image so we need to change the blend mode. You can find the 27 blending modes in the dropdown box near the top of the Layers panel.

Click in the box that says Normal by default. The list of blending modes will appear. As you hover over each one, you’ll see a preview of the image. Scroll down slowly to find the one that you like for your image.
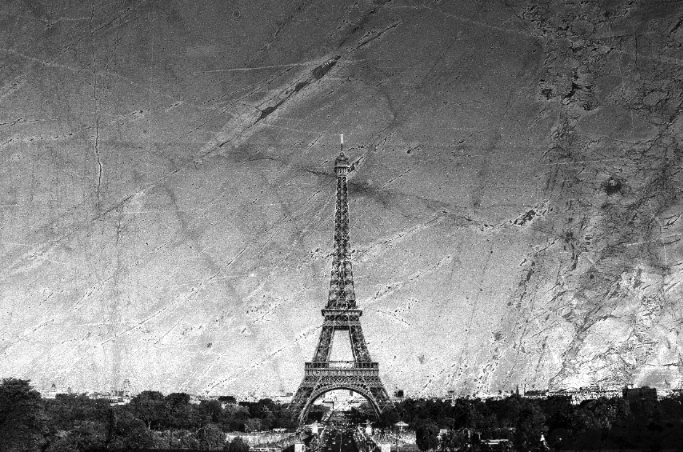
For this image, I’m going to choose the blend mode Vivid Light.
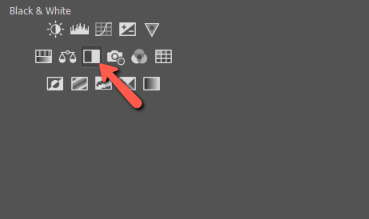
I’m also going to change the image to black and white by adding a black and white adjustment layer.
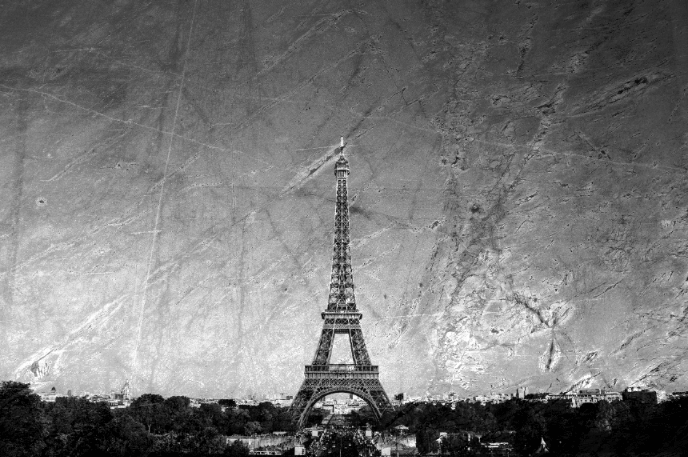
Now I have what looks like an old photo of the Eiffel Tower, complete with the wrinkled look of an old photograph!
Step 4: Remove the Texture from Unwanted Areas
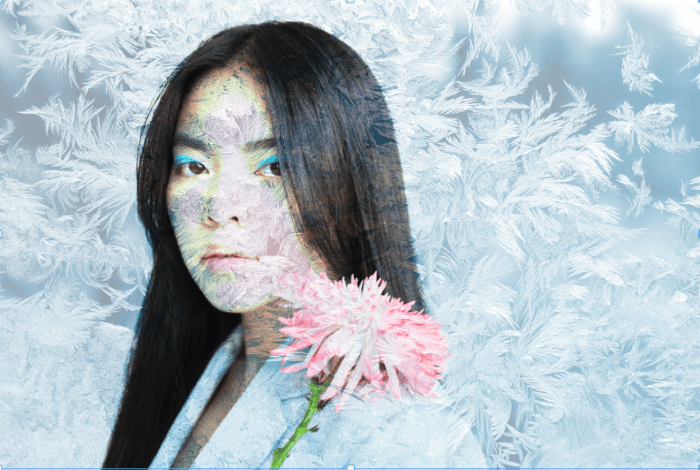
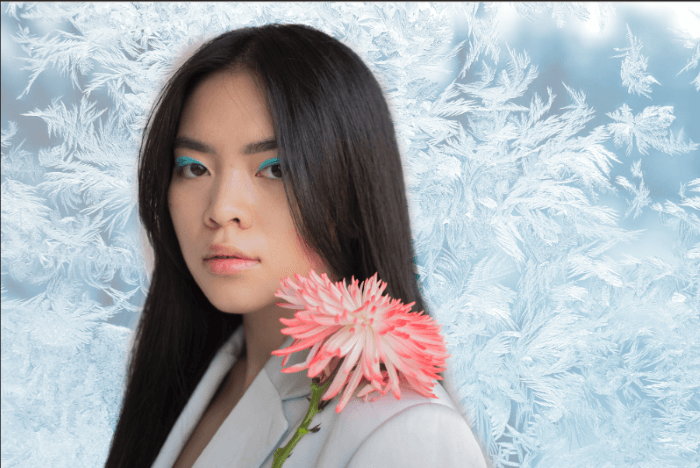
In this image, I don’t really need to remove any of the texture, but in some images, you will only want to apply the texture to parts of the image. For example, in a portrait like this image, you won’t want to affect the subject, just the background.
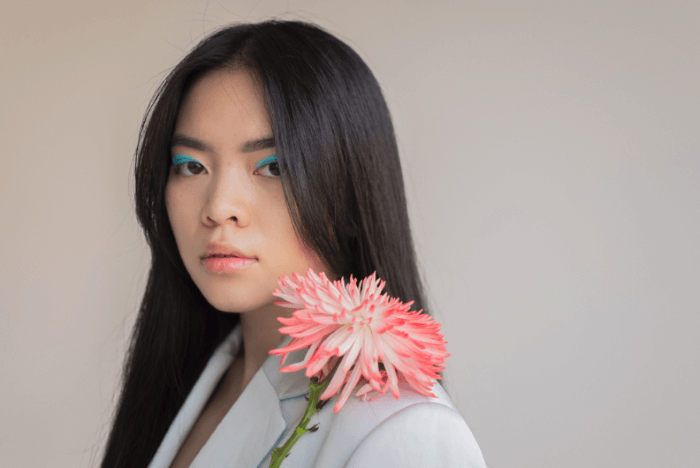
As you can see, the texture looks a little odd on her, but it makes an interesting background.
To remove the texture from parts of the image, add a layer mask by hitting the button at the bottom of the Layers panel.
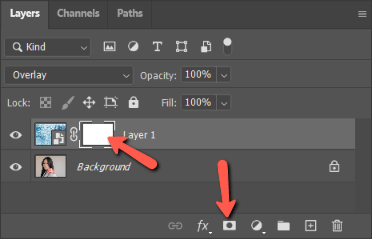
Hit B on the keyboard to open the Brush Tool. Choose a brush size that works for your image and turn the hardness down to 0% for a soft edge that will blend well.
With black as the foreground color, paint the image where you want to remove the texture.
Step 5: Play with Different Textures
What if you want to try out a different texture to see how it would look? Because you turned the texture layer into a smart object, you don’t have to repeat all these steps again with a new texture. You can simply replace the content and all the same settings will be applied.
Right-click in a blank space on the texture layer just like you did to convert it to a smart object. This time choose Replace Contents instead.
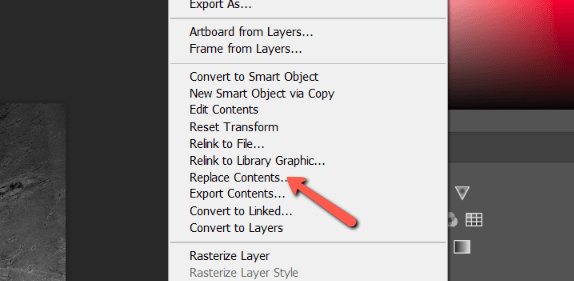
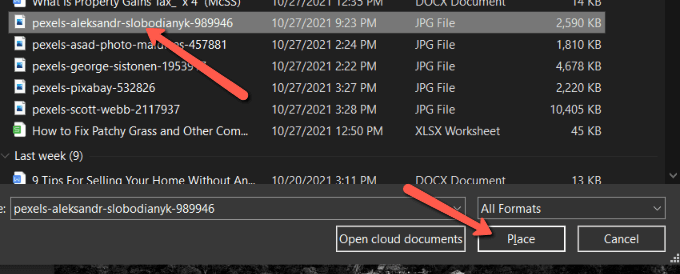
In the box that opens, browse to and select the new texture you want to apply and click Place.
With that one click, a new texture will appear on your image using the exact same settings as the first one.
In this case, I like the first one better. I can either undo by hitting Ctrl + Z (Command +Z) or right-click in the layer and replace the contents with the original texture.
Either way, now I have a cool new “old” photograph of the Eiffel Tower.
If you want to add texture to text in Photoshop, check out my other tutorial on How to Add Texture to Text.
About Cara Koch