How do I cut that out? At some point in your photography journey, you’ll likely want to cut something out of an image. Whether you need to do a realistic head swap in a group photo or get fancy with image manipulation, you’ll need to get out your digital shears and chop, chop!
Hey there! I’m Cara and as a product and portrait photographer, I needed to cut out part of an image or objects numerous times when compositing images in Photoshop. There are several ways of doing this, and let me tell you they are not all created equal. You have to know which tool to choose for the job.
So grab a cup of tea and come along with me as I show you several ways to cut out an image in Photoshop and examples of when to use which method.
Let’s get started!
Note: the screenshots below are taken from the Windows version of Adobe Photoshop, if you’re using the Mac version, the navigations may look slightly different.
Table of Contents
Cut Out Objects from An Image in Photoshop
In reality, cutting out part of an image in Photoshop only requires two steps.
Step 1: Make a selection around the object you want to cut out
Step 2: Make the cut by deleting the pixels, moving the selection to a new location, or inverting and deleting the background
Where cutting gets complicated is making the selection. Photoshop can’t read your mind and automatically select what you want to cut out (well, sometimes). Plus, drawing around a selection on a screen is really tricky especially when you want to cut out details like hair.
To start, I’m going to go over the various ways to cut out the image. Then I’ll briefly explain some selection methods.
I need to make a selection first, so I’ll use the Automatic Subject Selection option to get started. This is seriously the easiest way to make a selection in Photoshop when you want to cut out a piece of an image.
Simply go to Select in the menu bar and choose Subject. Photoshop will do its best to determine what is the subject of the image and make an automatic selection.
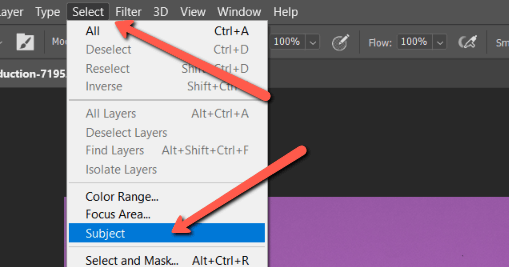
For obvious reasons, this works best when the subject is isolated and there is a lot of contrast between the subject and the background.
Here’s what Photoshop did with the eggplants in this image. Not too shabby!

Delete the Pixels
To cut them out, you can hit Backspace on the keyboard to remove them from the image. Then you will see this dialog box.
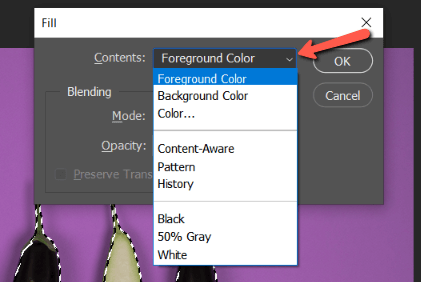
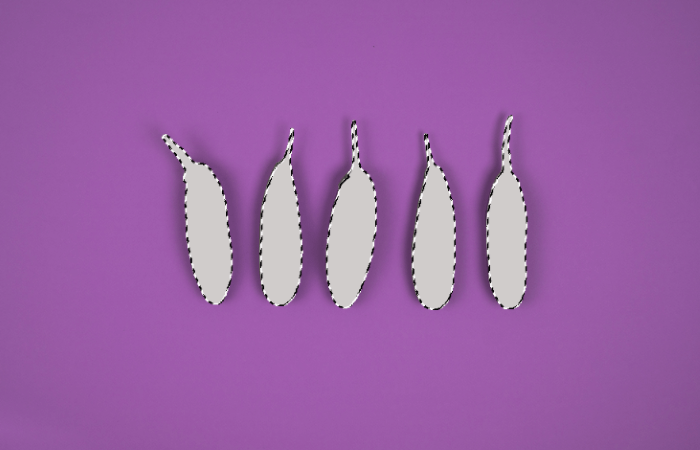
You can choose to remove the pixels and fill the space with the options listed by clicking on the drop-down arrow. For this example, I’ll go with the foreground color, which I have set to white. This is what I get.
Duplicate the Selection
If I want to duplicate the eggplants or paste them into another image, I’ll copy them instead. Hit Control + C or Command + C to copy. Then Control + V or Command + V to paste.
The program pastes the selection on a new layer exactly on top of the original selection. So at first, it will look like nothing happened. Hit V on the keyboard to select the move tool. Then click on the selection and drag with the mouse.
Here are my copied eggplants.

Invert and Delete the Background
Another way to cut out the selection is to invert the selection and make the background. Start with all the eggplants selected.

Invert the selection so everything except the eggplants is selected. Do this by hitting Control + Shift + I (Command + Shift + I). Or go to Select in the menu bar and choose Inverse.
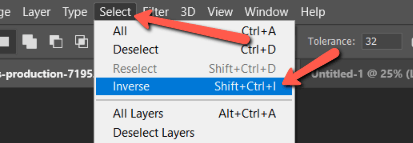
The marching ants now appear around the edge of the image because the purple background is selected, not the eggplants.
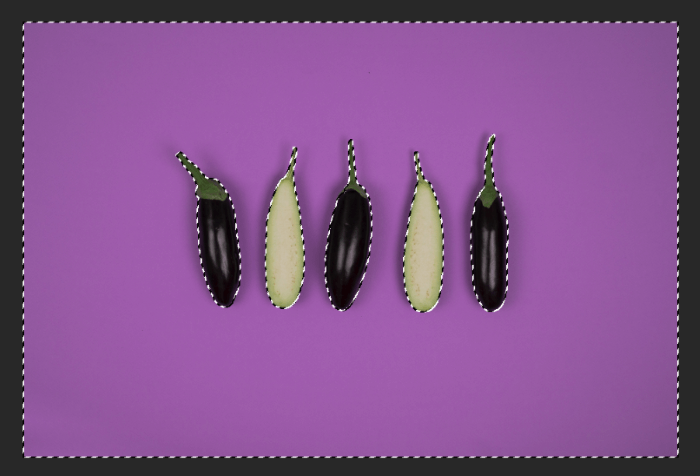
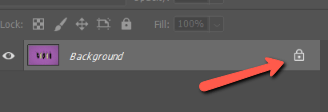
The background layer in an image is automatically locked when you open it. To delete the pixels and make the background transparent, you have to unlock the layer. Do this by clicking on the little lock icon on the background layer in the layers panel.
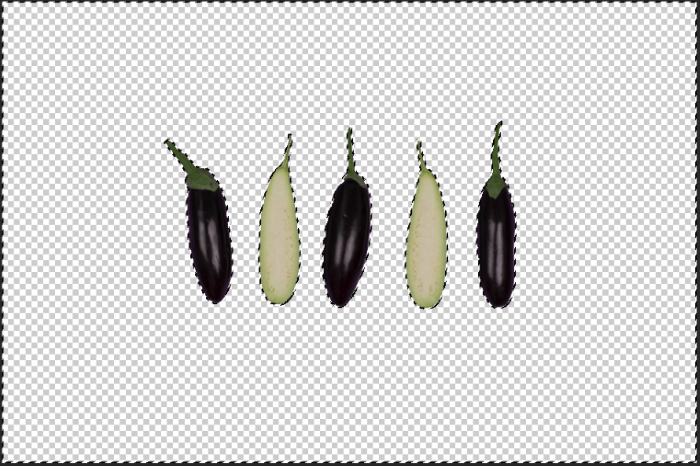
Hit the Backspace key to delete the background. The checkered pattern that Photoshop uses to indicate transparency appears.
These are the various ways of cutting out parts of an image. Now let’s look at some ways to make selections.
Marquee Tool Selection
The marquee selection tool is helpful when you don’t want to cut out the exact subject. Instead, you might want a circular, ovular, or rectangular piece of the image.
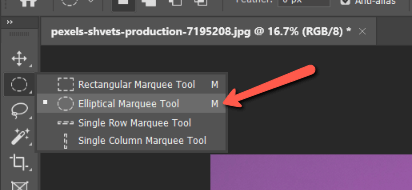
For example, I’m going to grab the Elliptical Marquee Tool. It might be hiding under the Rectangular Marquee Tool on the toolbar, depending on which one you used last. You can also just hit M on the keyboard.
With this tool, you can make a circular or ovular selection around the subject.
Pro tip: once you’ve drawn your shape, click and drag inside the selection to adjust the positioning.
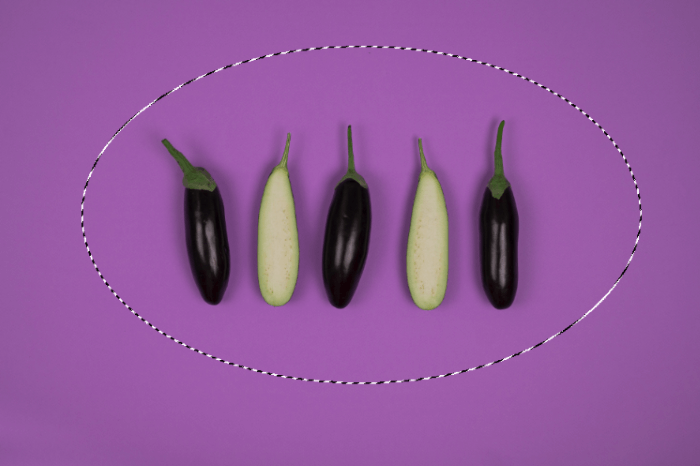
Now you can copy and paste the selection elsewhere in the image or into a new document.
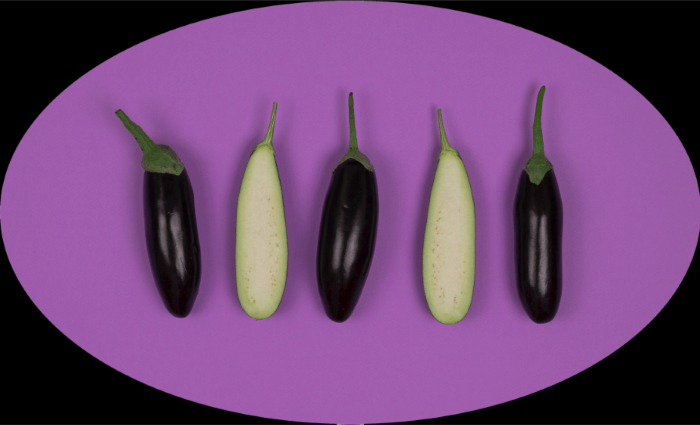
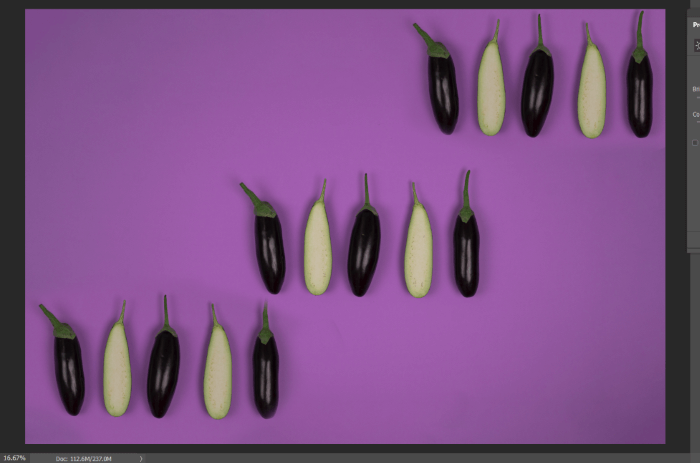
This is helpful for creating avatars for social media or duplicating isolated subjects in an image, like this.
Lasso Selection Tool
When you need a freehand selection tool, the Lasso Selection Tool is the one to turn to. You can simply draw around the object in whatever shape you need.

You can also get more precise with the Polygonal Lasso Tool or the Magnetic Lasso Tool. Check out our tutorial on how to use all the Lasso tools here.
The freehand lasso tool is good when you don’t need a precise selection, such as to duplicate these eggplants on a solid background.

Pro tip: you can also start your selection process with the Automatic Selection Tool, then fine-tune it with the Lasso tool, or the Quick Selection tool, which we’ll talk about next.
Quick Selection Tool
The Quick Selection Tool is another great way to select portions of the image. Simply click and drag over areas of the image you want to select.
The program will do its best to find edges and snap to them, so you don’t have to be super precise. Plus, you can zoom in and add or remove sections from a selection to fine-tune. Hold Shift and drag when you want to add and hold Alt and drag when you want to remove.

Magic Wand Tool
The Magic Wand tool is similar but works by looking for the same colored pixels.
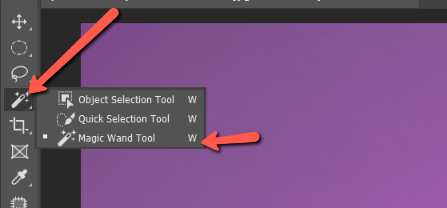
The advantage of this is that you can click once on one of the purple eggplants to select them all. The program will search for any pixels in the image that are the same color.

For this to work, you have to uncheck the contiguous box and play with the tolerance. If that’s all Greek to you, check out our tutorial on how to use the Magic Wand tool. I promise it will change your life.
With just a few more clicks, I was able to include the rest of the eggplants in the selection.

Whew! That was a lot of information, but hopefully quite useful as you deepen your Photoshop knowledge. Cutting out objects and moving them around are essential techniques in many Photoshop projects.
Ready to dive into more? Check out our tutorial on how to use the Patch tool to remove and duplicate objects.
About Cara Koch
Yusuf
Nice explanation
June
Thanks!
Rufina Bello
Very informative and helpful tutorial. Thanks