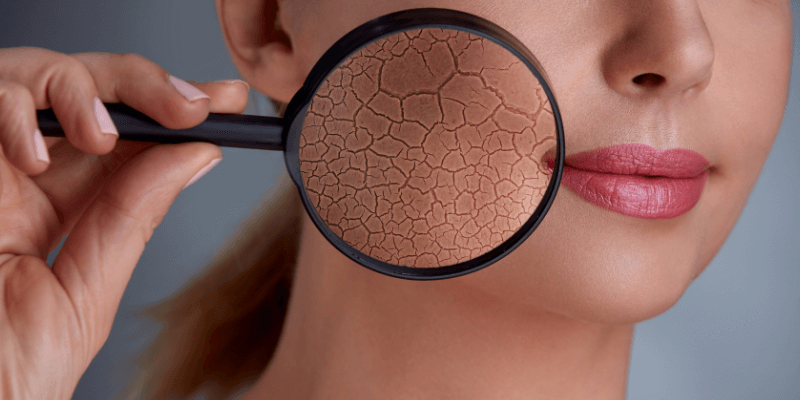
Skin has texture. Though we often spend a lot of time trying to smooth skin (whether in Photoshop or real life) when you go too far, it looks fake. Even a baby’s super smooth skin has some kind of texture – we’re not plastic dolls.
Hello, I’m Cara! I’ve been using Photoshop to touch up my images for years, and I like to create natural effects, especially for portraits. I often use the clone and patch tool to smooth skin, but sometimes lost a bit of skin texture, then I have to “re-create some skin texture so that the photo looks natural.
In this tutorial, I’ll show you how to create natural skin texture in Photoshop.
Note: I use the Windows version of Photoshop. If you are using a Mac, the workspace will look slightly different from the screenshots displayed here.
Table of Contents
Step 1: Make a Selection
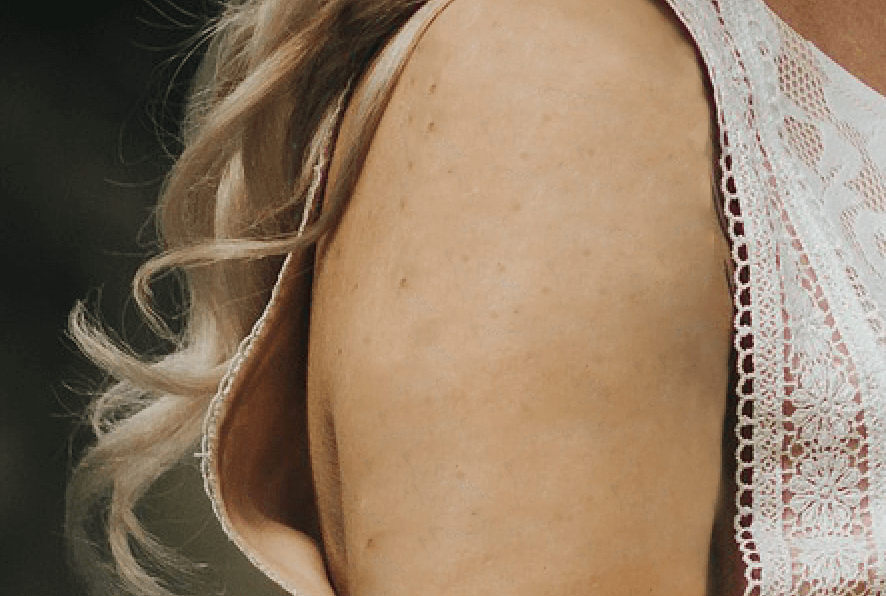
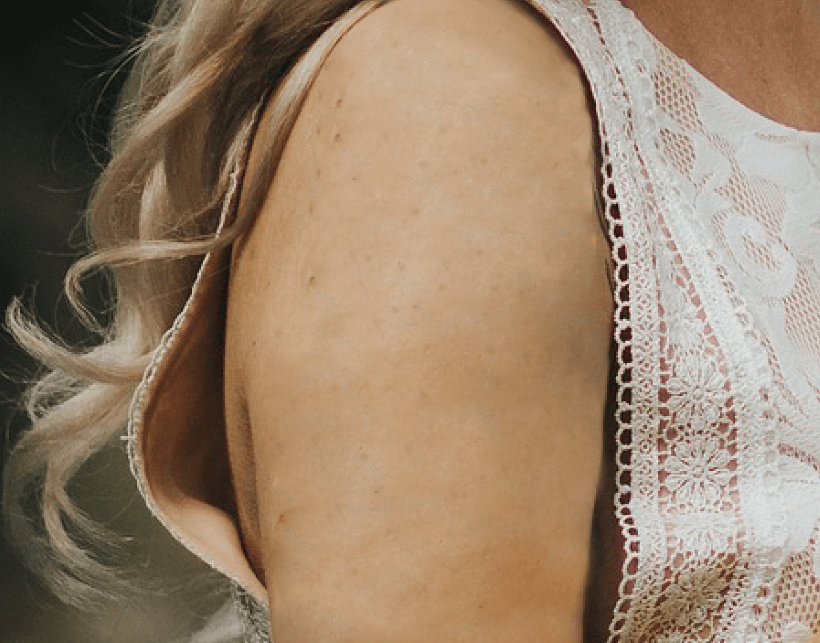
If you followed my tattoo removal tutorial, your tattoo edits will be on their own layer. But the whole image is included in the layer, not just the subject’s arm.
To add texture just to her arm, we need a new layer that is limited just to the area of skin we want to affect. Let’s grab the Quick Selection tool from the toolbar and make a perfect selection.
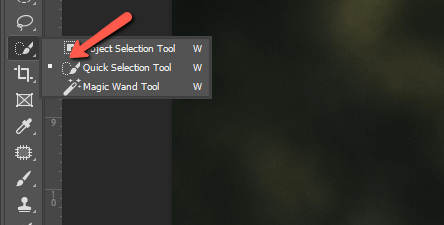
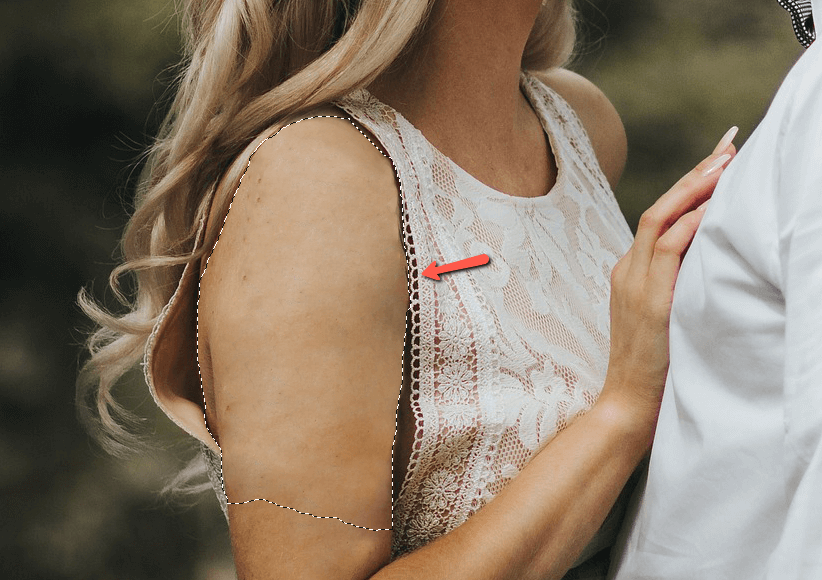
Drag around the section of her arm that we want to affect. You’ll probably have to zoom in to check areas and perfect little spots that Photoshop might not be guessing correctly. Remember, you can hold the Alt or Option key to toggle between adding to and subtracting from the selection.
Once you have your selection, press Ctrl + J or Command + J to copy the selection and put it on its own layer.
After this, we’ll be using clipping masks to limit changes just to this selected part of the image.
Step 2: Create a New Layer
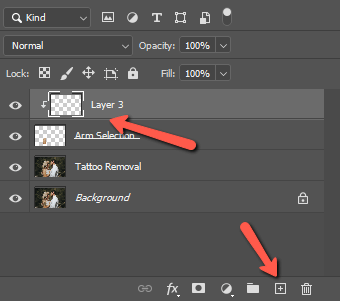
To add texture, we’re going to add noise. But to limit it to this section of the arm, we need a new layer clipped to the selection layer we just created.
Click the square with the plus inside at the bottom of the Layers panel to add a new layer. Hold the Alt or Option key while hovering between the two layers. When the cursor turns into a little box with a 90-degree arrow, click to create the clipping mask.
Step 3: Fill with 50% Gray
We can’t apply Noise to a blank layer, so let’s fill this with 50% gray. Go to Edit in the menu bar and choose Fill.
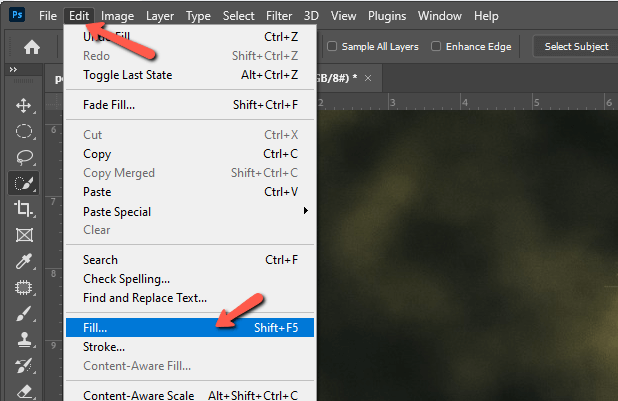
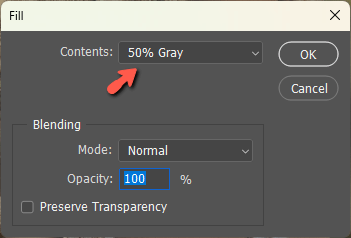
Put 50% Gray in the Contents box and hit OK.
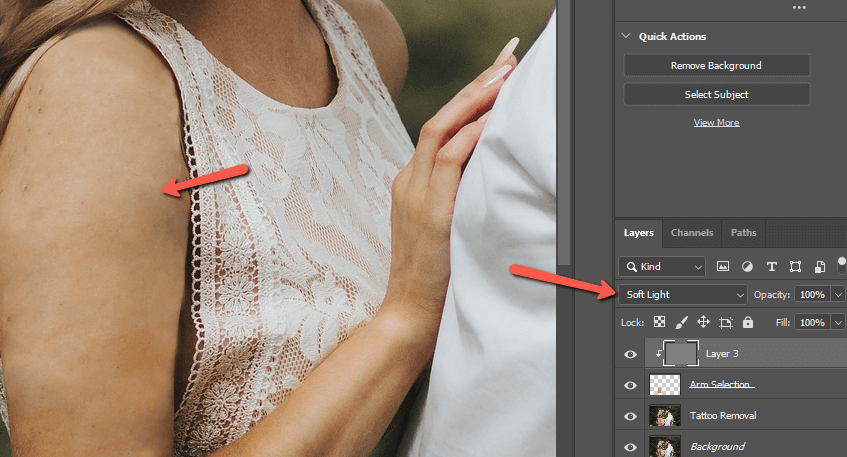
Then we’ll change the blending mode of this gray layer to Soft Light which hides any pixels that are 50% gray. Suddenly the gray disappears!
Step 4: Convert to Smart Object
To create the noise, we’re going to use filters. If you want to be able to come back and edit your filter (you do), then we need to convert this layer to a Smart Object.
Right-click on the gray layer and choose Convert to Smart Object.

Step 5: Add Filters
To create the texture, we’ll use three filters. You won’t be able to get them perfect on the first go because you’ll need to see how they interact with each other. Hence why we turned it into a smart object so we can make changes.
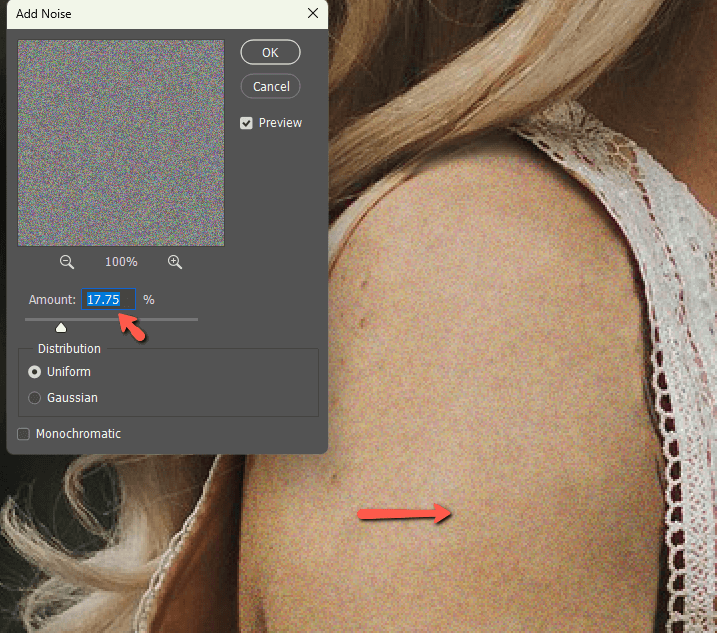
So let’s add the three filters real quick. Go to Filter in the menu bar, hover over Noise, and choose Add Noise.
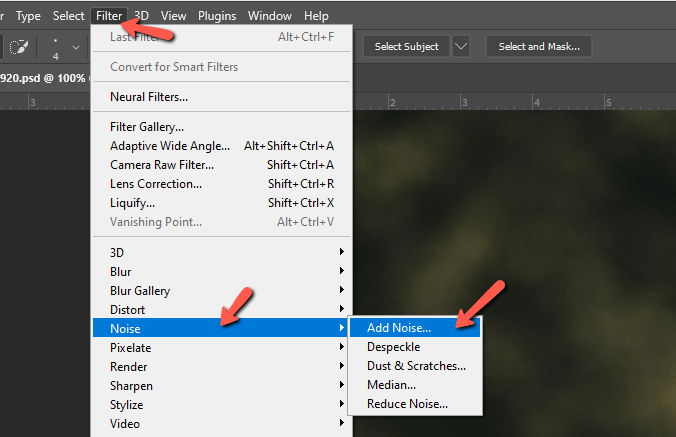
You can slide the Amount around and you’ll see a preview on the skin. Pick and spot that looks good, but don’t worry about perfection just yet. Click OK.
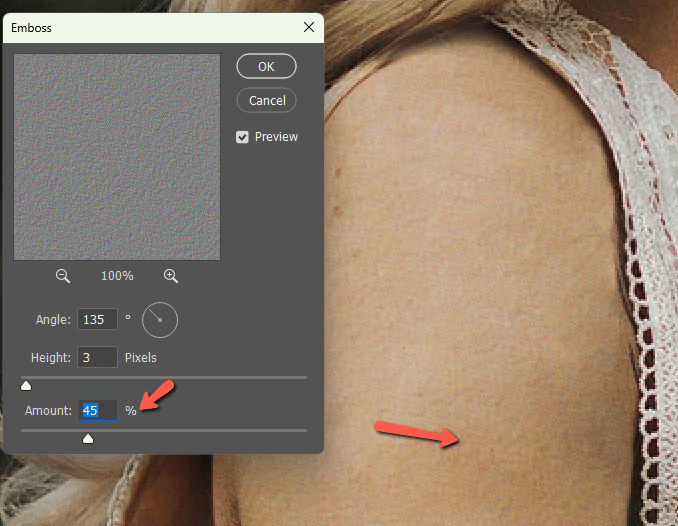
Now let’s go back to Filter, hover over Stylize and select Emboss. Again, slide the Amount around until you get something that looks about right.
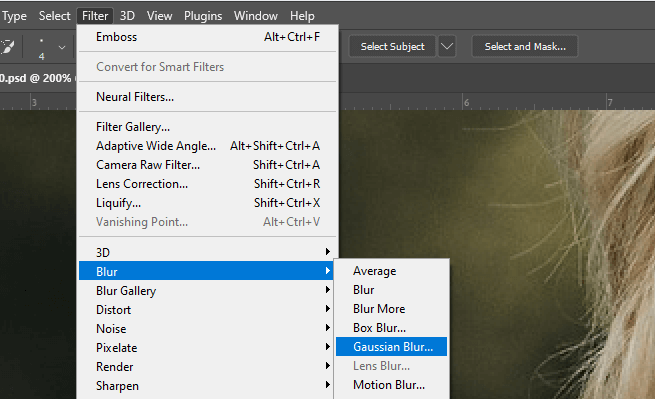
Now we need to soften this so let’s go back to Filter once more. Hover over Blur and choose Gaussian Blur.
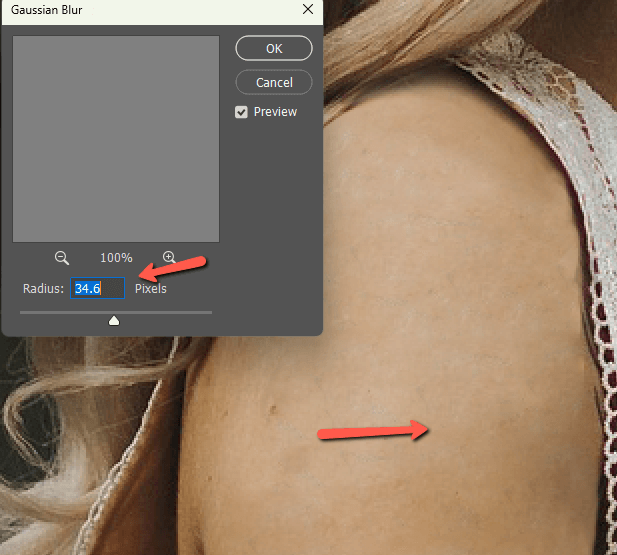
Adjust the Radius slider until the effect is properly smoothed.
To go back and adjust any of the filters, simply double-click on the filter in the layers panel. These filters will only appear here if you remembered to make the gray layer a smart object.

Step 6: Freckles and Hair
The skin looks quite good at this point, especially since I started with cloned skin instead of paint. However, to get a truly realistic look, we need to add imperfections, freckles, and hair.
To add freckles, choose the Brush Tool and choose a small round brush. Click the foreground color near the bottom of the toolbar on the left.
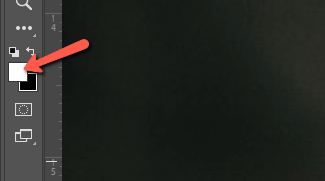
When the color picker opens, sample the color from one of your subject’s current freckles.

Add a new layer so the freckles will be on their own. Then go to the Brush Settings to adjust the scattering. This means you won’t have to add each freckle on its own.
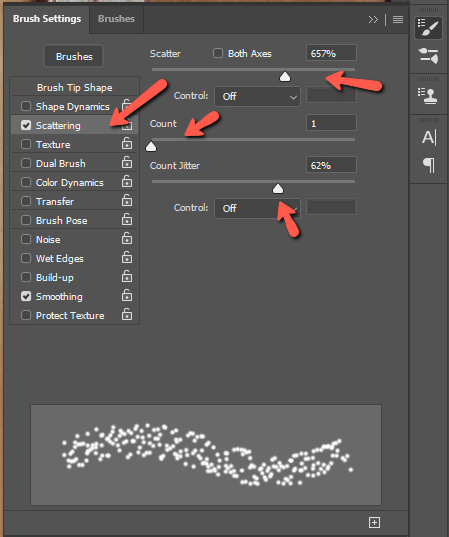
Turn down the Opacity and Flow in the toolbar so the freckles won’t be obviously computer created.

Then click a few times on her arm to add a few splotches.
To further blend, you can turn the layer into a smart object and add a Gaussian blur filter as we did earlier. You can also create other layers with different color freckles as needed.
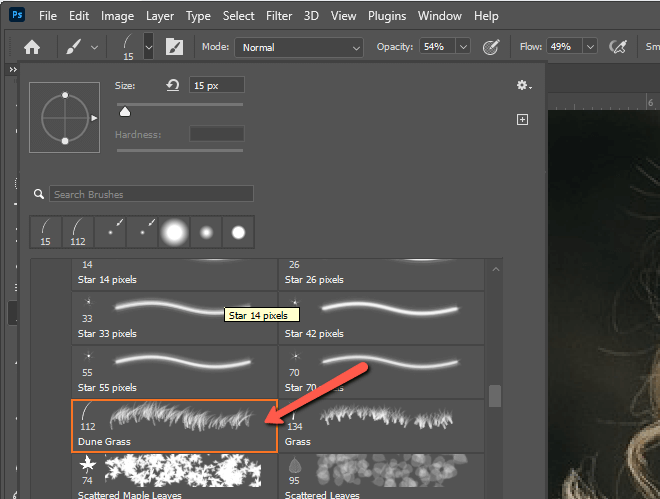
The final finishing touch would be to add tiny hairs. You can do this with the Dune Grass brush you’ll find in your Legacy Brushes folder. If you don’t have this folder, find out how to get it here.
Then, just as with the freckles, you can scatter the hairs (remember that hairs tend to grow in the same direction). Then blend with a blending mode and Gaussian blur filter.
And there you have it! We have quite nicely recreated her skin texture.
Wondering what other bodily changes you can make in Photoshop? Find out how to open a subject’s eyes here!
About Cara Koch