Have you ever regretted having a tattoo? Or maybe you didn’t regret it in general, but the tattoo just doesn’t fit with your wedding photos or another type of photo you were doing.
Hey there, I’m Cara! And thanks to the wonder that is Photoshop, you’re not stuck with your tattoo – at least in pictures.
Let me show you two ways to remove a tattoo in Photoshop!
Note: I use the Windows version of Photoshop. If you are using a Mac, the workspace will look slightly different from the screenshots displayed here.
Table of Contents
Method 1: Spot Healing Brush Tool
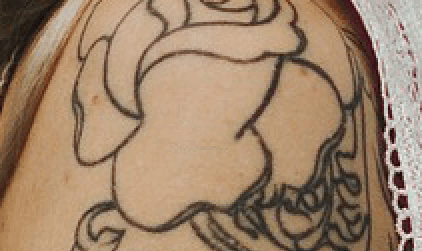
Most tutorials about how to remove a tattoo in Photoshop will show you a photo like this photo I downloaded from Pixabay.com.

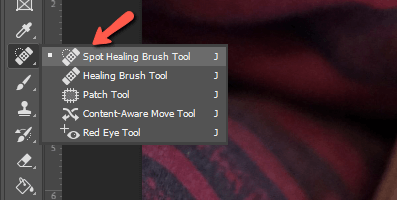
Then they’ll say all you have to do is grab the Spot Healing Brush tool from the toolbar on the left.
Then you just paint over the tattoo with the tool.

And voila! It’s so easy, the tattoo disappears like magic!
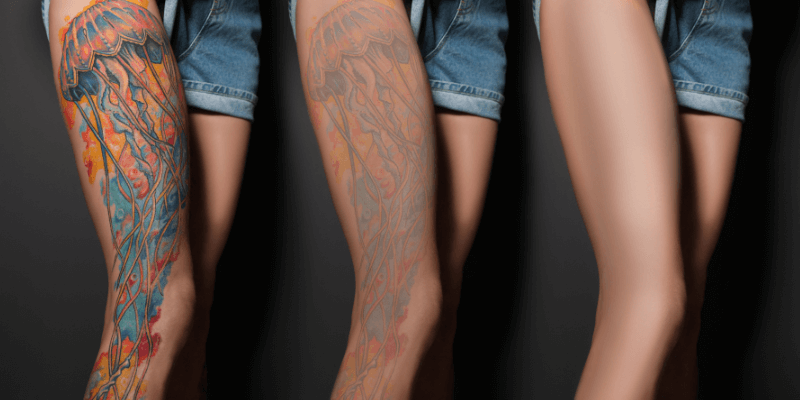
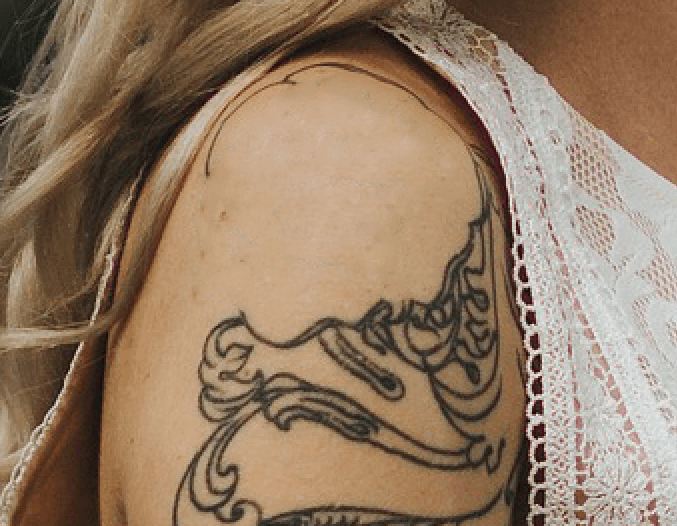
But then you look at your picture, which might look something more like this one I also downloaded from Pixabay.com.

Painting over it quickly with the Spot Healing Brush tool yields a disappointing result like this.

So let’s dig deeper.
Method 2: The More In-Depth Way to Remove a Tattoo in Photoshop
Whenever a quick swipe of the Spot Healing Brush tool will work, use it. It’s making your life easier and who can complain about that?
But removing bigger tattoos requires a bit more finesse. There is no one perfect way to do it, just different tools with different strengths and weaknesses. But hopefully, I can at least show you how to use the tools that will help you complete this task.
Always make a copy of your image first. When performing work this complicated, mistakes are possible. You’ll want the ability to start over if needed. So press Ctrl + J or Command + J to duplicate the image layer.
Spot Healing Brush Tool
Before we give up on this tool just yet, let’s take a look again. We can’t paint over the entire tattoo with good results. But what about small pieces? Let’s try using a small brush and following the line of this flower.
Well, that worked quite nicely!
I’ll continue to work with the Spot Healing Brush tool a little more on this part where the lines of the tattoo are defined and thin. Remember that if you want the tool to draw a straight line, you can hold Shift while clicking on one end and then the other.
Here’s what I got after carefully painting along the lines. We’ll have to use a different method for the thin line at the top, the Spot Healing Brush tool didn’t work too well there. And the next tool we’ll look at will work better for the more filled-in areas of the tattoo below.
Clone Stamp Tool
We need some clear skin to work with to use the Clone Stamp Tool. So now that we’ve cleared that top part with the Spot Healing Brush, we can work on these more intricate parts with the Clone Stamp Tool.
The Clone Stamp tool requires more finesse than the Spot Healing Brush tool. Photoshop doesn’t automatically help with blending. However, because you have more control, it doesn’t mess it up for you either.
Select the Clone Stamp tool from the toolbar on the left or press S on the keyboard. Reduce the brush to an adequate size for your image. You can quickly control the size with the Bracket [ ] keys.
Hold Alt or Option while clicking on a spot you would like to sample from. Then, drag the brush over an area you would like to remove.
Unfortunately, this happens a lot. The skin is not the exact same color throughout the photograph.
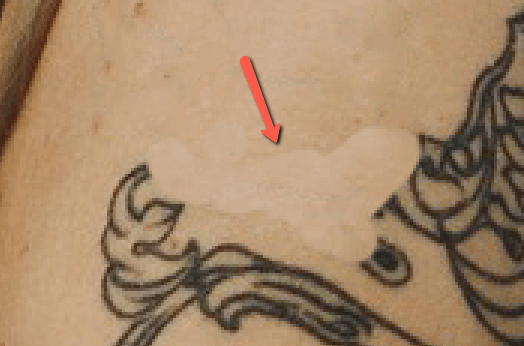
It’s okay, we’ll fix it in a moment. For now, let’s keep removing the black part of the tattoo with the Clone Stamp tool. Try to match the skin as closely as possible, but don’t sweat it too much.
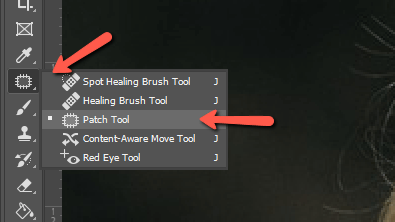
Patch Tool
Now let’s look at the Patch Tool. This tool is a nice mix of control and automation. You can control where Photoshop makes the selection and the program will automatically try to match the colors and lighting of the surrounding area.
You’ll find it hiding behind the Spot Healing Brush tool in the toolbar on the left.
With this tool active, you click and drag to draw a selection around a part of your image. Then you click and drag that selection to another area of the photo that you want to copy.
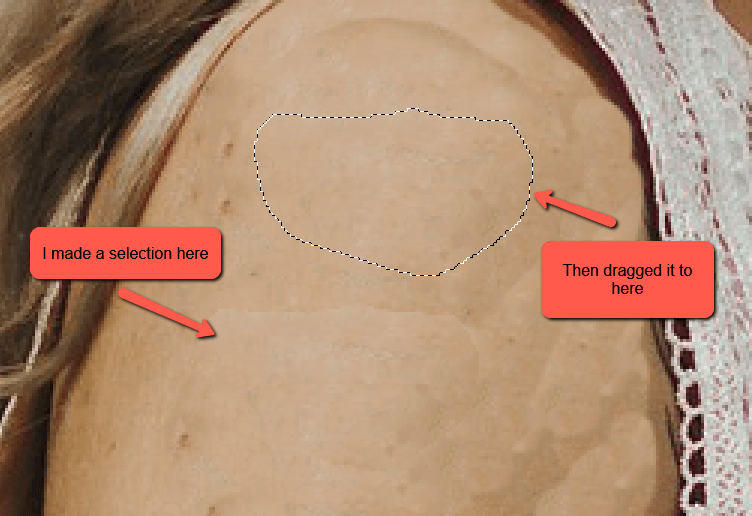
When I let go, the Patch tool will copy over the pixels, doing its best to match the surrounding pixels using Photoshop’s content-aware technology. You can learn more about the Patch tool here.
This is how we’re going to blend out the skin. I’ll draw around poorly blended sections and drag them to another area of skin until everything gets smoothed out.
Blending with the Clone Stamp Tool
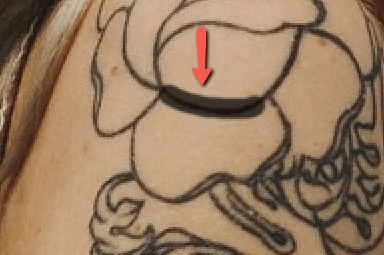
The Patch tool works quite well for blending, but occasionally you’ll run across a spot where it doesn’t. I removed the top lines of the tattoo with the clone stamp tool.
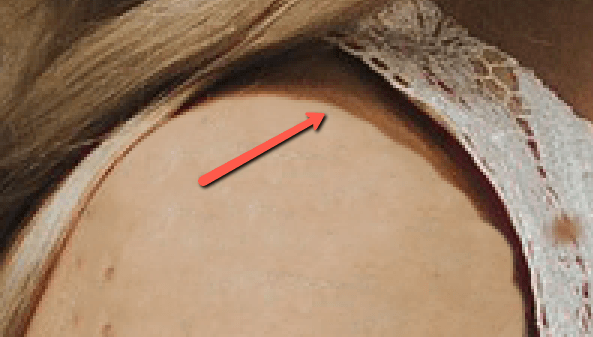
But it is not working to use the Patch tool to blend this small area. See how it is just smudging it weirdly?
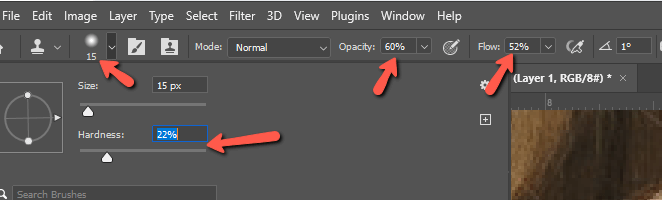
So we’ll use the Clone Stamp Tool instead. For blending, we need to bring down the Hardness as well as the Opacity and Flow in the Options bar. We want to be able to slowly build. Drastic changes won’t work.
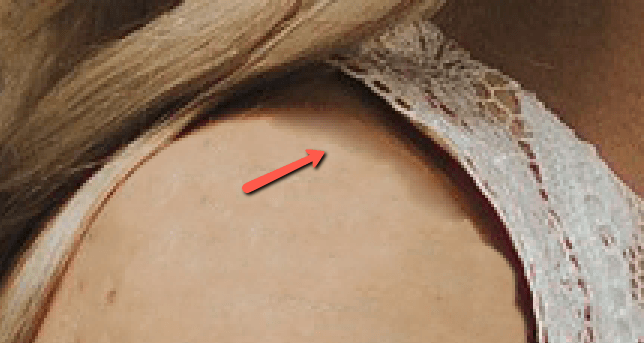
Then I’m going to sample from an area of skin where the color is somewhere in the middle of the dark and light shades we’re trying to blend. In this case, that will be from a spot farther down on her arm.
Working slowly, I’ll carefully paint over the edges until they are blended nicely together.
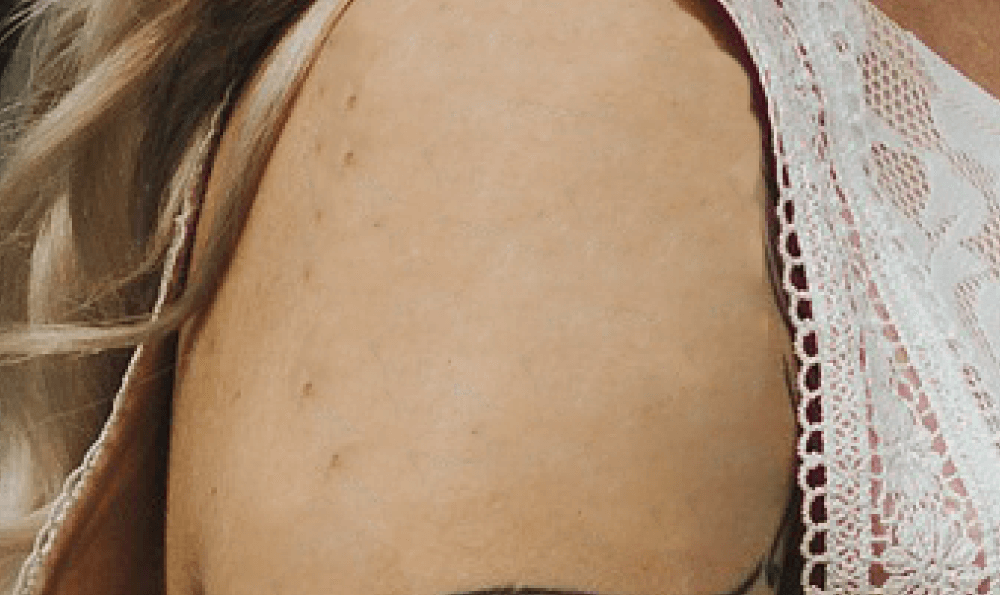
Thus, with a combination of these techniques (and a lot of patience), we can get rid of this tattoo.

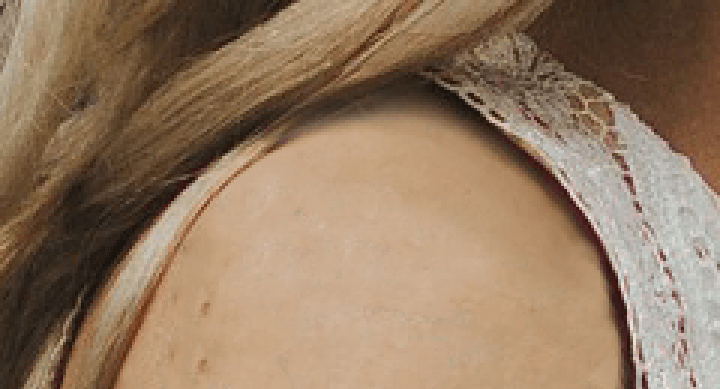
The tattoo is gone and you could leave it here if you like. However, because of all this work we did, she has lost some of the texture in her skin. You can add some skin texture to make this edit more realistic!
About Cara Koch