We could all use a little more sparkle in our lives, right? Any photo instantly becomes more magical when you add a little sparkle to it – especially if it’s a fairy photo.
Hello, I’m Cara and my inner little girl comes out when you start talking about fairies, magic, or anything fairy tale related. As a photographer, it’s a given that some photos need a bit of fairy magic added. So let me show you how to make and add sparkle in Photoshop.
Note: I took these screenshots from the Windows version of Photoshop CC. Those working with a Mac will find that the interface looks a little different.
Table of Contents
Create a Sparkle Brush in Photoshop
We’ll use a custom brush to make sparkles in Photoshop. The good news is that you don’t have to buy any special brushes (though that’s an option). We can create a custom brush right within Photoshop that will give us the sparkle effect.
So we’ll start off this project by creating the custom brush.
Step 1: Open a New Document
We need to build the brush in a new document. If you make your brush too small, you won’t be able to use it in larger images. If you make it too large, the brush will be slow to work with – not to mention take up a lot of extra space on your hard drive.
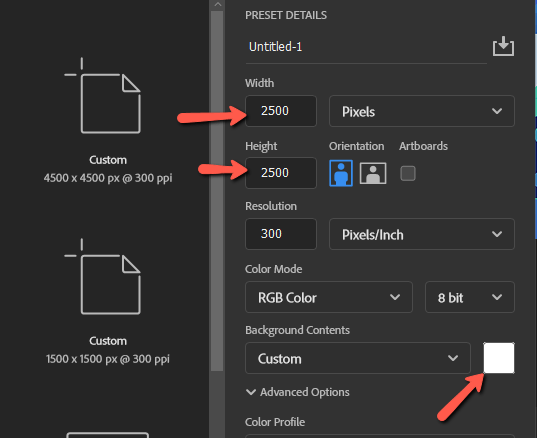
So press Ctrl + N or Command + N to open a new document and set both the height and width to 2500 pixels. Make sure the background color is set to white.
Step 2: Activate the Legacy Brushes
Depending on how your Photoshop is set up, you may or may not have access to the legacy brushes. We’ll need those for this technique so let’s go over how to activate them if you don’t have access to them.
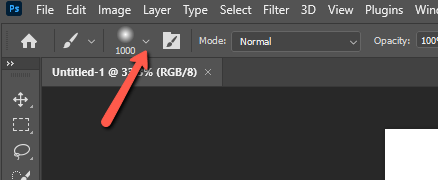
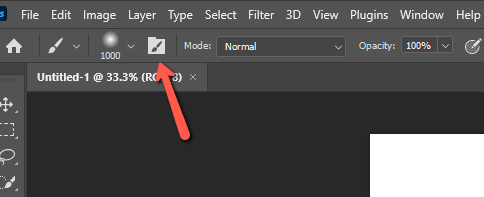
First, check to see if the legacy brushes are available. Click the little arrow next to the brush preview icon in the Options bar.
If you see a folder called Legacy Brushes, you can skip this step. If not, proceed to activate them.
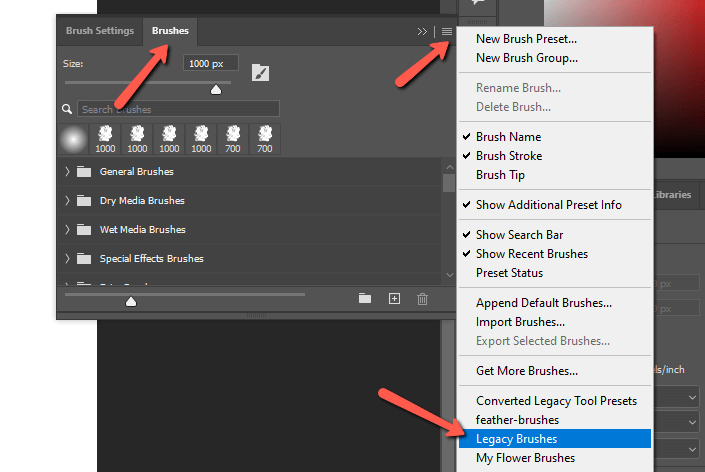
Click the Brush settings folder icon to the right of the brush preview in the Options bar.
When the Brush Settings panel appears, click on the Brushes tab. Then click the little lines up in the top right corner to open the menu below. Click on Legacy Brushes.
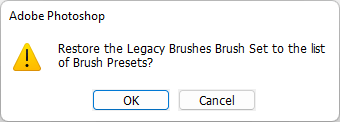
This box will pop up asking if you want to restore the Legacy Brushes Brush Set. Click OK.
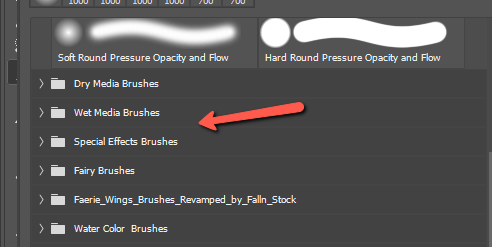
Now when you go back to the list of brush presets, you should see the Legacy Brushes folder.
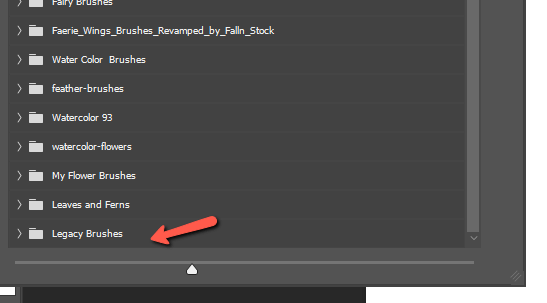
Click on the Legacy Brushes folder to open it and you’ll find a whole bunch of other brush folders. These are the brushes we’ll use to create our custom sparkle brush.
Step 3: Choose Your Brushes
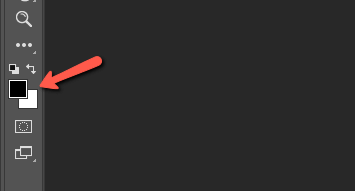
Make sure that your foreground color is set to black. You can do this quickly by pressing D on the keyboard. This will set the foreground and background colors to their defaults, which are black and white with black on top.
We want a star-shaped brush to get started. In the Legacy Brushes folder, open the Defaults folder and scroll down until you find the star brushes.
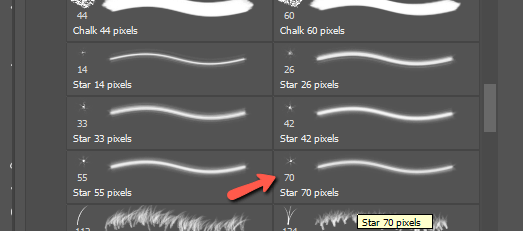
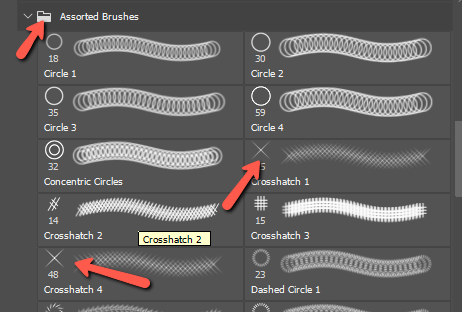
I’ll grab the Star 70 to get started but there are several good ones that will work for creating sparkles. For example, Crosshatch 1 and 4 in the Assorted Brushes folder.
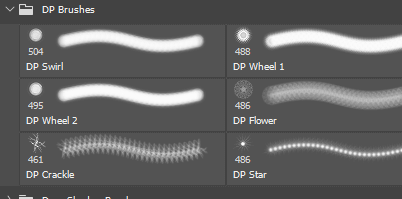
Or the DP Star in the DP Brushes folder.
Or the Starburst brushes in the second Legacy Brushes folder.
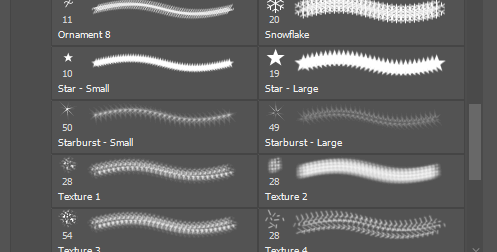
There’s more so feel free to browse these brushes to find ones that will help you create the perfect custom sparkle brush.
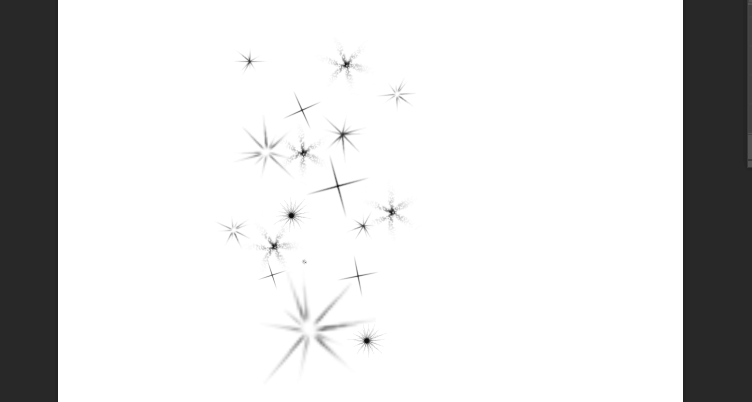
Step 4: Create the Sparkle Brush
Set your brush at a decent size – around 300 pixels or so. You’re going to drop a few strokes around the canvas. Make sure to space them out and don’t place too many, you’ll be filling in with other brush tip shapes in a moment.
Also, you should vary the size and direction. You can quickly change the brush size with the bracket [ ] keys. The left bracket makes the brush smaller and the right bracket makes it bigger.
You can change the direction by using the arrow keys. Press the right arrow key once to rotate the brush tip one degree to the right and vice versa for the left key. Hold Shift while pressing the arrow key to speed up the rotation to 15 degrees with each keystroke.
Consider how you want the brush to end up. If you’re creating a sparkle overlay, you can fill the whole space. If you want to create a sparkle swoosh or other shape, keep that in mind as you work.
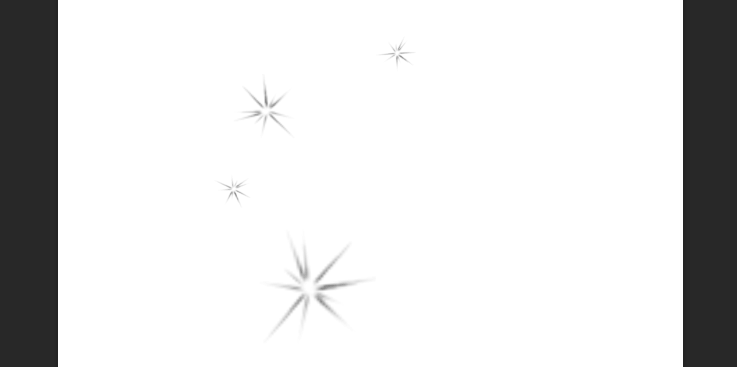
Now go back to choose a different brush tip and do the same thing. Repeat until you’ve created a sparkle that you like.
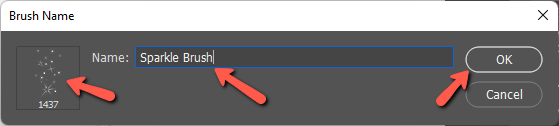
Step 5: Save as a Brush Preset
Once you’re happy with your sparkle brush, save it as a brush preset. Go to Edit and choose Define Brush Preset.
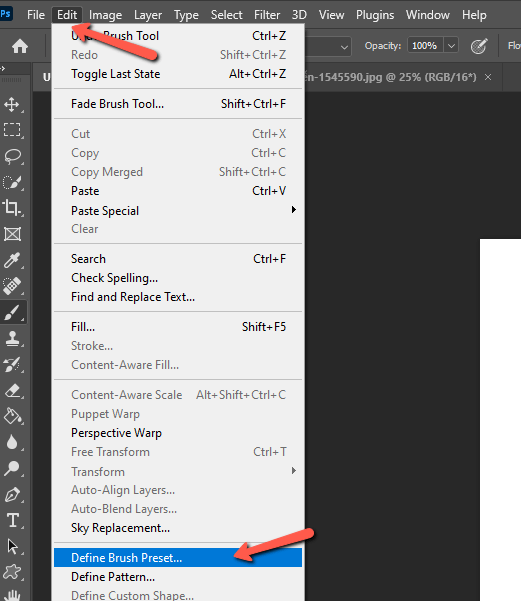
In the box that opens, you’ll see a preview of your brush and can give it a name. Press OK when finished.
Add Sparkles to Your Image in Photoshop
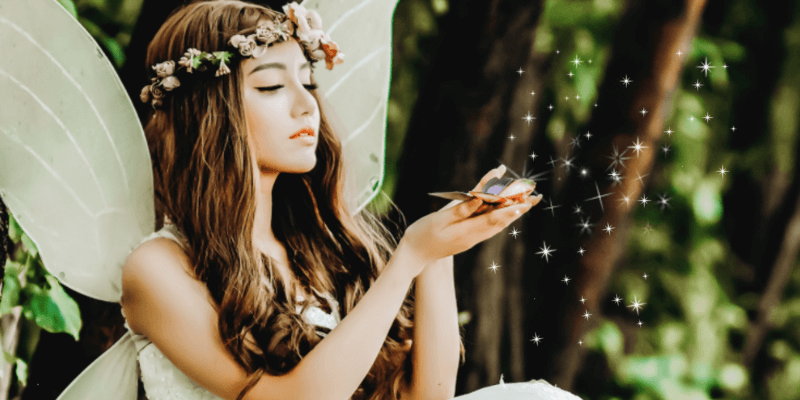
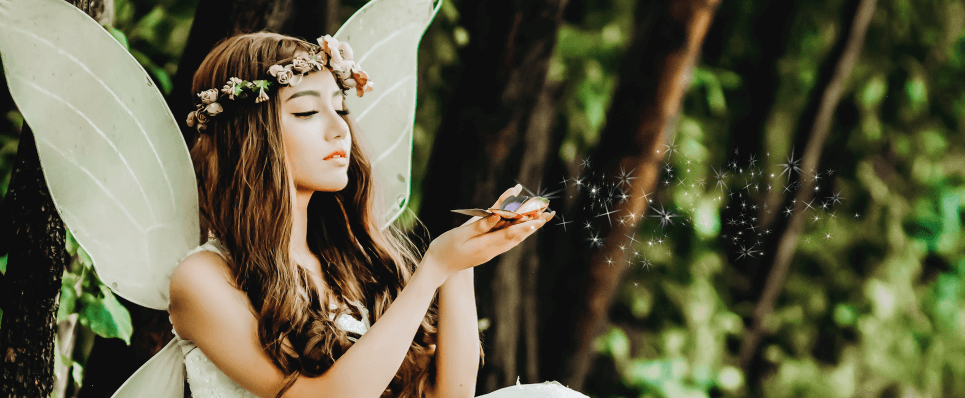
Now let’s open an image to which we want to add the sparkle effect. I got this fairy image from Pexels.com and then edited it because the original image was rather drab.
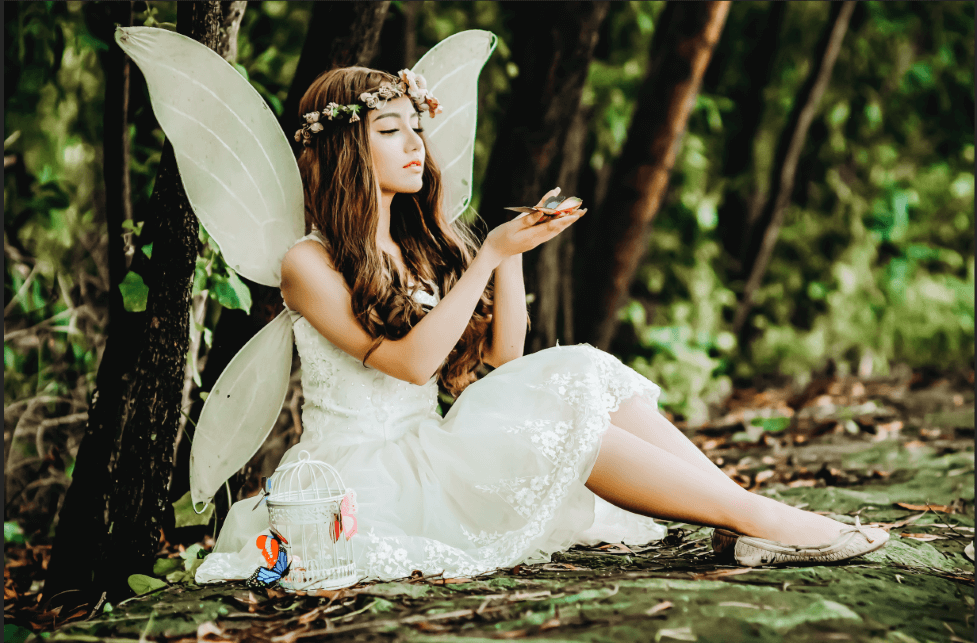
Let’s add some sparkle to the butterfly she has in her hand.
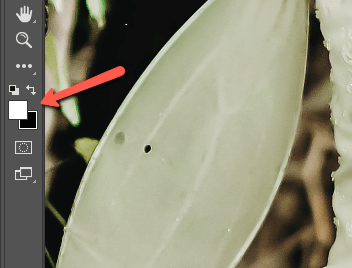
Make sure that your custom sparkle brush is active. Press X on the keyboard to switch your foreground color to white (or press the 90-degree arrows next to the color swatches on the toolbar.
Now click once to paint sparkles on the image.
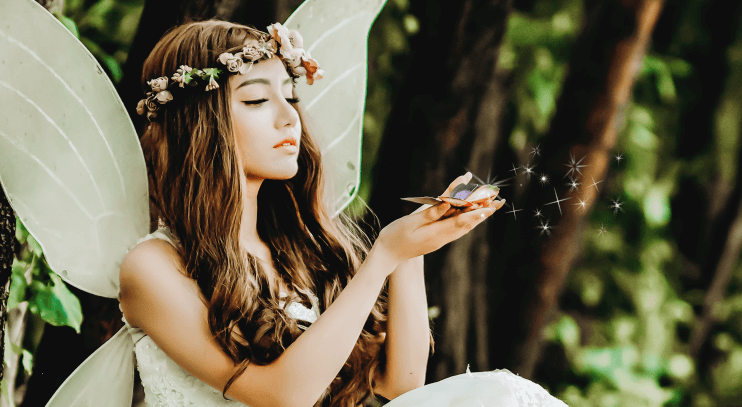
If you want to paint several times on the image, you’ll want to change up the size and maybe the angle of your brush. Otherwise, the pattern will look really obvious and your sparkles will look somewhat fake.
To speed up this randomness, you can change the brush jitter settings. To get there, click on the folder icon in the Options bar.
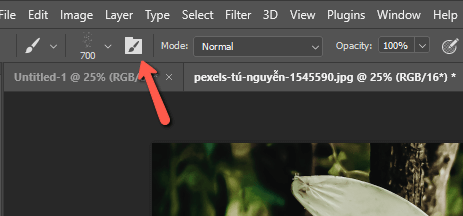
In the Brush Settings panel that opens, click Shape Dynamics. Depending on what you want to vary, slide the jitter sliders up. The closer to 100% you go, the more variation there will be.
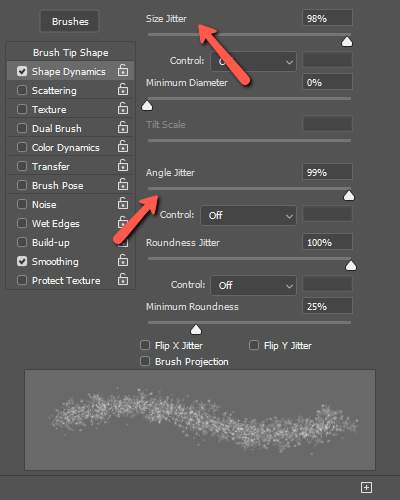
To change the size of the brush, adust the Size Jitter. To change the brush angle, choose Angle Jitter, etc. If you slide up multiple sliders, the program will vary all the chosen attributes at the same time.
Now, every time you paint a stroke, you’ll get a random variation that avoids the uniformity that will make your sparkles look fake. Well, you know what I mean. At least they will look as legit as magic sparkles can!
And now I’m feeling inspired to go take fairy pictures of my kids again, lol. I hope you’re feeling inspired too! And if you want to learn how to make something glow in Photoshop, check out this tutorial!
About Cara Koch