Ever wanted to make something glow? You can with the amazing tool that is Photoshop! The best news is that it isn’t as hard as you might think.
Hi there, I’m Cara! As a professional photographer that likes to dabble in image manipulation, I have wanted to make something glow in my images every once in a while, so I decided to explore the options and came up with this solution that I’m going to show you in this tutorial.
Follow along and I’ll show you how to do it!
Table of Contents
Glowing Things in Photoshop
In my other tutorial, I showed you how to make eyes glow in Photoshop. The method I chose for that tutorial was quick that involved painting white over the eyes.
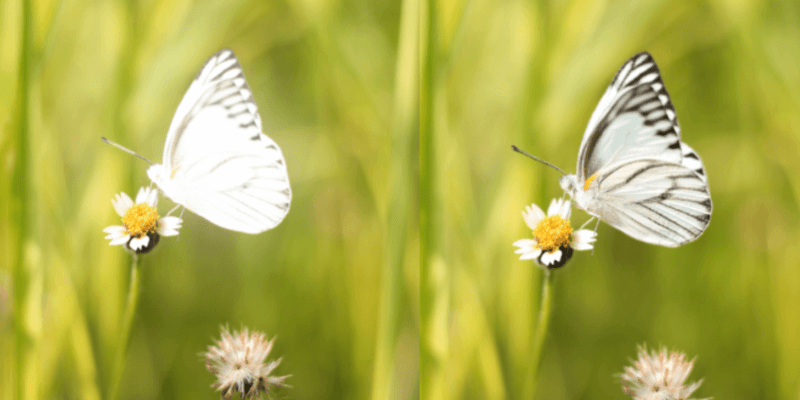
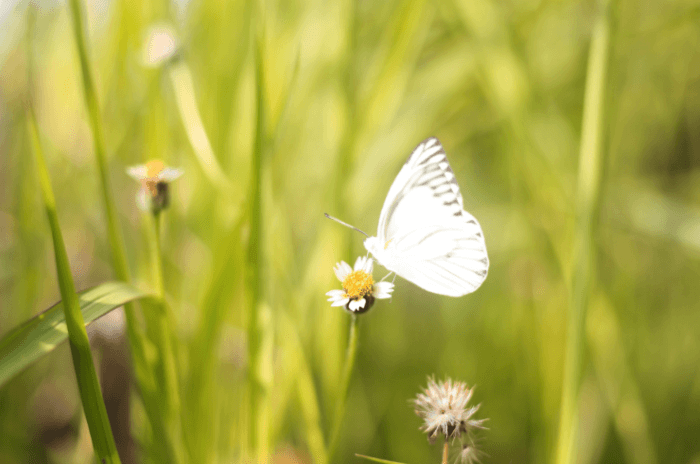
But what if you want to keep some details in the object that’s glowing? That’s what we’re going to look at today with this photo I got from Pexels.com. Let’s get started!

Note: the screenshots below are taken from the Windows version of Photoshop CC. If you are using the Mac version, they will look slightly different.
Step 1: Select Your Object
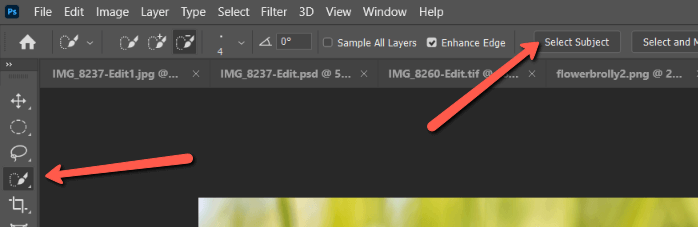
Click on the Quick Selection Tool in the toolbox (or any selection tool) and hit Select Subject up in the options bar. Photoshop usually does a good job, but you can refine the selection as necessary with the quick selection tool. Drag over any parts you want to include, and hold the Alt key while dragging to remove unwanted parts.
Step 2: Prep Your Object
With the selection active hit Ctrl + J (Command + J on a Mac). This will create a new layer with only the selected part of the image. I named it Butterfly for clarity.
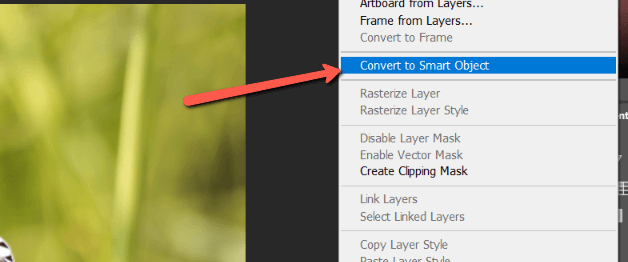
We’re going to work with this layer a bit, so right-click on the layer and hit Convert to Smart Object.
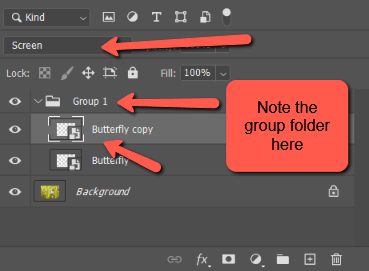
Then hit Ctrl + G (Command + G) to group together the next few layers we’re going to create. The current layer will be indented under the folder that appears above it. Everything indented under the folder is included in the group.
Step 3: Adding the Glow
With the butterfly layer selected, I’m going to hit Ctrl + J (Command + J) to duplicate the selection. A new butterfly layer appears inside the group. With the Butterfly copy layer selected, change the blending mode to Screen.
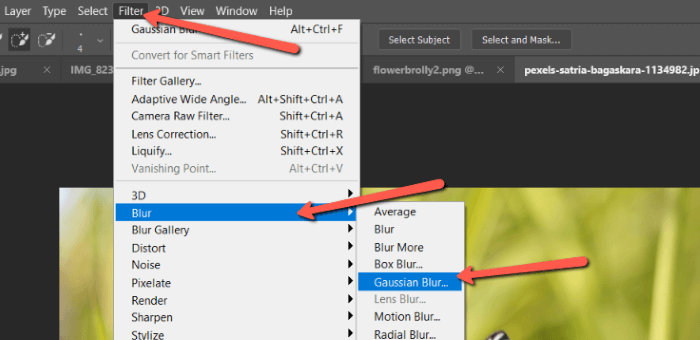
Now go to Filter in the menu bar at the top. Go down to Blur and choose Gaussian Blur.
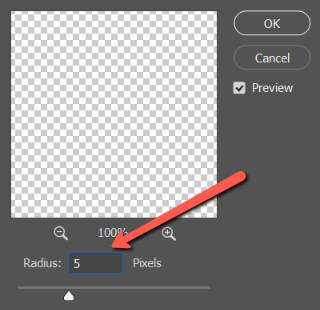
A properties box for the blur will appear. Set the radius to about 5 pixels to soften the edge.
Step 4: Magnify the Glow
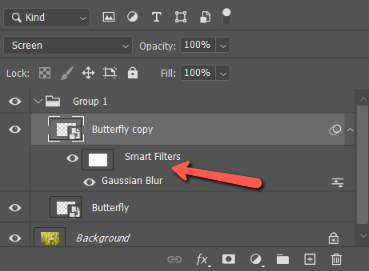
Because we converted the butterfly to a smart object, smart filters, and Gaussian blur appear beneath the layer name when the filter is added.
Hit Ctrl + J (Command + J) to create another copy. Double-click on Gaussian Blur beneath Smart Filters in the new butterfly copy.
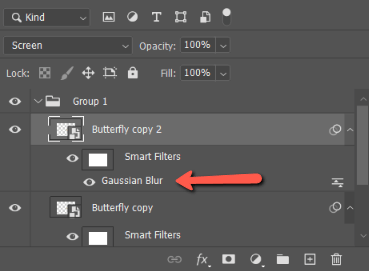
This will open up the properties box once more. Set the radius to 150 pixels this time.
Go one more round. Copy the layer, double-click Gaussian Blur in the layers panel, and set the radius to 300 pixels.
Now you should have something that looks like this.
Step 5: Color the Glow
It looks pretty good as is for this image, but what if you want the object to glow a different color? All we have to do is add a Hue/Saturation layer.
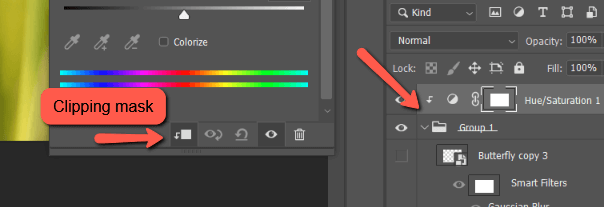
Click the half-filled circle at the bottom of the Layers panel and choose Hue/Saturation.

Drag the Hue/Saturation layer above the group. In the properties panel that opens, click the clipping mask so the color changes affect only the layers in the group.
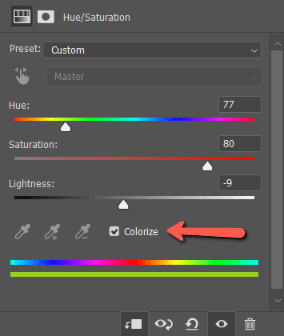
Next, click colorize and adjust the sliders to choose the color, saturation, and lightness that you want.
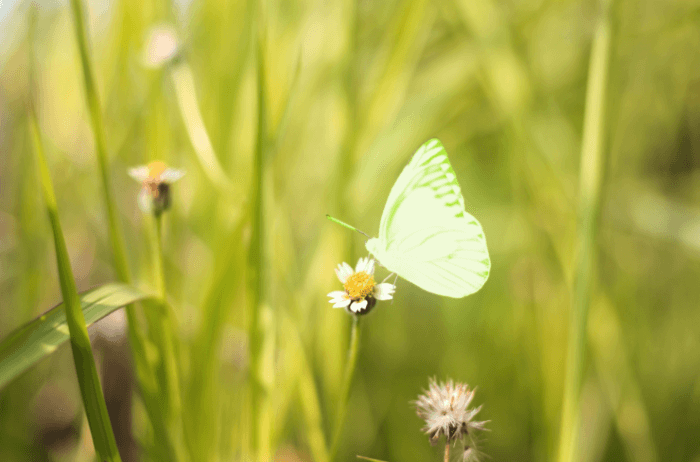
Boom! I added a bit of greenish-yellow tint and now I’ve got a glowing butterfly!
Interested in more easy tips and tricks in Photoshop? Check out more of our articles!
About Cara Koch