
If you’ve ever been frustrated by your subject’s hair, fur, or anything similar when cutting out objects in Photoshop, this tutorial is for you!
Hello, I’m Cara and I can’t even tell you how frustrated I’ve been trying to cut out hair or furry critters in Photoshop. But then one day, I learned about the Refine Edge tool in Photoshop and everything changed!
Let me show you how to use this game-changing tool that will change how you cut out objects in Photoshop (and make them look so much better)!
Note: the screenshots below are taken from Photoshop CC for Windows, Mac or other versions can look slightly different.
Table of Contents
Step 1: Make a Selection
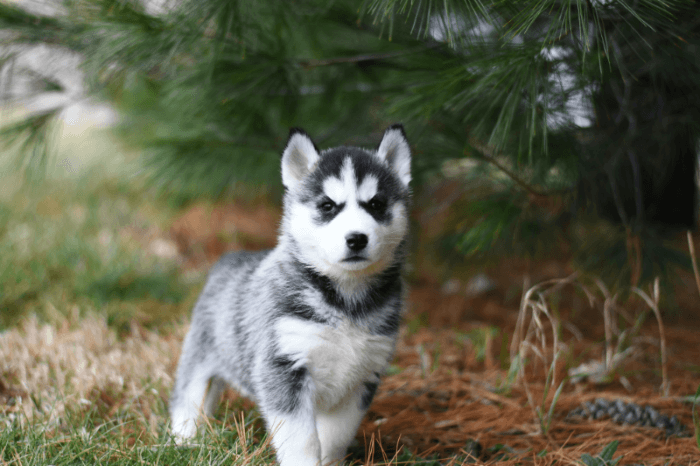
As an example, I’ll cut out this cute little guy from this photo I found on Pexels.com.
Here, I made a selection with the Quick Selection Tool and removed the background so you can see it. We’ve got the pup’s body, but his fur has been unrealistically cut off.
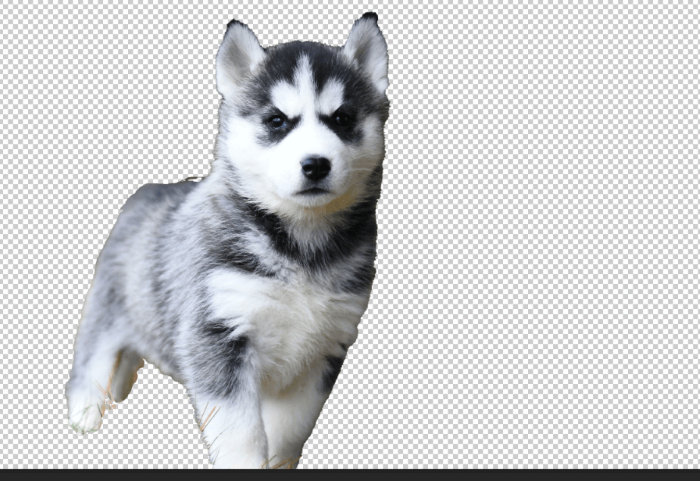
This is where the refine edges tool comes in.
Step 2: Open the Select and Mask Workspace
Let’s back up a second. Make your selection but before you cut anything out, press the Select and Mask button in the Options bar.
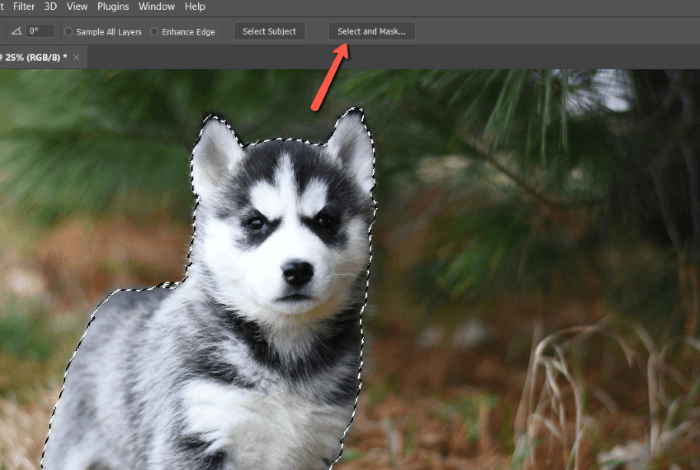
This will open the Select and Mask workspace.
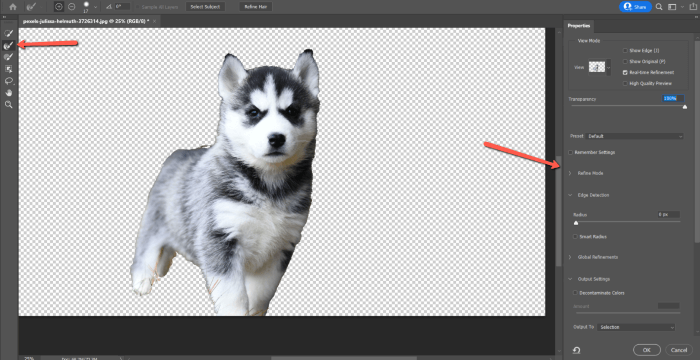
On the left, we see some selection tools, a brush tool, and the refine edges brush tool, which we’ll get to in a minute. On the right, there are several sliders with general refinements.
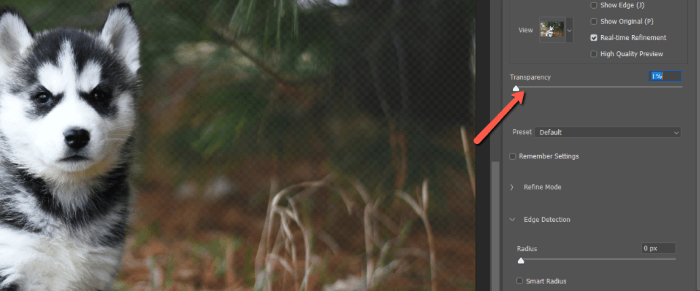
The Transparency is at 100% in my workspace so the only thing visible is the selection I’ve made. If you see this, bring the transparency down so you can see where you need to make adjustments.
Step 3: Paint With the Refine Edges Brush
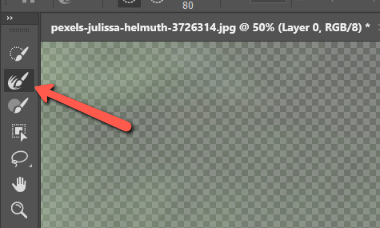
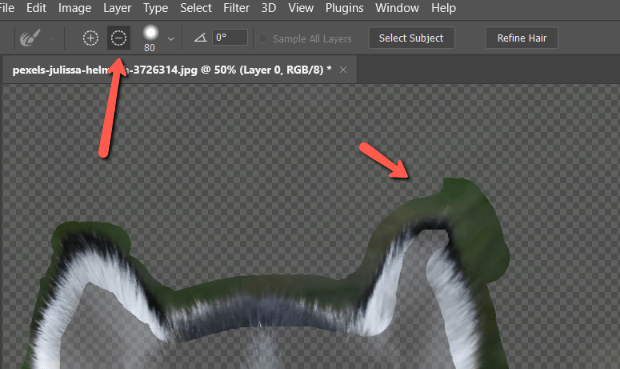
From the tool panel on the left, choose the Refine Edge Brush or press R on the keyboard.
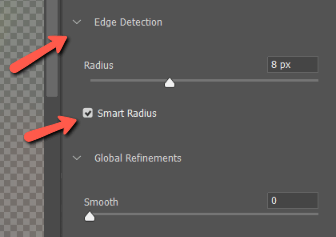
On the right side, check the Smart Radius box, which you’ll find under Edge Detection. You can also choose your own radius value if you prefer.
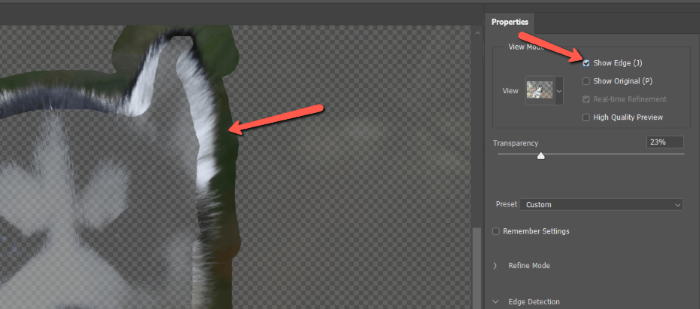
Then, tell Photoshop which parts of the image need work by painting over them. Check the Show Edge box (or press J on the keyboard) so you can better see what you’re doing.
If you paint over an area that you don’t want, choose the minus sign in the Options bar and paint back over the part you want to remove. You can also just hold Alt or Option on the keyboard to toggle back and forth between adding and subtracting.
Step 4: Refinement Sliders
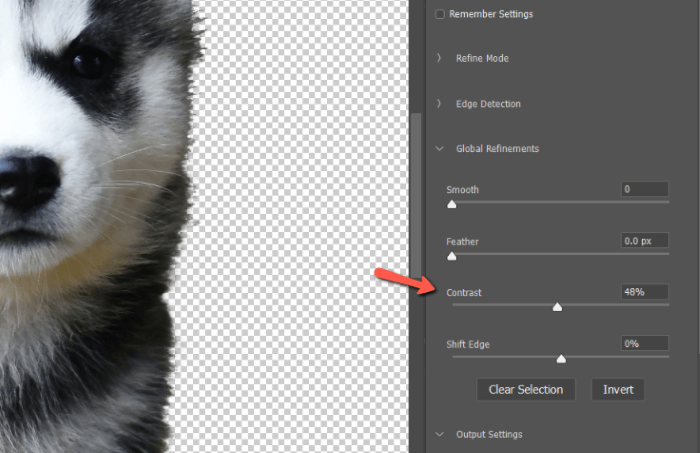
Once you’ve finished painting around the edges, uncheck the Show Edges box and turn the Transparency back up. You should be able to see how sharp the edges are.
Under the Global Refinements dropdown, you can adjust the sliders to fit your image. I brought up the contrast considerably, which helped the dog’s fur stand out more.
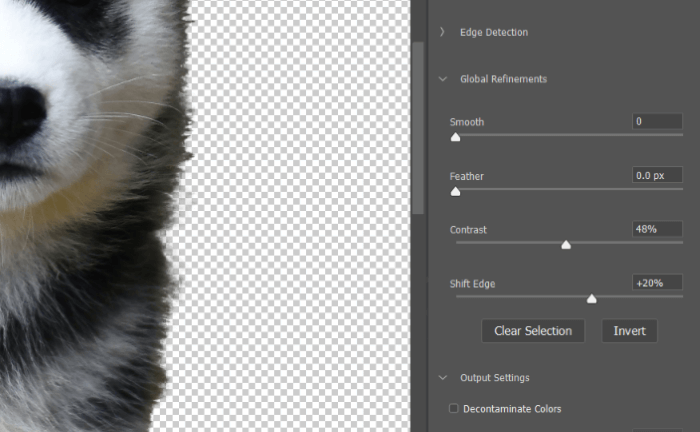
You can also shift the edge of your mask out with a positive number or in with a negative number. This can be useful for getting rid of that weird halo line that sometimes appears around selections.
The feather and smooth sliders are more useful when you want to smooth the edges of a selection. However, you can also play with them to see how they affect your particular image.
Press OK when you’re satisfied.
Step 5: Cut Out the Object
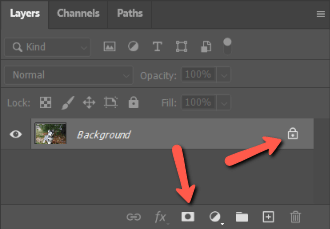
With your selection layer highlighted, press the Mask icon at the bottom of the Layers panel. If you’re working with the background layer like I am, press the lock icon on the right to unlock the layer.
I added a black background behind my subject so you can see easier. Check out those tendrils of hair. It’s pretty awesome!

Have fun playing around with this tool. Keep in mind, it works best when there is a lot of contrast between the subject and the background.
Intrigued to learn what else you can do in Photoshop? Check out our tutorial on how to make fog to learn more!
About Cara Koch