Brushes are a handy way to easily add effects and make changes to an image or design. You can add snow, fairy lights, paint splashes, and so much more!
But, what happens if you don’t have the right brush? Well, you can also download brushes but it’s also easy to create your own custom brush in Photoshop.
Hey there! I’m Cara, and I’ve run into this problem before when working on my own photographs. Turns out, it’s pretty easy to make your own brushes and I’ll show you how in this article.
Read on to learn more!
Table of Contents
2 Ways to Make a Brush in Photoshop
I’m going to show you two methods for making brushes in Photoshop. The first is to draw the brush design that you want. It’s completely customizable and you can create whatever your heart desires.
But, if you’re like me and can’t draw to save your brush, you might like this second way better. You can create the shape you want from any image or part of an image.
Let’s start with the drawing method.
Method 1: Make a Brush from Scratch
Step 1: Create a new document by hitting Ctrl + N (Command + N) on the keyboard.
Keep in mind that Photoshop allows you to create brushes up to 2500 pixels in size. However, the larger the brush, the slower it will work. Plus, generally, a 2500-pixel brush is so big it’s overkill.
I’m going to stick with a more conservative 300 x 300 pixels document. Feel free to follow and put 300 in both the width and height boxes and ensure the measurement value is set to Pixels.

Make sure that the background contents box is white and hit Create.
Step 2: Pick one of Photoshop’s existing brushes to draw your new brush design. Hit B on the keyboard or choose the Brush Tool from the toolbar at the left of the screen. In this case, I’m going to choose a small round brush.

When creating the brush, keep this important concept in mind. Photoshop can only create brushes in grayscale. That means it can only show black, white, and shades of gray.
Anything black in your design will be 100% visible in the final brush. Anything white becomes transparent. Shades of gray show up partially. Darker shades of gray will be more opaque than lighter shades.
For example, here’s the design that I drew. (I told you I couldn’t draw!) The black whirl will show up solid in my final brush. I reduced the opacity to 50% for the little dots everywhere so you can see what happens with those.

Step 3: To turn this into a brush, go to Edit in the menu bar and select Define Brush Preset.

Give your brush a name and click OK.

That’s it for creating the brush! Here’s a quick preview of my brush in action. I changed the color to red, but notice how the dots show up lighter?

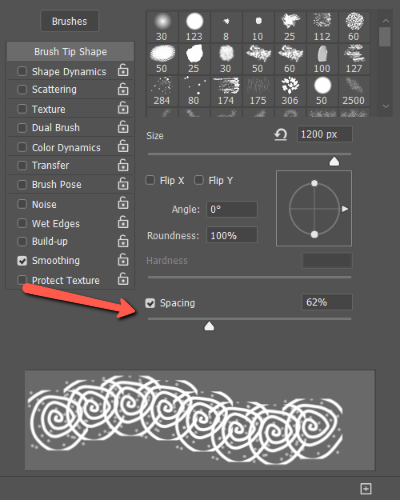
Photoshop also allows you to fine-tune the brush tip. To do this, open the brush settings panel. You can get there by going to Window in the menu bar and selecting Brush Settings. Or you can hit the Brush Settings icon on the right side of the screen.

To adjust the Spacing slide the bar up and down. A larger number will space out the brush strokes as you drag across the document. The box at the bottom gives you a preview of what the brush will look like.

To make further changes, click on Shape Dynamics under Brush Tip Shape.

Notice how my preview has changed after playing with the sliders for these settings? Play around with all the options to get the effect you would like.

Also Read: How to Make a Square Brush in Photoshop
Method 2: Creating a Brush from an Image
I got something kinda funky from my freehand drawing. Let’s see what I can do with an image now.
I’ve selected this image from Pexels to work with. The isolated flowers make the process easier. If your desired object isn’t isolated like this, you’ll have to cut out the object and paste it into a new document on a white background.
Step 1: Make a selection around the object you want to use. For example, you can use the Quick Selection Tool.

Hit Ctrl + C (Command + C) to copy the selection. Open a new document with a white background as we discussed above in Step 1 for drawing a brush. Hit Ctrl + N (Command + N) and select the appropriate size.
Hit Ctrl + V (Command + V) to paste the selection into the document.
Step 2: Make the Brush
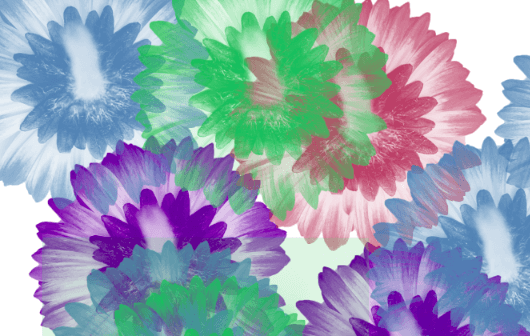
Making the brush is the same as the drawing method we already discussed. Go back and follow steps 3 and 4 to finish up. Here’s what I got.

Have fun with it! To learn more about working with brushes, be sure to check out our tutorial on how to rotate brushes in Photoshop!
About Cara Koch