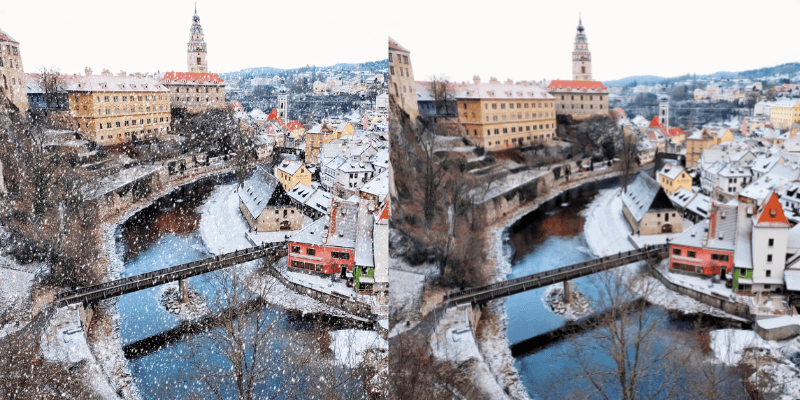
It’s quite challenging to get a nice snow shot because you’ll need to wait for the perfect timing and at the same time try to keep yourself warm. Well, there’s a perfect solution. Which is?
Capture the moment first and add the snow later in Photoshop. Capturing a good moment is much harder than adding snow effects in Photoshop especially if you’re taking outdoor photos of animals. They don’t wait for the snow to come out, right?
In this tutorial, I’m going to show you how to add snow to a photo in six easy steps along with some additional tips.
Ready to let it snow?
Table of Contents
6 Steps to Add Snow to a Photo in Photoshop
You can add a snow effect to your winter photograph by following the six steps below.
Note: the screenshots are taken from Adobe Photoshop CC Mac version, Windows and other versions can look different.
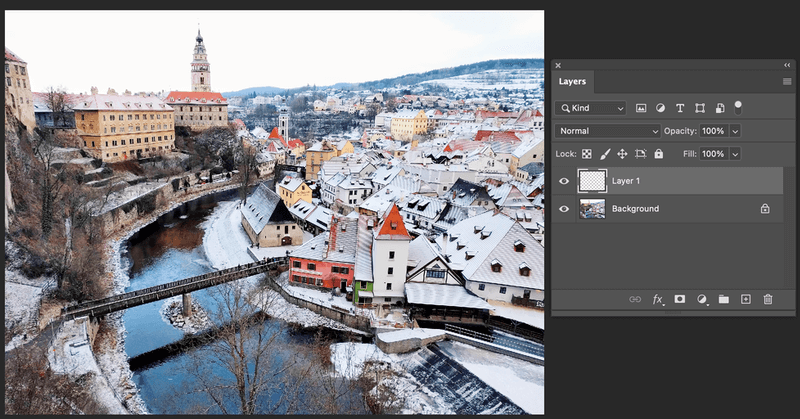
Step 1: Open the photo in Photoshop and add a new layer on top of it.
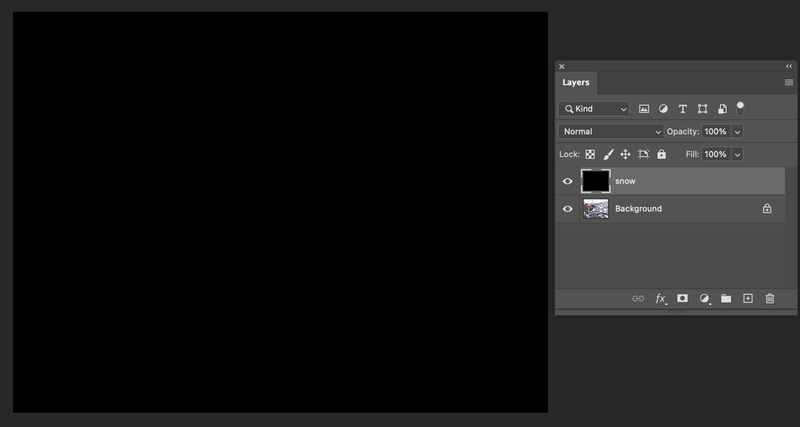
Step 2: Select the Paint Bucket Tool from the toolbar (usually it’s in the same tab as the Gradient Tool) and change the foreground color to black.

Click on the canvas to fill the layer in black. You can name the new layer snow.
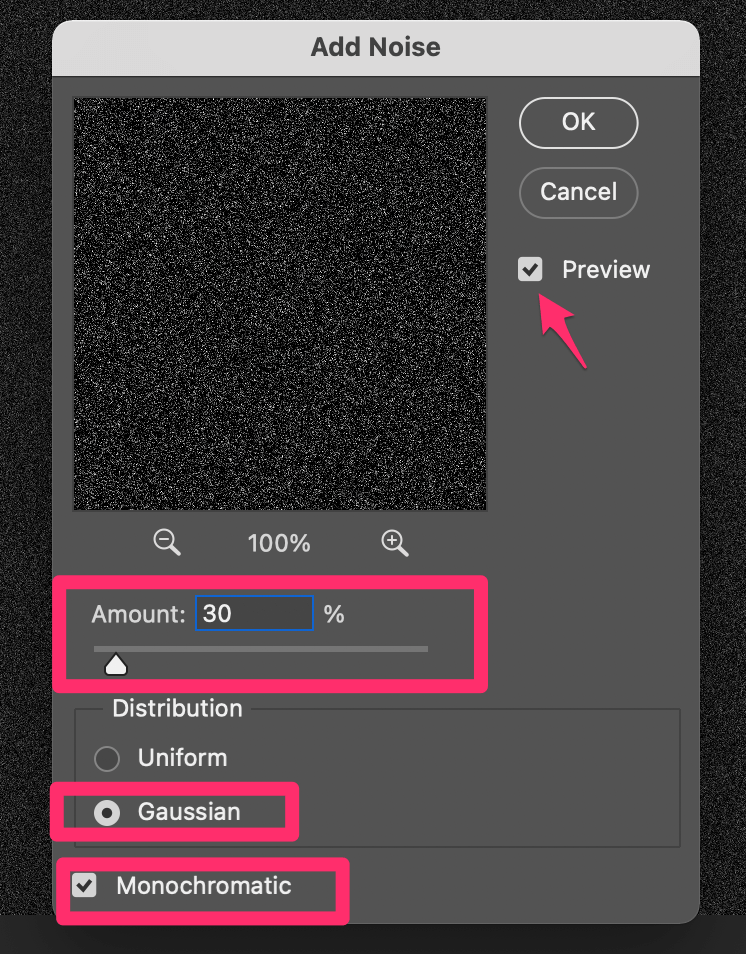
Step 3: Go to the top menu and select Filter > Noise > Add Noise.

I suggest setting the Amount to around 30%, selecting Gaussian as Distribution, and checking the Monochromatic box. You can check the Preview option to see how it looks on your image.
You wouldn’t see much of the snow yet at this point. There are a couple more filters and adjustments you’ll need to make.
Before going to the next step, you can use the Free Transform tool to increase the size of the snow layer. For example, I increased mine by 400%, and the Noise (supposed to be the snow effect) looks slightly larger.

Step 4: Change the layer blending mode to Screen. This blending mode will hide the black color and only show the white, which is the snow part.
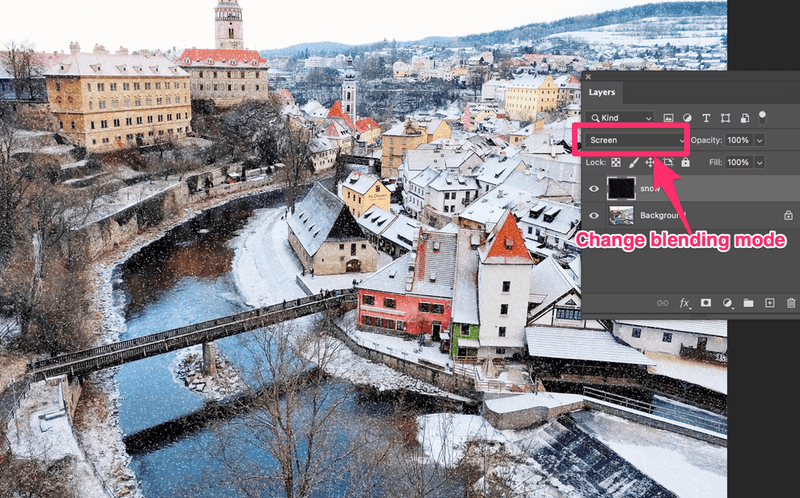
As you see that the snow looks quite small and not very visible, right? Don’t worry, there are more tricks, follow me to the next steps.
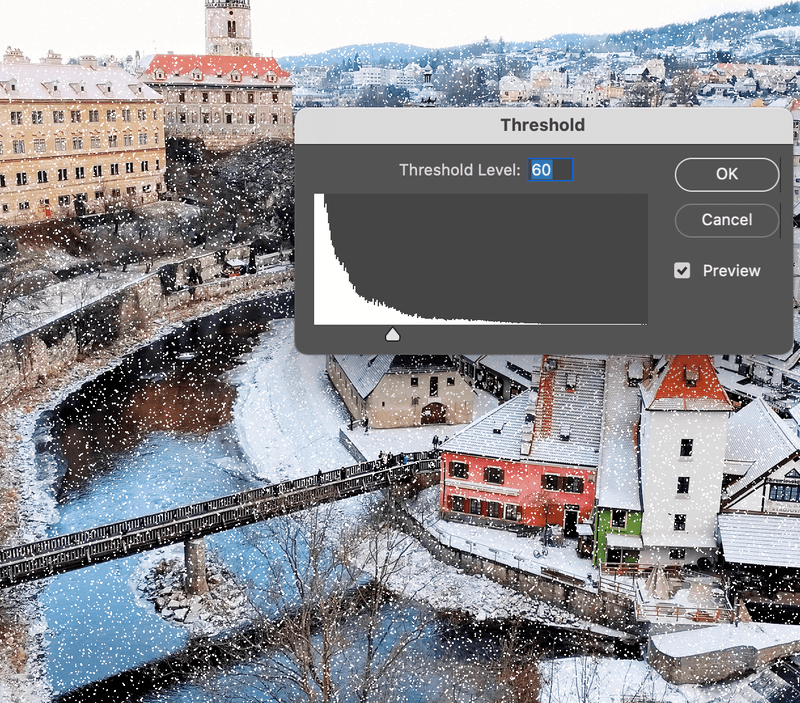
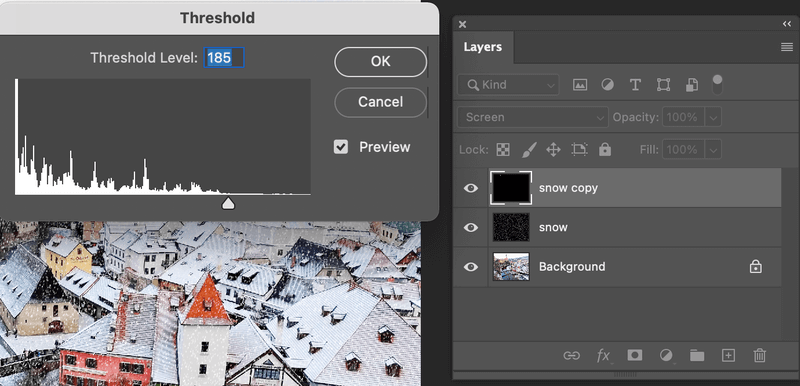
Step 5: Go to the top menu and select Image > Adjustments > Threshold. The lower the threshold value, the more white area (snow) will show. Move the slider left to decrease and move to the right to increase the value.
Step 6: Go back to the top menu and select Filter > Blur > Motion Blur. You can set the distance to around 7 to 10 Pixels and the snow will look more natural.
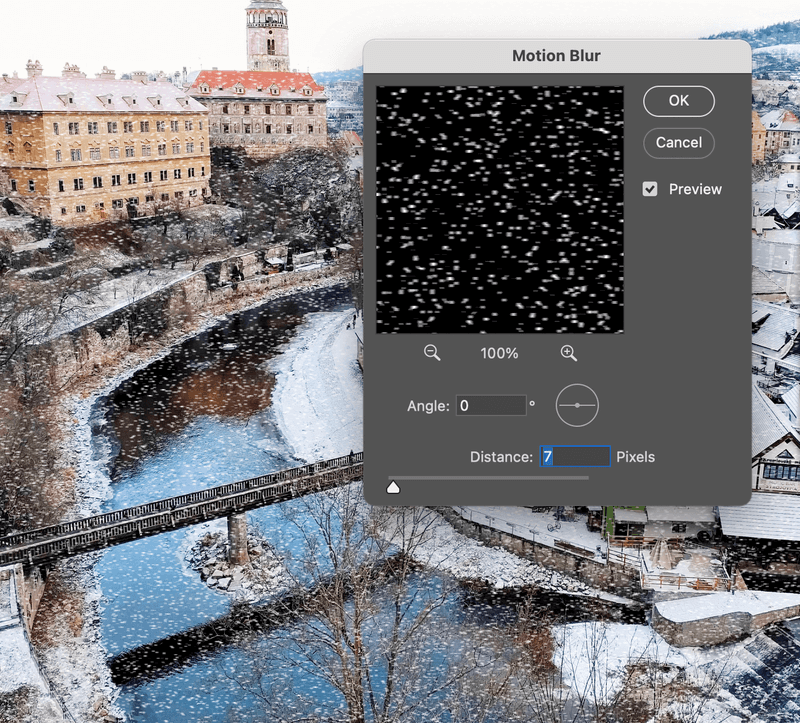
Check the Preview box to see how it looks. Click OK when you’re happy with the effect and that’s it.
Additional Tips
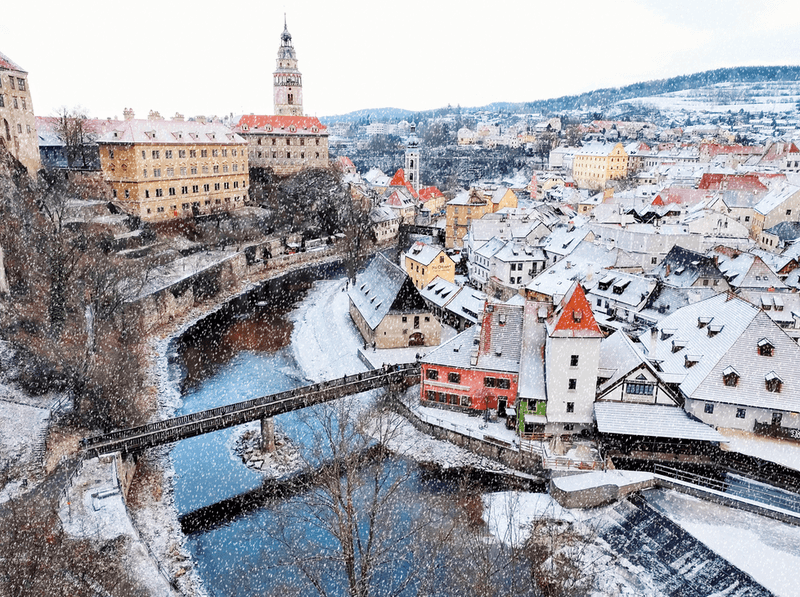
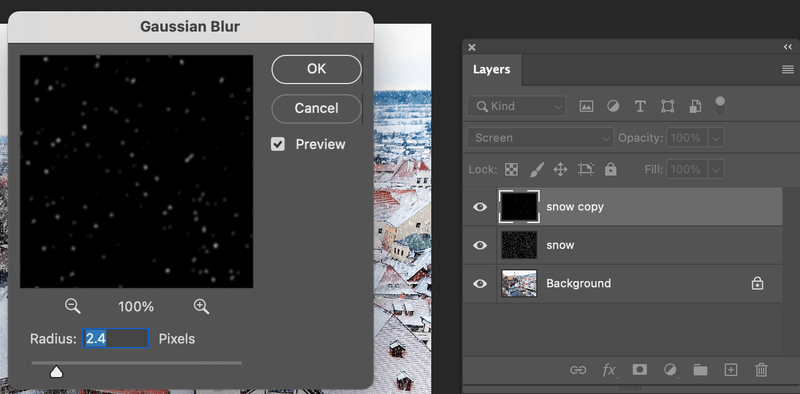
If you want to make a heavier snow effect, you can duplicate the snow layer and edit its threshold and blur.
This time I’m going to add a Gaussian blur to the snow copy layer.
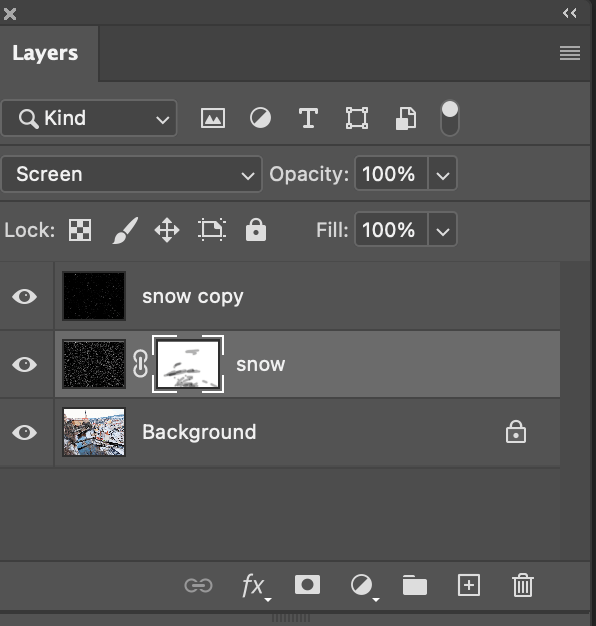
If you want to remove some snow in certain areas or make it look lighter, you can add a layer mask on the snow layer, and use the Eraser tool to remove or lighten some snow areas.
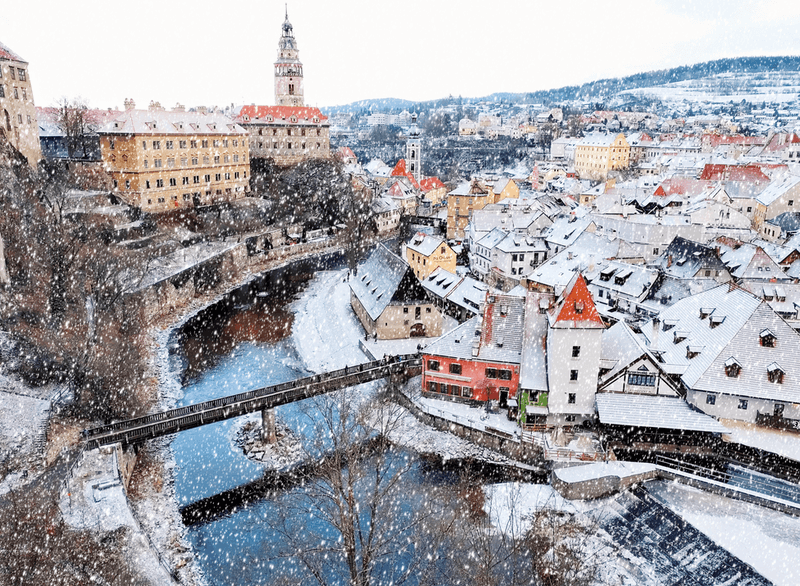
I duplicated four more snow layers to make it snow harder. It looks pretty good now. What do you think?
Conclusion
The basic idea of making snow effects in Photoshop is to manipulate the Noise. Give it a nice blur and find a good threshold balance are the two important steps. You can make light or heavy snow by duplicating the layers and changing the filter effect on each layer. Up to you.
Let it snow 😉
About June
COM
Good Job!
Awesome work!
GOOD WORK!
Roy
Good job, 🙂 But for a newbee like me it could be a little more detailed at some points.
Michelle
Is it me or maybe it’s my computer…it’s taking 30 minutes or so after each step to proceed. Also, how do you increase in free transform by percentage?
June
Hi Michelle,
I’m not sure if you can use free transform by percentage. As far as I know, it works with units.
Well, I could be wrong. If you find out a way, please share 🙂
Karen
good instructions – but for some reason at step 4 – the black background did not disappear when the blending mode was changed to ‘screen’? am I doing something wrong?
June
Hi Karen,
The blending effect somehow depends on your background image as well. Have you tried other blending modes?