Sometimes you just really like a shape from an image that you wish you could make a vector and use it on your design, right? That’s totally possible. You can easily crop that cute object and make it a brush in Photoshop.
I love using brushes as decorations for my design because they add more fun and personality. Actually, I’ve even created patterns with custom brushes (the smart and easy way!) Anyways, it’s a super useful tool to manage if you want to be a Photoshop pro.
In this tutorial, you’ll learn a simple and quick method to make a custom brush out of an image in Photoshop.
Let’s dive in!
Table of Contents
6 Quick Steps to Make a Brush from an Image in Photoshop
The idea is to select the object from the image you want to turn into a brush, then make a custom brush.
Note: Screenshots are taken from the Adobe Photoshop CC Mac version. Windows and other versions might look slightly different. Windows users change the shortcut Command to Ctrl and the Option to Alt.
Step 1: Open your image in Photoshop.
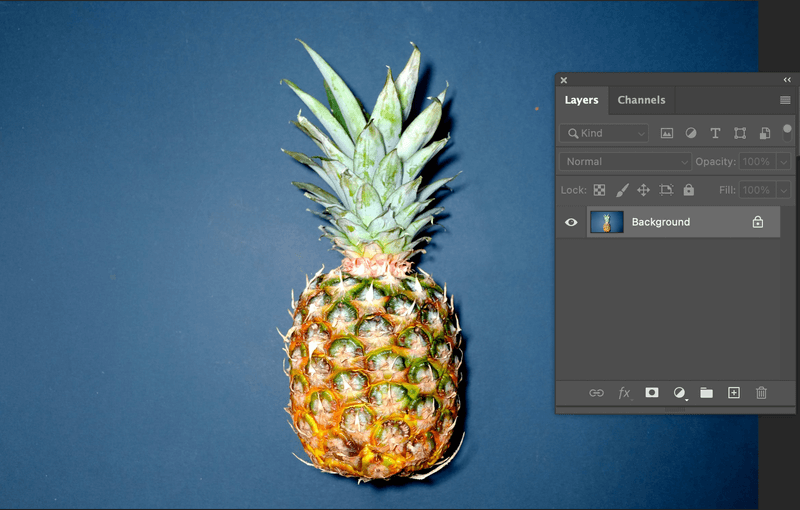
Note: According to Adobe, a brush can be up to 2500 pixels by 2500 pixels in size. So if your image is larger than this size, you’ll need to resize your image.
Step 2: Go to the overhead menu Image > Adjustments > Threshold.
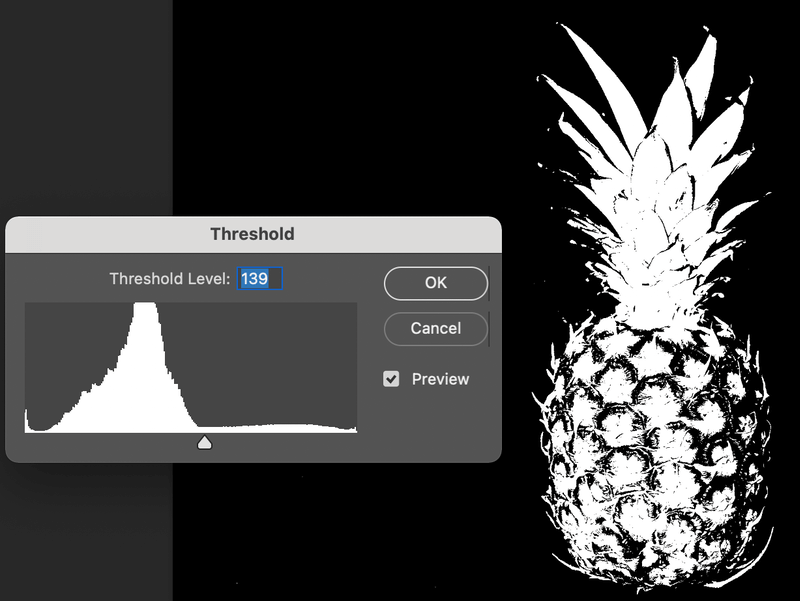
Move the slider to adjust the value until the background is clean.
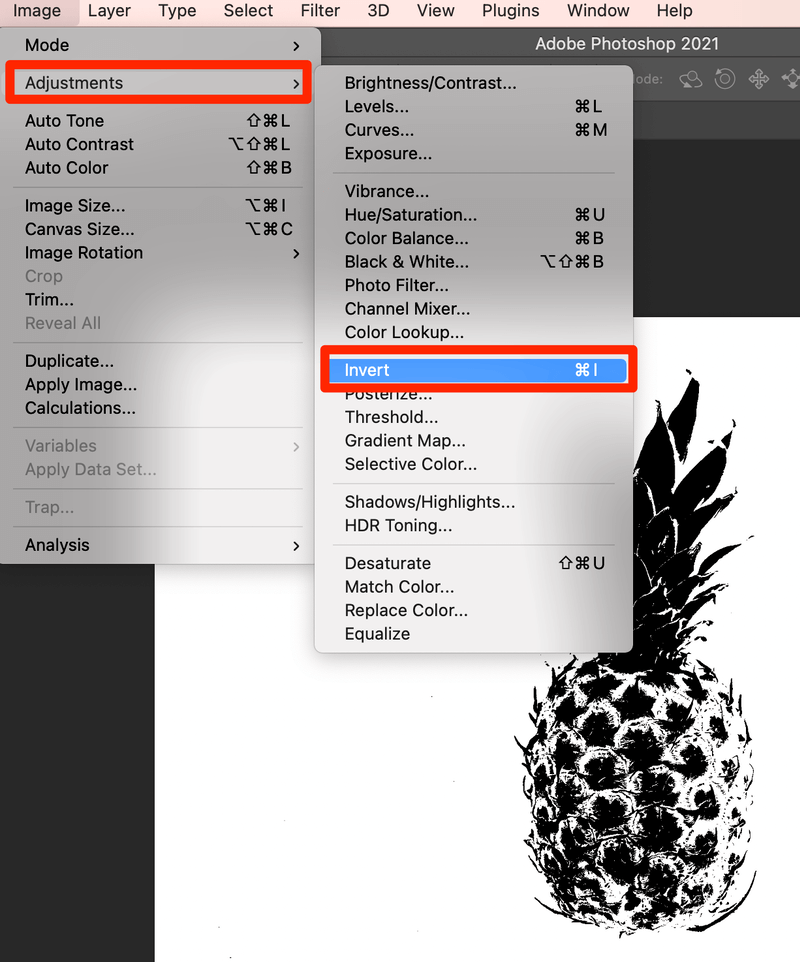
Step 3: Use keyboard shortcuts Command + I or go to the overhead menu Image > Adjustments > Invert to invert the image color. So the pineapple is black and the background is white.
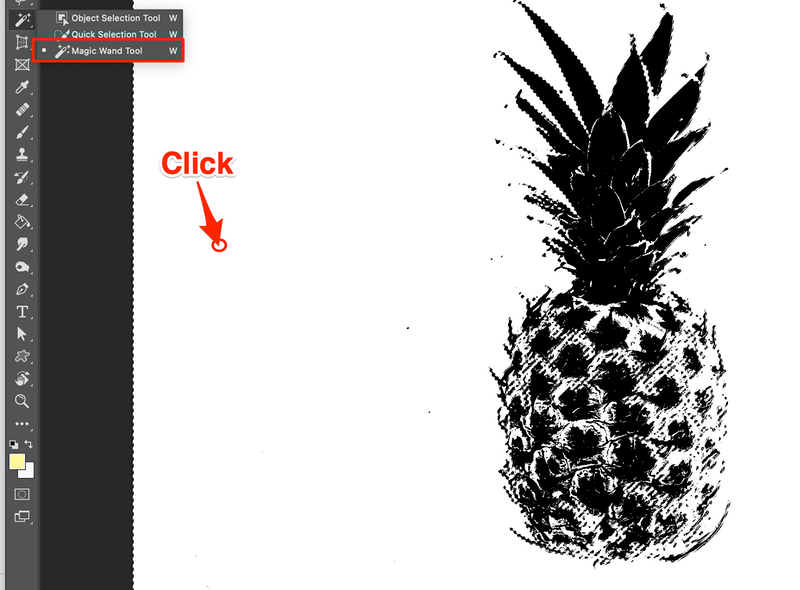
Step 4: Select the Magic Wand Tool to click on the background area. Hit the Delete key to remove the image background and deselect the object using the keyboard shortcut Command + D.
You might have to zoom in and click on leftover background areas within the image to make fully remove the background.
Tips: if the object you want to make a brush is not complicated, you can directly click on the object to select and go to the next step.
Step 5: Choose the Rectangular Marquee Tool (keyboard shortcut M) and select the image area you’re turning into a brush.

Step 6: Go to the overhead menu Edit > Define Brush Preset to turn the image into a brush.
If your Define Brush Preset option is greyed out, check out my post on how to fix when you can’t make a brush to see if you can find a solution:
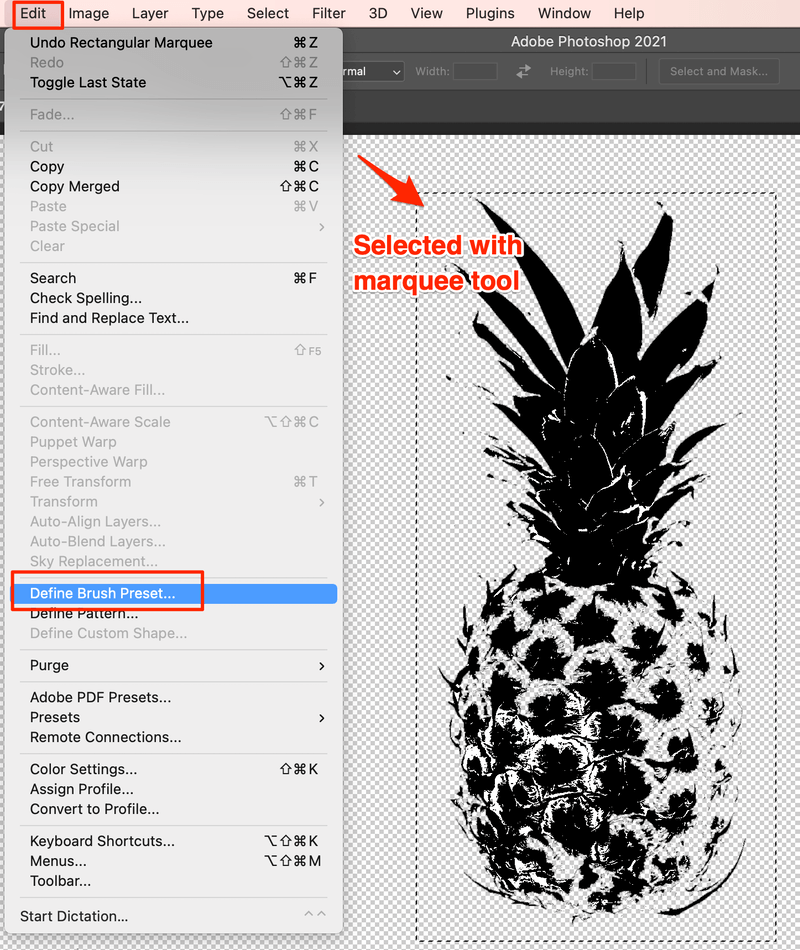
Name your brush and click OK.

Now that you have your new brush set up, wanna see how it looks?
You can find your custom brushes from the top menu when you have your brush tool selected, or you can open the brush panel from Window > Brushes.
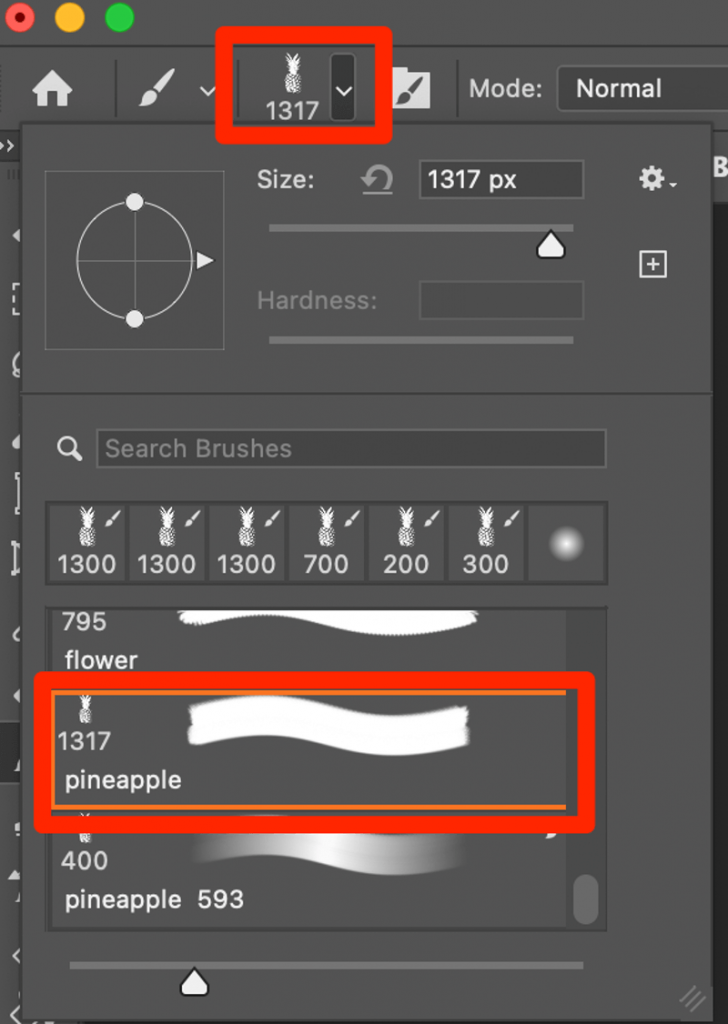
You can choose a color, change opacity, flow, and size as you prefer. Try them out!

FAQs
Here are more questions related to making custom brushes in Photoshop.
How to turn a logo into a brush in Photoshop?
If your logo is in png format, you’ll be turning the png image into a brush in Photoshop. So you can use the same method in this tutorial to make a brush out of the logo – open the image in Photoshop, select the logo, and choose Define Brush Preset.
If you have an .ai file of the logo, you can directly open or paste the logo in Photoshop, then select it and turn it into a custom brush.
How to change the brush settings in Photoshop?
You can open the Brush Settings panel from the overhead menu Window > Brush Settings. Then you can change the brush tip shape, size, orientation, hardness, etc from there.
How to save a brush in Photoshop?
When you create a new brush, it’s automatically saved on the Brushes panel. You don’t need to take extra actions to save the brush again.
Wrapping Up
There are several ways to make brushes from images by manipulating the image adjustments. The method I mentioned in this article is the easiest for complicated or simple images. You can use this method to convert a logo, or png image into a brush in Photoshop.
About June
