They say that two heads are better than one – sometimes that goes for images too! It isn’t always easy (or possible) to get everything you want in an image with one click of the shutter button. Merging photos together in Photoshop provides the answer to this conundrum.
Hey there! I’m Cara and I love getting creative with my photography. Sometimes I need to blend several photos together to get the effect I want, other times I have to merge them to create interesting effects.
Are you interested in learning to do the same? Then let’s dive in and learn how to merge two images in Photoshop!
Table of Contents
Why Merge Two Images Together?
There are a number of reasons why you might want to put two images together.
Perhaps you’re taking a group photo and someone blinked. Always take multiple photos and you can merge two or more images together so everyone has their eyes open in a single image.
Landscape and architectural photographers often use this trick as well. It’s hard to get even lighting in these types of images so they will take two (or more) images exposing different elements and then combine them.
You can also use this technique creatively to make double exposures or composite images.
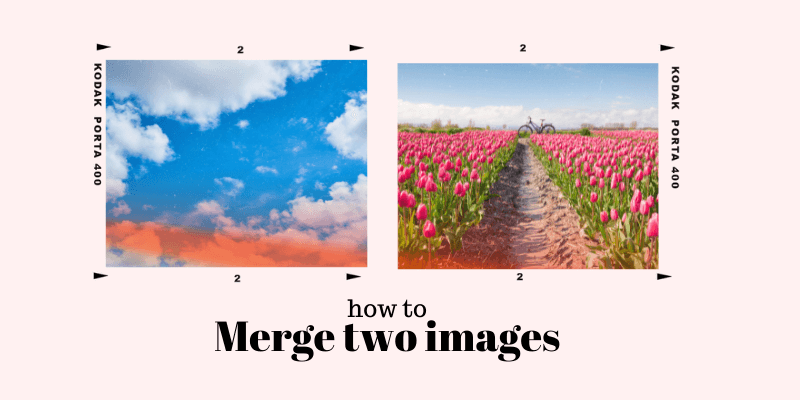
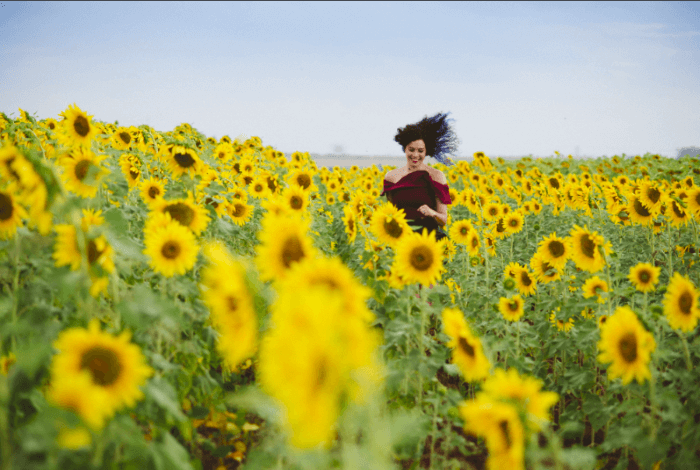
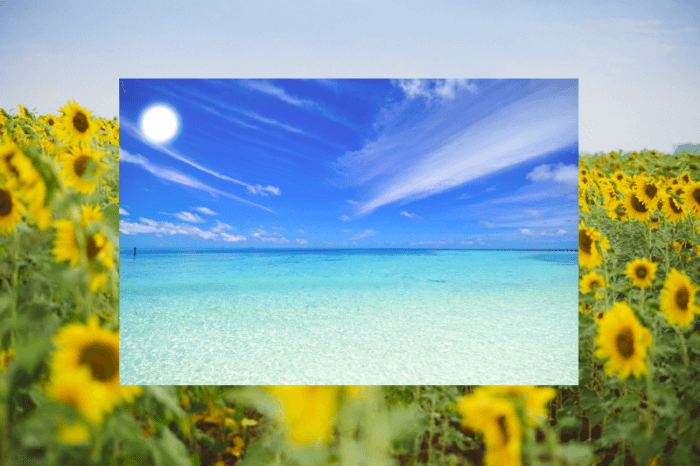
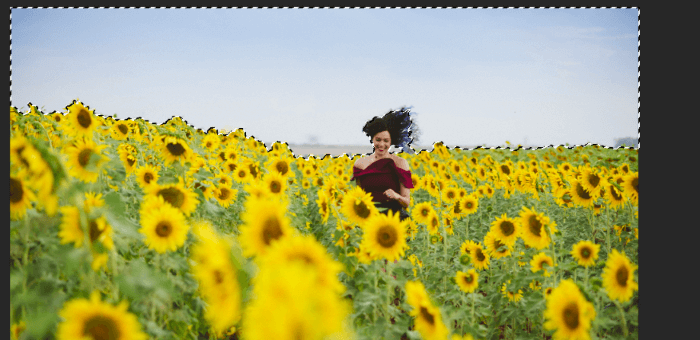
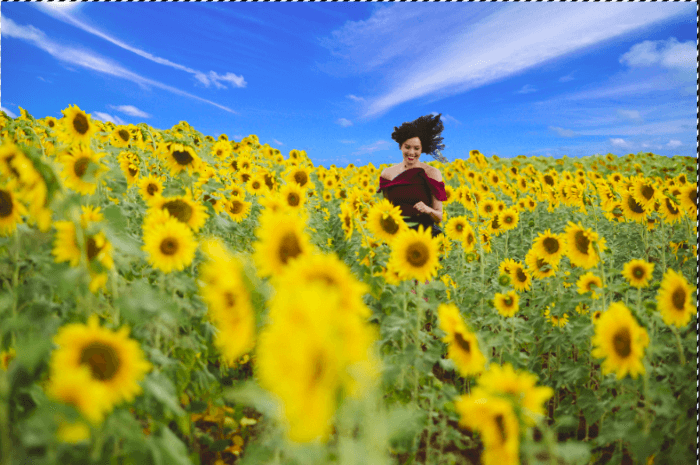
Today we’re going to work with two completely different images. This image of a happy woman running through a sunflower field is delightful, but the sky is bland.
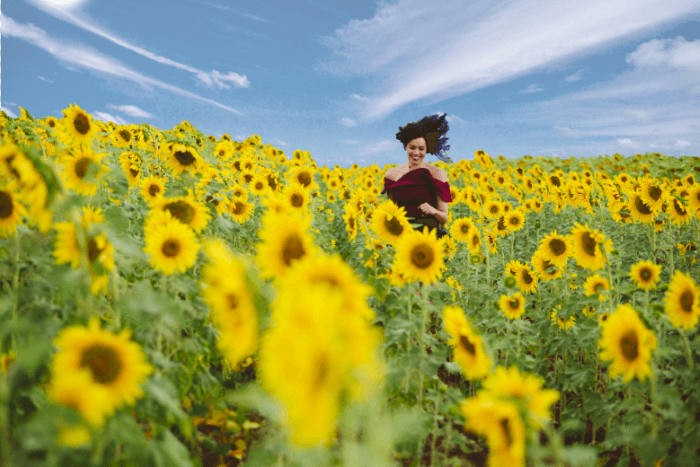
So we’re going to replace the sky with the one in this image.

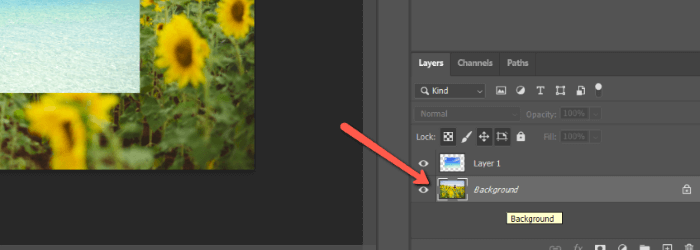
Step 1: Open Both Images in the Same Document
First, we need both images in the same document. There are a few ways you can do this. One is to open both images like normal. Then select one and copy and paste it on top of the other. Get detailed instructions for moving selections here.
Another way is to go to File in the menu bar. Hover over Scripts, then choose Load Files into Stack.
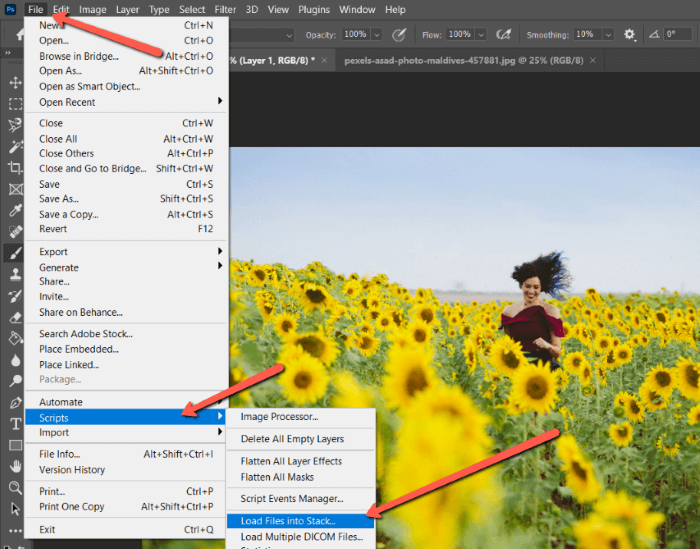
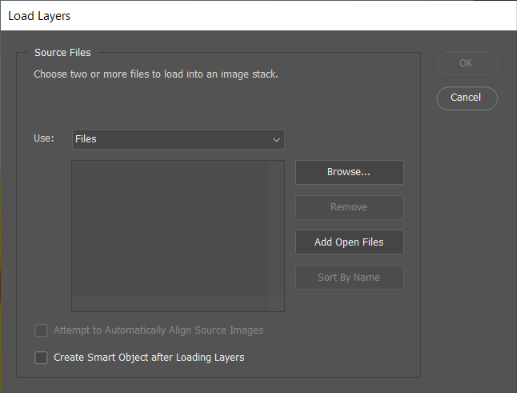
If you have both files open in Photoshop already you can hit Add Open Files and the program will put them in the same document. If not, hit Browse to find the images you want and hit OK when you’re ready.
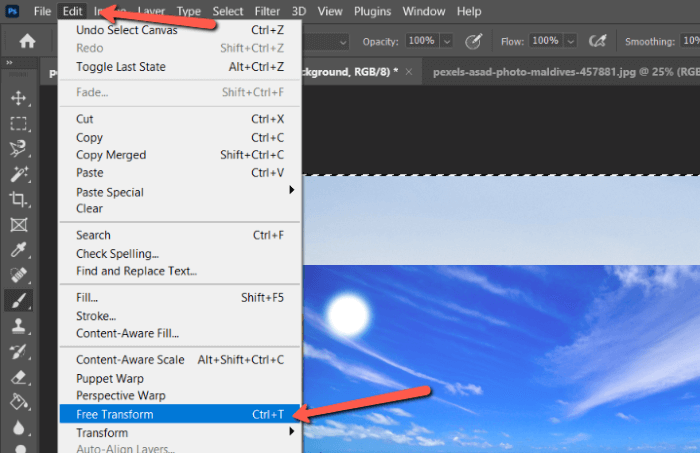
Step 2: Resize to Fit
Sometimes, the two images you want to merge will be of different sizes. The first step is to position and resize them. Generally, you want to make the bigger one smaller rather than the smaller one bigger. Enlarging images can easily lead to a noticeable quality loss.
To do this, make sure the image you want to resize is selected in the layers panel. Then hit Ctrl + A (Command + A) to select the image.
Now hit Ctrl + T (Command + T) to open the transform tool. Alternatively, go to Edit in the menu bar and select Free Transform from the menu.
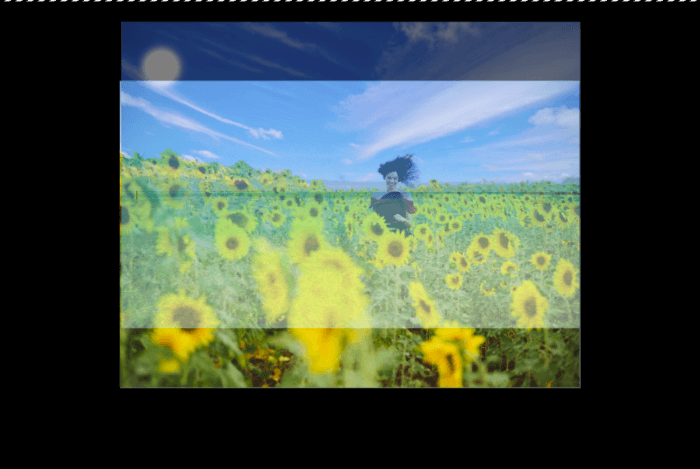
Handles will appear around the selected image. Click and drag to resize the image until you’re happy with its positioning. If necessary you can lower the opacity on the top image so you can better see what you are doing.
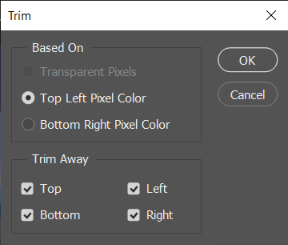
Trim away any extra canvas by going to Image in the menu bar and selecting Trim.
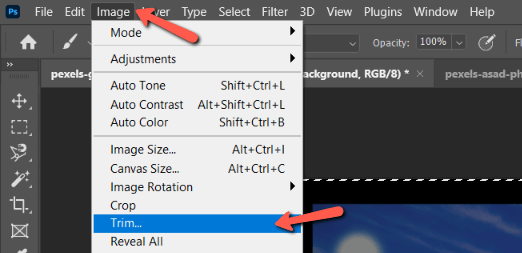
You can base the trim on transparent pixels if your canvas became transparent. If it’s a solid color, like mine, base it on either the Top-Left Pixel Color or the Bottom Right Pixel color.
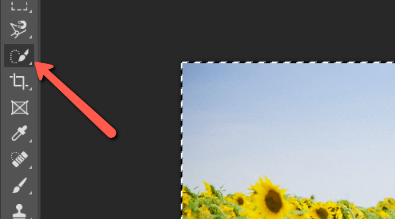
Step 3: Make a Selection
Next, you need to select either the part you want to keep or the part you want to get rid of. In my case, I rearranged the layers to put the sunflower picture on top (just click and drag on the layer) and I’m going to select the sky that I want to remove.
Select the Quick Selection Tool (or whatever tool works best for your image) and make your selection.
Step 4: Create a Layer Mask
Now hit the layer mask button at the bottom of the Layers panel.
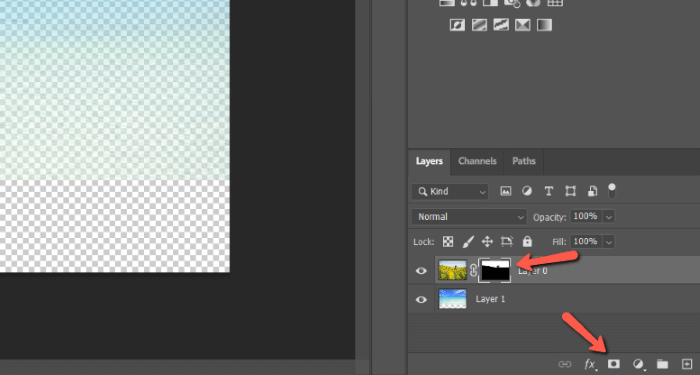
It will create a layer mask based on your selection. In this case, because I selected the part I wanted to remove, the layer mask deleted the wrong part of the image. To fix it, simply invert the mask by hitting Ctrl + I (Command + I) with the mask selected.
The blue is a bit strong in this case, so I toned it down by adjusting the lightness and saturation with a Hue/Saturation adjustment layer.
That’s it!
Now the sky looks just as happy as the woman and, to me, this image is much more striking.
Has this tutorial whetted your appetite to learn more tricks in Photoshop? Check out more of our articles, such as how to overlay images to learn more!
About Cara Koch