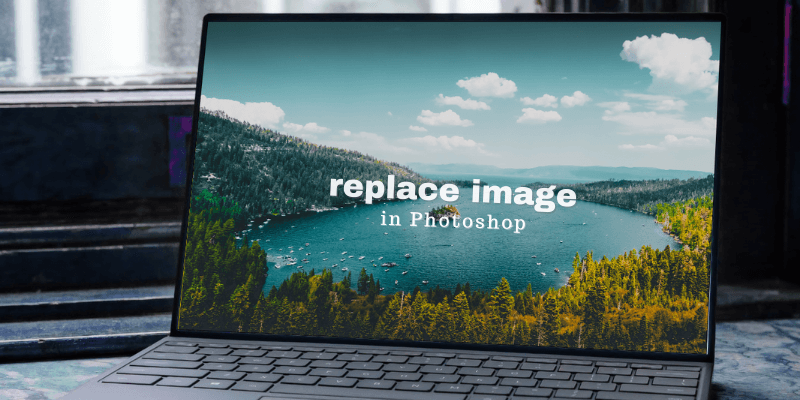
Want to showcase your web design on screens to see how it looks? Sure! Find a nice device background and replace the screen image of your own. But before getting to this method. I want to share with you an easier option to replace images in Photoshop.
In this tutorial, you’ll learn two simple methods to replace or change an image in Photoshop.
Let’s dive right in!
Note: the screenshots are taken from Adobe Photoshop CC Mac version. Windows or other versions can look different.
Method 1: Replace Contents
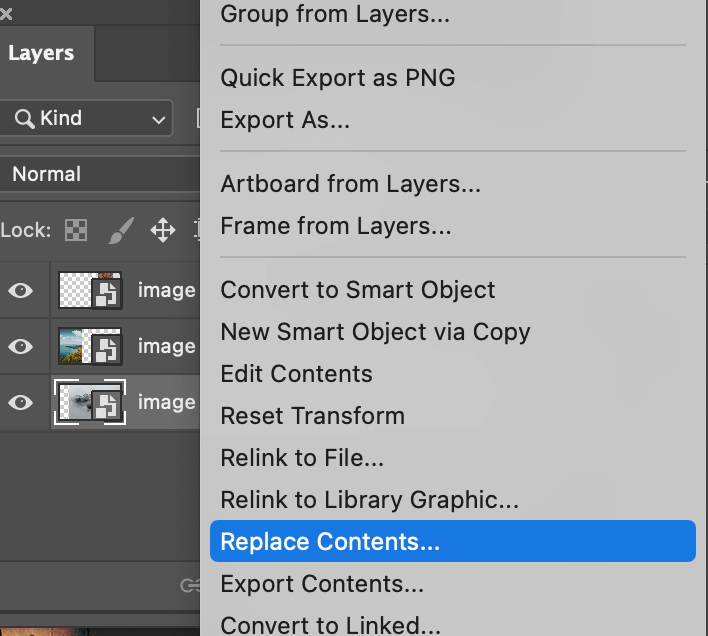
If you want to simply replace an image in a layout without modifying its shape, or perspective, there’s a really simple way to do it. For example, I want to replace the image in the middle.

Basically, all you need to do is select the image you want to replace, right-click on its layer, and select Replace Contents.
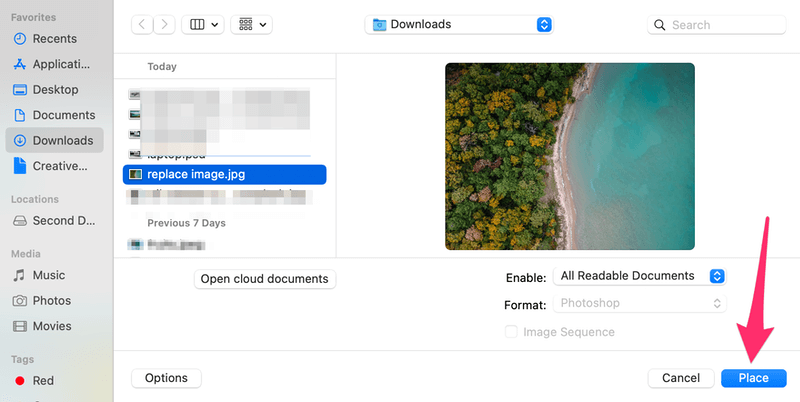
Select the image from your device that you want to replace, and click Place.
Your image 1 should be replaced with the new image you chose. You can use the Free Transform tool to resize the image to fit in your canvas if the new image is too large or small.

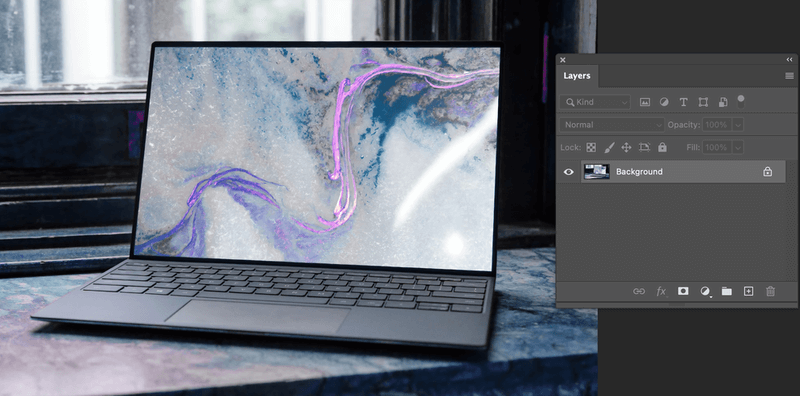
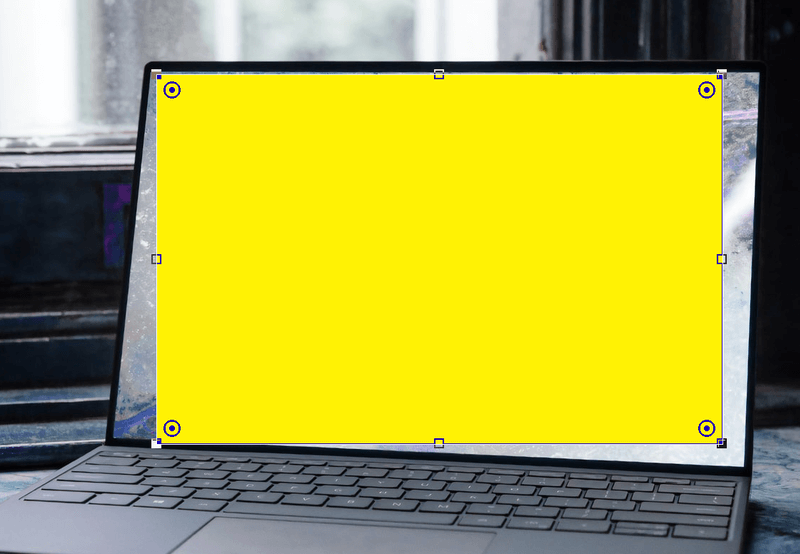
Pretty easy, right? Well, life isn’t always easy, sometimes you’ll need to do some extra steps to get what you want. So what if you want to replace the image within a perspective object? For example, I want to change the screen saver image for this laptop.

Method 2: Replacing Screen Image
This is a common method that graphic designers use to create mockups.
Step 1: Open the background image in Photoshop.
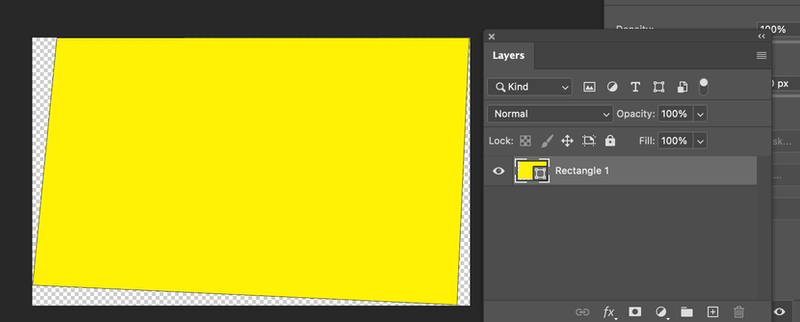
Step 2: Select the Rectangle Tool from the toolbar and draw a rectangle on the canvas. It doesn’t have to be exactly the same size as the laptop screen.
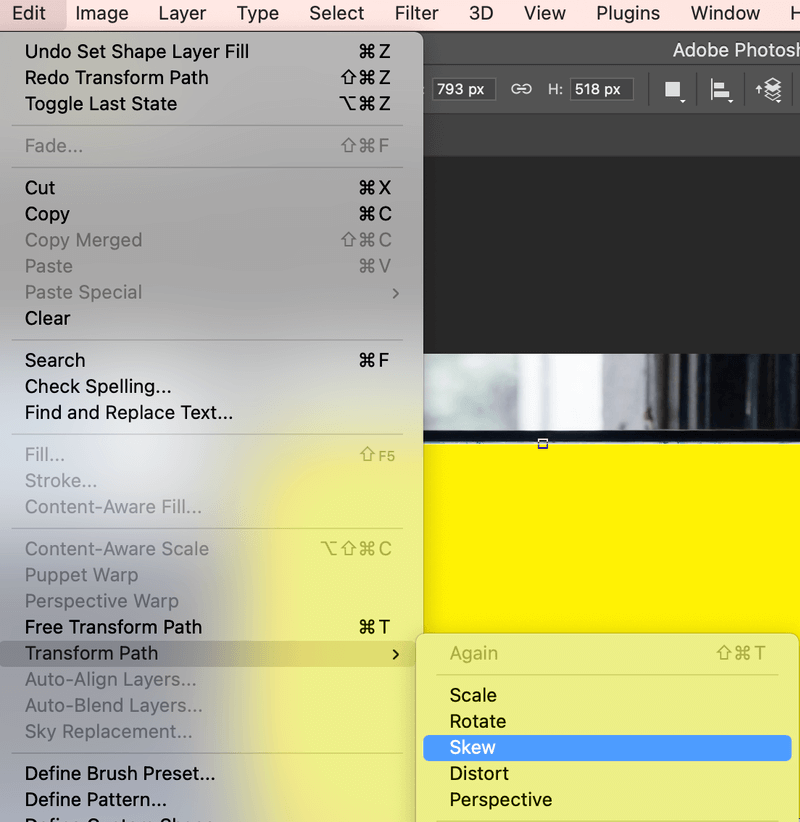
Step 3: Go to the top menu and select Edit > Transform Path > Skew. Or you can hit the keyboard shortcut Command (Ctrl for Windows users) + T, right-click on the transform box, and select Skew.
Drag the four corners to meet the laptop screen corners. You can lower the opacity to see and adjust.

Once you’re done adjusting the corners and position, bring the opacity back to 100%.
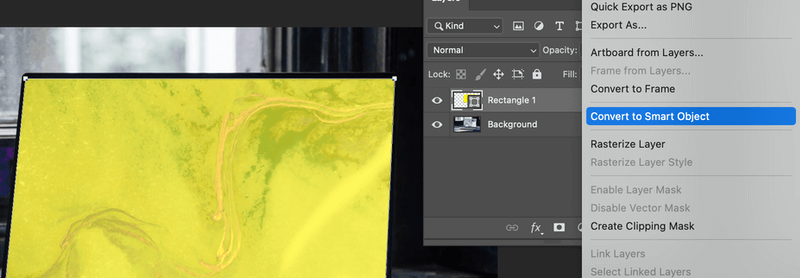
Step 4: Right-click on the (rectangle) shape layer and select Convert to Smart Object.
Now you should see an Edit Contents option in the Properties window.
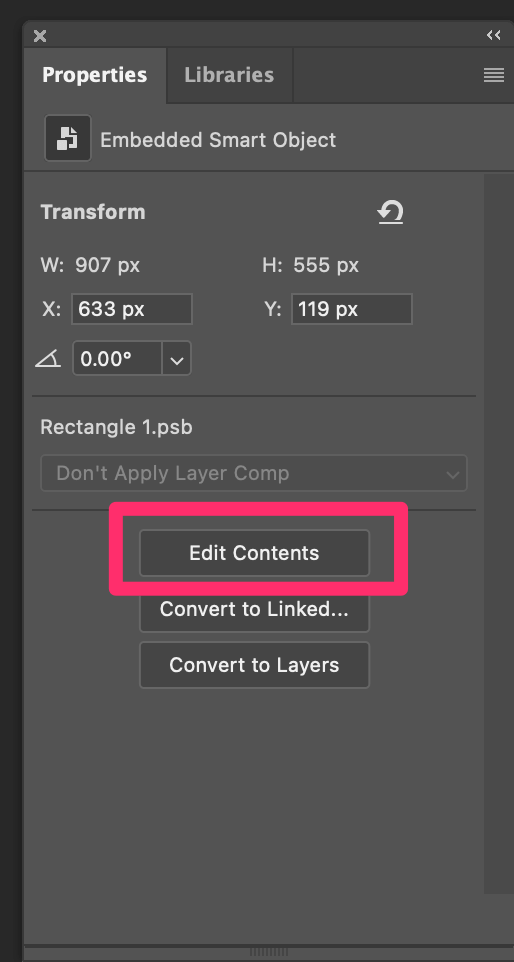
If your version doesn’t show it, you can directly right-click on the shape layer and select Edit Contents.
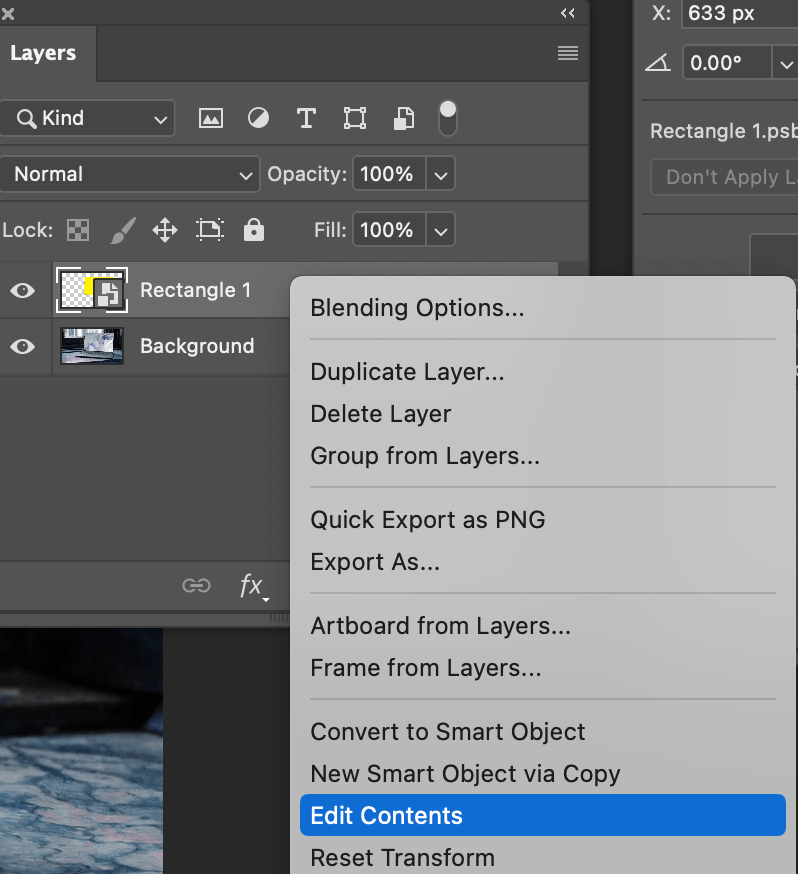
After you click on the Edit Contents options, the smart object (rectangle) should open in a new document window.
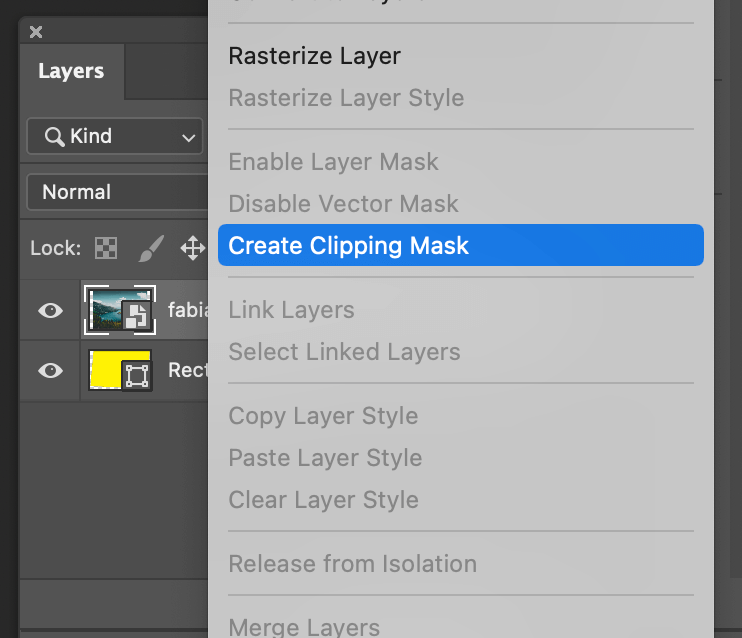
Step 5: Place the photo you want to replace in this document. Right-click on the image layer and choose Create Clipping Mask.
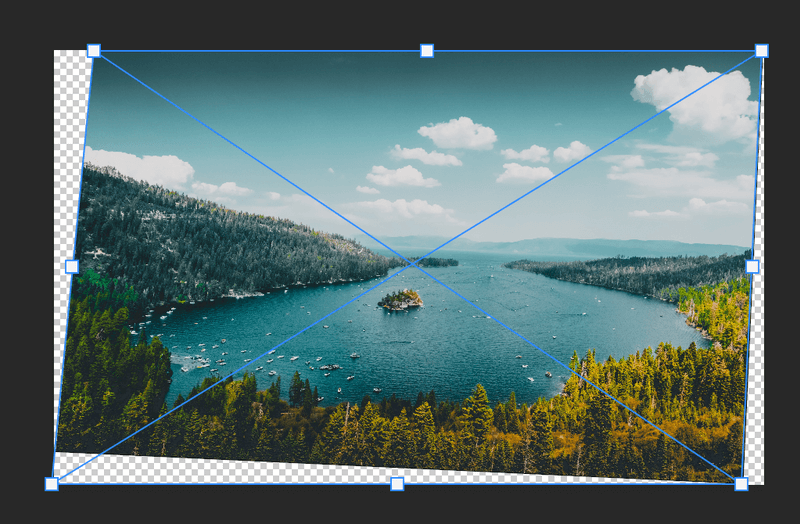
Bring out the Transform tool and skew the image to the smart object.
Step 6: Hit Command (Ctrl for Windows) + S to save the image. Now if you go back to the original document, the one with a laptop background, you will see that the screen has been replaced.
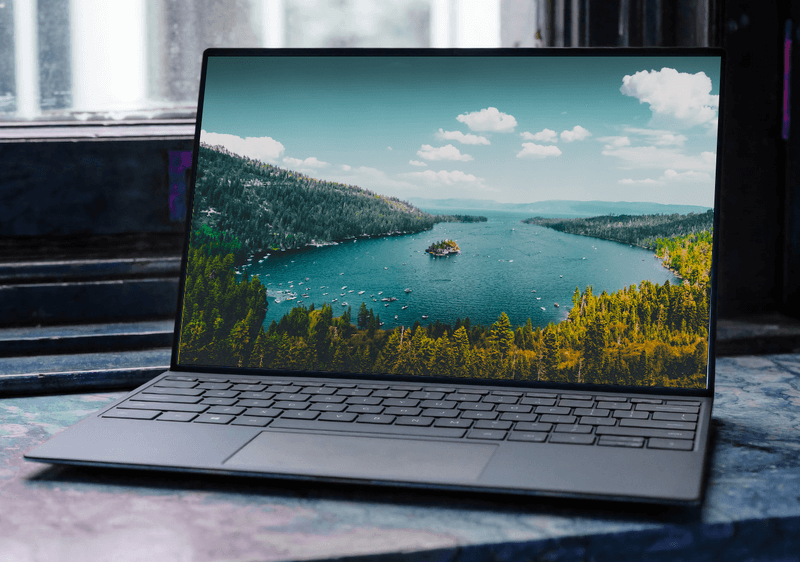
You can use this method to add images to your project mockups on screen.
Conclusion
Method 1 is pretty convenient and easy, but I’m guessing you will be using Method 2 much more often. The key to method 2 is to manipulate the smart object, and don’t forget to make the clipping mask.
About June
Fiona Mackenzie
I have a template and its literally impossible to change the image in it… I don’t know how and these methods aren’t working for me. Can you tell me how to change post 5 in this file (its a free download)?
https://www.freepik.com/free-psd/instagram-posts-collection-zero-waste-lifestyle_11401043.htm
June
Hi Fiona,
You can click on the dropdown menu from the “Image” folder, delete that image and add your own image.