
In the future, nobody’s going to go to work in person anymore, right? We’ll all just send holographic images of ourselves when we want to make presentations.
Hello, I’m Cara! I’m back with another super cool tutorial. Today we’re going to learn how to bring the future to now – in Photoshop at least. Let’s look at how to make holographic images in Photoshop!
Note: I use the Windows version of Photoshop. If you are using a Mac, the workspace will look slightly different from the screenshots displayed here.
Table of Contents
Step 1: Choose and Prep Your Images
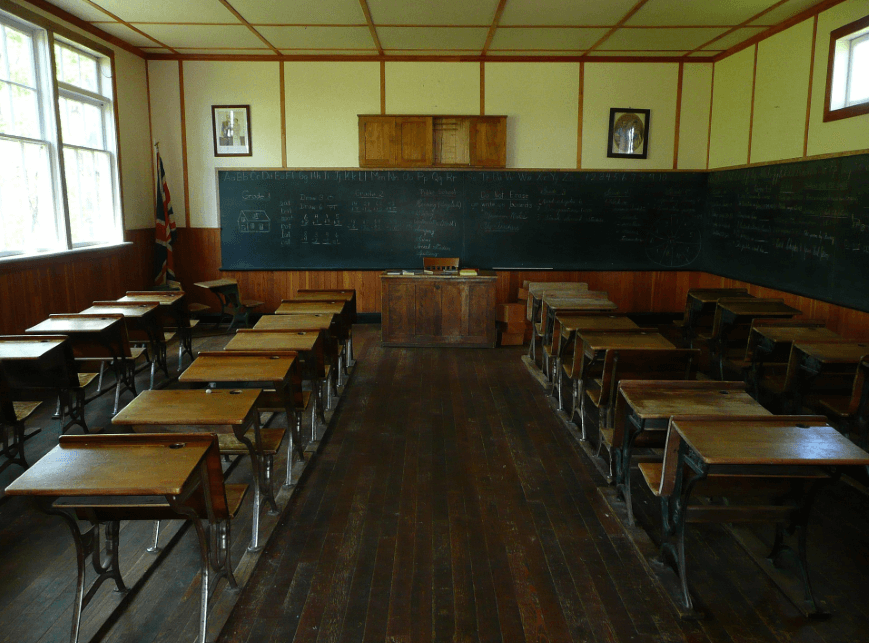
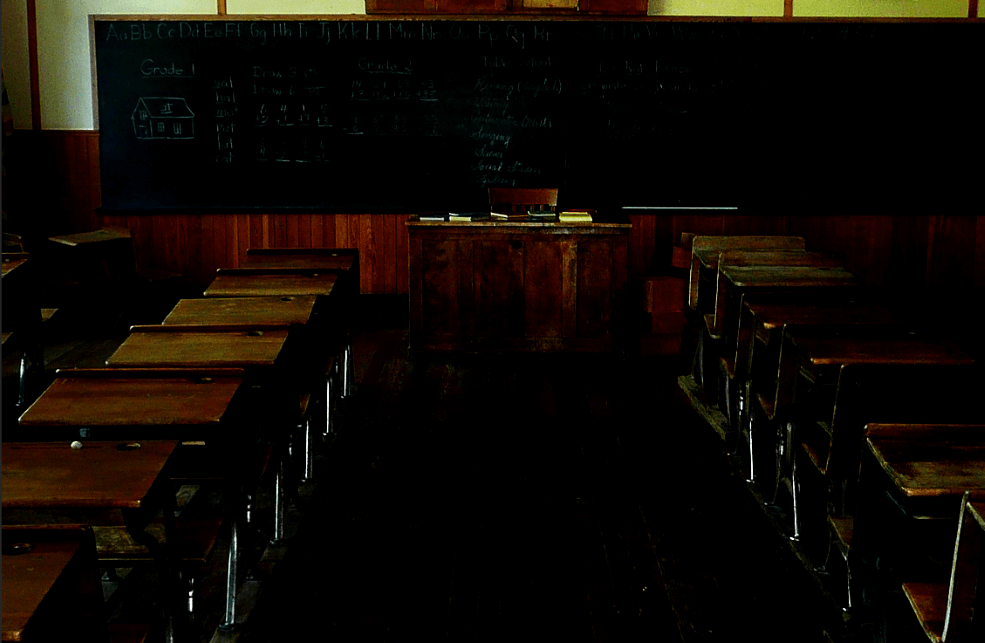
For this example, we’re going to put a holographic teacher into this old-fashioned classroom image I got from Pixabay.com.
Then we’ll use this stately lady from Pexels.com as our holographic professor.

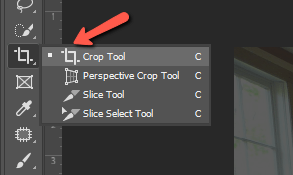
Holographic projections work better in a dark room so let’s prep our classroom image to make it darker. First, I’m going to press C or choose the Crop tool from the toolbar on the left to crop the image.
Then let’s cut off those windows because we don’t need those bright spots in the image. I want to get a little closer to the front of the classroom anyway.

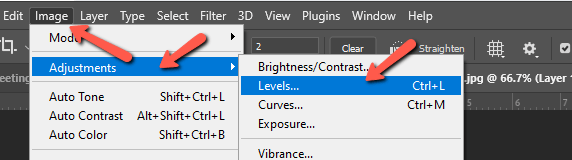
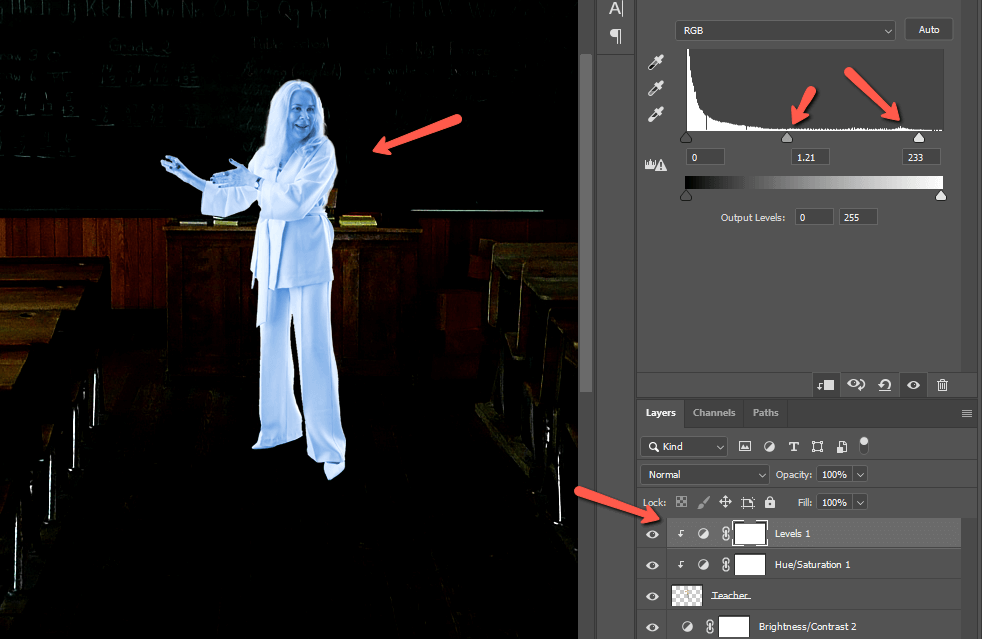
Create a copy of the background layer by pressing Ctrl + J or Command + J. Then press Ctrl + L or Command + L to open the Levels feature. Or to go to Image in the menu bar, Adjustments, then choose Levels.
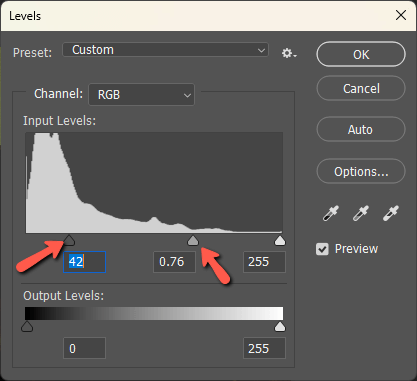
In the box that opens, let’s darken the image by bringing up the Shadows and Midpoint sliders.
You can also use a Brightness/Contrast adjustment layer to bring down the brightness if needed.
Here’s my darkened image after cropping in a bit tighter as well.
Step 2: Cut Out the Subject
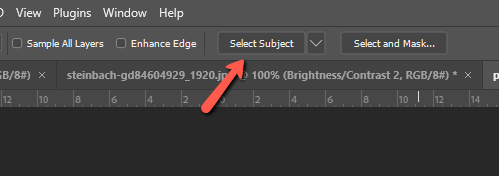
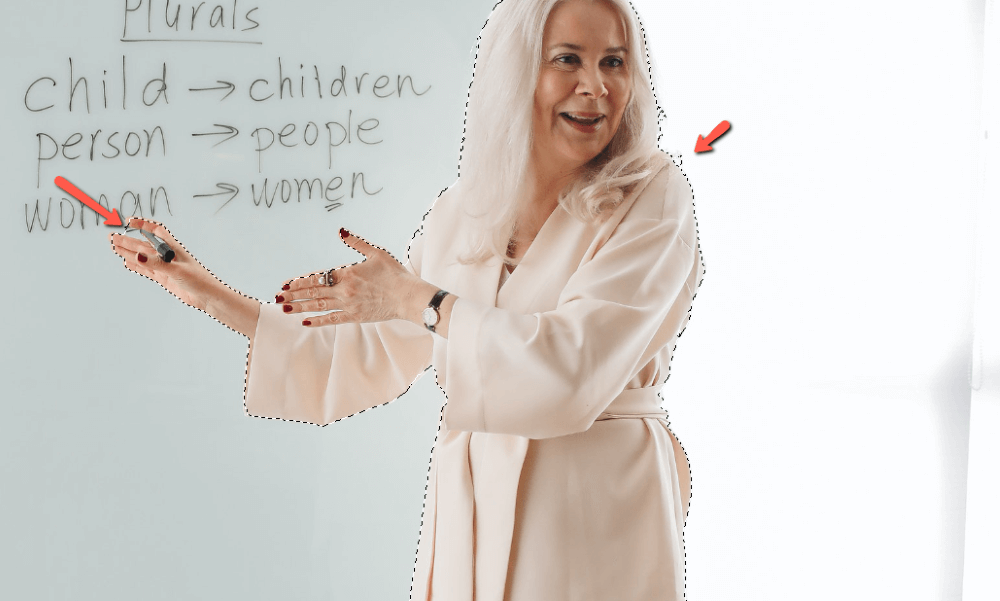
Moving on to our holographic professor. First, we need to cut her out of the image she’s currently in. Choose a selection tool from the toolbar and press Select Subject in the Options bar.
Photoshop will then make an automatic selection. You’ll usually have to clean it up a touch, but it takes out a lot of the work.
Photoshop actually did quite well. I’ll clean up these little spots with my preferred selection tool. Check out how to use selection tools if needed.
Once you’re happy with your selection, press Ctrl + C or Command + C to copy it. Then move back to the classroom image and press Ctrl + V or Command + V to paste the selection on the classroom image layer.
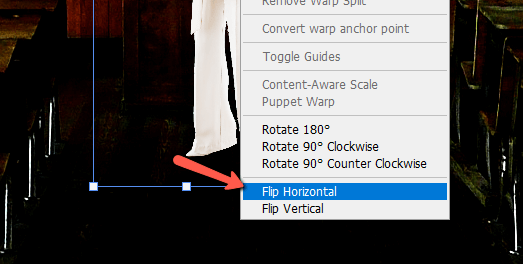
Use Ctrl + T or Command + T to activate the Transform tool and resize/reposition your subject. You can also flip your subject if needed by right-clicking and choosing Flip Horizontal.
Here she is in position.
Step 3: Turn the Subject Blue
Everybody knows from Star Wars, Star Trek, and whatever other Star ____ franchise that holograms are blue, so let’s change the color.
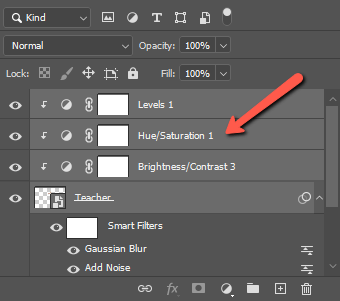
Click the Adjustment Layer icon at the bottom of the Layers panel and choose Hue/Saturation.
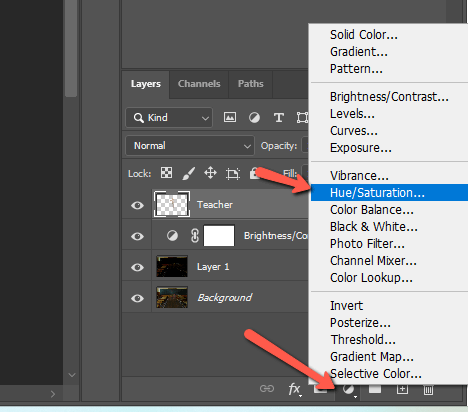
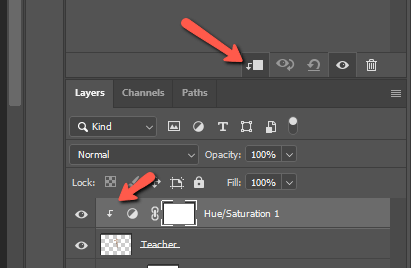
If the subject layer was selected, this adjustment layer will appear above it. Click the Clipping Mask button to clip it so the color will only affect the subject.
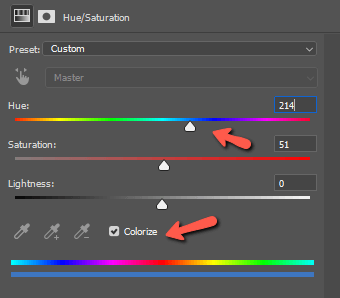
Check the Colorize box. Then adjust the hue slider until you get the blue tone you’re looking for.
From the same Adjustment layer icon at the bottom of the Layers panel, choose a Levels adjustment layer. Play with the highlights and shadows to give her a slightly softer, glowing look. We’ll add more to this later so don’t worry that it doesn’t get too glowy.
Step 4: Add Noise
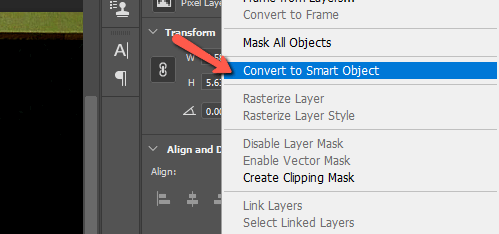
Holograms aren’t perfect yet so the image comes through somewhat crackly. To simulate this look, let’s add some noise. Select the subject layer. If you want to be able to make adjustments to your filters later (always a good choice) let’s turn it into a Smart Object.
Right-click the subject layer and choose Convert to Smart Object from the menu.
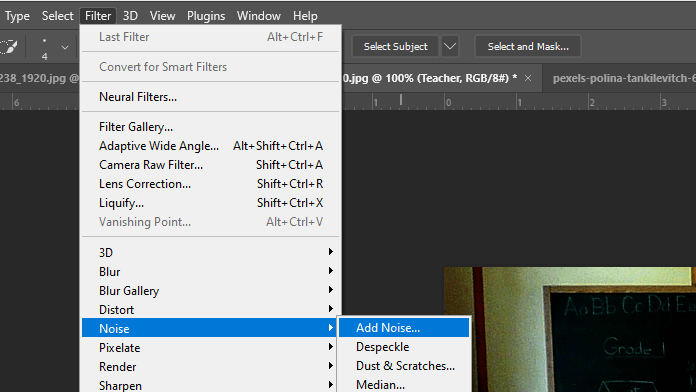
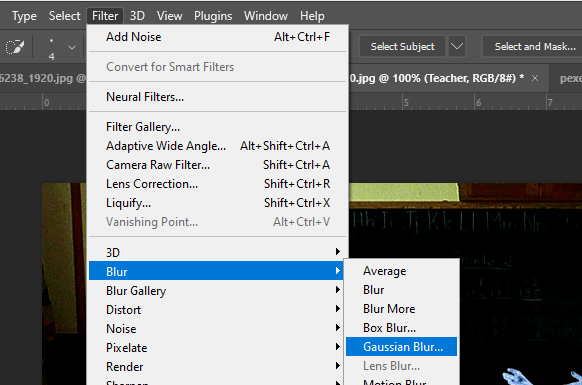
Then go to Filter in the menu bar and choose Noise, then Add Noise.
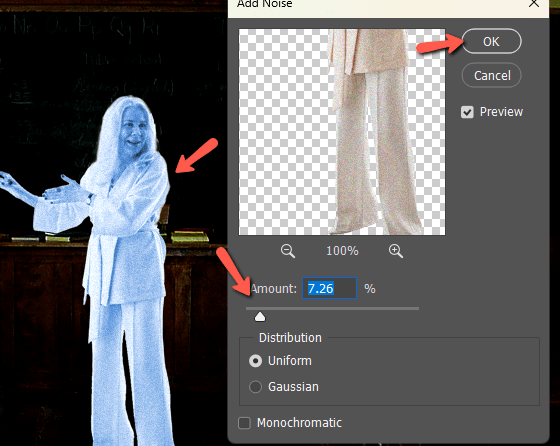
Choose the Amount you want with the slider. Don’t go too crazy, this effect should be subtle. Then press OK when ready.
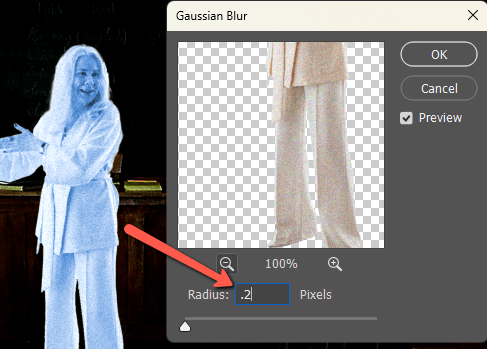
Now, let’s blur it to soften the effect. Go to Filter, hover over Blur, and choose Gaussian Blur.
Choose a Radius that works for your image. Mine is pretty small because my image is so small. (Remember I cropped it in a lot at the beginning).
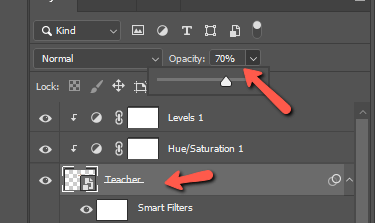
Step 5: Lower the Subject’s Opacity
Holographic projections aren’t normally super solid. So we should be able to see some of the backgrounds through our subject.
To do that, lower the opacity of the subject layer.
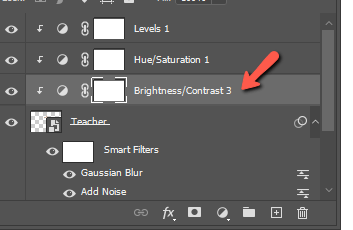
Reducing the opacity darkens my subject a little, which I don’t want. To bring back the brightness, add a Brightness/Contrast layer, clip it to the subject, and bring up the brightness.
Step 6: Intensify the Glow
By virtue of being brighter than the surrounding image, my subject already looks a little glowy. But we need to intensify this effect and really make it look like she’s a light source.
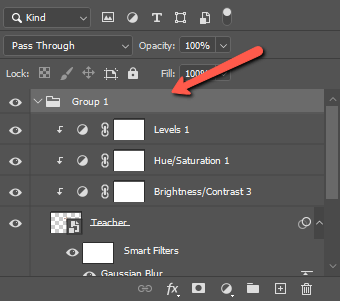
Let’s bring the subject and the layers affecting only the subject into one group. You can select multiple layers by holding Shift while clicking on the first and last layers in a row.
Press Ctrl + G or Command + G to group them together.
Duplicate the subject group by selecting the group and hitting Ctrl + J or Command + J on the keyboard.
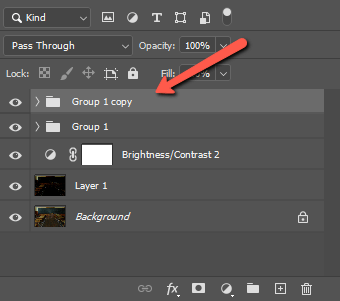
Open the copied group. If you turned the subject into a smart object, the copied subject will also be a smart object. We need to rasterize it in order to proceed. Right-click on the subject layer and choose Rasterize Layer from the menu.
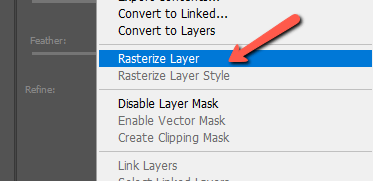
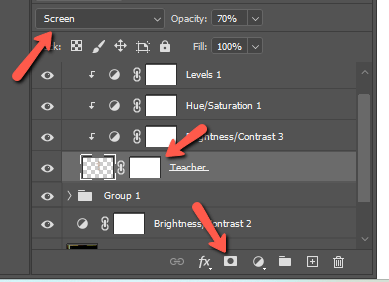
Press the Layer Mask icon at the bottom of the Layers panel to add a layer mask. Near the top of the layers panel, open the dropdown menu to change the blending mode from Normal to Screen.
Now, add a Gaussian blur filter as we did earlier. Start with a low value. Then add a bunch of Gaussian blur filters one on top of the other, slowly bringing up the Radius value each time. I did it like 7 times to end up with this.
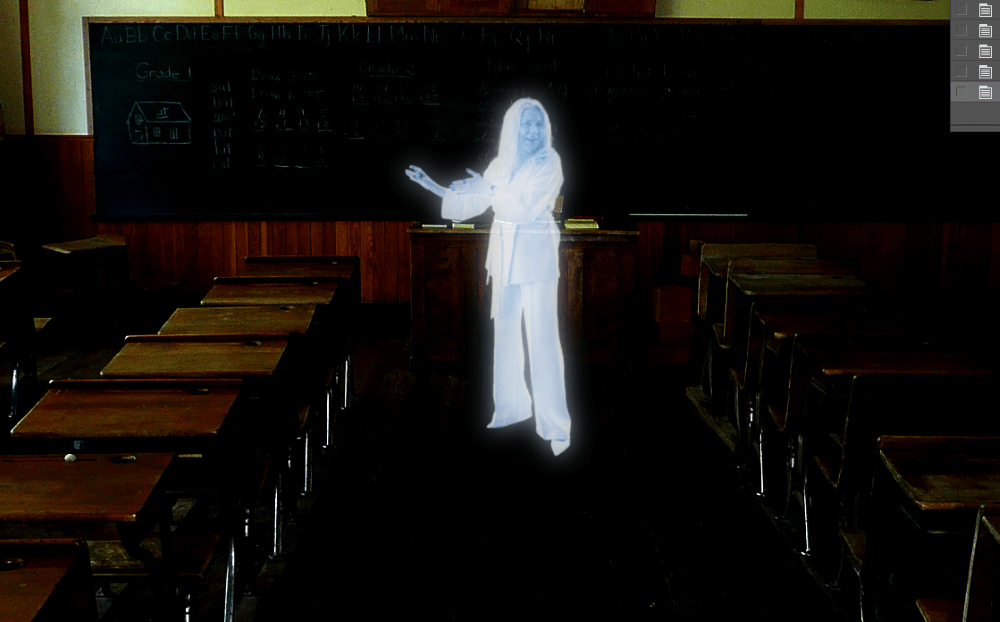
I think she’s a little too bright now so I’m going to go back to my Brightness/Contrast layer in the first subject group and bring the brightness down.
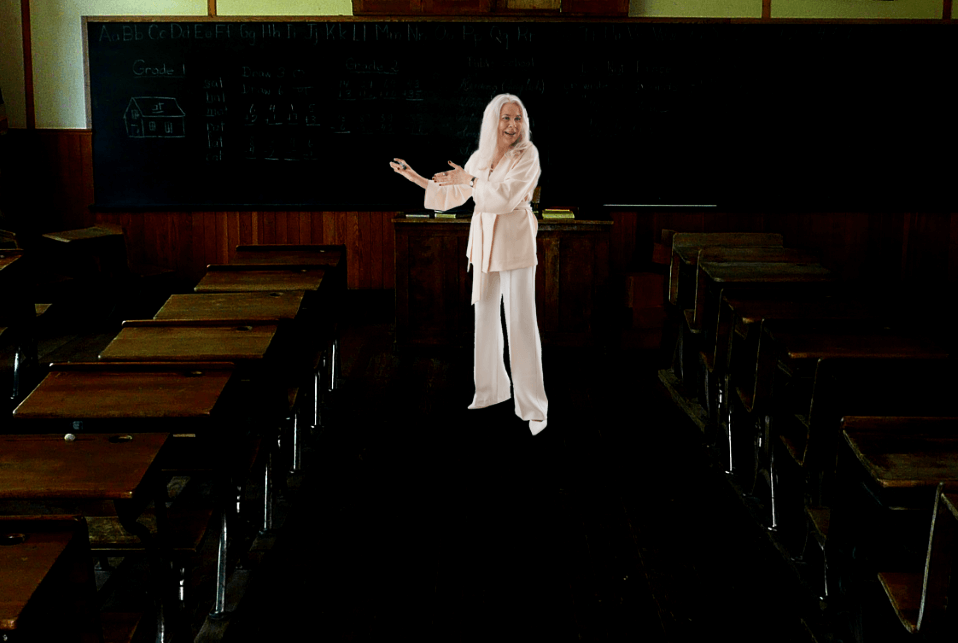
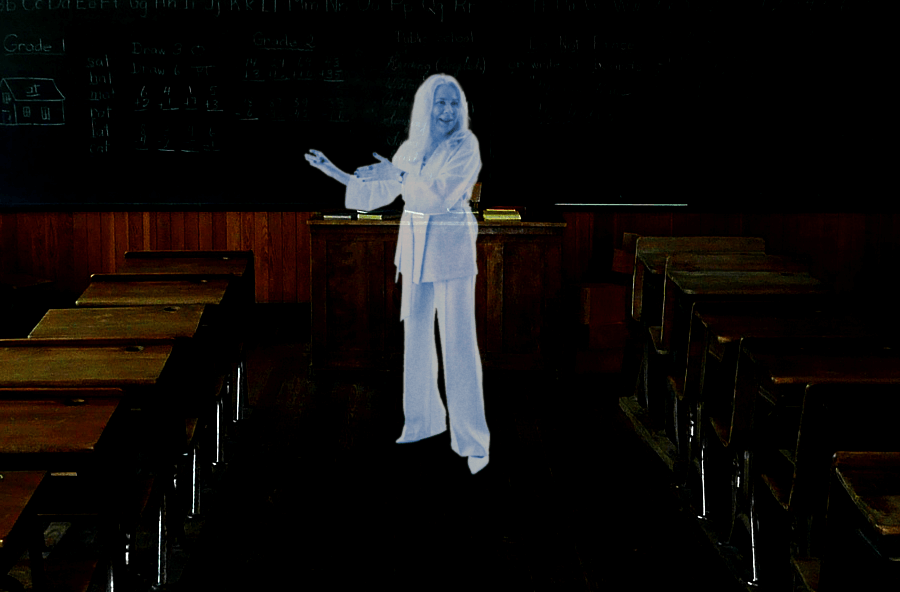
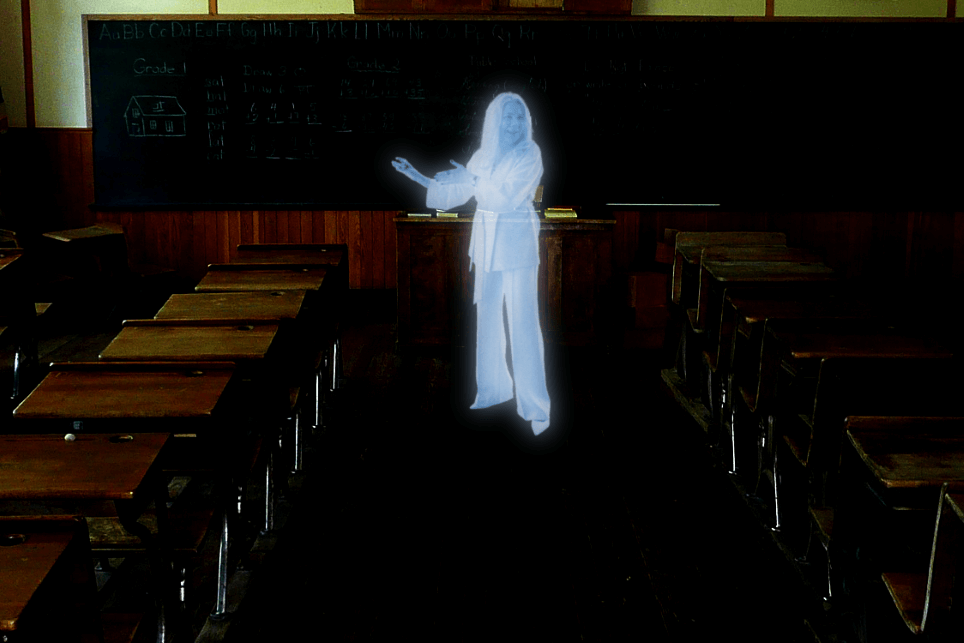
And here’s my final hologram!
Pay attention to what your teacher is saying, it’s important! Curious about other cool effects you can create in Photoshop? Check out how to add fire to images here!
About Cara Koch