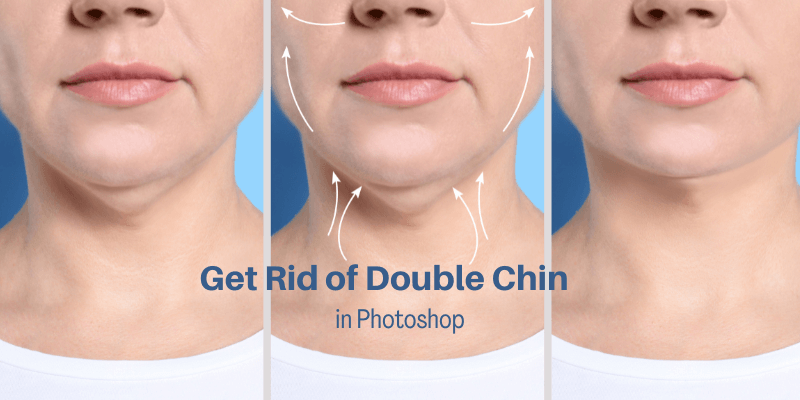
Frustrated by a double chin? You’re not the only one, I promise! The cool thing is that Photoshop makes it possible to remove those annoying double chins in photos.
Hey there! I’m Cara and in my work as a professional photographer, I try not to change people too much in Photoshop. I like to celebrate individuals as they are. However, sometimes a weird position will make undesirable features like double chins pop out.
For the moment when this happens to you, let me show you how to remove double chin in Photoshop!
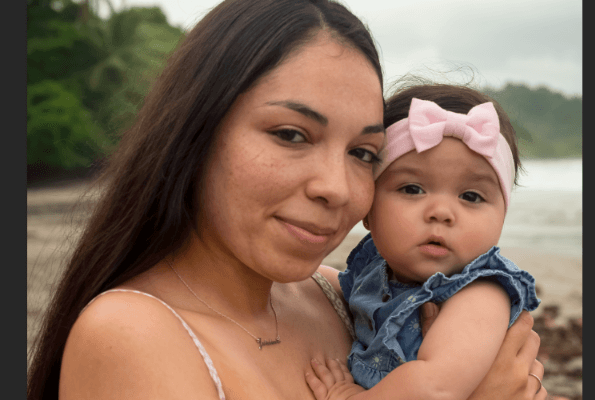
This image is from a recent family photoshoot I did. She doesn’t really have a double chin but the way her head is positioned in this image made her jowl look a little thick. So let’s fix it!
Note: the screenshots and tutorial below are based on the Windows version of Adobe Photoshop CC, other versions might look different.

Table of Contents
Step 1: Sculpt the Jaw with the Pen Tool
First, we must define how we want the jaw to look when we’re finished. Basically, you get to be the plastic surgeon here. Remember, you want to go for as natural a look as possible.
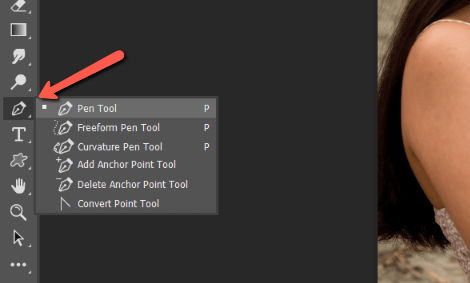
To do this, select the pen tool from the toolbar on the left or press P on the keyboard.
Carefully, trace around the bottom of the jaw, defining the new edge that you want. New to the pen tool? Check out this pen tool tutorial to learn how it works.
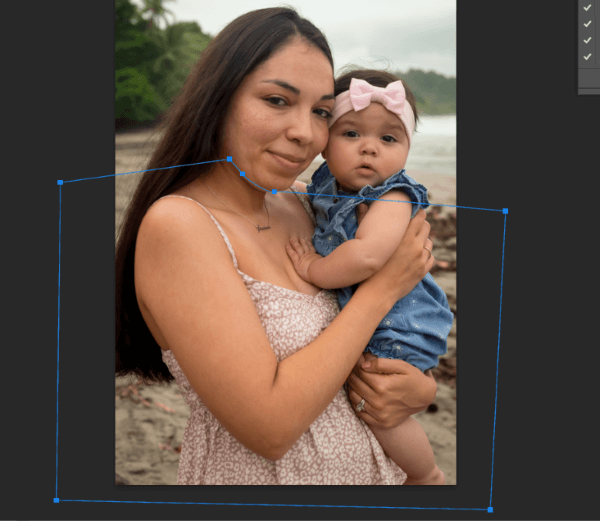
You only need to trace the bottom of the jaw and then finish the path with a few rough points outside the image.
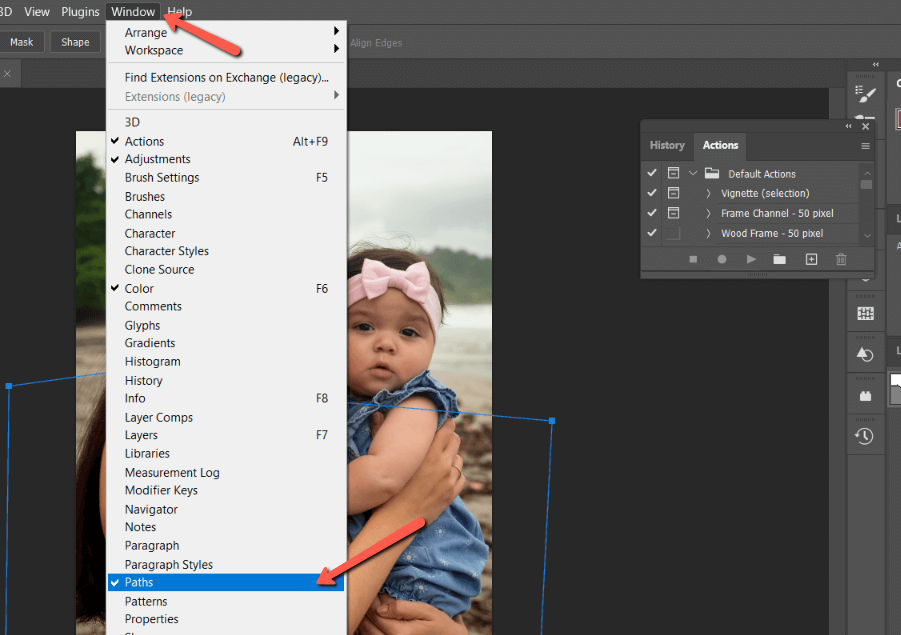
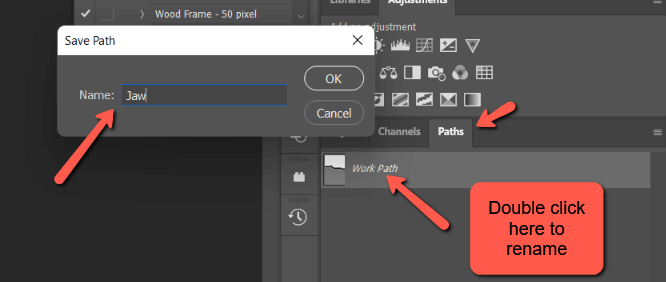
In case you lose it, name your path to make it easy to find. Click the Path tab in the layers panel. If it isn’t there, choose Paths from the Window menu.
Double-click on the path name. Type the new name in the window that opens.
Step 2: Prepare the Image
Go back to the Layers tab to prepare the image for modification. We’re going to use the liquify tool to push the chin in where it should be.
However, if we just start liquifying without preparing, other aspects of the image will get out of whack. That’s why we need a selection to anchor the parts we don’t want to move.
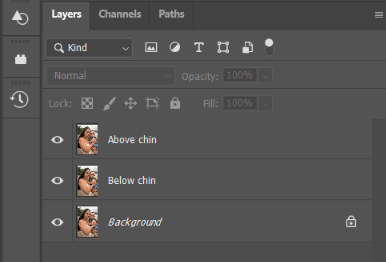
So make two copies of your image by pressing Ctrl + J or Command + J two times. Name one Above Chin and the other Below Chin or whatever works to keep them straight.
Step 3: Make a Selection
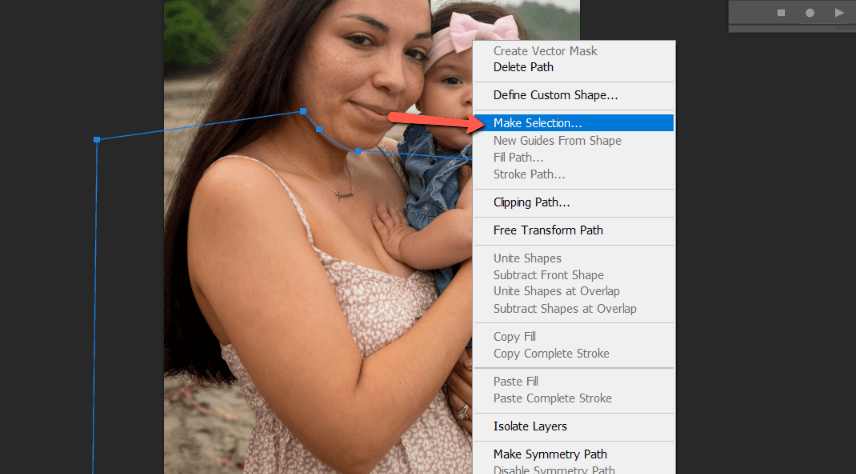
When using the Pen Tool, we draw a path. That’s great but at this point, we need a selection. To transform the path to a selection, right-click anywhere on your project. Choose Make Selection from the drop-down menu.
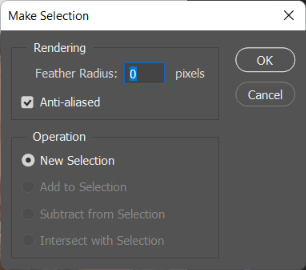
In the box that opens, choose a Feather Radius of 0 pixels and hit OK.
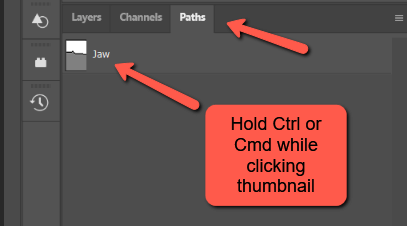
What happens if you lose the path? Do you have to start over? Nope! Simply go to the Paths tab. Your saved path will be there. To instantly turn it into a selection, hold Ctrl or Command while clicking on the path’s thumbnail to create a selection.
Step 4: Create Masks and Prepare to Liquify
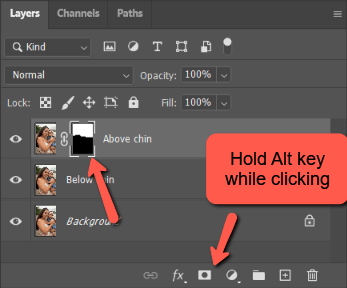
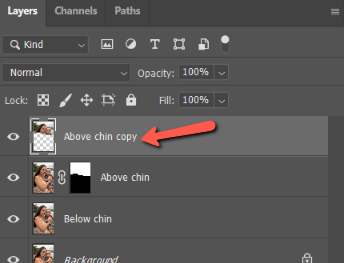
We’ll use masks to isolate the above chin area from the below chin area. Back in the Layers panel, choose the layer you named Above Chin.
We want to keep the above chin area intact, which means we actually want to mask off the area below the chin. We’ll need an opposite mask to do this so hold the Alt key while clicking the mask button at the bottom of the Layers panel.
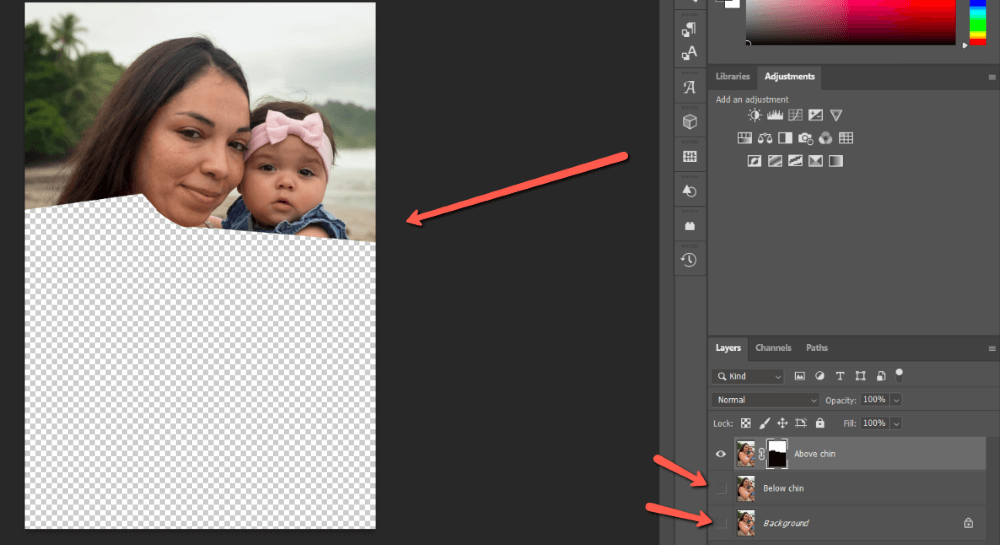
Remember, black conceals and white reveals so the lower portion of the image is behind the mask. You can turn off the visibility on the two lower layers by clicking the eye icon on the left to check the image. You should only see the top portion of the image.
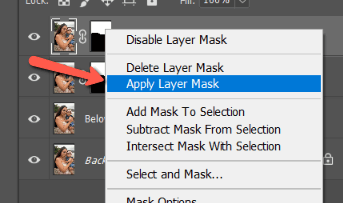
As we move things around, we’ll want to see an original chin to compare. To make this available, copy your above chin layer and layer mask by pressing Ctrl + J or Command + J.
Right-click on the copied layer and choose Apply Layer Mask otherwise, we won’t see the chin with the layer mask active when we come to compare.
It should end up like this.
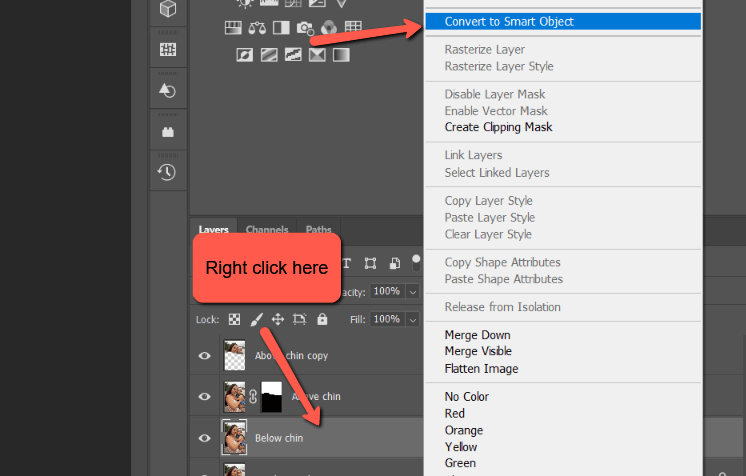
We should also turn the Below Chin layer into a smart object. This is the layer we’ll be affecting and turning it into a smart object allows us to come back and edit the filters later.
Right-click on the Below Chin layer and choose Convert to Smart Object.
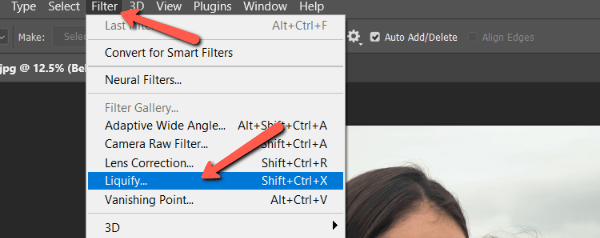
Step 5: Liquify
Select the below chin layer and go to Filter in the menu bar. Choose Liquify from the menu.
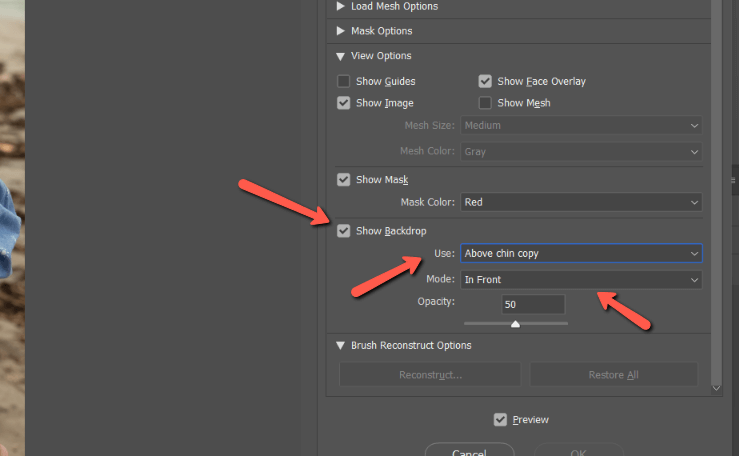
When the tool opens, let’s make sure we have some settings correct. The Show Backdrop box should be checked and in the Use box, select the Above Chin copy. Choose In Front for the mode.
This keeps the unaltered above chin copy in front so we can see how the final effect will look in real time.
Choose the Forward Warp Tool as your weapon of choice.
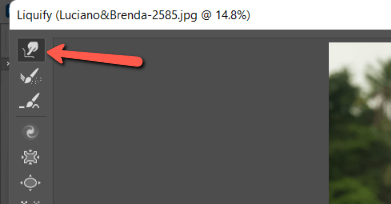
And bring down the Pressure on the Brush Tool Options so the changes aren’t too drastic.
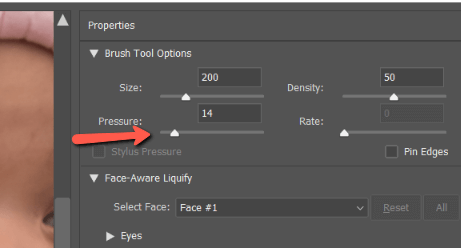
Now push the sagging chin area up with the brush.
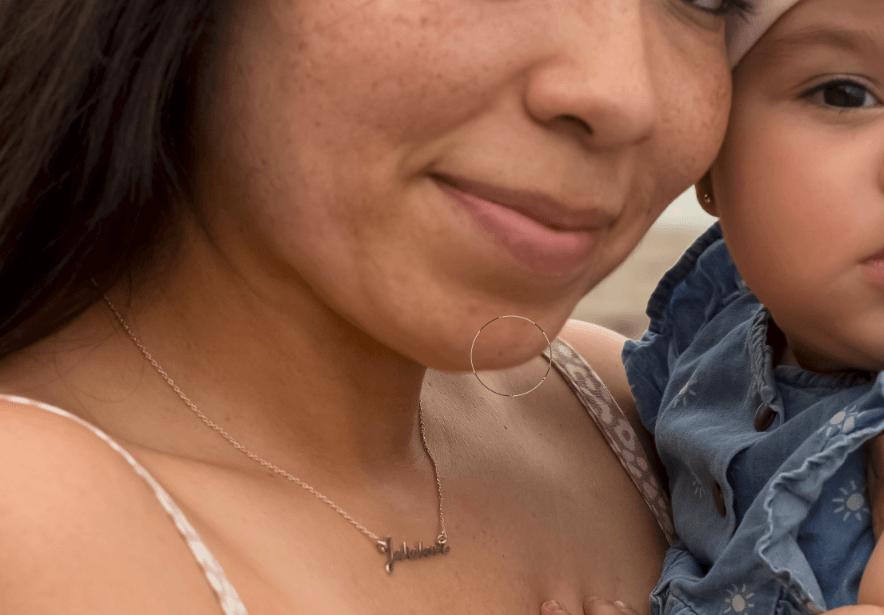
It’s like magic! Here’s the before to compare.

Step 6: Refine
The edges where you use the liquefy tool will usually look too sharp in comparison to the natural edge of the jawline. So let’s use the Blur Tool to soften the edges.
We don’t need that top above chin copy anymore, so let’s delete that. Select the mask on the original Above chin layer.

Choose the Blur Tool from the toolbar.
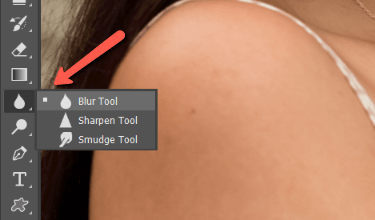
You can set the Strength in the Options bar at about 50%.
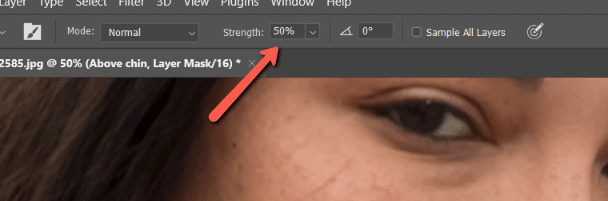
Then, paint over the sharp edges until they blend naturally with the rest of the jawline.
In some cases, you might also need a shadow if your liquifying action removed too much of the natural shadow. I don’t really need it in the image, but it’s good to know so I’ll show you how to do it.
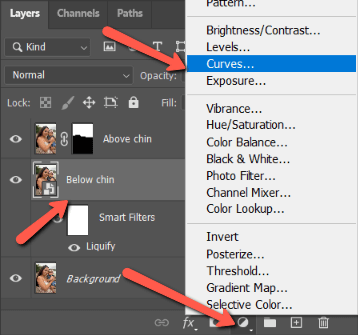
Select the Below chin layer to add an adjustment layer above it. Click the icon that looks like a half-filled circle at the bottom of the Layers panel and choose Curves from the menu.
Grab the midpoint of the curves line and drag it down to create a shadow on the entire below chin section.
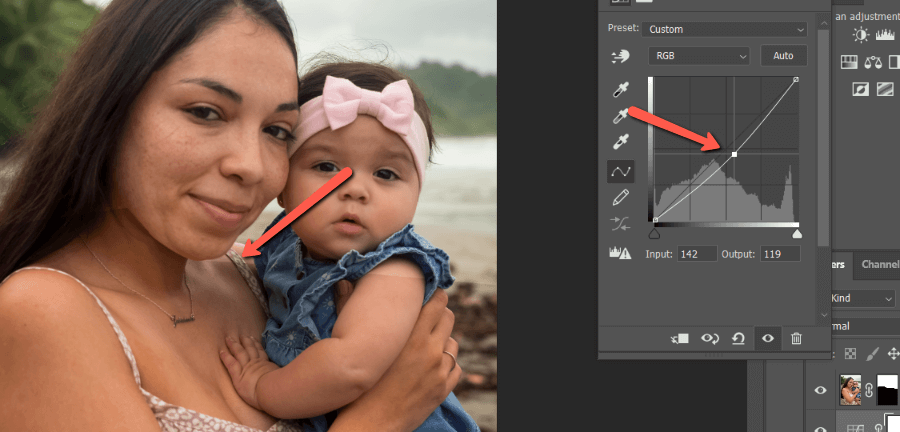
Then press Ctrl + I or Command + I to invert the mask and make the shadow disappear. Choose the Brush tool from the toolbar (or press B) and paint white on the black mask with a soft brush directly under the chin.
Bring the opacity of the curves layer down as needed to make sure the shadow looks faint and natural.
That’s pretty much it!
Curious about other ways to modify humans? Check out how to change eye color here!
About Cara Koch