
In this tutorial, we talked about the importance of smooth edges when cutting and pasting composites together. However, you won’t always want a crisp line, sometimes you want a soft edge around your selection.
Hey there! I’m Cara and as a professional photographer, I sometimes put together collages or other creative pieces to display photographs. While doing this, I don’t always want a harsh line around my selections.
Let me show you what I mean and how to create the soft effect here!
Table of Contents
Softening Selection Edges in Photoshop
As with many things in the program, there is more than one way to blend edges in Photoshop. Which method you use will depend on your goal with the image, which selection tool you choose, etc.
Let’s take a quick look at several handy methods of softening edges in Photoshop!
Note: the screenshots below are taken from Photoshop CC for Windows, if you are using the Mac version, they can look different but the steps should be similar.
Method 1: Automatic Feathering While Selecting
All the marquee tools already have a built-in feathering feature you can use. Simply choose how many pixels you want to be feathered in the box in the Options bar.
The higher the number, the more obvious the effect. Keep in mind that the effect will always be more obvious on smaller images because they have fewer pixels.
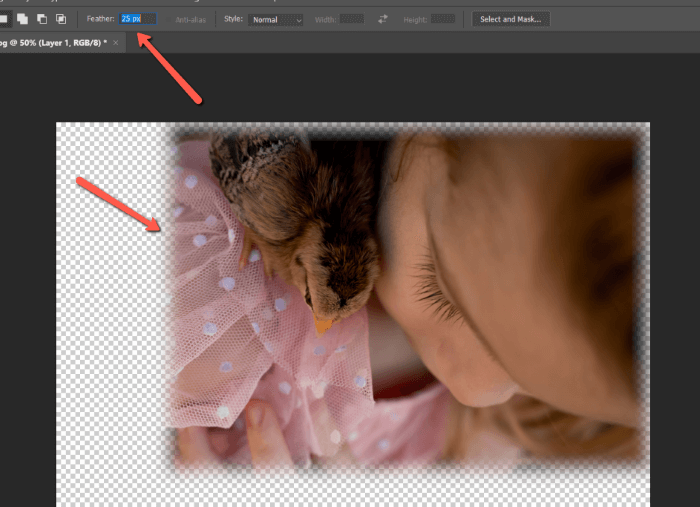
When I create a rectangular selection from this image of my daughter and paste it to its own layer, you can see it appears with a feathered edge.
Method 2: Modify an Existing Selection
What if you have already made your selection? Adding a feathered edge after the fact is simple as well.
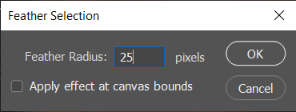
Make your selection, then go to Select, hover over Modify, and choose Feather.
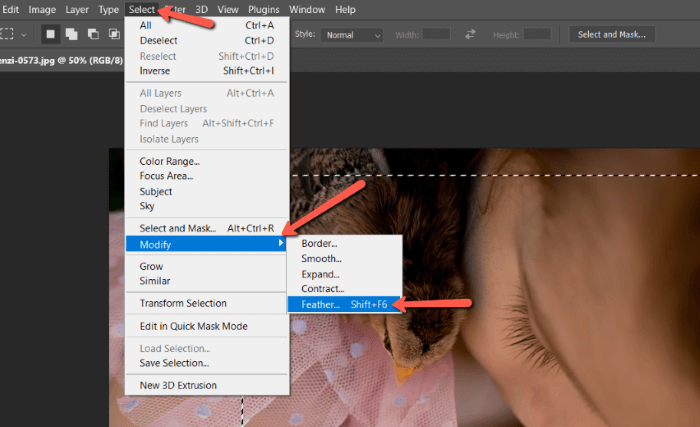
In the box that appears, you can choose the number of pixels. Click OK.
Then, press the Mask icon at the bottom of the Layers panel to see your selection.
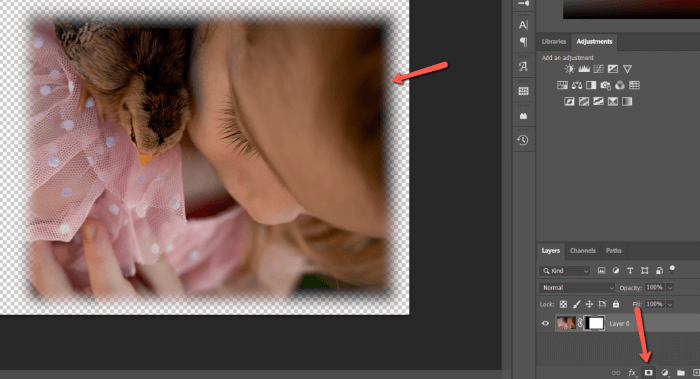
You can go back to try a different value by undoing and redoing these steps.
Method 3: Feathering Slider
Of course, undoing and redoing can get clunky if you have no idea what number you need and want to try several looks. A better option is to make your selection, cut it out, then use the Feather slider in the properties panel.
Here’s how to do it.
Make your selection and cut it out. Then access the Properties panel. If the panel is hidden, go to Window and select Properties from the menu.
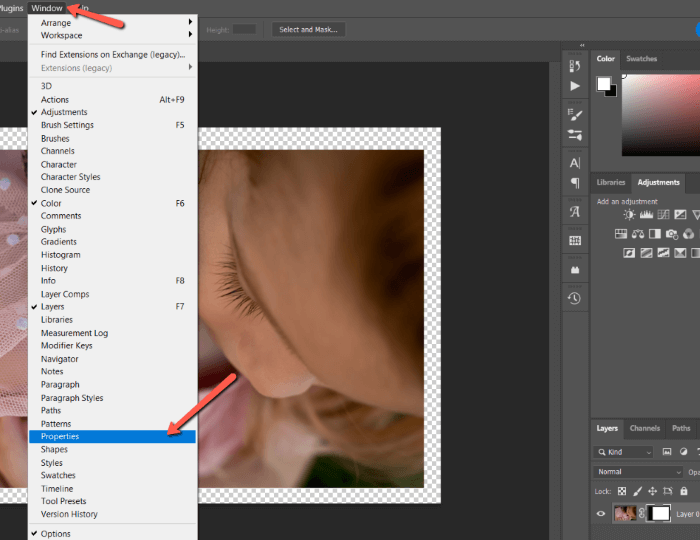
From there you can grab the Feather slider and go up and down, making a non-destructive edit and easily finding the exact value you want.
Method 4: Select and Mask Controls
The controls for this final method are found in the Select and Mask workspace. The button appears in the Options bar when a selection tool is active.
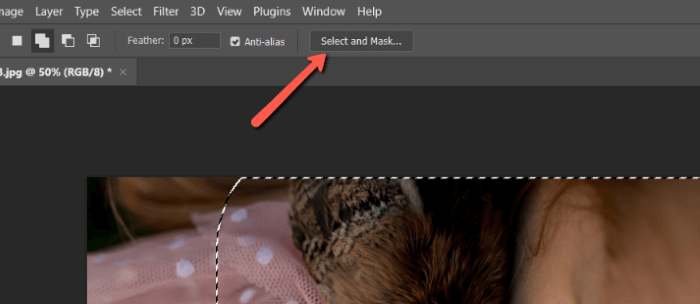
Clicking this button will take you to the Select and Mask workspace.
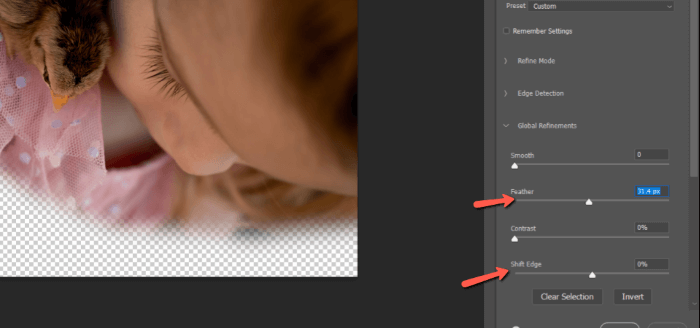
The main controls are found under Global Refinements. Slide the Feather slider up and down until you find the spot you like.
The Shift Edge button lets you move the edge outward with a positive number or inward with a negative one. This is helpful to adjust the position of your selection without having to redo it.
Click OK when finished.
Softening Edges in Photoshop
These are all handy techniques for when you want a soft edge in Photoshop. Have fun creating collages or other exciting artwork with this technique!
Interested in learning more about the power of Photoshop? Check out this tutorial on how to create a watercolor painting effect with Photoshop!
About Cara Koch