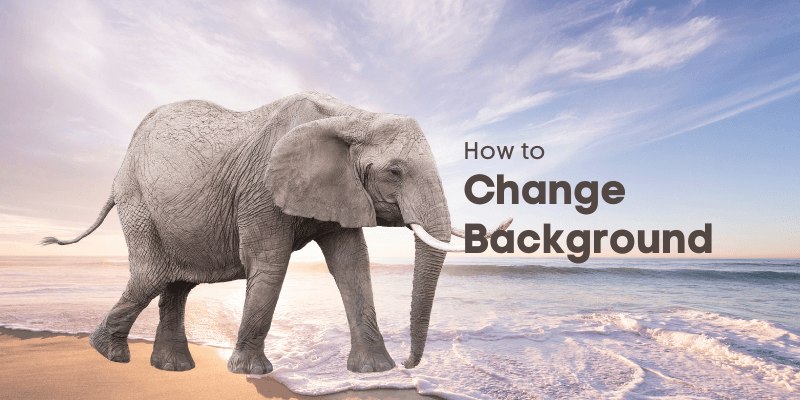
Want to put yourself on a tropical beach? How about standing proudly at the top of a mountain? These and many other images are completely possible in Photoshop. All you have to do is take a picture and swap out the background for the desired effect.
Hello! I’m Cara and I’ll be your guide on this adventure today that can put you literally anywhere! I know that changing the background seems like a big edit, and it is, but it also isn’t as hard to do as you might think.
Let’s get started!
Quick note: the screenshots and tutorials below are based on Photoshop CC for Windows, macOS, and other versions can be slightly different.
Table of Contents
Step 1: Choose Your Images
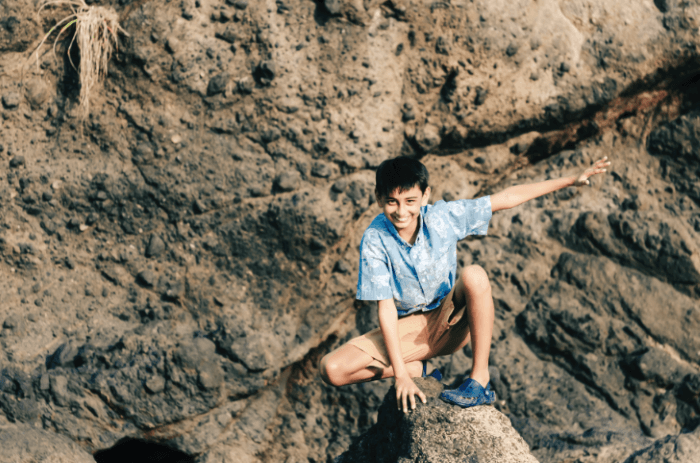
I’ve got this image from a recent family session that is just begging to be placed in a cityscape. This kid totally looks like he should be ready to swoop down on some unsuspecting bad guy.
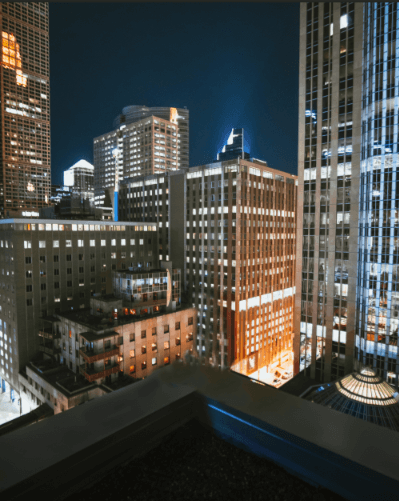
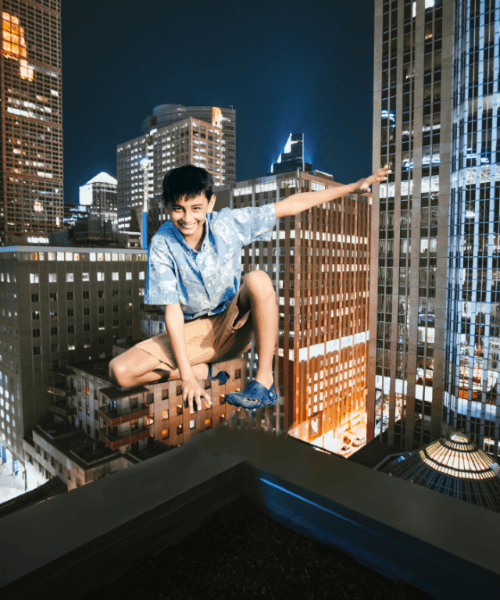
Then I found a suitable city background on Pexels.com. This particular image already had a Spiderman in it but I’ve taken him out. I didn’t do an amazing job but that doesn’t matter because the kid will cover it up anyway.
Step 2: Select Your Subject
Now it’s time to make a selection. This is how we tell Photoshop what we want to keep in an image. I’m going to start by choosing any selection tool, and then hitting the Select Subject button in the Options bar.
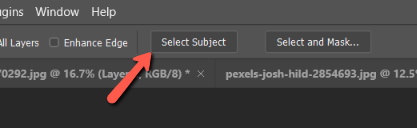
Photoshop will do its best to determine what is the subject of the image and make a selection around it.
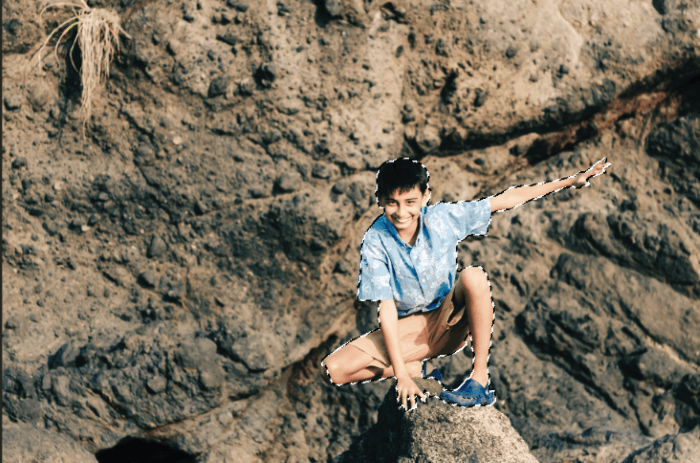
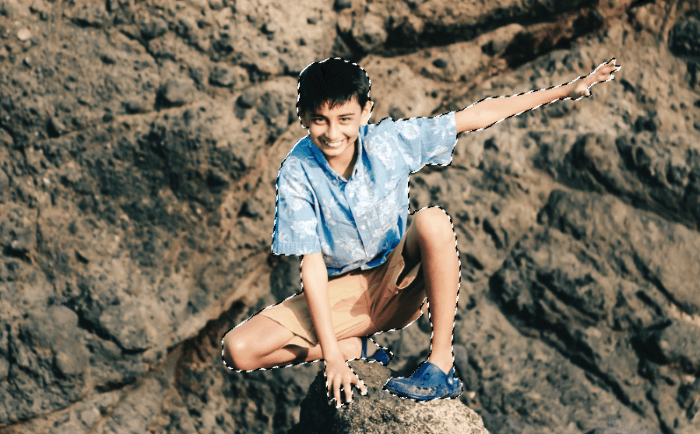
Because modern-day Photoshop is amazing, it didn’t do too bad. We just have to clean up a little bit around his knee and the very top of the rock.
Let’s use the Quick Selection tool to cut out and refine the object.

Use the plus and minus options to add to or remove bits of the selection until you are satisfied.
Step 3: Change the Background
We have two options here for how to change the background. I can either cut the kid out and put him in the other photo. Or I can delete this background and drop the other photo in behind him.
For this demonstration, let’s cut him out and move him to the other image.
Press Ctrl + C or Command + C to copy the selection. Go to your other image and press Ctrl + V or Command + V to paste it.
Step 4: Harmonize the Subject
The new version of Photoshop includes a pretty powerful feature that makes creating composites easier than ever. With the click of a button, Photoshop takes care of the heavy lifting when it comes to blending a subject with a new background.
Let’s look at how to do it. Go to Filter in the menu bar and choose Neural Filters.
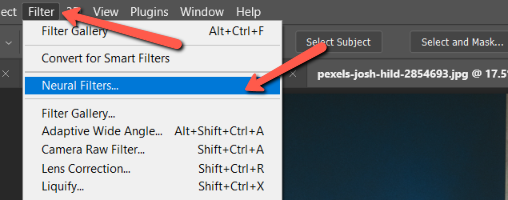
Photoshop will open a window with the various neural filters that are being offered. We want the Harmonization filter.
If you haven’t already downloaded it, click the icon to do so. If you’ve got it set up as I do, simply click the gray circle to turn it on. The circle will move to the right and turn blue.
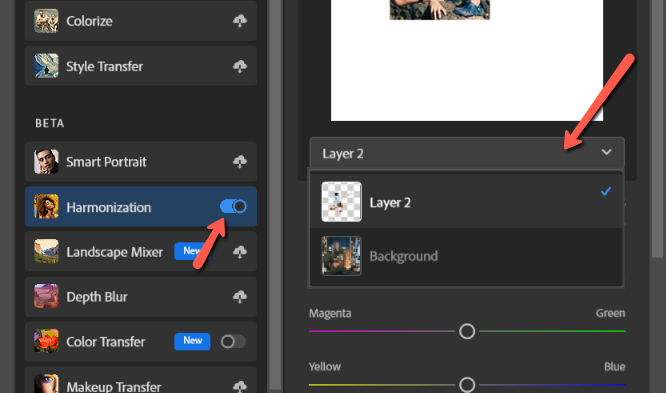
The reference photo will appear to the right and you’ll need to choose the layer you want to affect. Photoshop will think for a moment and then offer a preview in the box to the left.
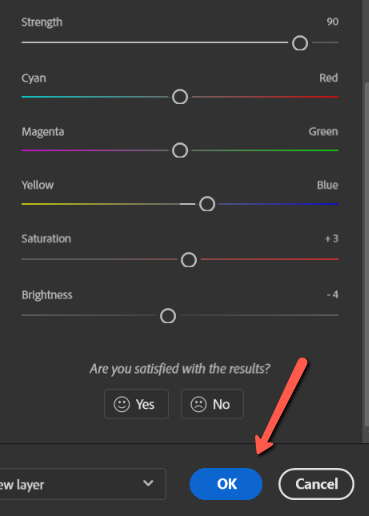
You can also mess around with the settings underneath to tweak the results to your liking. When you’re happy press OK at the bottom of the screen.
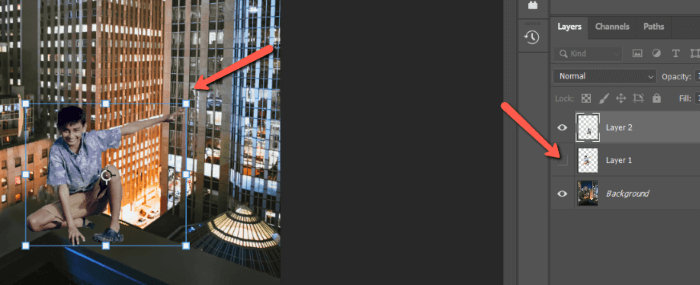
Step 5: Resize and Position
Now let’s move the subject into position. I chose to output the harmonization filter to a new layer so the original layer is still there plus the newly harmonized one. Click the eye icon to the left of the original layer to deactivate it.
With the Move tool active (press V to access it) you can drag the layer around and place it wherever you like. You can also resize or rotate it using the handles in the corners of the blue box around the layer.
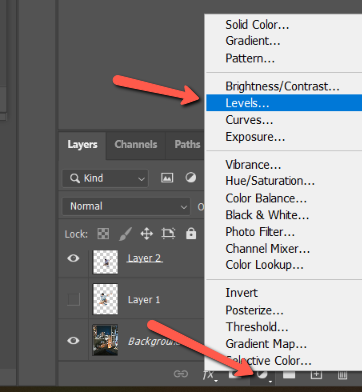
Step 6: Blend
Once you’ve got your subject where you want it, you’ll probably need to blend a little more. Use Photoshop’s adjustment layers like Curves, Levels, Brightness and Contrast, or others to tweak your subject.
I’m going to grab a Levels adjustment layer to tone down the subject a little bit. Click the half-filled circle icon at the bottom of the Layers panel. This will open your adjustment layer menu. Choose Levels.
Click the clipping mask icon at the bottom of the Levels properties panel to apply the effects of the adjustment only to the layer directly beneath it. In this case, my subject layer.
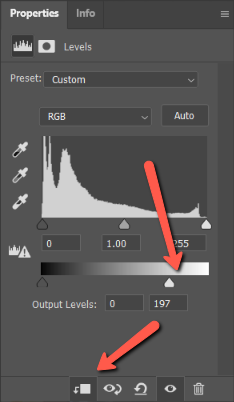
Make adjustments to match your background. I’m going to bring down the highlights a little.
You can also add a Brightness adjustment layer to bring the brightness down and the contrast up a little. You can keep adding adjustment layers and playing with the controls until your subject blends well into the new background.
Step 7: Add a Shadow
Now, there is one more thing that’s missing, he needs a shadow. Even at night, Spiderman has a shadow!
Double-click on the subject layer to open the Layer Styles panel. Choose Drop Shadow from the list of options.
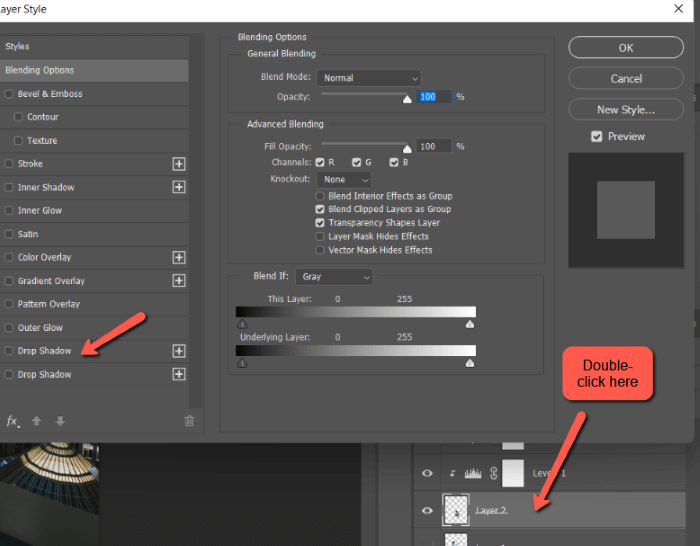
Play around with the settings until you get a shadow that matches your image.
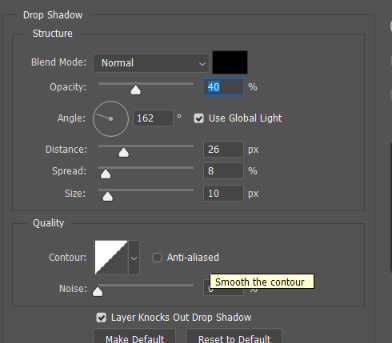
This isn’t too bad, but as you can see there is an immediate problem. He has a shadow under his arm and beside his leg where there is nothing to cast a shadow on.
To fix this problem, we need to separate the drop shadow from the subject so we can make adjustments independently. Right-click on the drop shadow effect and choose Create Layer.
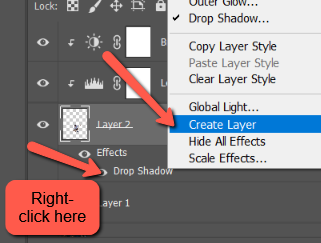
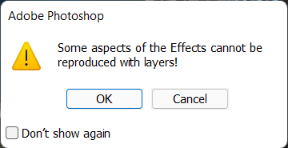
You’ll get this warning, but that’s okay. Just hit OK to continue.
The drop shadow appears on its own layer. Click on the drop shadow layer to select it.
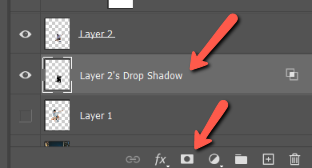
Create a mask by pressing the mask button at the bottom of the Layers panel. It looks like a rectangle with a circle inside.
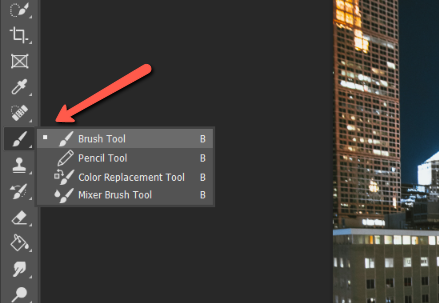
Press B to activate the brush tool, or select it from the toolbar on the left.
With black as your foreground color, paint anywhere on the layer where you don’t want the shadow to appear.
Voila! No weird shadows under his arm!
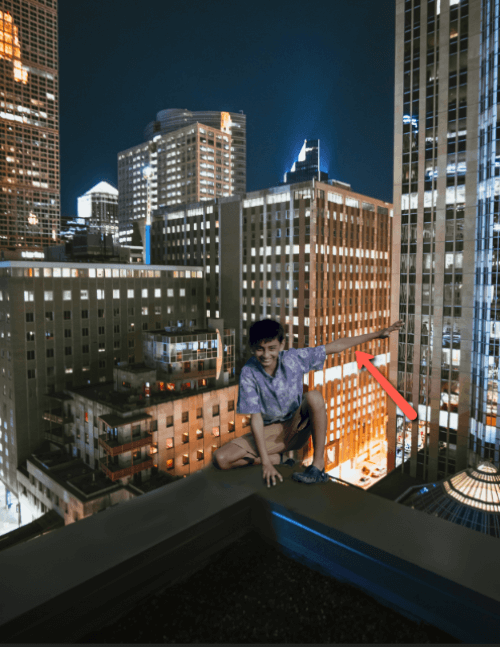
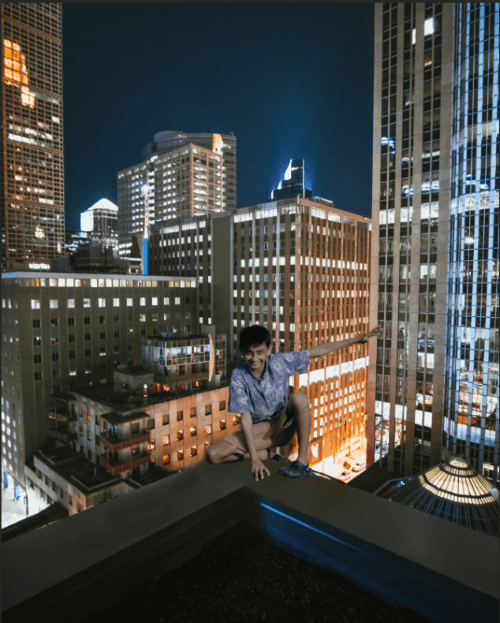
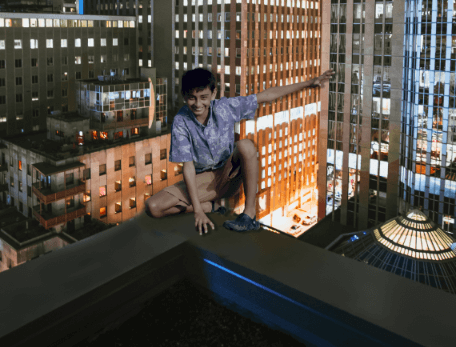
There you have it! This kid is totally rocking his Hawaiian Spiderman vibes!
The effect still looks a little odd around his hand and foot, which you can spend a little more time cleaning up.
It’s also something to keep in mind if you’re taking an image with the purpose of changing the background later. I wasn’t planning on this edit so I wasn’t too concerned with his foot and hand placement. If I had placed them better, it would be easier to blend the two images.
Interested to learn more tricks that you can do in Photoshop? Check out how to add fog to an image in this tutorial!
About Cara Koch