How do you get the viewer’s eye to go directly where you want it to go in an image?
Would a neon arrow pointing to your subject be too obvious? Hmm, while that might work if there already is a neon arrow in the photo, it won’t work in the vast majority of cases.
Hey there! I’m Cara and in my portrait and family photography, I want to make sure that the subject of my image is the most striking thing in it.
The eye is naturally drawn to the brightest spots of an image and the darker parts are easier to pass over. We photographers can use this trick to “put a neon arrow” on our subjects without being quite so obvious.
A simple way to do this is by adding a vignette effect to your image in Photoshop. Come with me and I’ll show you how to add a vignette in Photoshop!
Table of Contents
How to Add a Vignette with Lens Correction
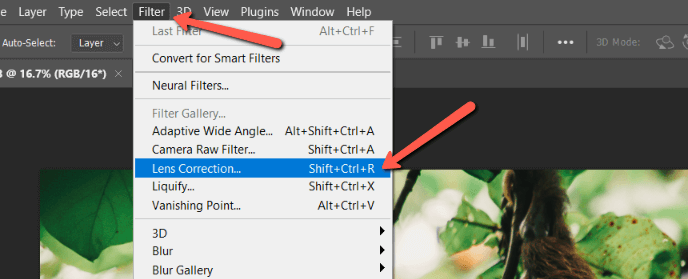
There are various methods of adding a vignette in Photoshop. Some allow you more control than others or add cool effects. Let’s start with the quickest method – using the Lens Correction tool.
With your photo open in Photoshop, go to Filter in the menu bar at the top. Choose Lens Correction from the menu. Or you can hit Shift + Ctrl + R or Shift + Command + R on a Mac.
A preview window will open up. Click on the Custom tab on the right. Notice the Vignette controls about halfway down the panel.
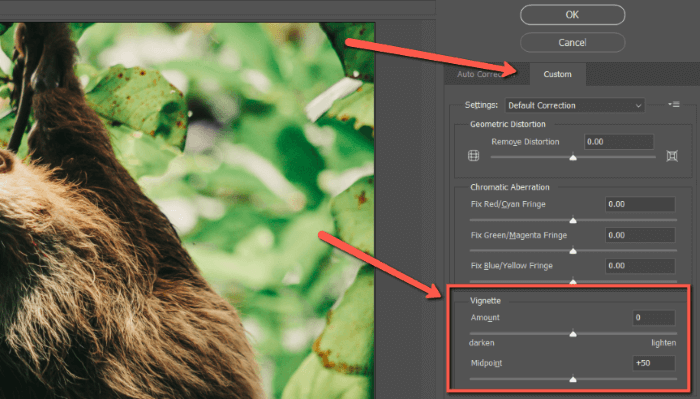
Drag the Amount slider to the left to darken the edges. Drag it to the right to lighten them. Your changes will be previewed in the copy of your image on the left.
Drag the Midpoint slider to the left to make the unaffected area in the center smaller. Drag it to the right to make the unaffected area larger.
This method is good for quick, basic vignettes. However, if you want to offset your vignette, create a vignette with a different shape, or simply have more control over the effect, you’ll need to try a different method.
How to Add a Vignette with an Adjustment Layer
Traditionally, a vignette means darkening or lightening the corners of an image. There are various adjustment layers that are capable of this. For example, Brightness/Contrast, Levels, Curves, and Exposure.
Both the Brightness/Contrast and Exposure adjustments are pretty basic. You don’t have as much control over the final look with these adjustment tools. However, you can use these adjustments using the same method I’m going to describe here.
Both Levels and Curves give us more control over how we affect the shadows and highlights. Let’s go with the Curves adjustment layer for the example.
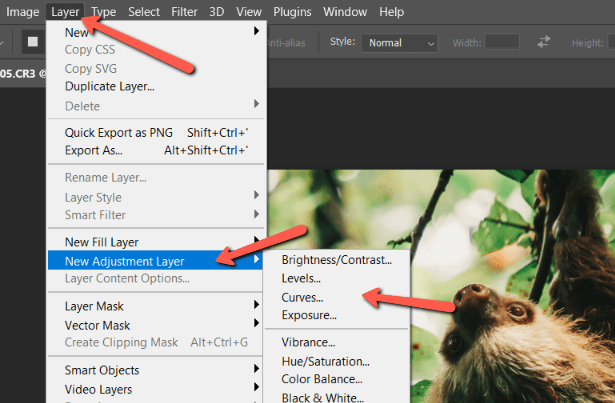
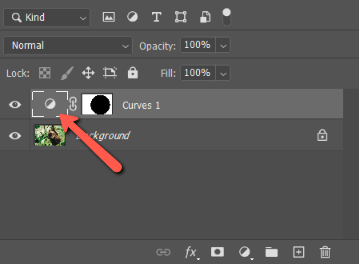
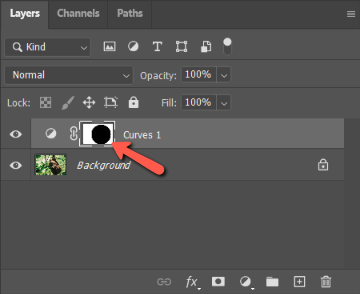
Step 1: Open the Adjustment Layer
Create the adjustment layer of your choice. Click on the Adjustment Layer icon at the bottom of the Layers panel. It looks like a half-filled circle.
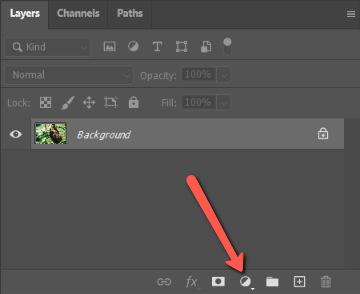
Click on the adjustment layer you want to use. Let’s click Curves for this example.
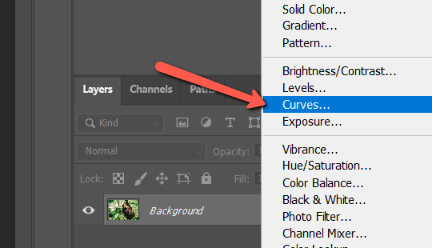
Alternatively, you can go to Layer in the menu bar, hover over New Adjustment Layer, and choose the type of adjustment you want to add.
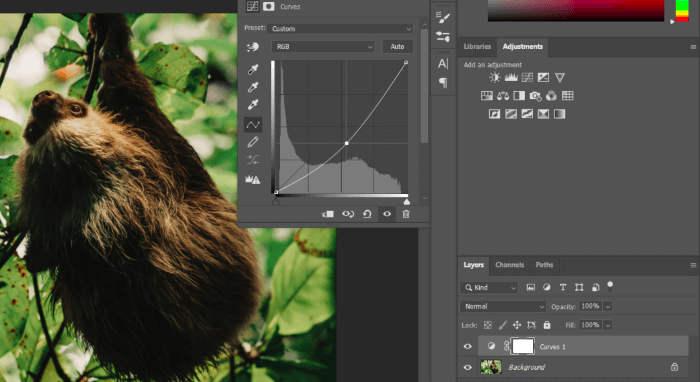
Now, we’ve got our adjustment layer and the Curves panel appears. Pull down the line to darken, pull it up to lighten.
As you can see, pulling down the curve darkens the whole image. Thus, we need to define the vignette and there are a couple of ways you can do this.
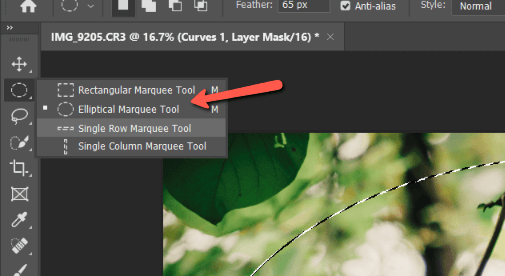
Step 2A: Draw a Vignette with the Marquee Tool
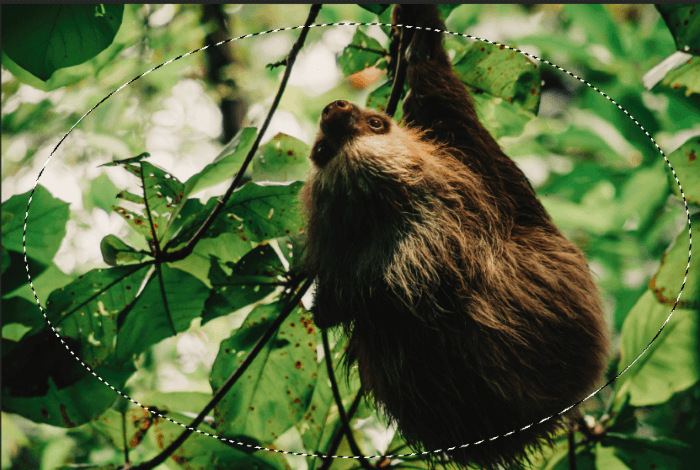
If you want a simple circle, oval, square, or rectangular vignette, you can use the Marquee tool. Choose the Marquee tool from the toolbar on the left (either the rectangular or elliptical marquee tool). Remember right-click to see the related tools hidden under the top icon in the toolbox.
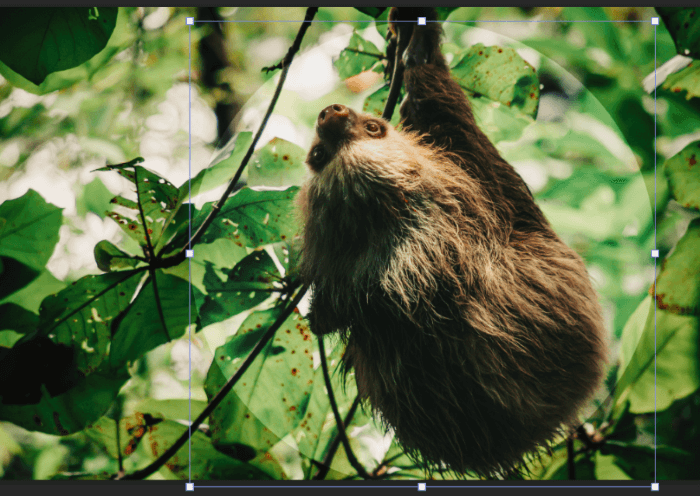
Draw a selection around your subject. When we’re all finished, everything inside this circle will remain unaffected.
Simply click and drag to make the selection. Hold down the Space bar as you’re dragging to reposition the selection if needed.
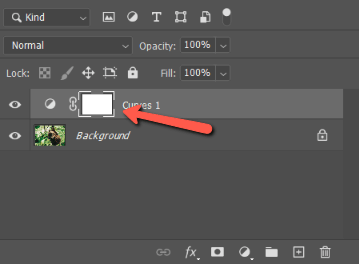
Highlight the mask for the adjustment layer in the Layers panel.
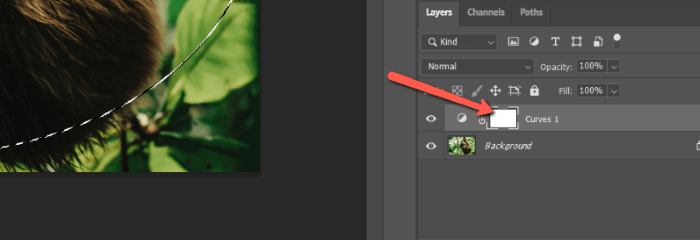
This hit Ctrl + I or Command + I to invert the mask.
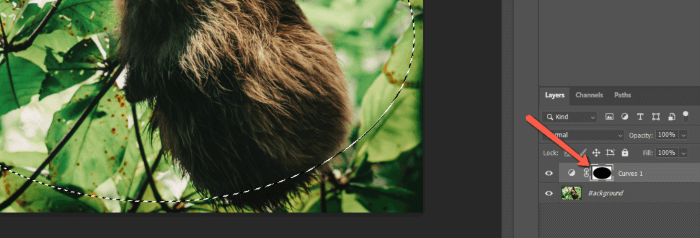
Now the middle of the image is unaffected but the corners have been darkened.
Most of the time when you’re creating a vignette, you’ll be happy with either of these shapes. But what if you want to get creative with the shape of your vignette?
Then you can use the Brush tool.
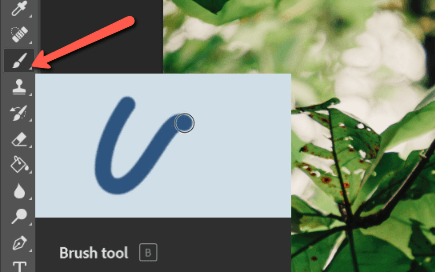
Step 2B: Draw a Vignette with the Brush Tool
Make sure to select the mask of your adjustment layer.
Then hit B on the keyboard or select the Brush tool from the toolbar on the left.
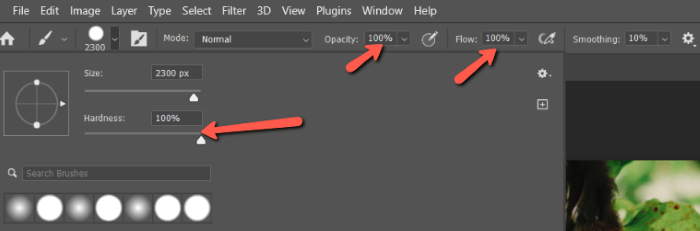
In the options bar at the top, make sure the Flow and Opacity are set to 100%. The Hardness of your brush should also be set to 100%.
Click somewhere in the image to draw a shape. For this example, I’m just using the basic circular brush, but you can use any brush you want to create many different effects.
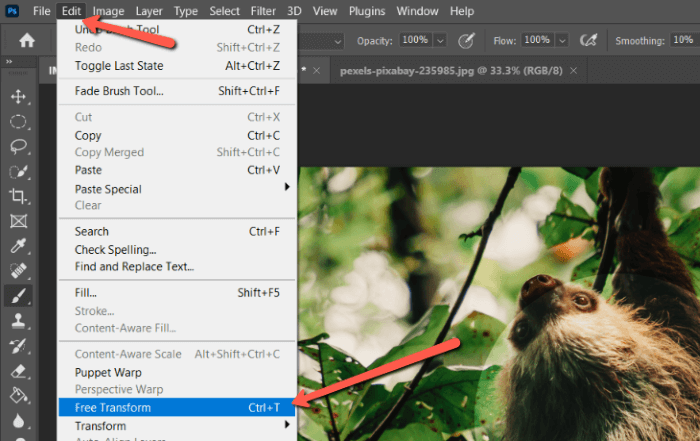
The circle is too small, but no worries. Hit Ctrl + T or Command + T to open the Transform tool. Alternatively, find the Transform tool in the Edit menu under Free Transform.
When you get to the Transform tool, a blue box will appear around your brush mark. Grab the handles to resize and position your vignette.
Step 3: Feather the Vignette
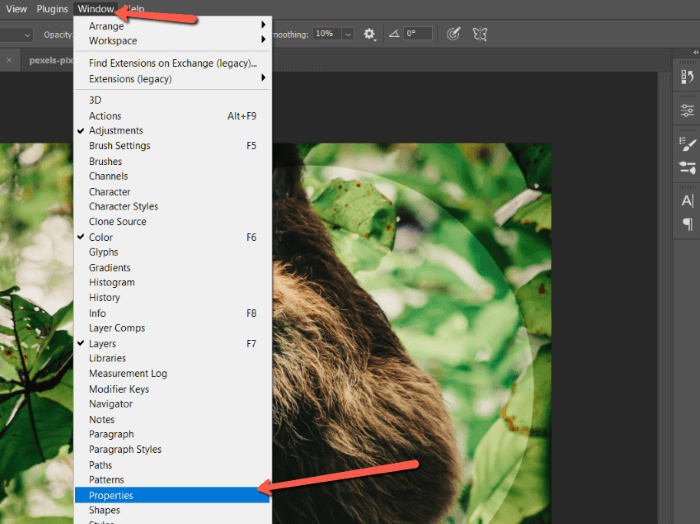
With the hard line between light and dark, the vignette is way too obvious. Open the layer mask properties panel to feather the edges.
Get there by double-clicking on the adjustment layer thumbnail.
Or you can go to Window in the menu bar and click Properties. Make sure the adjustment layer is selected and you’ll see the correct Properties panel.
At the top of the Properties panel, you’ll see two-panel options. The left one is for the adjustment layer. The right one is for the mask.
We want to enter the mask panel, but if you just click the right icon, the mask panel will appear all grayed out. To fix this, click on the mask thumbnail in the Layers panel.
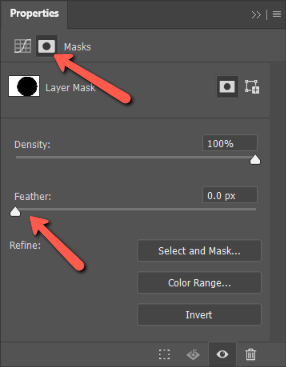
You’ll see the feather slider in the middle of the mask properties panel. Drag it to the right to soften the edges of your vignette.
Step 4: The Finishing Touches
Now that you can see better what you’re doing you can add the finishing touches. Hit Ctrl + T or Command + T to resize the mask and play with the feathering until you get the look you like.
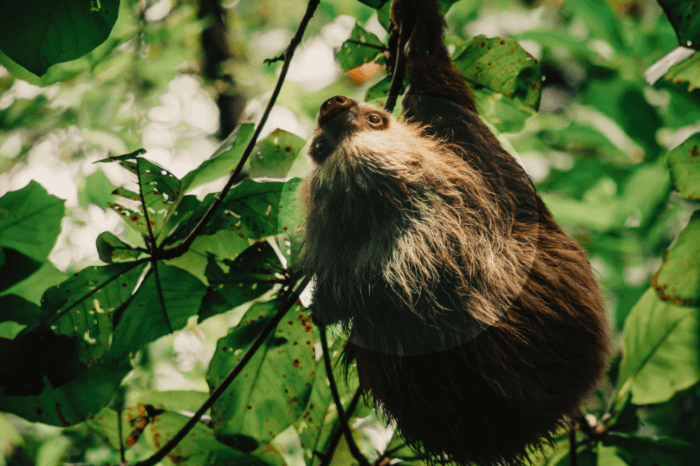
See what a difference this makes? Here’s my before:

And here’s my after:
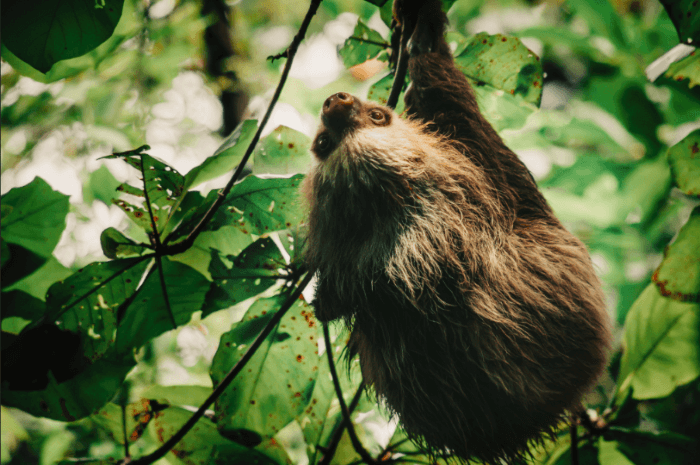
The effect is subtle and natural, but the viewer’s eye is more immediately drawn to my little sloth friend!
Interested to learn more tricks for enhancing images in Photoshop? Check out some of our other tutorials, such as how to overlay images for more fun techniques!
About Cara Koch