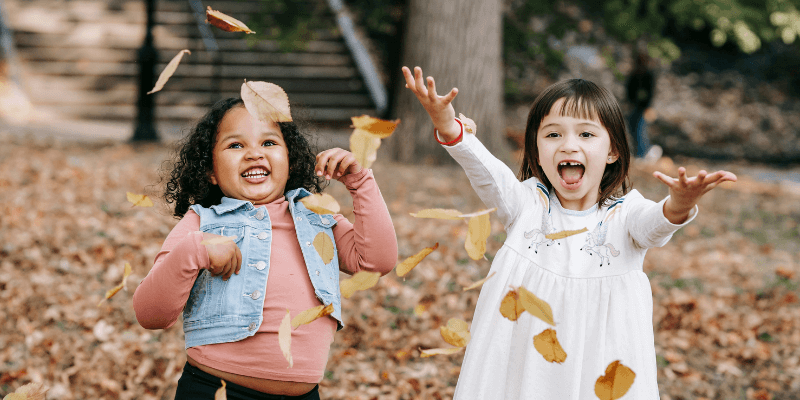
Have you ever wished you could put a different head on the body in your picture? That’s an odd question, I know. But if you’ve ever photographed a large group of people, you probably have had this wish.
Hey there! I’m Cara and in my work as a professional family photographer, I’ve run into this many times. I always take several images of the group. My hope is that every person in the group looks good in at least one picture – but it doesn’t have to be the same picture because I can swap the heads around in Photoshop.
Cool right? Let me show you how to Photoshop a face onto a body in another picture in five steps.
Table of Contents
Step 1: Choose Your Two Images
For this to work easily, the two images you choose should be compatible. Ideally, the person will be standing the same way in both images so all you have to do is swap the head or perhaps just the face.
Sometimes this isn’t possible. I’ve had to do all sorts of weird swapping around before to get an image just right.
But to keep the work to a minimum, try to choose two very compatible images. Open them both in Photoshop.
Step 2: Copy the New Face
Go to the image with the face you want to use. You’ll need to make a selection around the part of the image you’ll be copying to the other photo. This selection doesn’t have to be very precise. I usually grab the Lasso tool and draw a quick circle around the part I need.
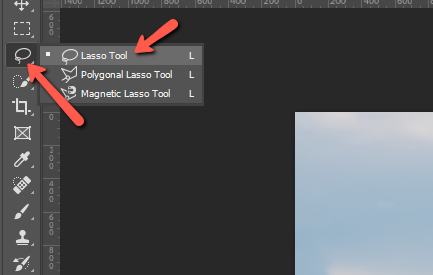
Choose the Lasso tool from the toolbar on the left. Then draw a rough circle around the head. Don’t laugh at my circle.
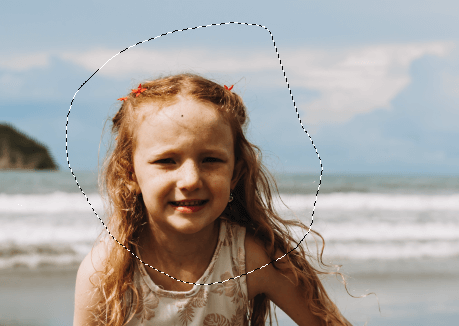
It doesn’t have to be perfect, but bigger is better. We’ll be erasing the parts we don’t need later, but the only way to get more parts that you do need is to start over. So err on the bigger side.
Step 3: Copy and Paste Selection
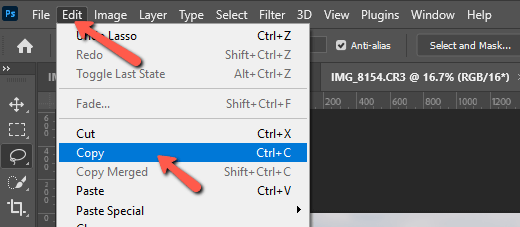
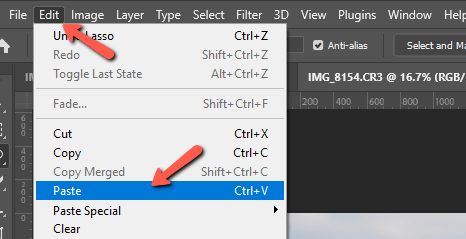
Now you need to move the face over to the image with the body you’ll be using. Press Ctrl + C or Command + C to copy the head. Alternatively, you can use a menu command by going to Edit and choosing Copy.
Paste the selection to the body photo. Press Ctrl + V or Command + V to paste the head on the image. Or go to Edit and choose Paste.
Step 4: Line Up the Images
Depending on the size of the two images you’re using, you may need to adjust the size of the head. Press Ctrl + T or Command + T to activate the Transform tool. Or go to Edit and choose Free Transform.
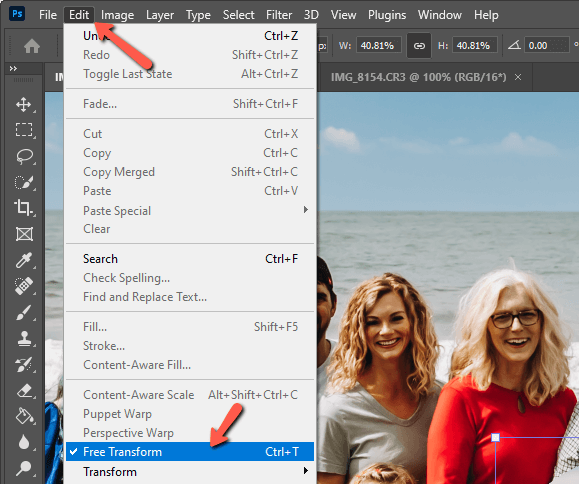
A box will appear around the pasted head. Grab and drag the corners to resize the selection as needed.
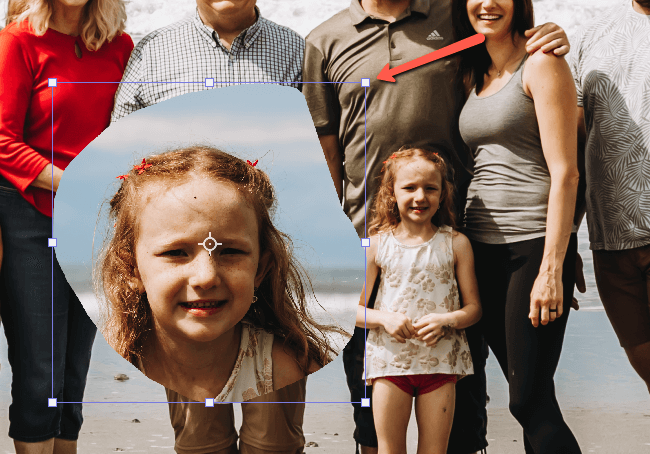
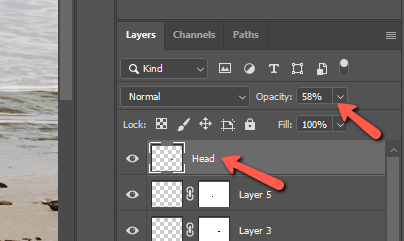
When you place one over the top of the other, it’s hard to gauge the size. A trick to help with this is to lower the opacity on the top layer so you can see through it somewhat.
Highlight the head layer in the Layers panel. Then click the arrow next to the Opacity box. A slider will appear and you can bring the opacity down to around 50%.
This will make it easier to get the right placement and size.
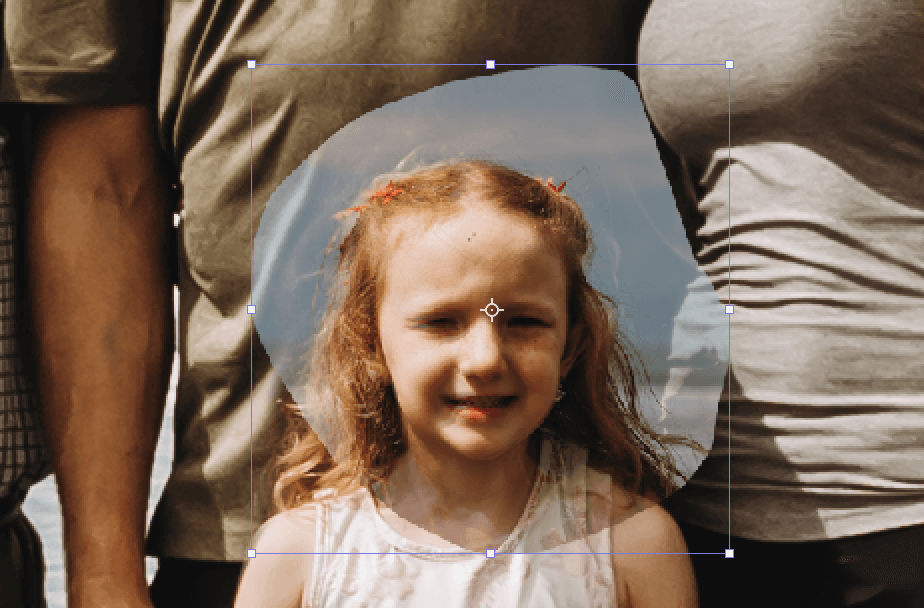
Once you’re happy with the placement, bring the opacity back up to 100%.
Step 5: Add a Layer Mask and Refine
It’s time to get rid of the parts that we don’t need. We’ll use a layer mask to do this.
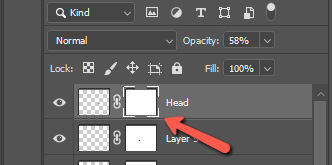
With the head layer highlighted in the Layers panel, press the Layer Mask icon at the bottom.
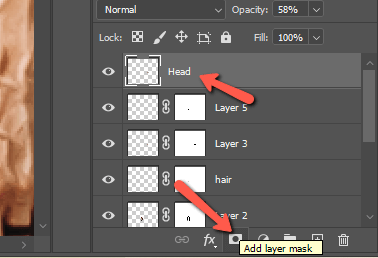
This will add a white layer mask to your head layer.
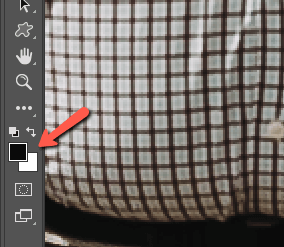
To refine this, you’ll need to use the brush tool. Press B on the keyboard or choose the Brush tool from the toolbar on the left.
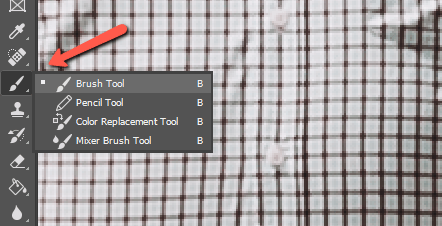
Make sure the brush is set to black at the bottom of the toolbar. If white is on top, just click the arrows to switch them.
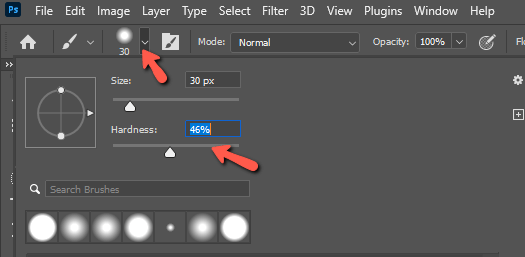
Go up to the Brush Settings in the Options bar at the top of your workspace. Click the little arrow to the right. Set your hardness to somewhere in the middle so that the edges will blend nicely. Choose an appropriate size for your project.
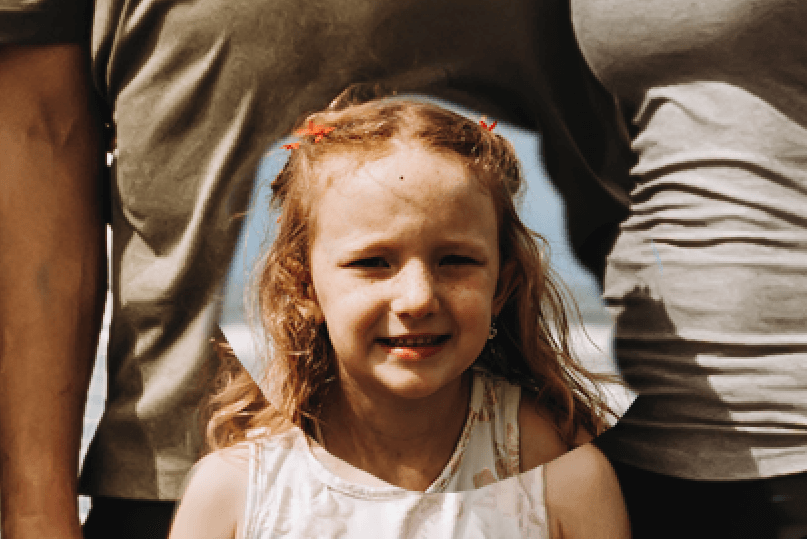
Then, start painting the excess area you need to remove. Work slowly and take care to blend the images together. Hard lines and other clues will make it obvious the image has been doctored.
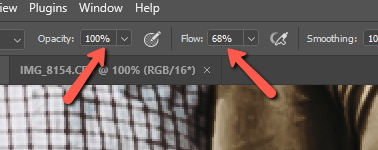
If needed, you can lower the Flow or Opacity (or both) of the brush as you work. These settings are up in the Options bar. This will make the tool function more gently and help you blend the images together more effectively.
Once you’re finished, it shouldn’t be obvious that you’ve made a change – unless you compare the two images, of course!
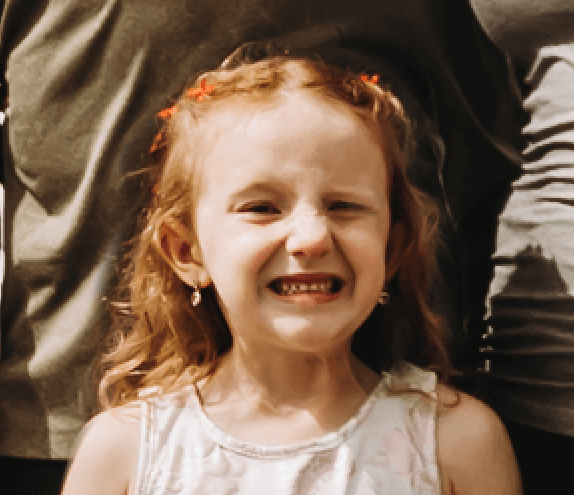
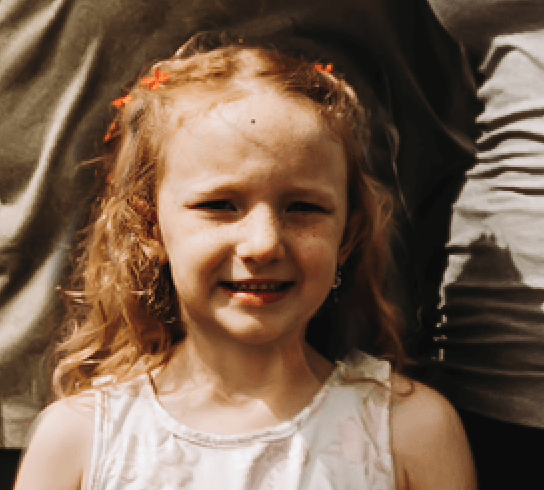
Woot! Woot! She’s much cuter in the second image. The shadows are a little darker on one side of her face, but it isn’t noticeable in the image overall. The main thing is that she’s got a nicer smile and Grandma was delighted with the final result!
Getting Crazy with Head Swapping
Now that you know how to head swap well, there’s a lot you can do with this. Who knows? You could put your head on a centaur’s body or something else really cool. Looking to strengthen your Photoshop skills for projects like that? Check out how to warp images here!
About Cara Koch