
Have you ever wondered how they get a block of text to wrap around certain parts of images in magazines? Do they painstakingly write each line to perfectly line up and curve fluidly around the subject?
No. I promise, they don’t waste the mind-numbing hours that would require.
Hello, I’m Cara, and today I’m going to show you the easy way to wrap text around images or shapes in Photoshop. It’s super easy and there is nothing mind-numbing about it!
Note: the screenshots below are taken from the Windows version of Photoshop CC, if you’re using the Mac version, they may look slightly different.
Table of Contents
Method 1: Wrap Text Around an Image in Photoshop
Photoshop can’t just magically look at your image and understand where you want to wrap the text. It’s really smart, but not quite there yet.
However, to get the text to wrap, all you have to do is define an area. With that definition, Photoshop can then fill the defined area with your text.
Step 1: Define the Area
You need a path to do this so you’ll want to use the Pen Tool. Check out this detailed explanation of how to use the pen tool here if you need help.
Otherwise, choose the Pen Tool from the toolbar on the left.
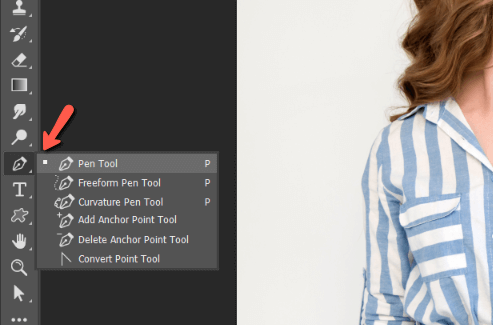
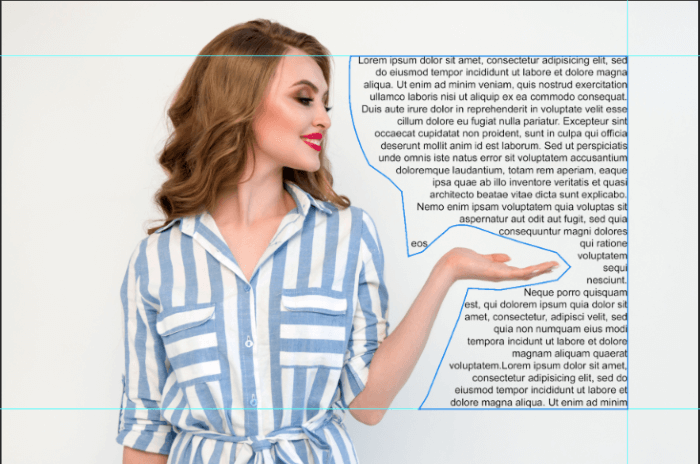
I’ll use it to wrap the text around the body and hand of the model in this image I got from Pexels.com.
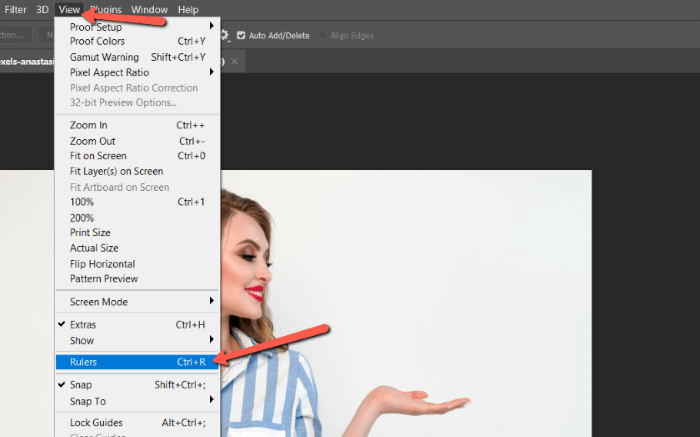
To make it easier, let’s add some rulers to define a straight line on the top, bottom, and right sides. Go to View in the menu bar and choose Rulers.
Then, click on the ruler and drag it down to place it on the image. I’ll place one on the top, the bottom, and the right side.
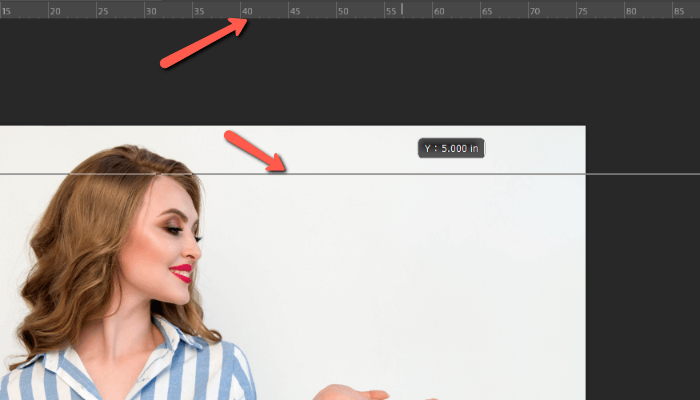
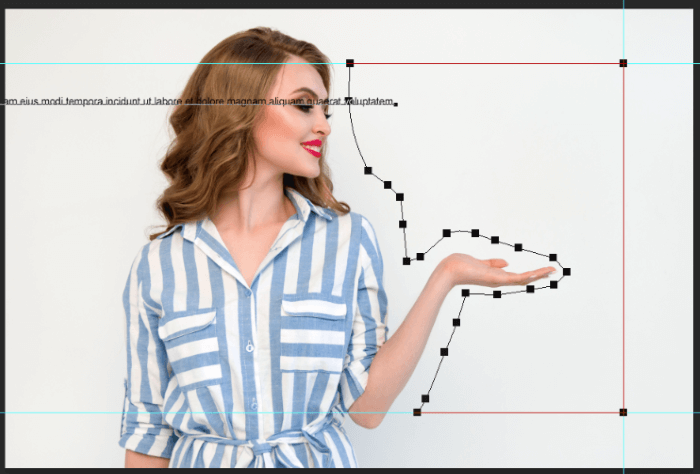
Now draw loosely around the woman with the pen tool. When you get to the ruler lines, use them as a guide to draw straight lines. Hold Shift when clicking to create perfectly straight lines.

Make sure to close off the path by ending back at your first point.
Step 2: Fill the area with Text
Select the Horizontal Type tool from the toolbar on the left.
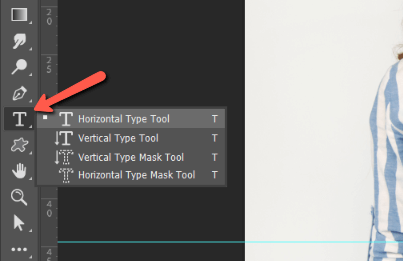
When you move the cursor into the defined area, you should see a circle appear around the type tool cursor. Click anywhere inside the path and add text.
The text will accommodate your defined area like this.
Troubleshooting tip when you can’t wrap text in Photoshop
What if the circle doesn’t appear around the cursor? What if the text will only appears in a straight line, like this?
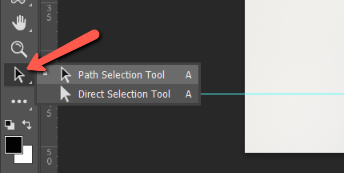
You need to change the Path Operations Setting. Go to the Path Selection tool at the bottom of the toolbar.
Up in the Options bar, open the path operations options and choose Intersect Shape Areas.
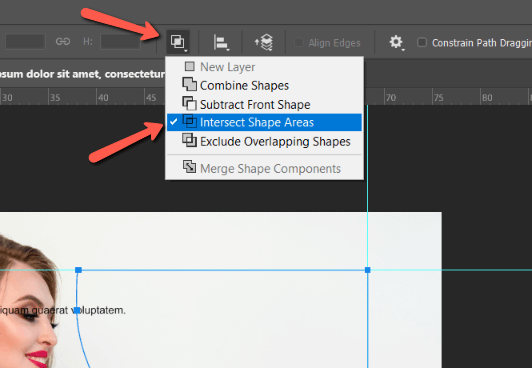
Go back to the text tool and try again. You should now be able to fill the shape with text.
Method 2: Wrap Text Around a Shape in Photoshop
You can also attach text to a shape and cause it to wrap around the edge of the shape. This can make some really interesting effects.
To do it, the concept is similar. Pick any shape you want. You can use the Rectangle Tool, Ellipse tool, or choose the Custom Shape Tool.
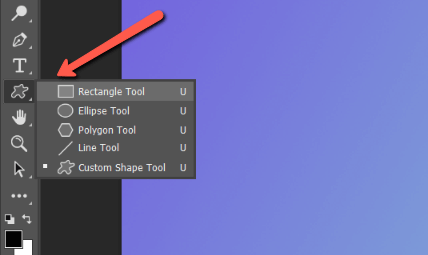
If you want to wrap text around a circle, choose the Ellipse Tool to create a circle, and then click on the circle path to add text. Pretty easy and straightforward.
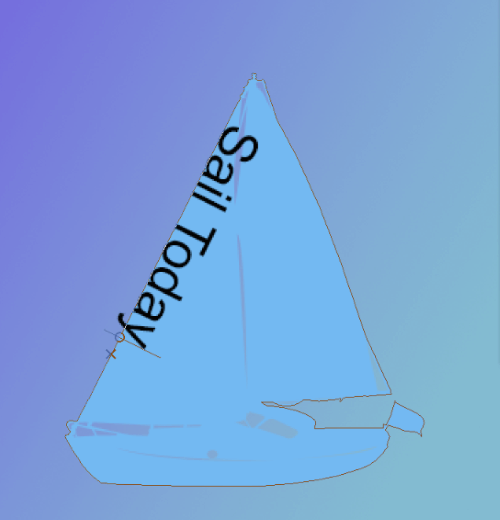
Here’s an example of wrapping text around a custom shape. I chose the custom shape tool and chose this sailboat from Photoshop’s collection to put on my canvas.
Notice how it appears with a path around it?

Grab your text tool and hover over the edge of the shape. You’ll notice a squiggly line appear next to the cursor. Click and start typing and you’ll see the text wrap around and follow the shape of the path.

Pretty cool!
What if you want the text to wrap on the inside of the shape? Hit Ctrl + A or Command + A to select all the text. Hold down the Ctrl or Command key, then click and drag the text toward the inside of the shape.
Excited to give this technique a try? We’d love to hear about your experience. Let us know how it goes in the comments!
Of course, once you get a taste of Photoshop, you’ll be sure to come back for more. Start with this tutorial on how to use the color replacement tool!
About Cara Koch