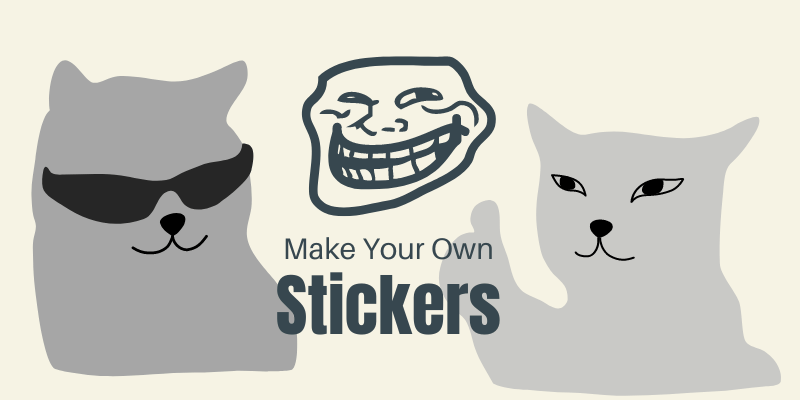
Did you know that you can turn images into stickers in Photoshop? It’s pretty cool! You can either print them on sticker paper to make physical stickers or use them as digital stickers in applications like WhatsApp.
Hey there, I’m Cara! There seems to be no limit to what you can create with Photoshop, right? Yep, pretty much you are only limited by your imagination.
So let’s dive in and see how we can do this! There are eight steps to creating your own custom stickers in Photoshop.
Note: I took these screenshots from the Windows version of Photoshop CC. Those working with a Mac will find that the interface looks a little different.
Table of Contents
Step 1: Prep the Document
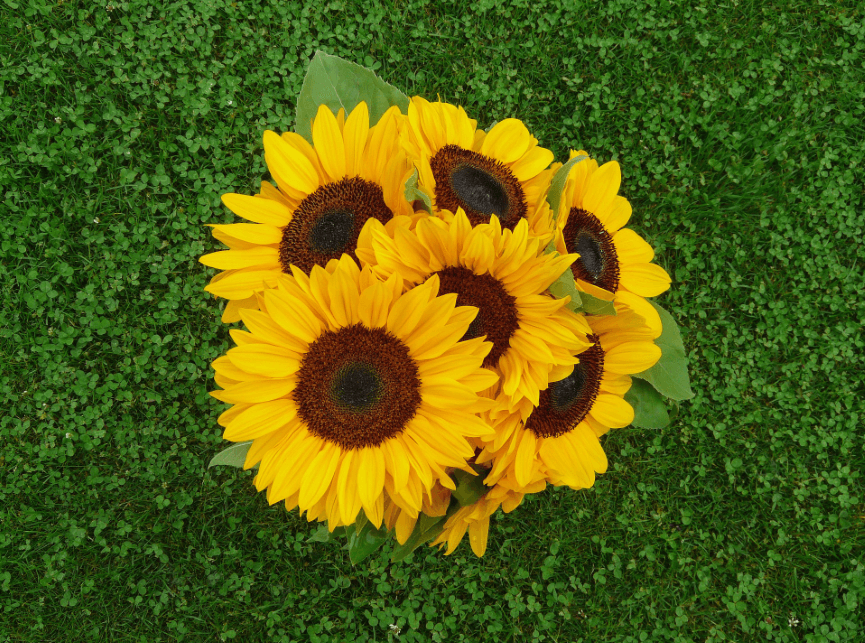
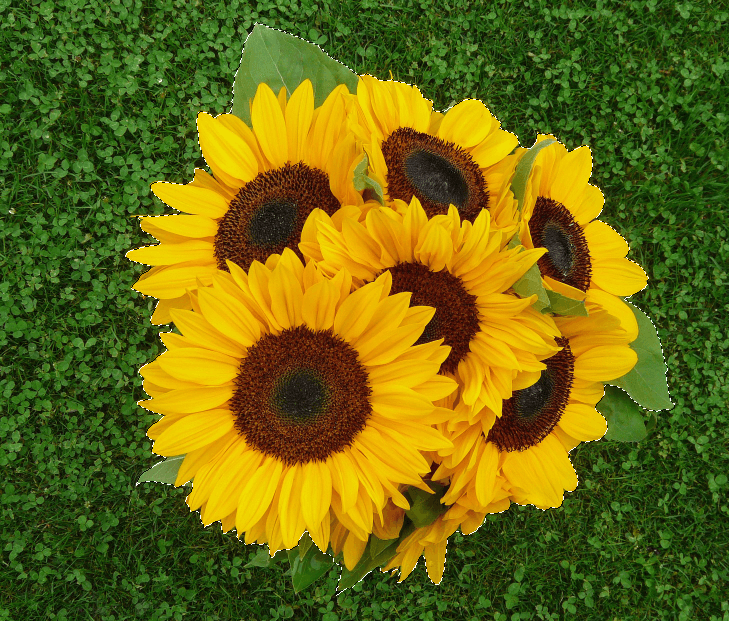
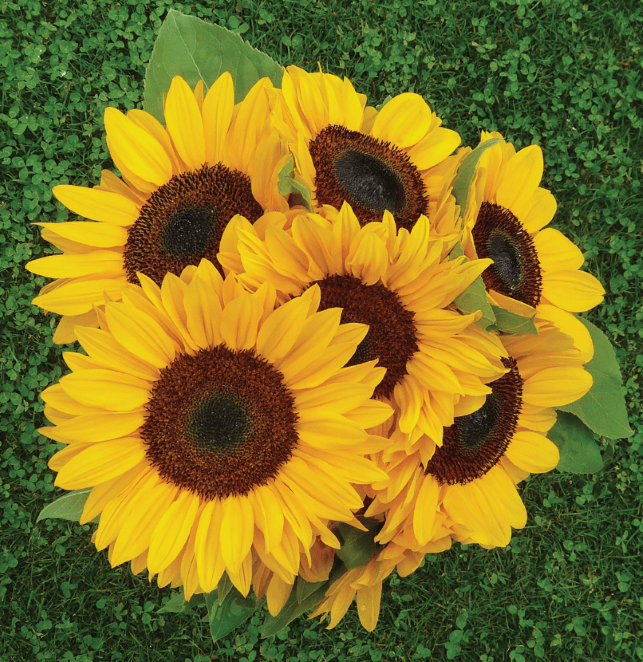
Open your image or artwork in Photoshop. For this tutorial, I downloaded this sunflower image from Pixabay.com.
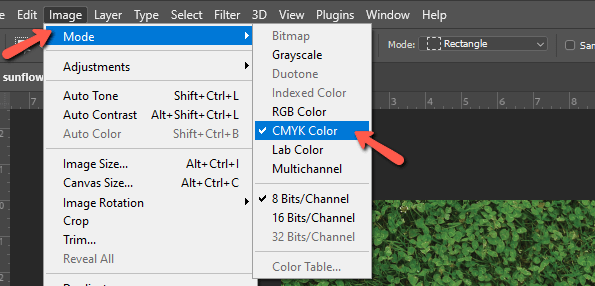
If you’ll be printing your stickers, make sure to change the color mode to CYMK for the best results. Go to Image in the menu bar, hover over Mode, and choose CMYK Color.
Also, check the image size and resolution. If the image is too small, some of the filter effects we’re going to apply in a moment won’t work very well.
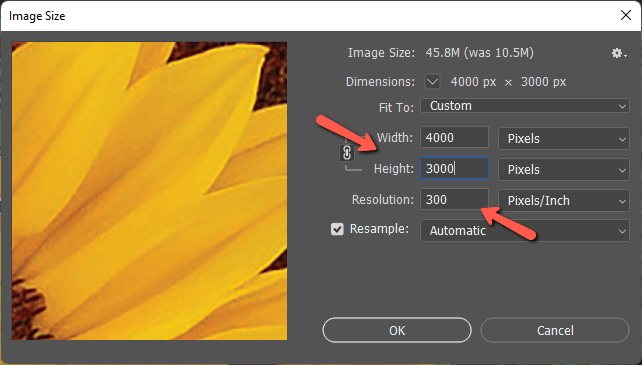
Go to Image in the menu and choose Image Size.
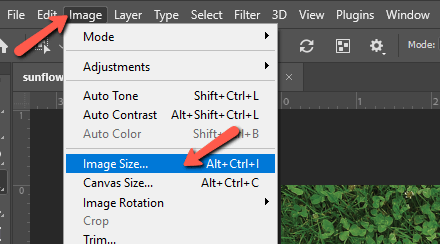
Check to make sure the resolution is at 300. The smallest side of the image should be about 3000 pixels or more. If the values are not right, change the resolution first because this will affect the height and width. Then change those values. Press OK when finished.
Step 2: Make a Selection and Cut it Out
To begin the sticker-making process, you need to make a selection around the part of the image you want to turn into a sticker. You can use any of the selection tools to do this. I’ll grab the Object Selection tool for this image.
With the object selection tool, I can draw a box around the sunflowers and Photoshop will stick a selection to the edges. Make any adjustments as needed.
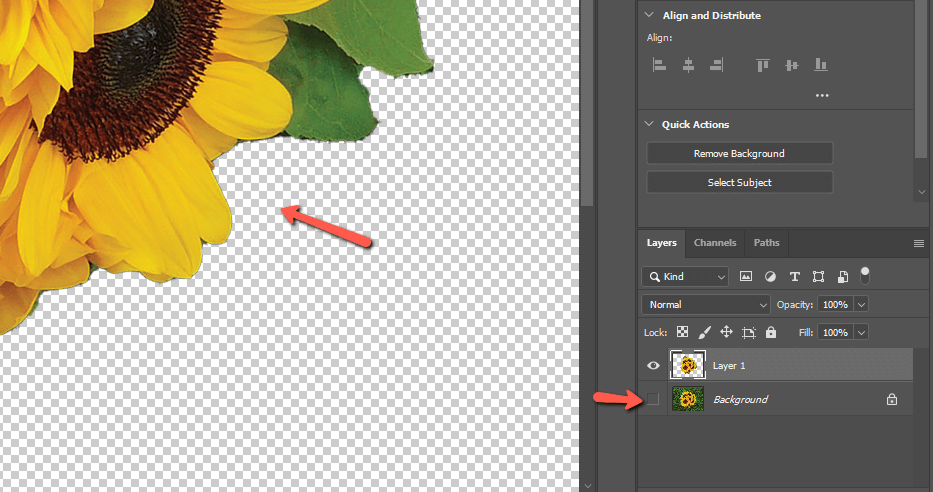
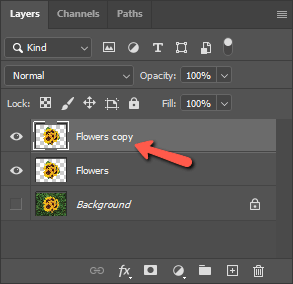
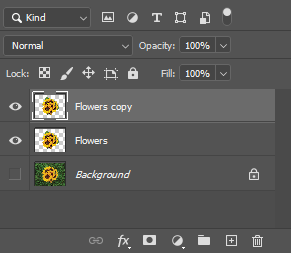
Press Ctrl + J or Command + J to copy the selection and put it on its own layer. Turn off the visibility of the background layer by clicking the eye icon to the left of the layer. You’ll see the checkerboard pattern that Photoshop uses to indicate transparency.
Step 3: Apply Filters
At this point, you can apply filters to create whatever effect you want for your sticker. To give you something to work with, we’ll apply a cartoon effect. There are a lot of filters to apply, but it isn’t as complicated as it seems at first glance. Just stick with me.
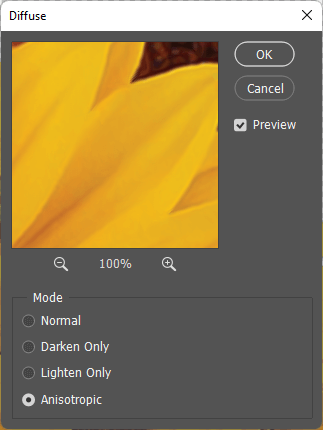
Go to Filter in the menu bar, hover over Stylize, and choose Diffuse.
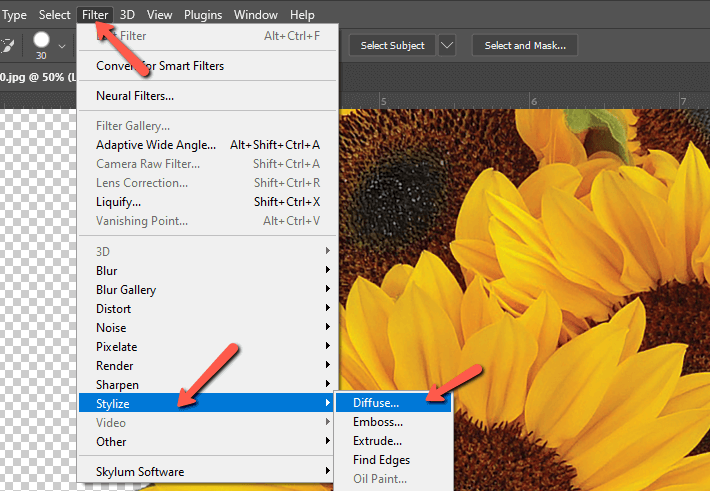
Click the Anisotropic button. Then click OK.
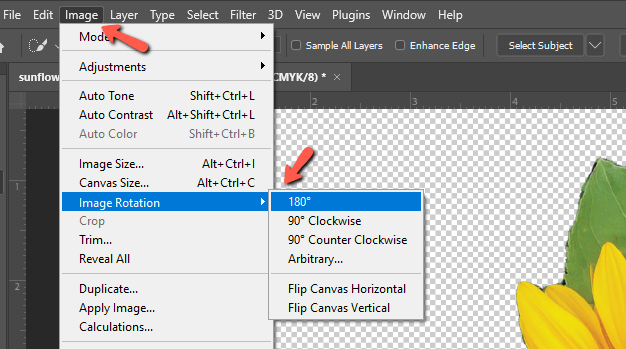
The effect is super subtle so we’ll need to apply it 3 or 4 times. However, you should rotate the canvas every time otherwise you can end up with weird lines on the final result. Rotating the canvas applies the filter at different angles so that doesn’t happen.
So go to Image, Image Rotation, then choose 180 degrees.
Add the Diffuse filter again and repeat a couple more times, rotating the canvas each time.
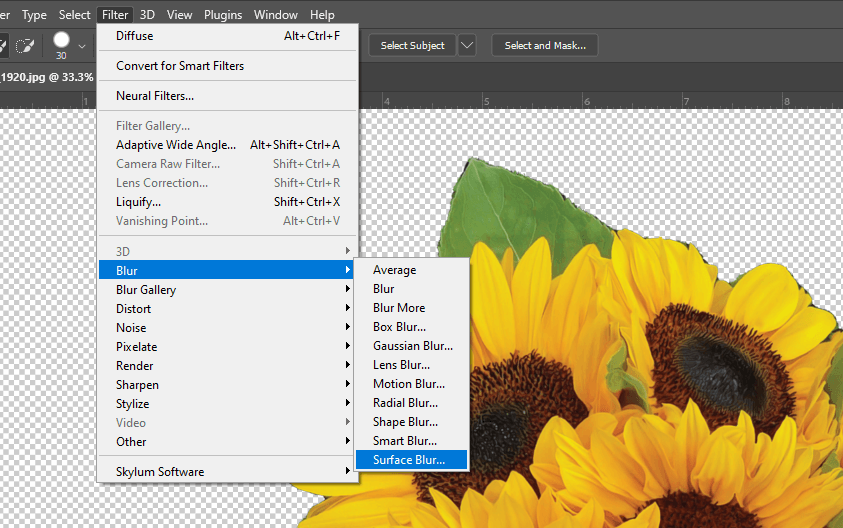
Now, let’s soften the image a bit. Go to Filter, Blur then choose Surface Blur.
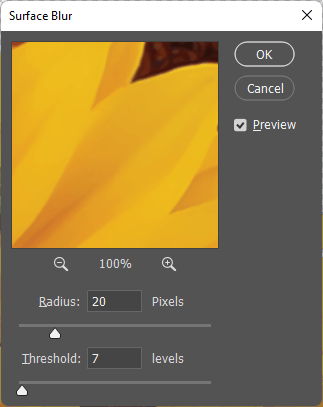
Set the Radius to about 20 pixels and the Threshold at around 7 levels.
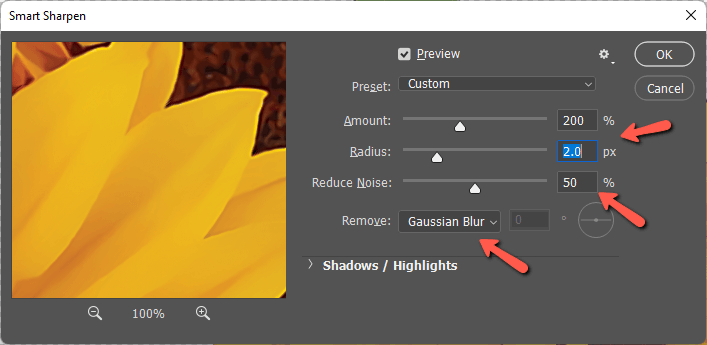
We want a smooth look, but we don’t want to lose edge details. So now let’s apply a sharpening filter. Go back to Filter, Sharpen, and choose Smart Sharpen.
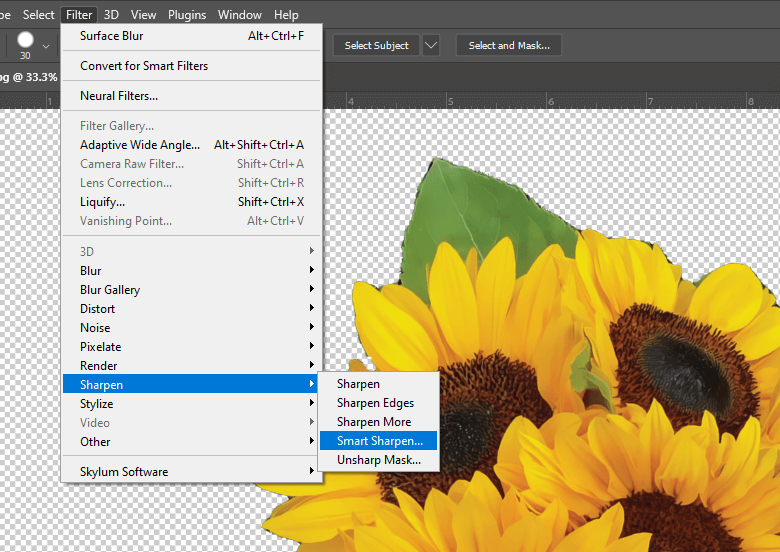
Your values may be slightly different for your image but here’s what I used. Set the Amount to 200%, the Radius to 2 pixels, Reduce Noise to 50%, and put Gaussian Blur in the Remove box. Press OK when finished.
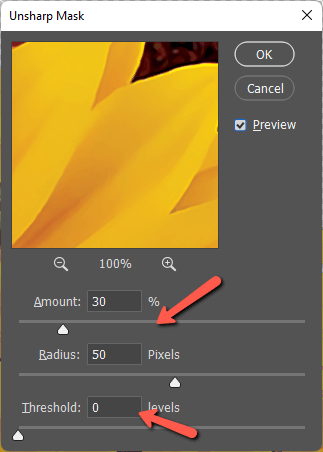
We’ll also apply the Unsharp Mask filter. Go back to Filter, Sharpen, and choose Unsharp Mask.
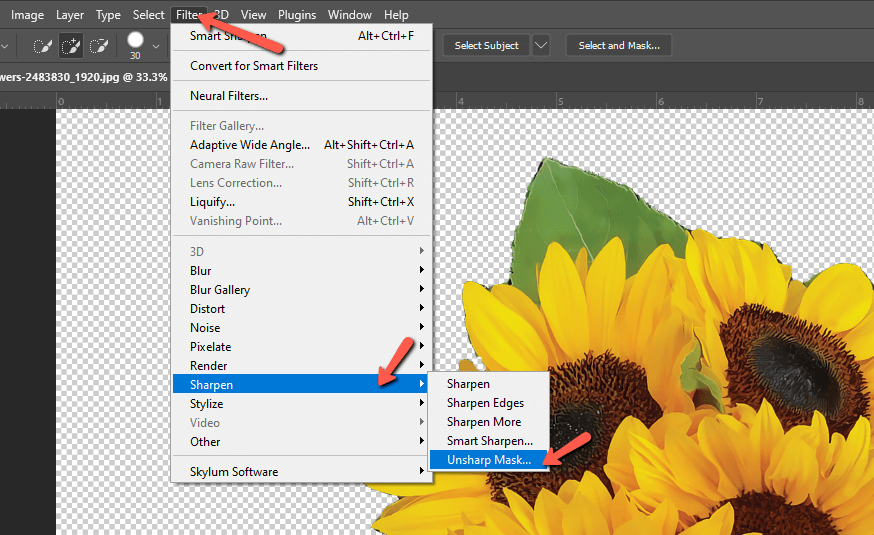
Set the Amount to about 30% and the Radius to 50 pixels. The Threshold can stay at 0.
Step 4: Apply and Blend High Pass Filter
We’ve smoothed and sharpened the image, now we’ll use more filters to blend and add contrast to the image.
First, duplicate the layer with Ctrl + J or Command + J.
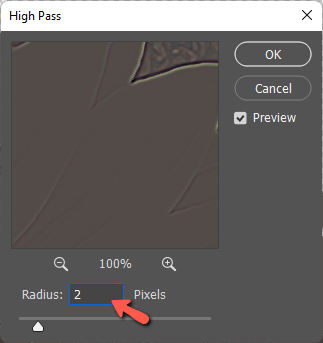
Now go to Filter, Other, and choose High Pass.
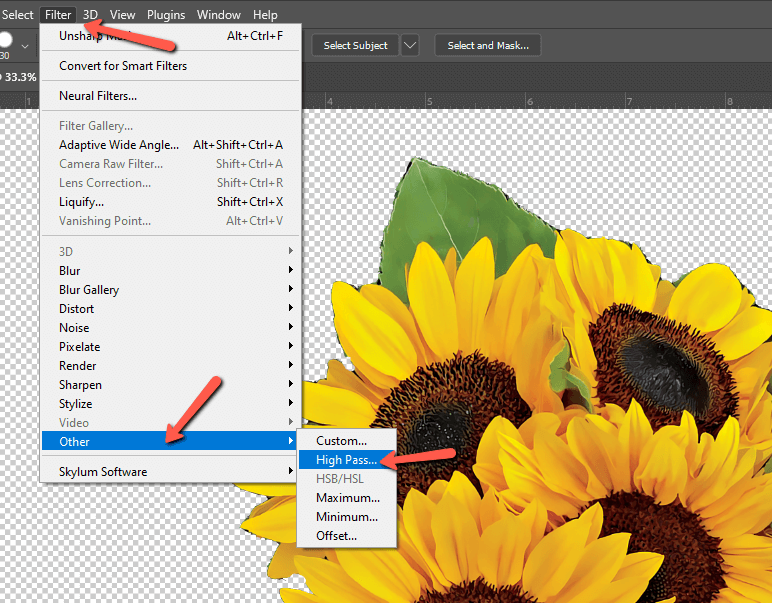
Change the Radius to 2 pixels and click OK. It looks weird, I know. Just stick with me.
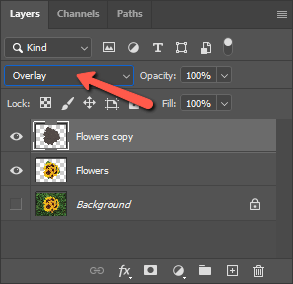
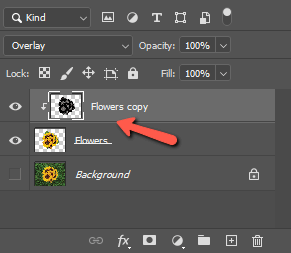
In the Layers panel change the Blend Mode to Overlay. You can play with some of the other modes to create different effects.
Now, select both layers and right-click to open the menu. Choose Merge Layers to put them together.

Now, you can leave it like this, or you can repeat the last two steps and apply all the filters again to embolden the effect. You can do this as many times as you like.
I’m going to add them all again twice. You can use some of the same values. I changed the Smart Sharpen Amount to 100% and the Radius to 1 pixel. I also changed the Unsharp Mask to 25 pixels and used a value of 1 pixel for the High Pass.
Step 5: Add an HDR Effect
To finish off our cartoony look, let’s add an HDR effect. Like the High Pass filter, this one is going to look weird for a moment, but it will all work out in the end.
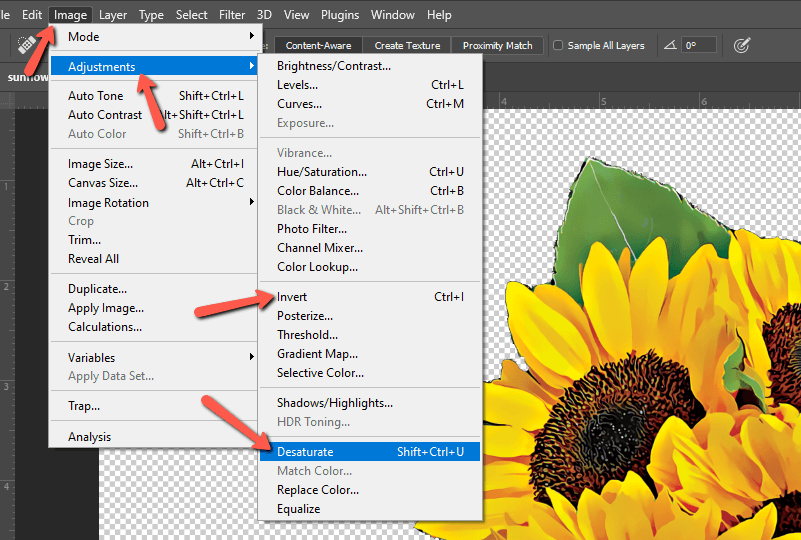
Duplicate the layer by hitting Ctrl + J or Command + J.
With the copied layer highlighted, go to Image, hover over Adjustments, and choose Desaturate. Alternatively, press Shift + Ctrl + U or Shift + Command + U. Come back to the same spot and choose Invert this time. Or press Ctrl + I or Command + I on the keyboard.
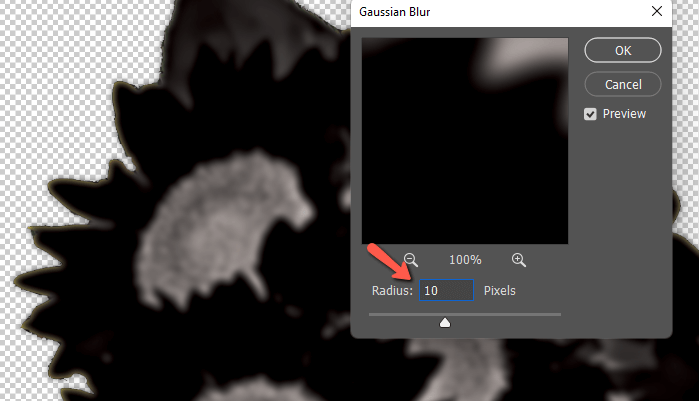
Now let’s add the filter. Go to Filter, hover over Blur, and choose Gaussian blur. As you can see, things are getting funky with the image.
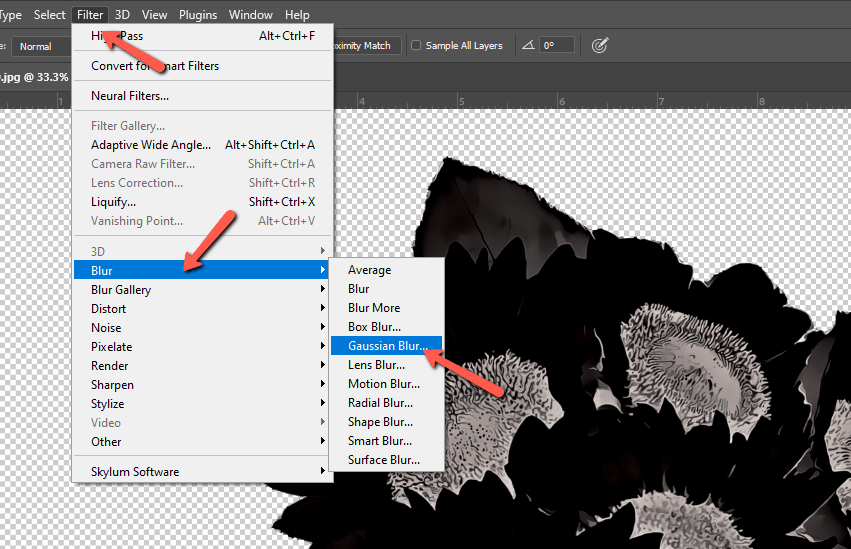
Let’s go for about 10 pixels here and ignore how strange the preview looks.
Again, change the blend mode to Overlay. The effect will probably be too strong, so bring the Opacity of the layer down.
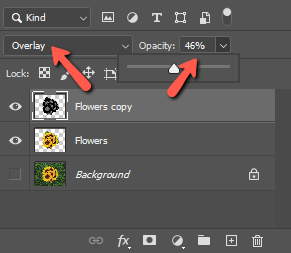
We want to restrict the HDR effect layer to only the selection so hold Alt or Option while clicking on the line between the two layers. This “clips” the HDR layer to the object layer.
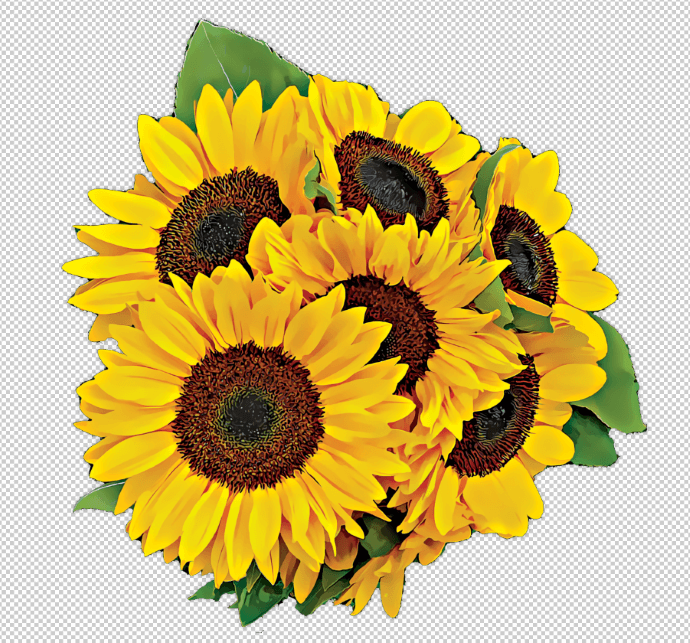
Each filter is very subtle so it’s hard to see the difference as you work. But the filters added together to make quite a difference by the time you’re done! Here’s the before and after.
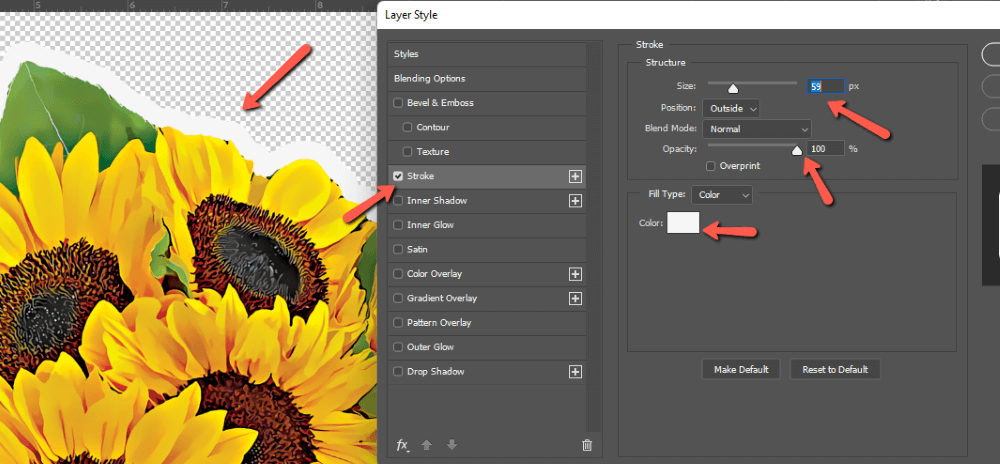
Step 6: Add Stroke and Shadow
If you’re going to be printing the sticker physically, you can skip down to the next step and save your sticker now. If you want to make it look like a sticker for digital use in WhatsApp or something similar, let’s do this extra step.
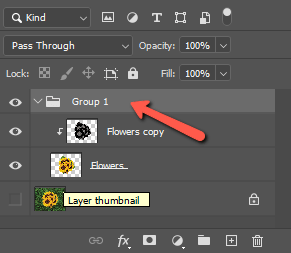
First, group the object layer and your HDR layer so they are affected together. Select both layers and press Ctrl + G or Command + G.
Double-click on the group layer to open the Layer Styles box. Choose the Stroke option. Set the color to white and pick a size that works for your image. Make sure the Opacity is set to 100%. You’ll get a thick white line around your object like that of a sticker.
Still in this same menu, click the Drop Shadow. Set the color to black and choose your distance, Spread, and Size values according to how you want the shadow to look.
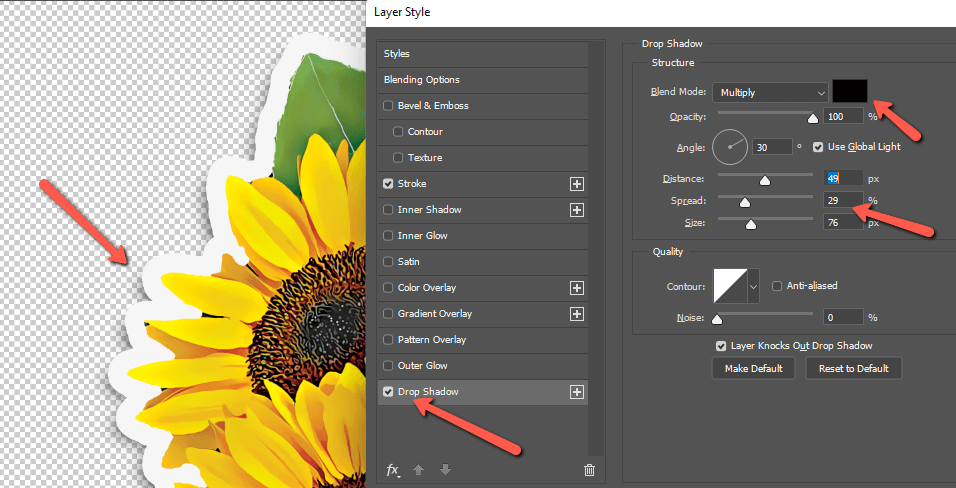
This lifts the sticker a touch so it doesn’t disappear into the page. Press OK when finished.
Step 7: Trim the Excess
We don’t want all the extra space when we save the sticker. So go to Image and choose Trim.
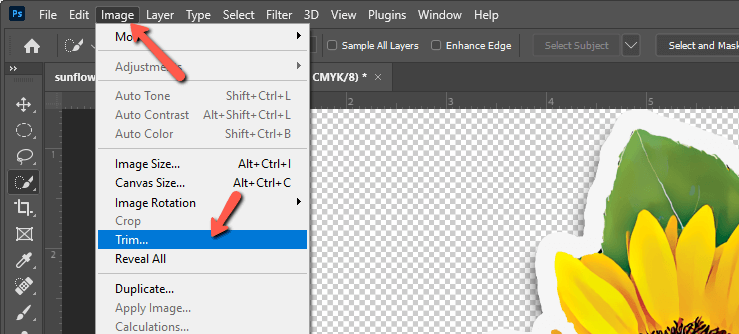
You want it to trim away based on the transparent pixels. Make sure all the boxes are checked so it trims all sides. Press OK.
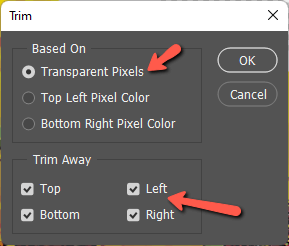
The program will create a neat rectangle around the object, cutting off any excess canvas.
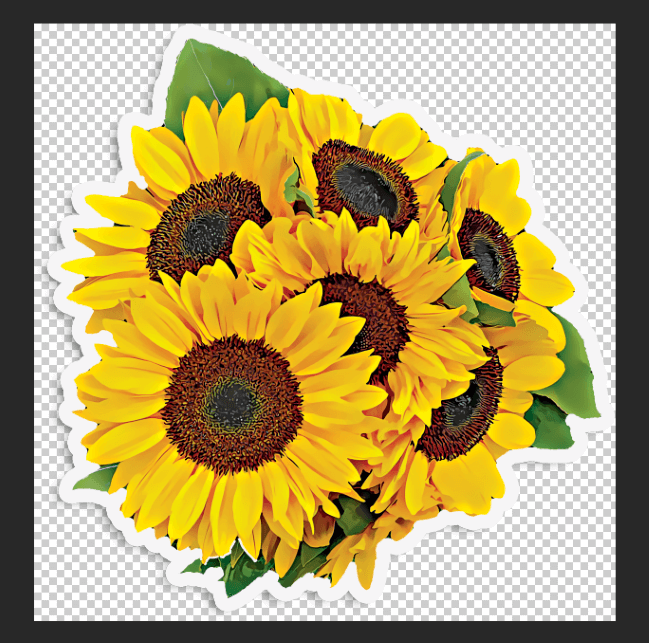
Bam! What an awesome sticker!
Step 8: Save the Sticker
Make sure you export as a PNG to keep the transparent background. Just go to File, hover over Export and choose Quick Export as PNG. Navigate to where you would like to save your sticker and give it a name before saving it.

I know it seems like a lot of steps, but making the sticker is pretty quick once you get the hang of it. Plus, you can definitely have a ton of fun with it!
If you want to use your sticker in WhatsApp, you’ll need a sticker maker app like the “Sticker Maker” app. It is super easy to use and helps you turn your file into a usable digital sticker. Curious about other effects you can create in Photoshop? Check out this tutorial for turning a photo into a watercolor painting!
About Cara Koch
Benjamin Ohakim
I intend to make color (paint) by sticker book to be published online on print-on-demand program. When you have time to spare, please, can you go further to educate me how to proceed and do it? I can send a sample.