Did you know you can put a digital rubber stamp on anything in Photoshop? As with many techniques, it isn’t even as hard as you think!
Hello! I’m Cara, here again with another surprisingly easy Photoshop tutorial. Today we’re going to learn how to make a stamp in Photoshop. With this method, you can turn anything into a stamp, even a logo!
Making a text-based stamp is quite simple, we’ll go through it here quickly so no one gets left behind. However, you can also use a logo or graphic or anything you already have ready that you want to turn into a rubber stamp.
So let’s get started!
Note: I use the Windows version of Photoshop. If you are using a Mac, the workspace will look slightly different from the screenshots displayed here.
Table of Contents
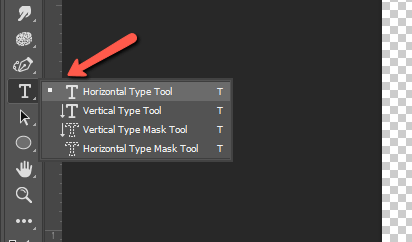
Step 1: Choose the Text Tool
Start by opening a new document with a transparent background. Then choose the Horizontal Type Tool.
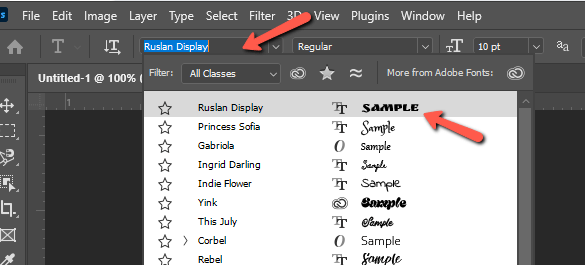
Click on the document and a preview of the text will appear. In the Options bar at the top, you can choose the font. You can use anything, but a thick, fat font will give a more realistic rubber stamp appearance.
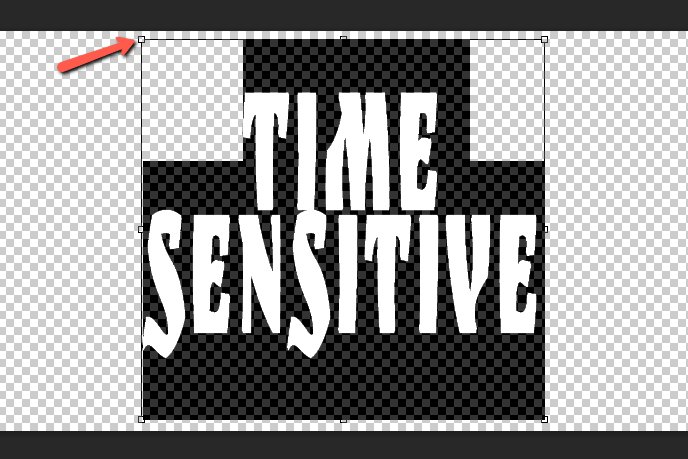
Step 2: Write and Adjust the Text
Write your text, then hold down the Ctrl or Command key so the resizing box appears. Pull on the corners to resize your text and reposition it on your document.
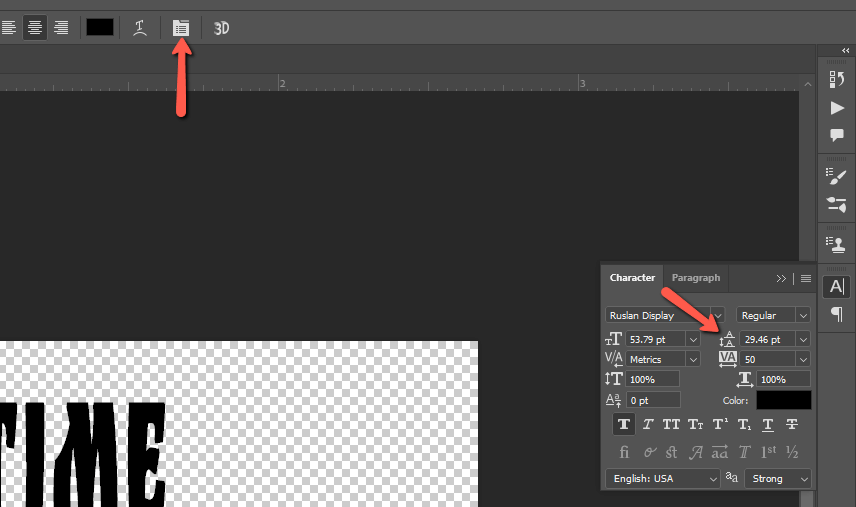
If you’re using two words on different lines like I am, you may need to adjust the spacing between the two lines. Click the Character panel in the Options bar and adjust the value in the line Leading box.
Once your text is set, press Enter or click the checkmark in the Options bar.
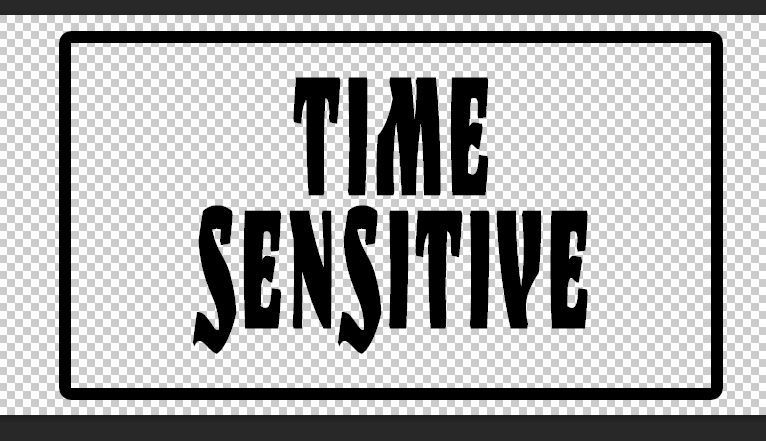
Step 3: Add a Rectangular Border
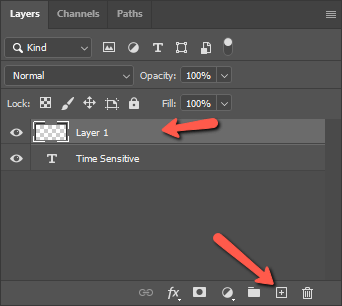
To put a border around it, as rubber stamps often have, click the New Layer icon at the bottom of the layers panel.
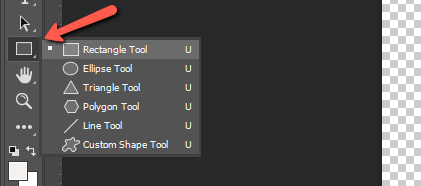
Now choose the Rectangle tool from the toolbar.
In the Options bar, make sure the first dropdown is set to Shape. The Fill should be transparent, which is indicated by a white box with a red line through it. Choose a Stroke size that will work for your image, I’m going with 12 pixels.
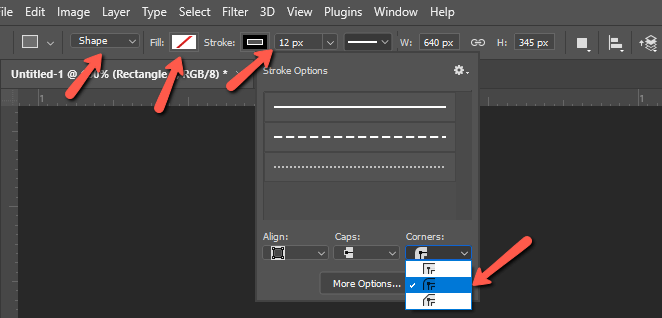
In the Stroke Options dropdown, you can round the corners as well as choose the alignment of the stroke.
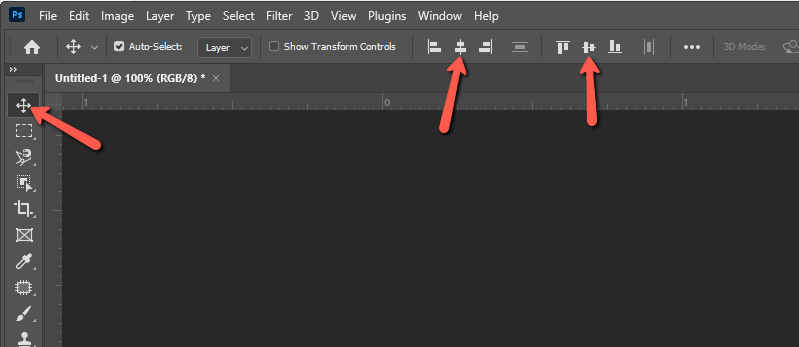
Once everything is set, draw a rectangle around your text and make adjustments as needed. To make sure both elements are perfectly aligned with each other, hold Shift while clicking on both the text and rectangle layers.
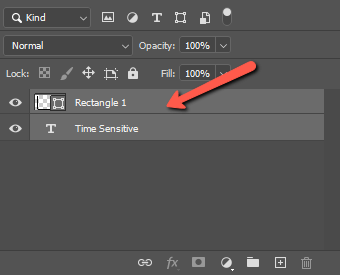
Then, choose the Move tool at the top of the toolbar. Click both the horizontal and vertical center alignment icons.
Now your stamp is ready for the rubber stamp effect!
Now we’re going to give this graphic the rubber stamp effect look.
Step 4: Convert to Smart Object
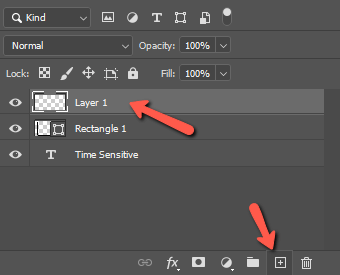
To be able to make our edits non-destructively, we need to convert the graphic to a smart object. We also need to add a background to the stamp and it needs to be on the same layer so the filter effect we’re going to use can work.
So click the New Layer icon at the bottom of the layers panel.
Go to Edit in the menu bar and choose Fill.
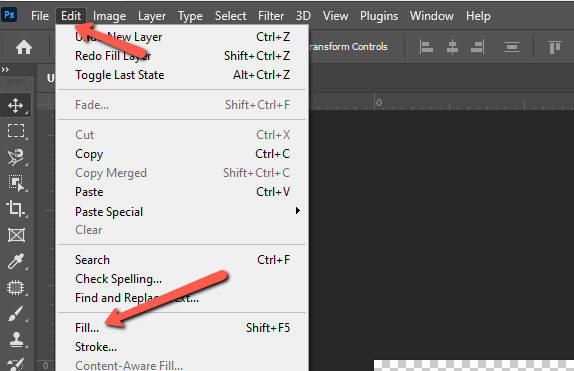
Choose Black for the Contents box and click OK. You can change the color of your rectangle and text layers as needed. Simply click on the layer and the appropriate tool (rectangle or text tool tools) and change the color in the Options bar.
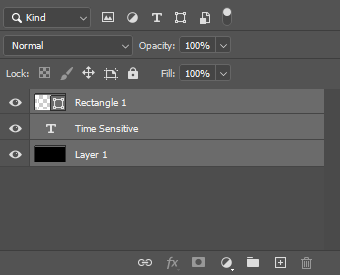
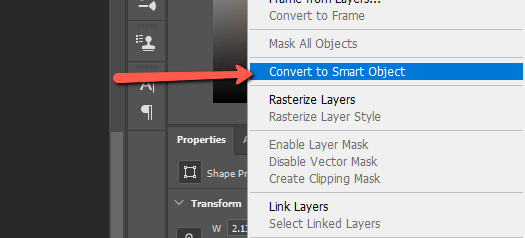
Finally, drag the black layer to the bottom of the stack. To put the layers together on the same layer and convert to a smart object at the same time, hold Ctrl or Command while clicking to select all three layers.
Then, simply right-click and choose Convert to Smart Object from the menu that opens.
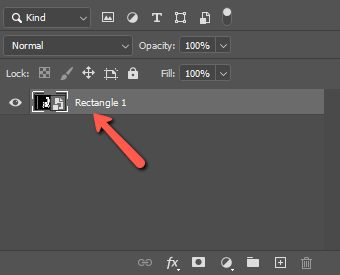
The layers will all merge together and become a smart object as shown by the icon in the lower right corner of the thumbnail.
Step 5: Add a Filter
With these preparations complete, we can now add a texturizing layer to start the rubber stamp look.
Go to Filter in the menu bar and choose the Filter Gallery.
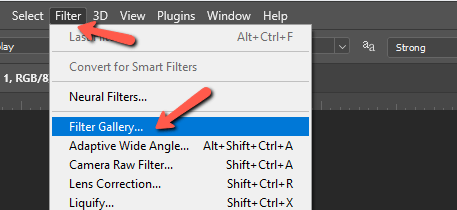
Once inside, open the Brush Strokes folder and choose Spatter. You’ll see a preview of your image on the left and you can adjust the Spray Radius and Smoothness sliders on the right to get the effect you’d like. Press OK when finished.

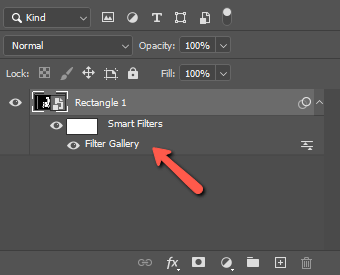
Because we converted the graphic to a smart object, you can make changes to the filter later if needed. Simply double-click on the Filter Gallery in the layers panel to reopen it and make adjustments to the filter.
Step 6: Remove the Background
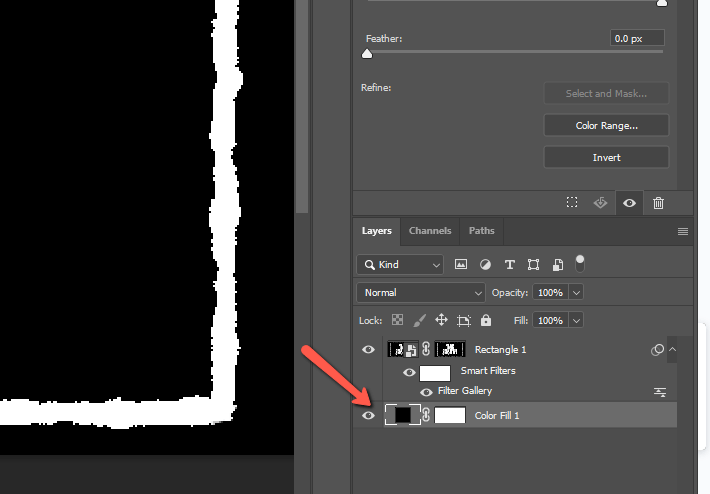
We needed a solid background so that the filter effect would work properly, but now we need to get rid of the black background once more. We’ll do that with a layer mask but, of course, we need to make a selection first.
A quick way to do this in a simple graphic like this is to switch to the Channels tab in the Layers panel. (Or go to Windows in the menu bar and choose Channels).
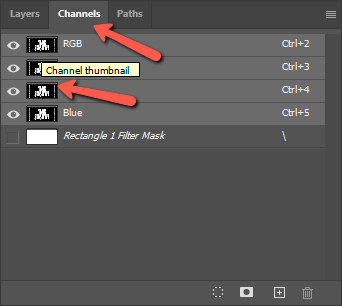
Then hold Ctrl or Command while clicking any of the channel thumbnails to make the selection.
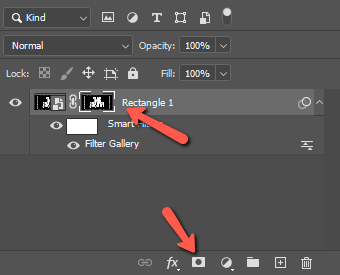
Switch back to the Layers tab and click the Layer Mask button at the bottom of the Layers panel. The black background disappears and we have our stamp with a transparent background.
Step 7: Add a Scratched Effect
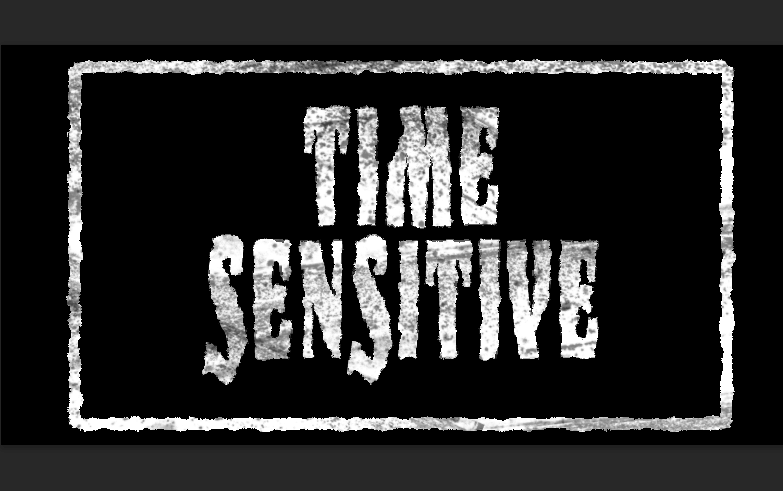
We’ve got some rough edges now, which is perfect for a rubber stamp. But you know that a rubber stamp doesn’t leave ink evenly pressed onto the paper. There are faded parts where the ink isn’t as thick. We’ll use the brush tool to simulate that effect.
Now, you can use any colors you like for your stamp. Right now, my stamp is white, which is kind of hard to see against the checkerboard background which indicates transparency.
So I’m going to add a solid color adjustment layer behind my stamp just for now. I’ll delete it again later, this is just a trick so we can see what we’re doing better.
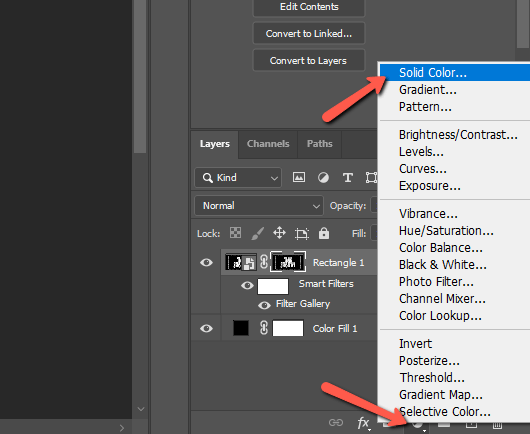
Click the half-filled circle icon at the button of the Layers panel. Choose Solid Color and then pick black from the color picker (or whatever color you want).
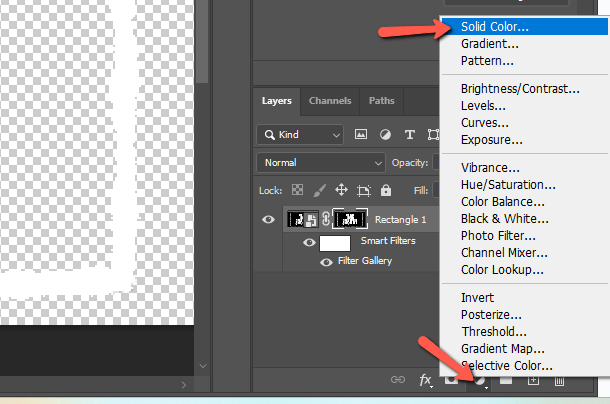
It will cover your project, so grab the solid layer and drag it to the bottom of your stack in the layers panel.
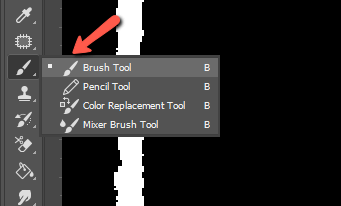
All right, back to the scratches. We’ll use the Brush tool to do this so choose it from the toolbar.
You may already have a grunge effect brush that will work, but if not you’ll need to download some new Photoshop brushes. I got mine from here. Download the brushes and be sure to unzip the file.
To bring the brushes into Photoshop, open the Brush tip panel and right-click anywhere. Click Import Brushes from the menu that opens.
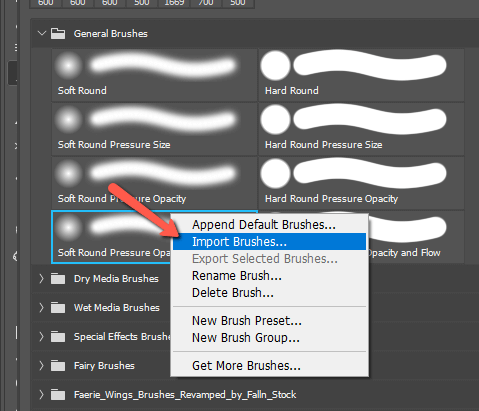
Navigate to your downloaded brushes and click Load.
Back in Photoshop, scroll to the bottom of your brush tips panel and you’ll see the downloaded brushes.
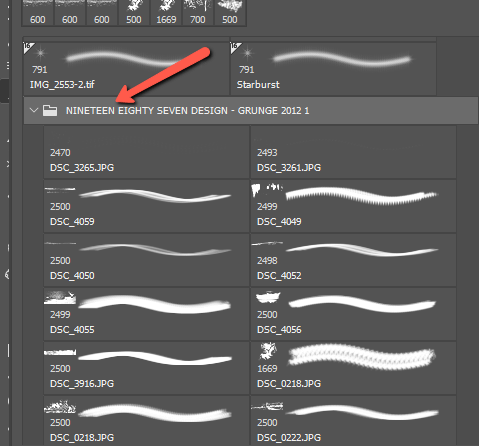
For this effect, I’m going to use this DSC_1561 brush, but you can use anyone you like.

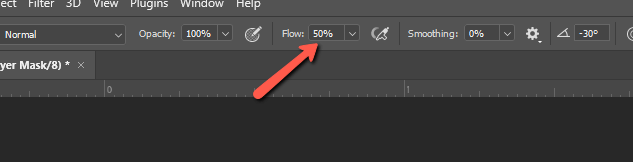
Adjust the brush size either at the top of your brush tip panel or by using the bracket [ ] keys. Bring the flow down to around 50% in the Options bar.
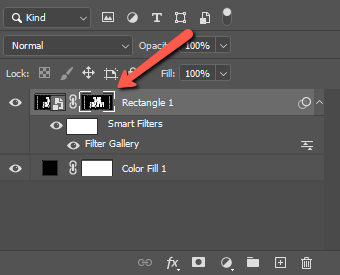
Make sure the layer mask is selected in the Layers panel and that the foreground color is set to black.
Now, click around on the graphic a few times to apply the effect. Remember you can rotate the brush one degree at a time with the arrow keys. Hold Shift while pressing the arrow keys to jump 15 degrees at a time.
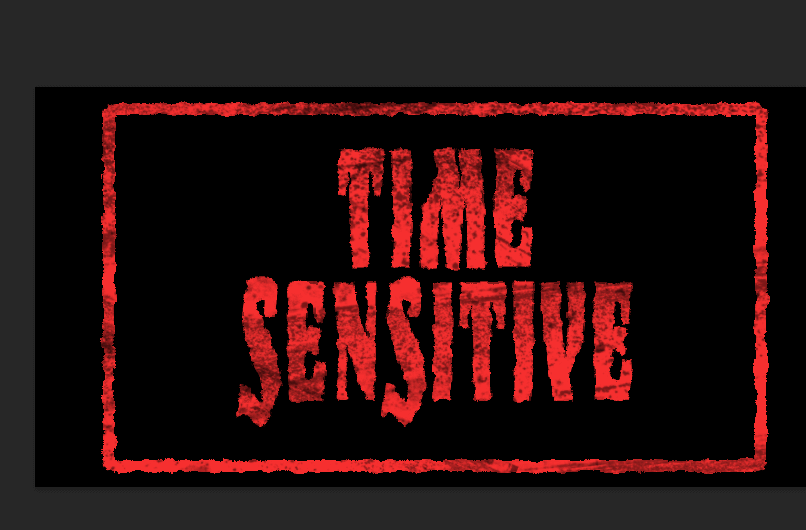
And here’s the final effect.
Step 8: Final Adjustments
You can make this rubber stamp in any color you like. Simply add a solid color adjustment layer on top. Click the half-filled circle icon at the bottom of the Layers panel and choose solid color.
Choose your color from the color picker. To limit the color to only the stamp, hold the Alt or Opt key while hovering between the graphic layer and the color layer. When the cursor turns to a right-angle arrow, click to create a clipping mask.

And voila! The color changes!
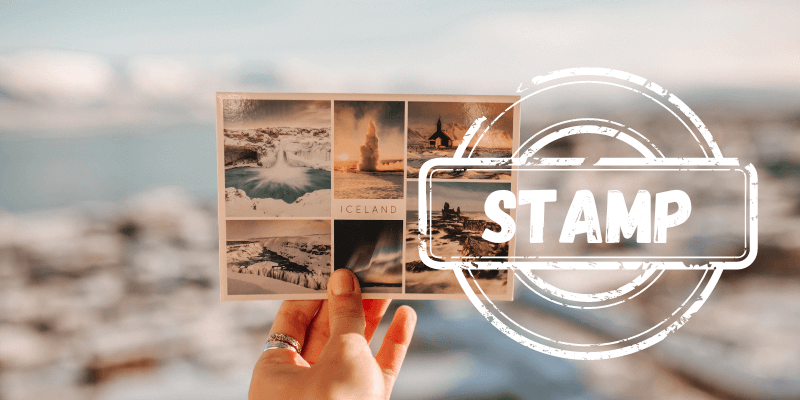
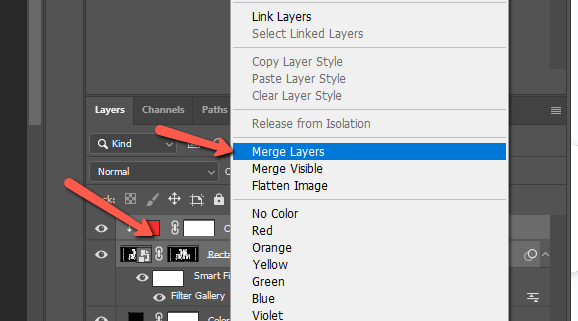
To place this stamp onto another document, make sure to merge the color and graphic layers together. Select both and right-click to access the Merge Layers command.
Then you can use Ctrl + C or Command + C to make a copy. Move to another document and use Ctrl + V or Command + V to paste it. I’ve got this image from Pexels as an example. Press Ctrl + T or Command + T to activate the Transform tool and position your stamp where you want it.

This is great fun for digital scrapbooks, marketing materials, and lots of other projects. Enjoy! Curious about other fun effects you can create in Photoshop? Check out how to make metallic text here!
About Cara Koch