It seems like vintage everything is back in style these days – including photographs. There’s something nostalgic and timeless about looking at a vintage photograph, a snapshot of a different place in time.
Hello there, I’m Cara and I have some exciting news! With Photoshop you can make any photo look vintage and create those warm fuzzy feelings without having to go back in time to take a picture, then wait a few decades.
So let me show you how to make a photo look vintage in Photoshop! Follow the five essential steps below to make an image look vintage in Photoshop.
Note: I use the Windows version of Photoshop. If you are using a Mac, the workspace will look slightly different from the screenshots displayed here.
Table of Contents
Step 1: Choose a Photo
It’s important to choose your photo carefully. While you can apply these edits to any photo, not every photo will actually look vintage. For example, if you take a photo of a brand new car and turn it vintage, everyone will still know they’re looking at a modern photograph.
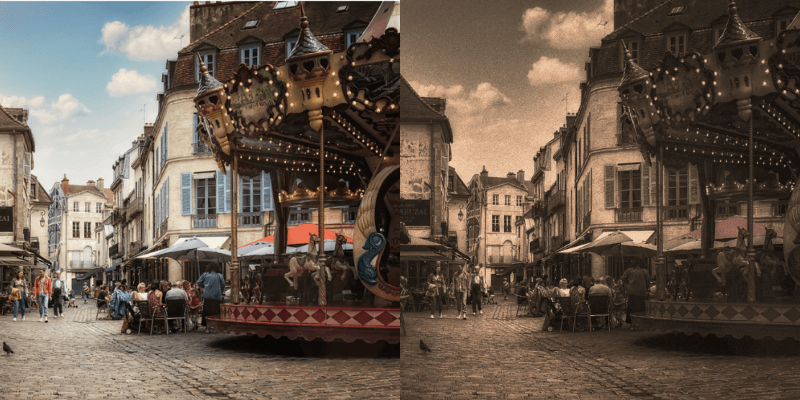
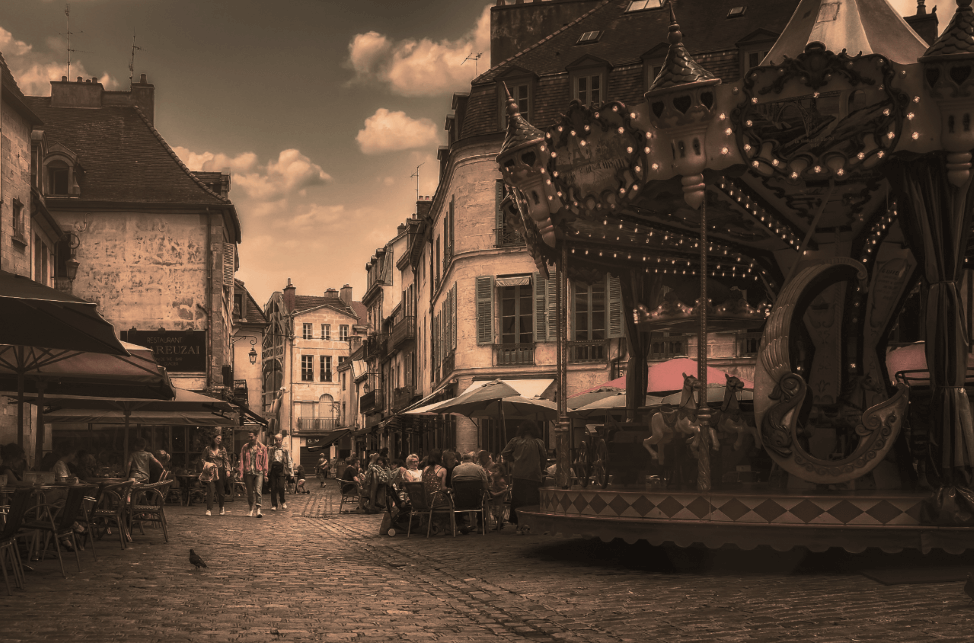
So pick a photo that is already giving you some nostalgic vibes. For example, this image already looks like it’s taken from the old times, but we can make it even more vintage.

It appears to be an old village somewhere in Europe, with this old-fashioned carousel giving off distinct vintage vibes.
Step 2: Change the Color Tone
Remember that old-time photographs did not present the range of colors we are used to seeing today. Depending on the timeframe, photos were black and white or sepia-toned, not to mention the photos fade even more over the years. Some turn green or yellow with age.
So let’s start there.
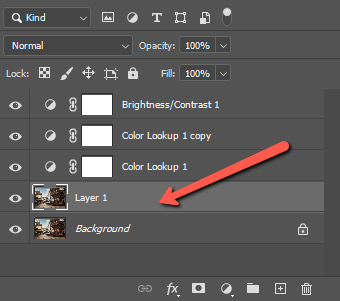
Before we start making any changes, press Ctrl + J or Command + J to make a copy of your image. Now, let’s add a Color Lookup adjustment layer to get started with making color changes.
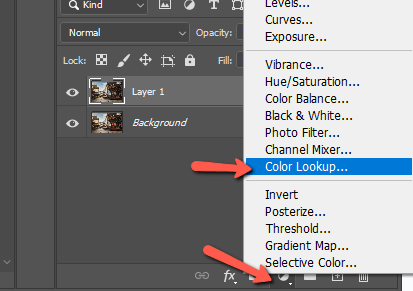
Click the half-filled circle icon at the bottom of the layers panel to open the adjustment layer options. Click Color Lookup.
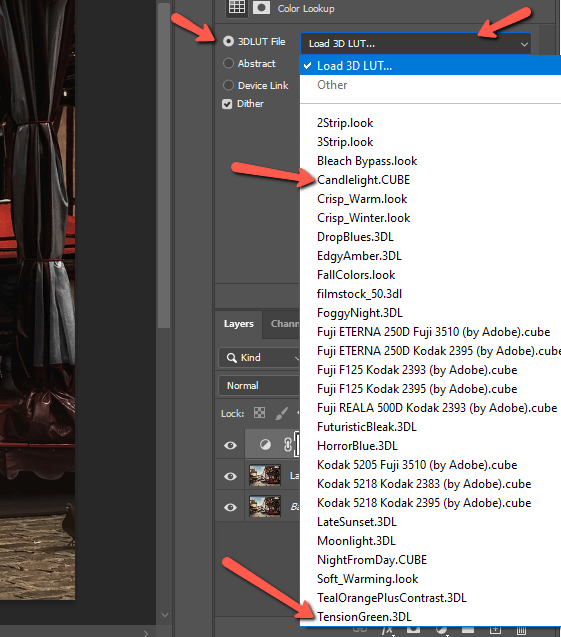
Make sure to select the 3DLUT File radio button. Then click on the dropdown box to open your options.
The TensionGreen one at the bottom is good if you want a green-tinged color photograph. I want more of a sepia tone, though, so I’m going to choose this one called Candlelight.
Here’s the effect I get.
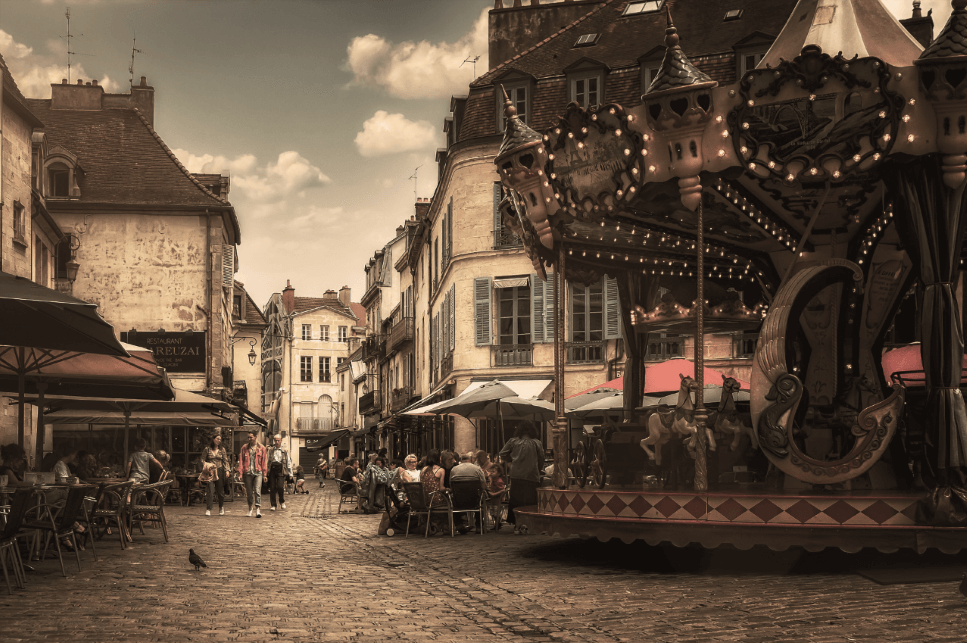
As you can see, it muted the colors quite a bit and gave it a sepia-toned look. To make the effect stronger, you can duplicate the layer with Ctrl + J or Command + J. If doubling it is too strong, you can adjust the Opacity of the second layer to get it just right.
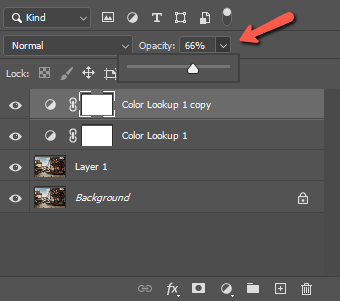
Here’s how it looks with the Opacity of the second Color Lookup layer at 86%.

Step 3: Adjust the Brightness
Old-time camera equipment wasn’t as good at gathering light as the amazing equipment we have today. Thus, photos tended to be dark and a little fuzzy. So let’s bring down the brightness and contrast to simulate that appearance.
Click the half-filled circle again to open the adjustment layers and choose Brightness/Contrast.
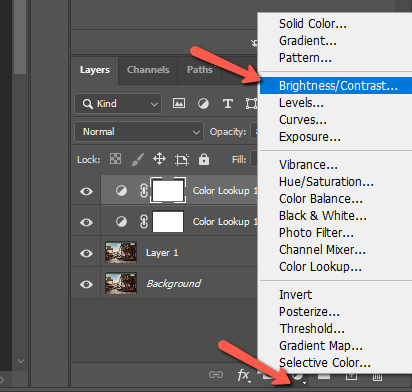
In the Properties tab, slide the Brightness slider to the left to darken the photograph. You’ll probably want to bring the Contrast down as well to remove the crispness from the blacks and make the image more hazy.
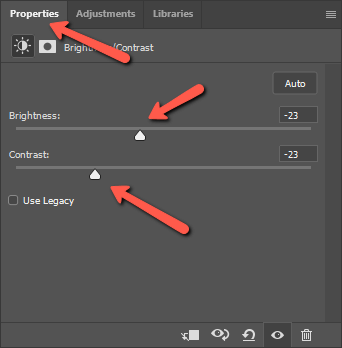
It’s looking pretty good!
Step 4: Add Noise
Again, old-time photographic equipment produced grainy images – a far cry from the crisp, clear images we can create today! So let’s add some grain to this image.
A quick way to do this is with the Camera Raw Filter. Make sure to select the base layer (not one of the adjustment layers) otherwise, it won’t work.
Then go to Filter in the menu bar and choose Camera Raw Filter. Or you can press Shift + Ctrl + A or Shift + Command + A on the keyboard.
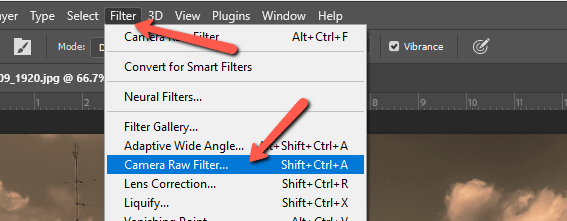
It will open a preview without the adjustment layer changes we’ve made. That’s not a problem, they’ll be back as soon as we go back to the workspace. On the right side of the preview, open the Effects section. There you’ll see a Grain slider you can use to adjust the amount of grain.
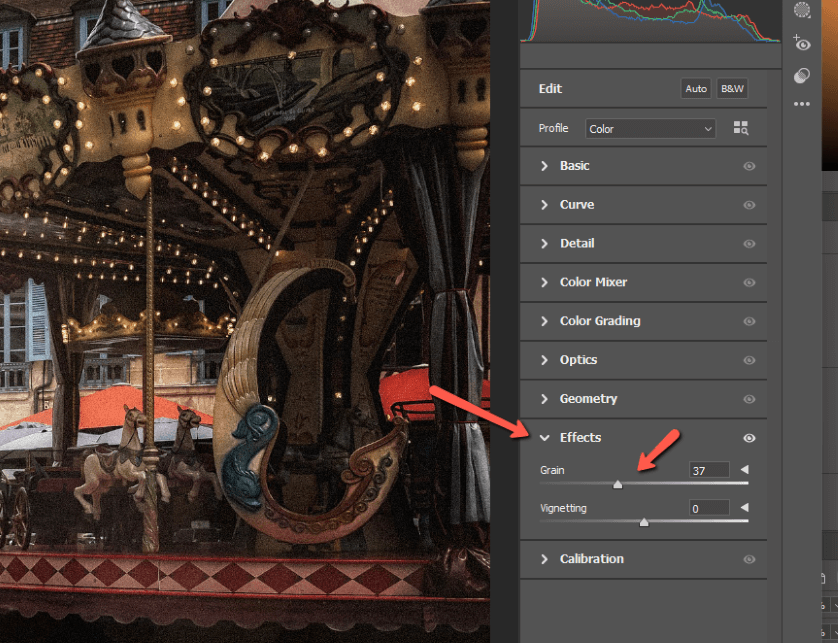
Once you’ve picked a value that works for your image, click OK and you’ll go back to the main workspace. This is looking quite good!
Step 5: Add a Black and White Filter
One of the cool things about working with layers in Photoshop is that you can go back and add stuff later.
I’ve decided that for this photograph, there is still a little too much color. I didn’t start by turning the image to black and white because I didn’t want a full black-and-white image.
So here’s what I can do to dial it back. Just like we did when adding the noise, I’m going to select the base layer of the image.
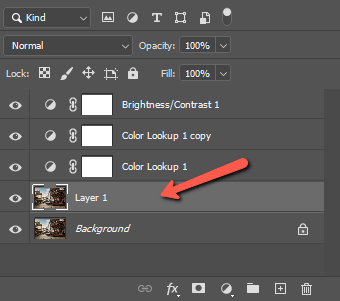
Why is this necessary? Because if you add a black-and-white adjustment layer at the top of your layer stack, you’ll override the color lookup effects we added as well.
From here, click the half-filled circle icon and choose Black and White from the list of options.
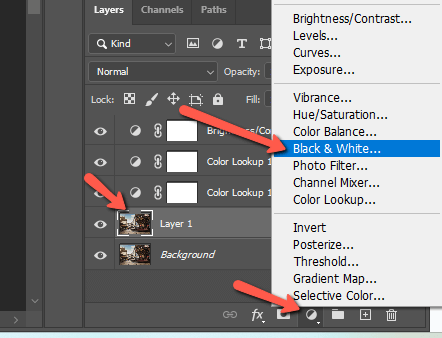
A black-and-white adjustment layer will slide in between the base layer and the first Color Lookup layer we added. This removes the color from the image without touching the color tint we added.
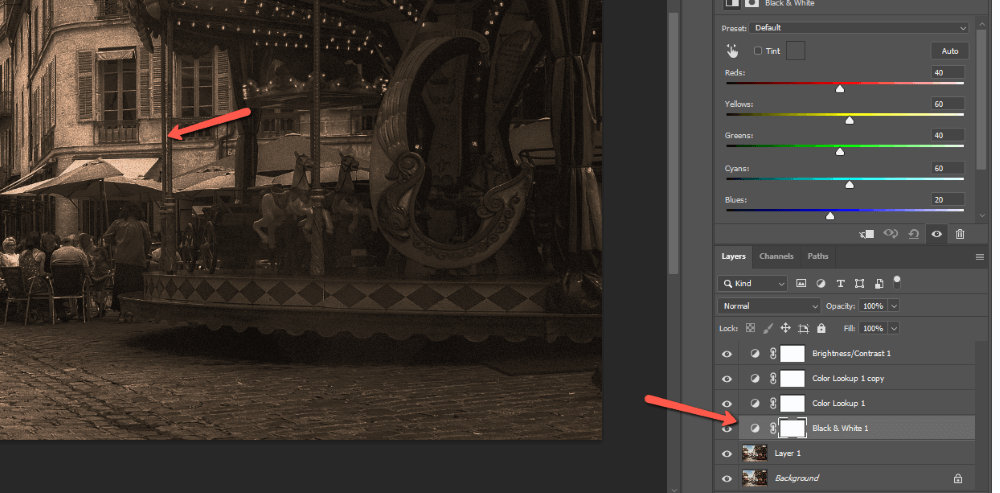
However, I don’t want to remove all the color from the image, in this case. So let’s adjust the Opacity slider for the black-and-white adjustment layer.
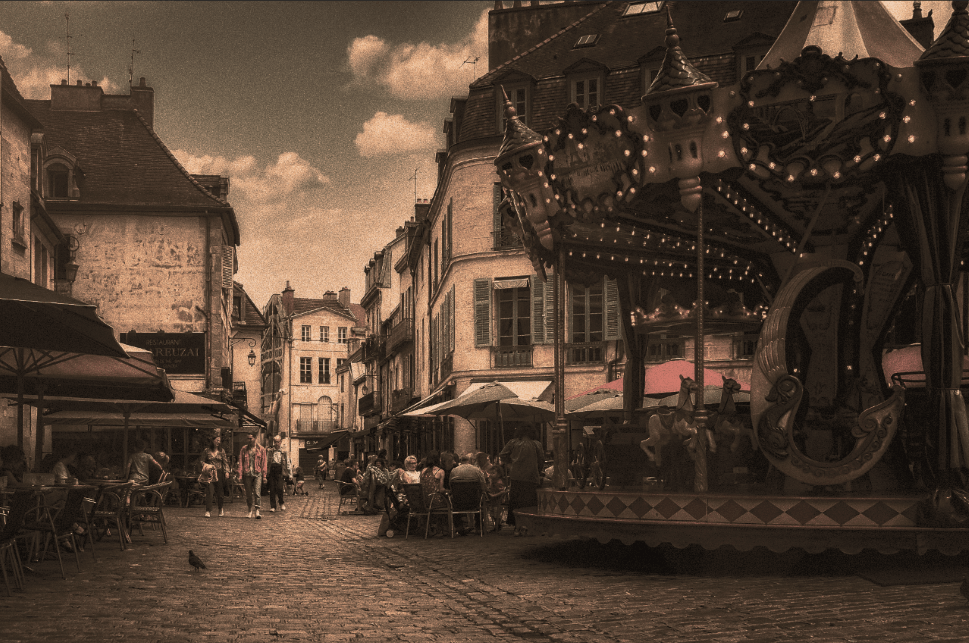
Now we’ve got an image that looks like it started as an old-time color photograph, but has faded over the years.
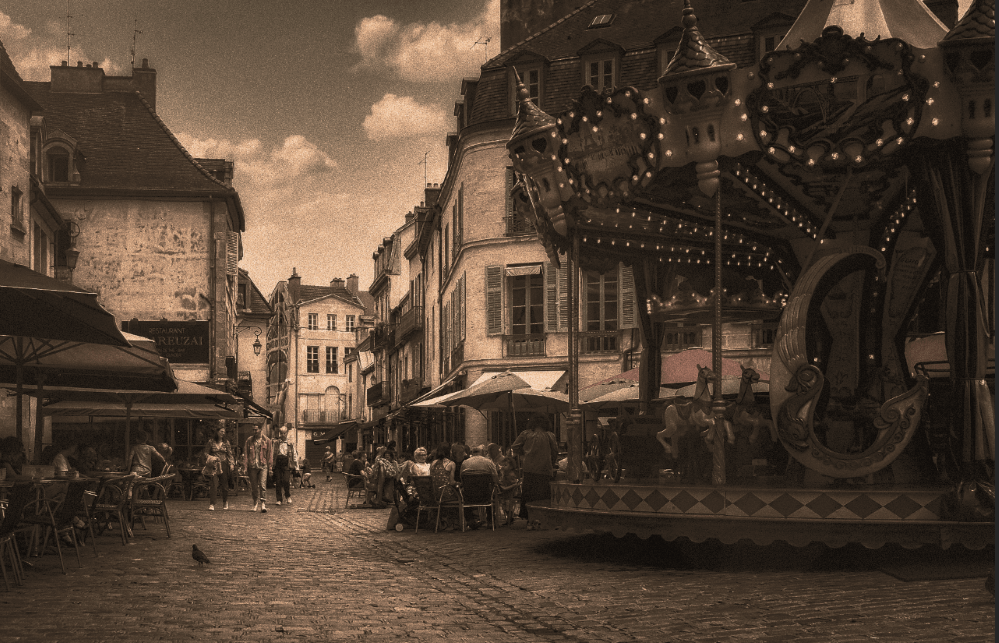
What do you think?
Of course, there is more than one way to make a photo look vintage in Photoshop. For some other ideas check out my tutorials here on Photoshop Buzz on adding a vintage texture or how to make your photos sepia with complete control over the final look.
Most of all, have fun with it!
About Cara Koch