A sepia tone is a great way to give your photos an old-time, vintage-style feel. It can be fun for scrapbooking or many other types of projects.
Hello! I’m Cara and here I am once again with simple Photoshop tips for you! As with many things in Photoshop, there is more than one way to create this effect. Which method you choose will have a slightly different effect on your image. Thus, it’s good for you to know your options.
So let’s take a look at a few methods for how to make a photo sepia in Photoshop!
Note: I use the Windows version of Photoshop. If you are using a Mac, the workspace will look slightly different from the screenshots displayed here.
Table of Contents
Method 1: Add a Photo Filter
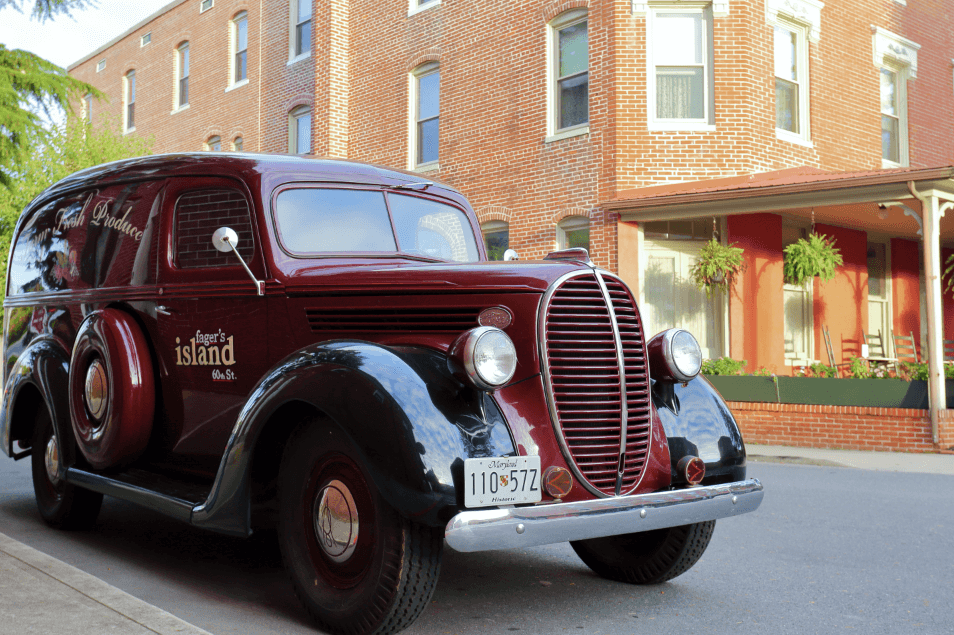
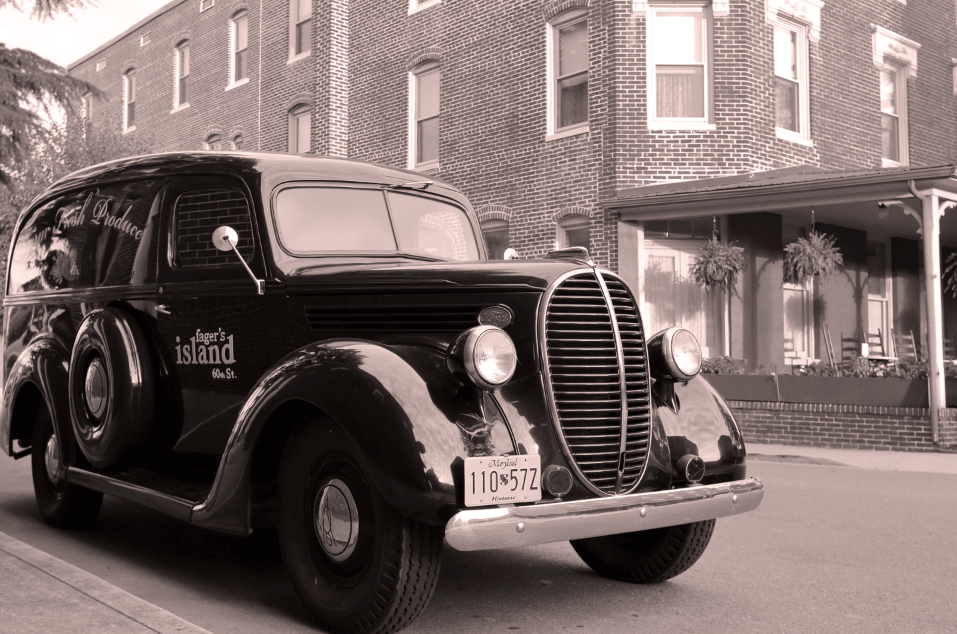
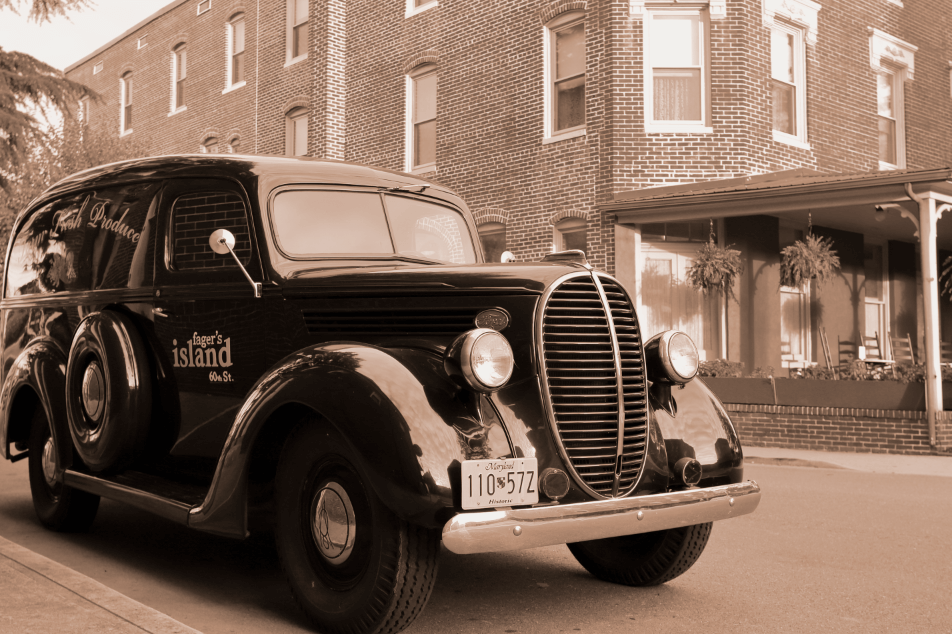
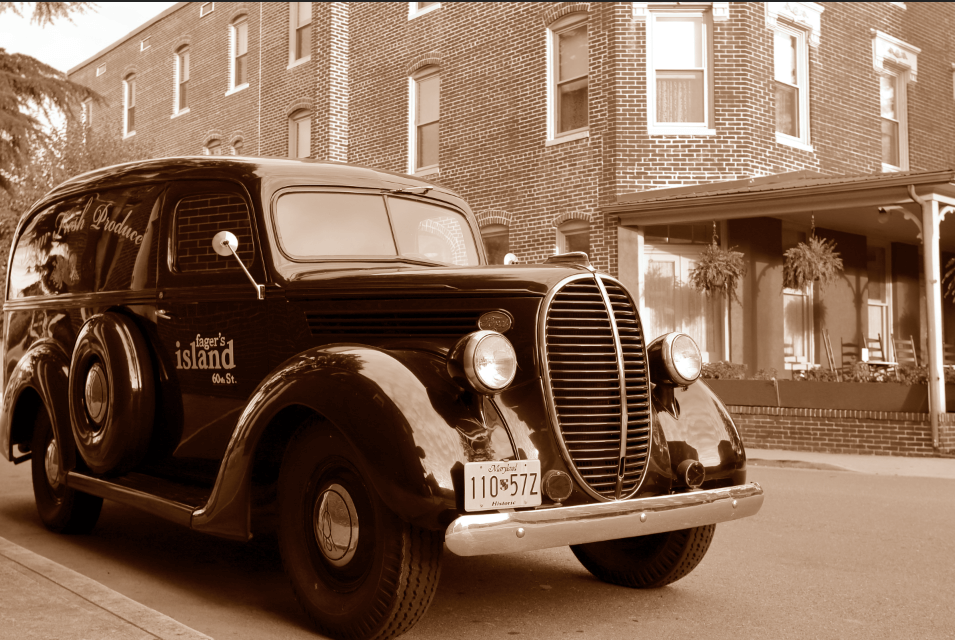
This first method we’ll look at requires a monochromatic photo to begin with. So if your image is in color like mine, you’ll need to convert the image to black and white first. By the way, I took this image in a small town called Berlin, Maryland.
Step 1: Convert the Image to Black and White
There are two ways to do this. You can go to Image in the menu bar, hover over Adjustments and choose Desaturate.
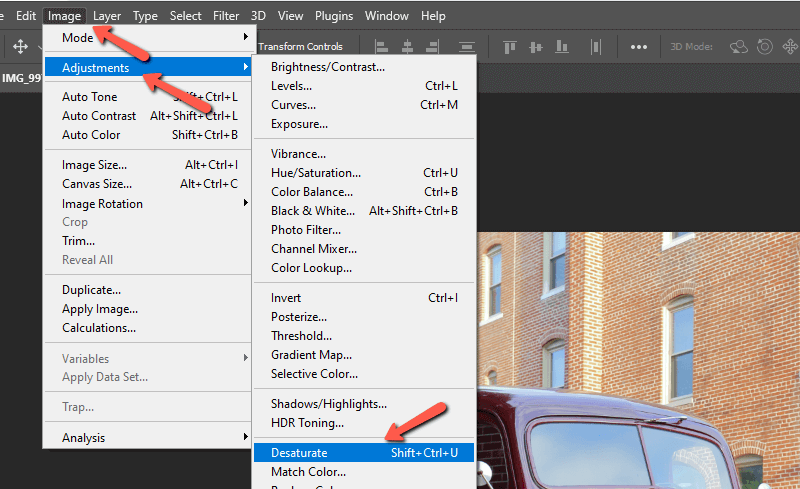
However, I don’t recommend doing it this way. This method simply desaturates the image and you can’t make any adjustments to the final black-and-white look. Plus, it is destructive, which means you can’t come back and change anything later.
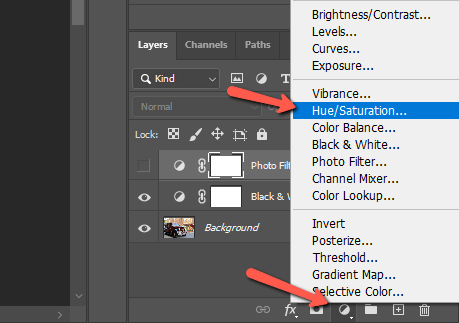
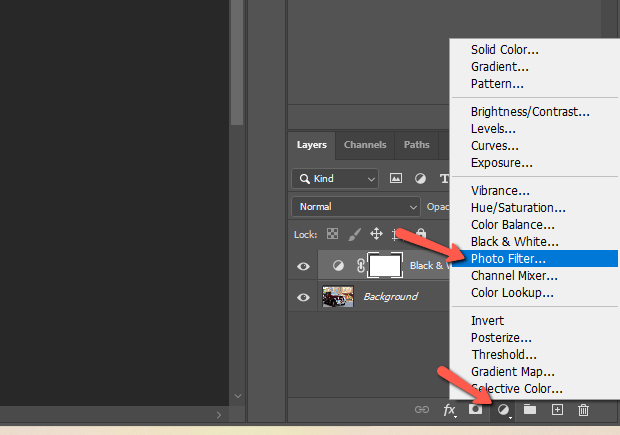
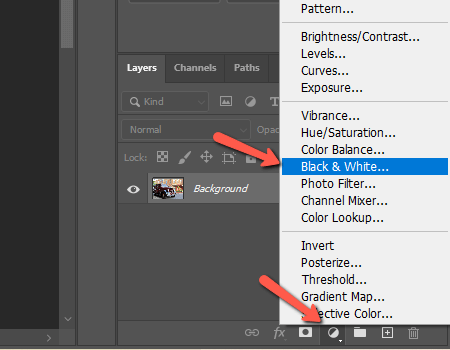
A better, non-destructive method, is to use a Black and White adjustment layer instead. To find it, click the half-filled circle icon at the bottom of the Layers panel. Choose Black & White from the menu that appears.
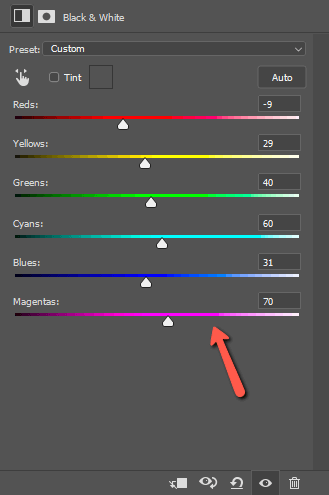
You can leave the image as-is, or make adjustments with the sliders in the black-and-white adjustment panel.
Step 2: Add the Sepia Photo Filter
Now that your image is in black and white, let’s add the photo filter. Click the adjustment layer icon at the bottom of the Layers panel once more. Choose Photo Filter this time.
You can start by trying one of the presets in the dropdown menu next to the Filter box. Warming Filter (85) is usually a good one for sepia.
For more control, click the button next to Color and you can choose the exact shade of orange/brown by double-clicking on the color swatch and choosing from the color picker.
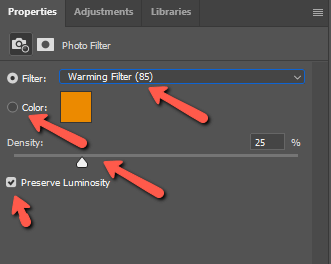
The Density slider gives you control over how strong the effect is. Slide it up to give a stronger tint. Check the Preserve Luminosity box if you want the lighting to stay the same, otherwise, the photo will change luminosity according to the luminosity of the color you choose.
Method 2: Add a Hue/Saturation Layer
Another way to add a sepia tone in Photoshop is with a Hue/Saturation layer. Again, access this through the adjustment layer icon at the bottom of the Layers panel.
The original photo does not have to be monochromatic for this method, but it does change the outcome slightly. Try it both ways to see which you like best. I’m going to keep it black and white for this example.
In the Hue/Saturation adjustment panel, click the Preset box to open the preset menu. Choose Sepia as a starting point.
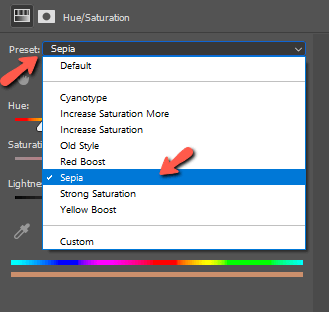
Then you can adjust the Hue, Saturation, and Lightness sliders to find a look you like.
Method 3: Color Balance Adjustment Layer
Another option is the Color Balance adjustment layer. You’ll need to start with a monochromatic image for this effect so be sure to add your black-and-white adjustment layer first.
You’ll find this in the same place at the bottom of the Layers panel. Choose Color Balance from the menu.
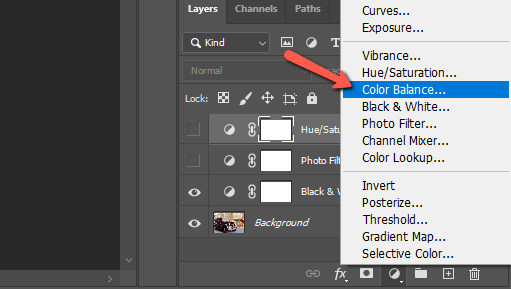
You can choose whether you want to work with shadows, midtones, or highlights. Generally, you want to start with the midtones. Bring down the yellows and bring up the reds until you get the effect you like.
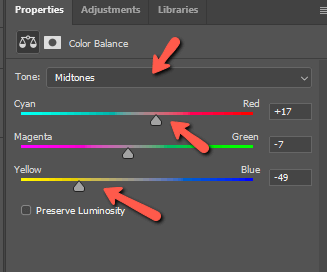
Then, you can fine-tune as needed.
Method 4: Color Fill Layer
The final method is to add a solid color fill layer. This allows you to pick the exact color you want to use from the color picker. Plus, you can combine the color with different blending modes to create different effects. This method also requires a monochromatic starting image.
Step 1: Add a Solid Color Adjustment Layer
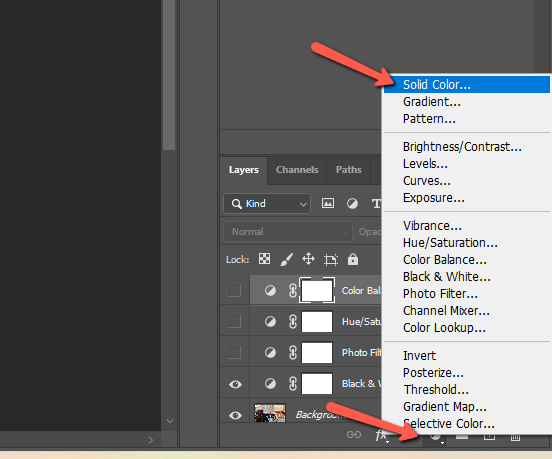
To get started, choose the Solid Color option from the adjustment layer menu.
Pick the shade of orange/brown you want. It will fill in your whole project so to bring the image through, we need to change the blend mode.
Step 2: Change the Blending Mode
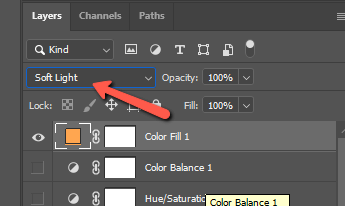
Near the top of the Layers panel, you’ll see a box that says Normal. Click on that box to open the blend modes menu. As you hover over each blend mode, you’ll get a preview of the effect in the main workspace. Take a look to see how each one affects the image. I chose Soft Light.
What if you like one of the blend modes, but the effect is just too strong? Remember, you can always bring the Opacity of the layer down to fine-tune the effect.
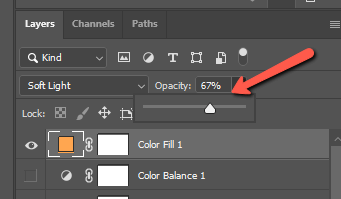
Here’s my final image using the #d9a353 hex code with the soft light blend mode at 67% Opacity.

And there you have it. I bet you never knew there were so many ways to make a photo sepia in Photoshop! Curious about other ways to make photos look vintage in Photoshop? Check out how to add vintage textures here!
About Cara Koch
felix
really really helpful, thank you