
The great thing about building a business with Photoshop is that you can use the program to design a lot of your own materials. This includes marketing materials like business cards.
Hello, I’m Cara! As an artist, I can understand how you might feel that design templates put you in a box. You want a business card that truly represents your style, but you just can’t get it from somewhere else.
Photoshop gives you the freedom to design your card exactly how you want it to perfectly reflect you. And it’s not even difficult to do. Let me show you how! I’m going to break down the tutorial into four essential steps.
Note: I took these screenshots from the Windows version of Photoshop CC. Those working with a Mac will find that the interface looks a little different.
Table of Contents
Step 1: Prepare the Document
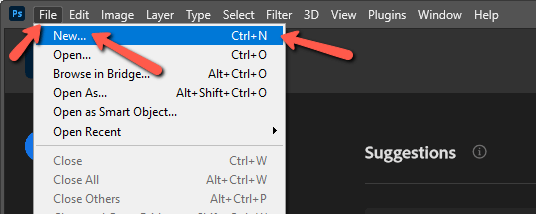
First thing is to open a Photoshop document using the right dimensions. Go to File and click New or press Ctrl + N or Command + N on the keyboard.
A box opens that allows you to choose the size of your project. Make sure the measurement unit is set to inches and not pixels, centimeters, or one of the other options.
The typical business card is 3.5” x 2” so you might assume those are the dimensions you should choose. However, we’re going to put 3.75” x 2.25” in the boxes.
This gives you a ?” bleed area that allows the background color of the card “bleed” over the edges a little bit. If you don’t do this, you’ll end up with tiny bits of white around the edges of the cards when cut.
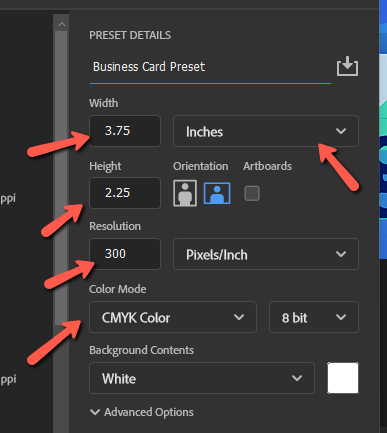
For proper printing, make sure the resolution is set to 300 pixels per inch (change the dropdown menu if necessary). Also, set the color mode to CMYK Color. If you already know your background color, you can choose it here. Otherwise, you can leave it white for now.
Step 2: Set the Margins
Remember, our project area is slightly larger than we need. If we end up putting text or graphics too close to the edge, it will get cut off.
To avoid this, let’s set up a few guidelines. These lines are purely for design purposes and won’t show up when saved and printed.
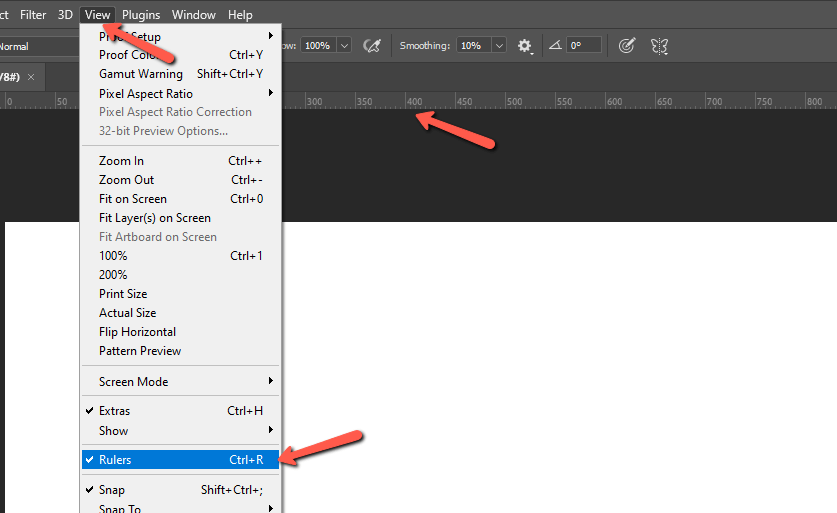
Press Ctrl + R or Command + R to activate the rulers in your workspace. Or go to View and choose Rulers from the menu.
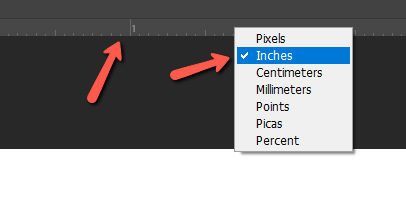
If your rulers are set to a different unit of measurement, right-click on the ruler and choose inches from the dropdown.
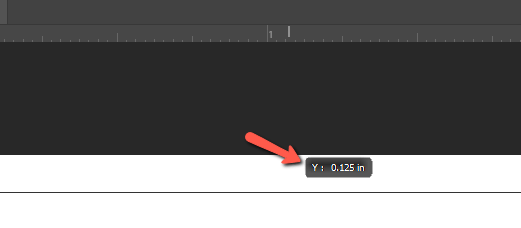
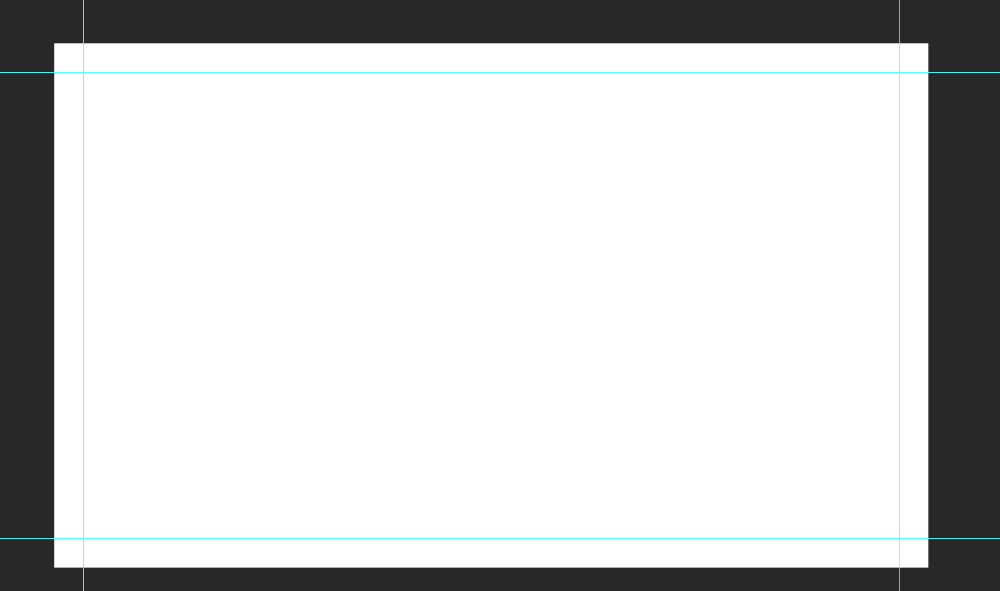
Click and drag down from the ruler to pull a guideline into your workspace. Drop it at ?” or 0.125” to represent your cut line.
Repeat for the other three sides of the card.
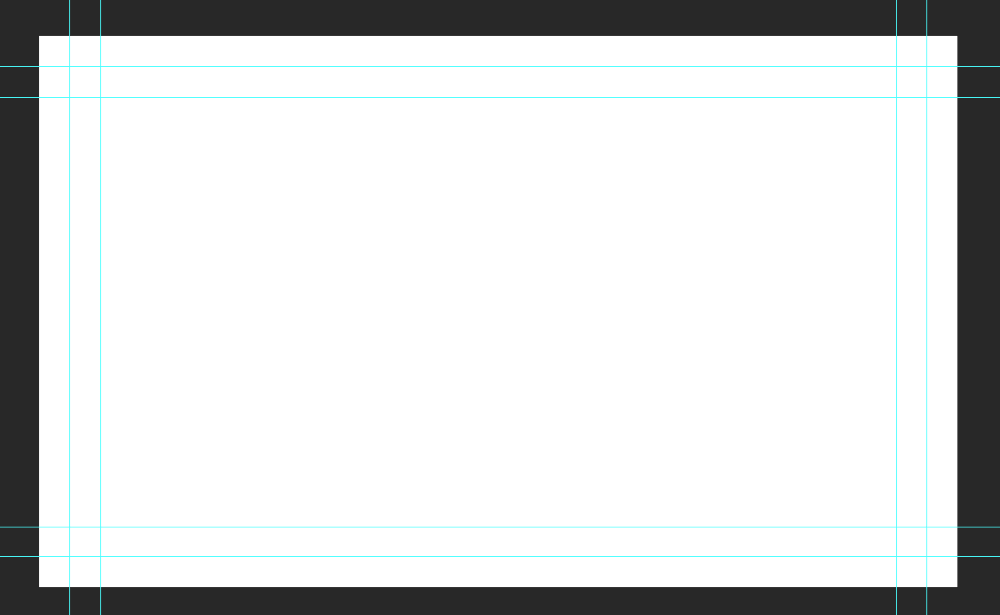
It’s a good idea to add another four lines ?” farther. This gives you a “safe” area on the card. Keep all text and graphics within this safe area to ensure they won’t get cut off when cutting the cards.
Step 3: Design Your Card
You can create whatever you want on your custom business card. But most people will probably at least change the background color, add some graphics, and add some text. So we’ll go through each of those techniques briefly.
Add Graphics
Let’s start with the graphics. Go to File and choose Place Embedded from the menu.
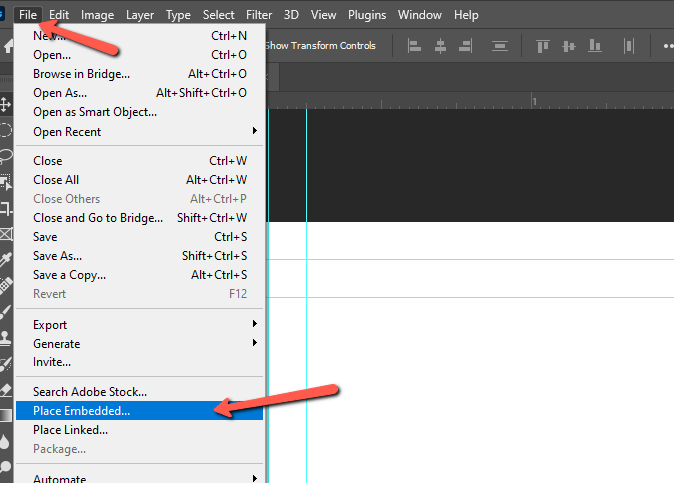
Navigate to the graphic file you want to use and press Place. This will automatically create a new layer for the graphic and put it on the card. Grab the blue squares on the corners to resize the element. Click and drag on the graphic to place it where you want it.
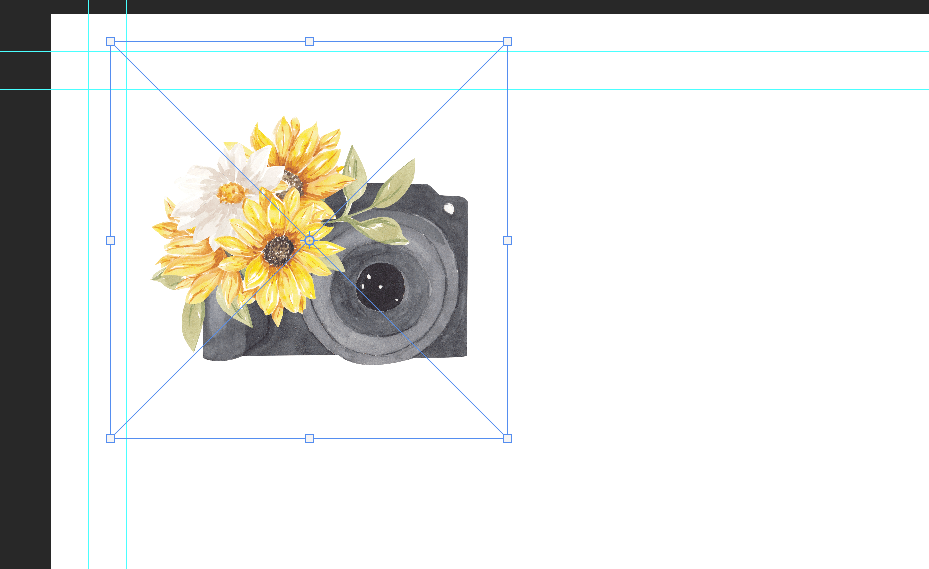
Remember to stay inside the guidelines. Add other elements as desired.
Add Text
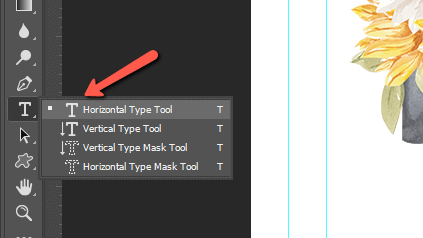
To add text to your business card, click the Text tool from the toolbar on the left or press T on the keyboard.
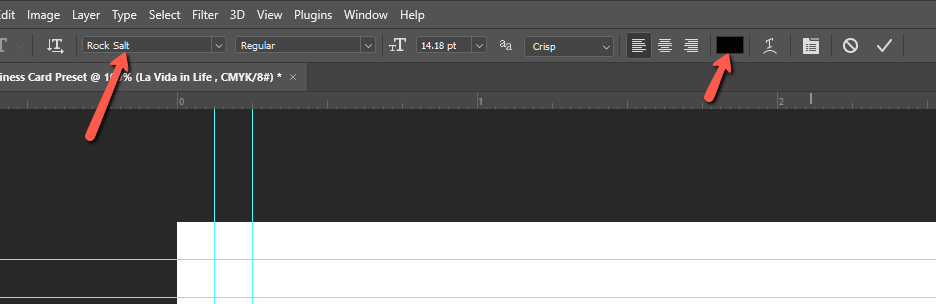
Click on the document where you would like to add the text and type something. In the Options bar at the top, you can adjust the font, size, color, and other aspects of your font. Check out this tutorial for more in-depth instructions for editing text.
Once you’ve added your text, your business card should be really coming together.
Change the Background Color
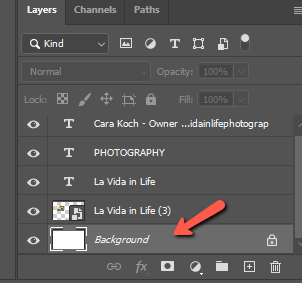
Now let’s give our card a different background color. Click the Background layer in the Layers panel.
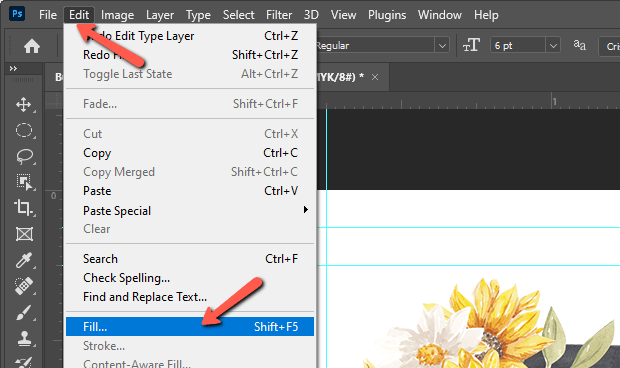
Go to Edit and choose Fill from the menu. Or press Shift + F5 on the keyboard.
In the box that opens, choose Color from the dropdown for the Contents box.
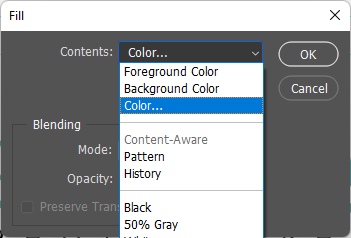
The Color Picker will open. Choose the color you want or type the hex code into the box. Press OK then OK again.

The background color will change to the new color.

Step 4: Save Your Business Card
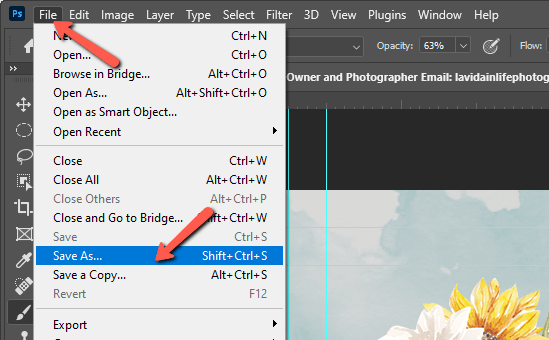
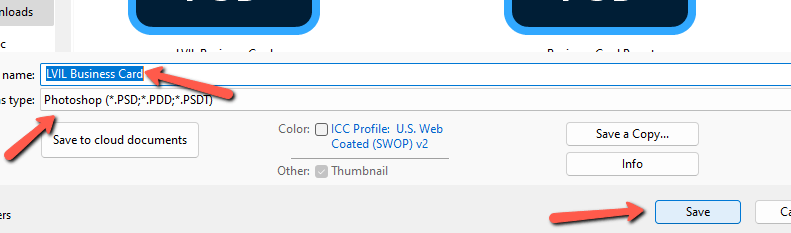
Save your card as a PSD file if you want to be able to make changes later. Go to File and choose Save As… from the menu.
Give your file a name, make sure you’re saving it as a PSD file, and click Save.
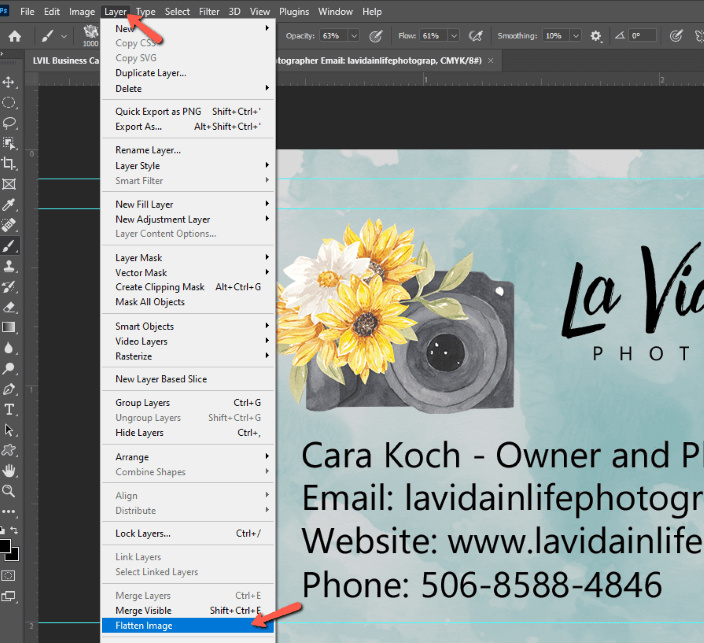
Some printers will accept PSD files for print, but it’s usually a better idea to save them as a flattened PDF, JPEG, or TIFF file for printing.
Flattening the file simply means you’re compressing all the layers into one. This reduces the file size and helps ensure accurate printing. Go to Layer in the menu bar and choose Flatten Image.
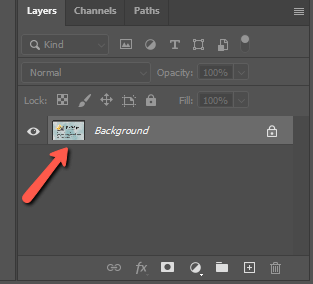
You’ll notice all your layers disappear in the Layers panel.
Then go to File again and choose Save a Copy. Do not hit Save or Save As because you’ll end up copying over your PSD file.
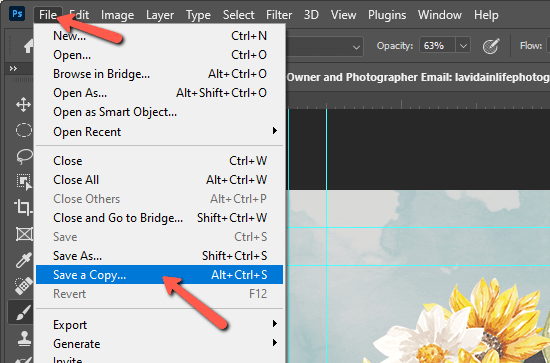
When the Save a Copy box opens, click the dropdown menu in the Save as type box. Choose your preferred file type from the list.
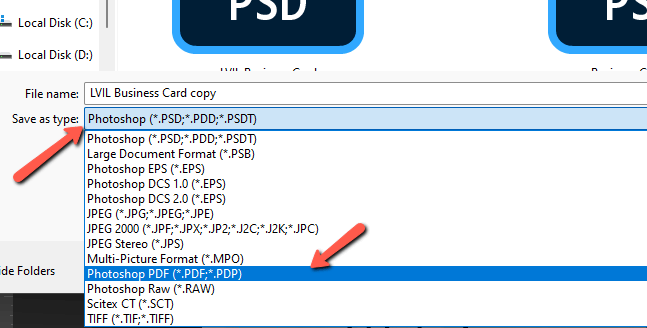
When you click save, Photoshop will save a new version of your file. When you go back, make sure to close out the PSD document without saving it so you don’t lose your layers.
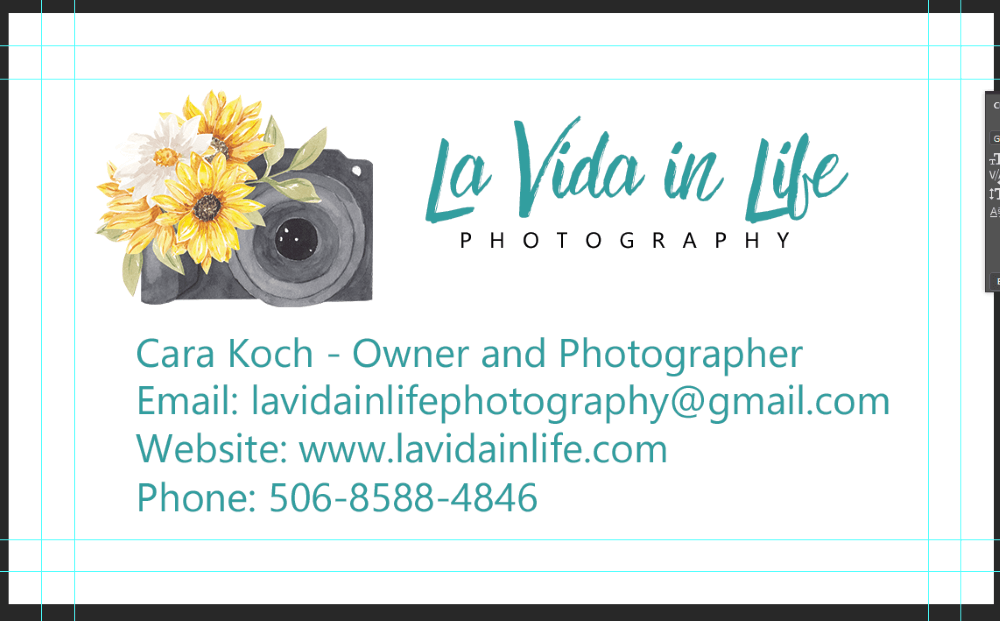
And there you have it! After a bit of finessing, here is my final business card. Have fun playing with it, because you can create anything!

Curious to learn more about Photoshop? Check out this tutorial on how to add a drop shadow to text in Photoshop.
About Cara Koch
Eva Rubio
Fantastic blog, so creative. Thanks for sharing 🙂