
Saving a project in Photoshop as a PDF is quite simple. Depending on the settings you choose, you can even open the document in Photoshop and continue making changes later.
Hey there, I’m Cara! If you’ve ever wondered how to save as a PDF in Photoshop (or if it is even possible), this tutorial is for you. Check out the super simple steps below!
Note: the screenshots below are taken from the Windows version of Photoshop CC. If you are using the Mac version, they will look slightly different.
Table of Contents
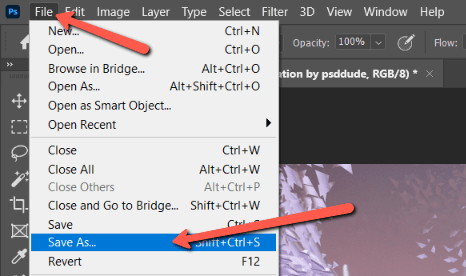
Go to File in the menu bar and hit Save As. Don’t hit save or the program will just automatically save it with the default settings – which is not as a PDF.
Step 2: Choose PDF Format
In the menu that opens, click on the Save as type box to open this list of format options. Select Photoshop PDF.
Important: if you want to be able to continue working with the original file in Photoshop, check the As a Copy box near the bottom. Otherwise, depending on the settings for the document, you may not be able to access the layers and continue editing.
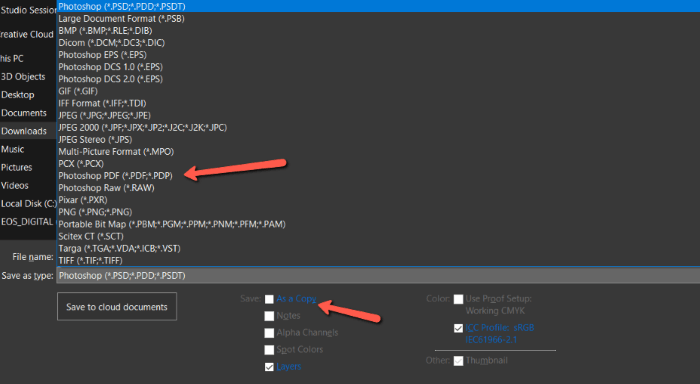
Click Save.
Step 3: Choose the Appropriate Adobe PDF Preset
Before the document saves, another menu will pop up. There are various settings when saving PDFs that will make the document more suited to different applications. Adobe makes it easy by including PDF presets so you don’t have to mark all the settings.
Click in the Adobe PDF Preset box near the top to access this dropdown menu.
If you’ll be printing the file, choose the High-Quality Print preset for home printing. For commercial printing, choose Press Quality to preserve the information required for professional printing.
If you’ll be putting the file on the web, choose the Smallest File Size to optimize for internet use. You’ll also want to make sure the Optimize for Fast Web Preview box is checked for speedy viewing in a web browser.

Step 4: Configure the Settings
If you want to be able to edit the PDF file later, make sure the Preserve Photoshop Editing Capabilities box is checked. If the project is finished and you want a smaller file size, uncheck this box to reduce the size significantly.
To reduce the size even further, click Compression on the left side of the window.
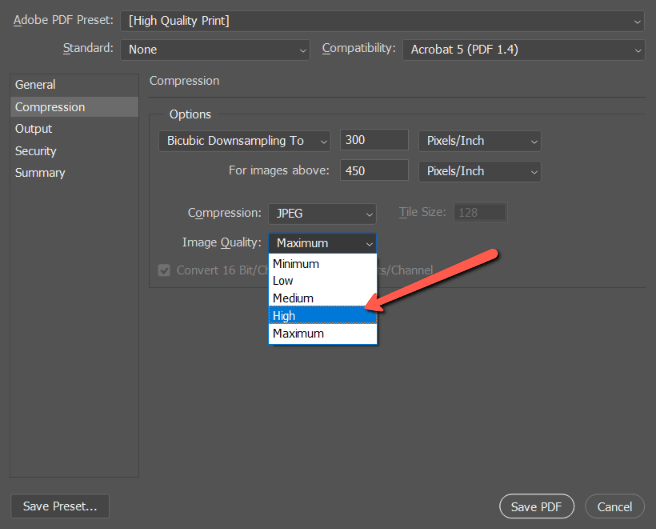
Hit the dropdown menu for Image Quality and choose High instead of Maximum. Once the settings are fixed the way you like, hit Save PDF at the bottom.
Interested in learning how to save as different file types in Photoshop? Check out our article on saving as a PNG in Photoshop here!
About Cara Koch
Chris Fulton
Thanks for the helpful instructions!
June
You’re welcome, Chris!