
PDFs generally aren’t easy to edit. That’s part of the point of a PDF, to make a file that can’t be easily edited.
Hey there! I’m Cara and I’d like to point out that the keyword in that last sentence is “easily”. With the power of Photoshop in your grasp, you can still edit PDFs even if it is a little cumbersome.
Of course, Photoshop isn’t really the best tool for editing PDFs. There are some limitations and if you want to make major changes (or create a PDF from scratch) it would be better to use a dedicated PDF tool. However, for fixing a typo or switching out an image, it works great!
Let’s take a look at the three essential steps to editing a PDF in Photoshop!
Note: I use the Windows version of Photoshop. If you are using a Mac, the workspace will look slightly different from the screenshots displayed here.
Table of Contents
Step 1: Open Your PDF in Photoshop
Opening a PDF is a little different than opening an image file. Open Photoshop and go to File and choose Open as you normally would. Navigate to your PDF and click Open.
Here’s where things are different. You’ll get this box that comes up with a few options. Make sure that the Pages button is checked so Photoshop will open multiple pages of your PDF if desired.
You must select all the pages you want Photoshop to open. Do this by holding Ctrl or Command while clicking on the pages in the preview box.
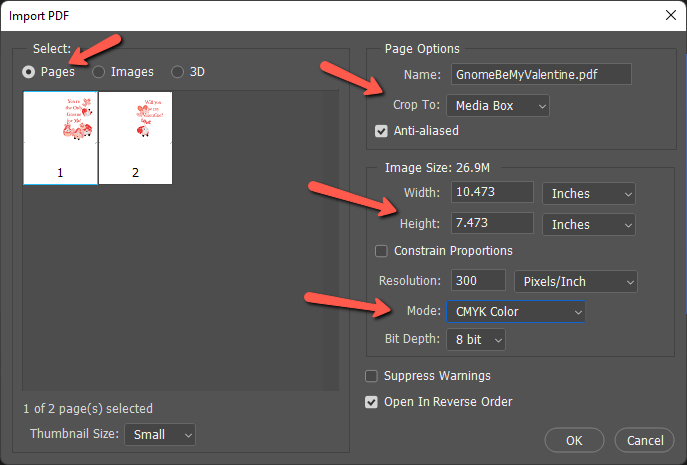
If you actually want to edit the images in the PDF, check the Images button instead. Photoshop will extract the images for you to work with.
On the right, you have a few options in the Crop To box. Most are specifically for commercial printing. If you don’t know which to use, set it to Media Box. It’s the largest box and defines the final page dimensions (as opposed to cropping to a bleed line etc.)
Check your image size and resolution and make changes if necessary. If you want your PDF to appear in color, change the Mode from Grayscale to RGB Color for images or web use or CMYK Color if your PDF is for printing.
Click OK.
Now, you can see I’ve got my PDF open in Photoshop and each page automatically appears on its own document.

Step 2: Making Edits
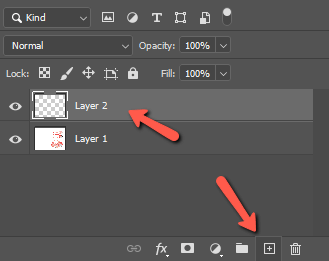
You can add anything you want to your PDF. So you can add elements, text, annotations – whatever you want. However, you cannot make direct edits to the elements already in your PDF. As you’ll notice there are no layers in the Layers panel for you to select and make adjustments.
Covering Up Elements
With a little creativity, though, there is a bit of a workaround. Let’s say we wanted to personalize this PDF Valentine’s day card. We can remove the “You’re” and put the recipient’s name quite easily.
Press the New Layer button at the bottom of the Layers panel to add a new layer.
Now, choose the Marquee tool from the toolbar on the left. Which shape you choose depends on the element you want to remove. I’m going to use the Rectangular one.
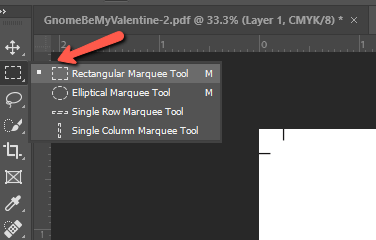
Click and drag to draw a box around the element you want to remove.

Now go to Edit and click Fill or press Shift + F5 to open the fill box.
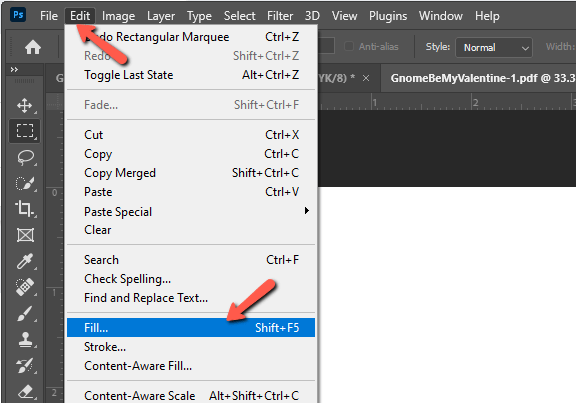
Set the Contents box to White and press OK.


Now you’ve covered over the “You’re” and can replace it with something else.
Adding Elements
To add the new text, choose the Text tool from the toolbar on the left.
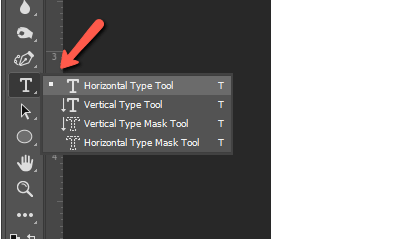
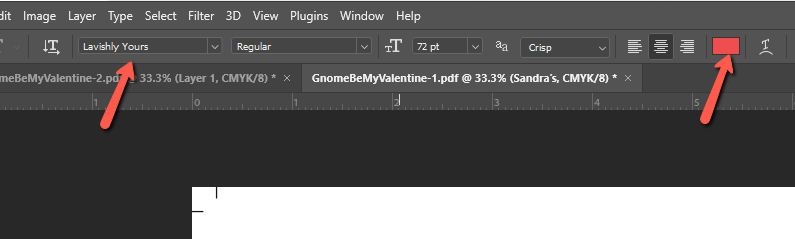
Click on the document where you want to add the text and write it in. Up in the Options bar, you can choose the font and color of the text.
If you don’t know what font was used in the PDF, you can use online tools to figure it out. Then you can download the font and add it to Photoshop. Or you can use a different, complementary font if that works for your purposes.
To match the color, click on the color swatch in the Options bar. The color picker will open and your cursor will turn into an eye dropper.
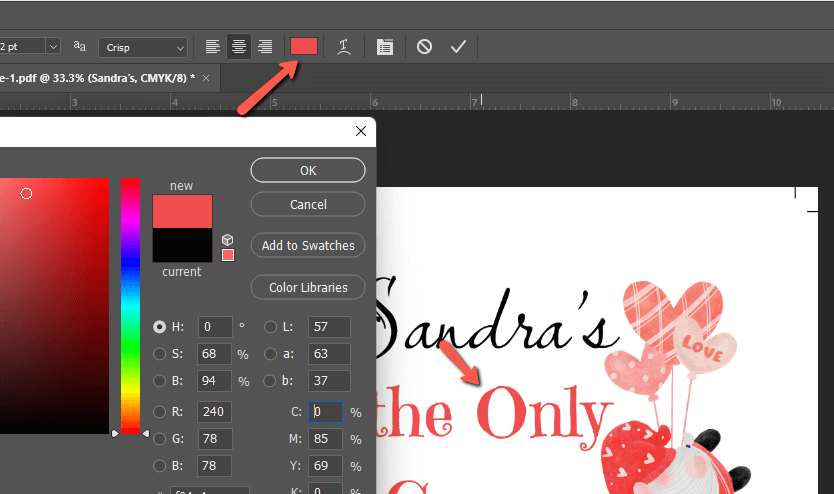
Click on a color in your design that you want to match. Photoshop will choose the right color for you.

If you want to add any other text or elements, you can add them as you would to any other document in Photoshop.
Step 3: Exporting Your PDF
Saving your PDF in Photoshop is a little trickier than saving images. Remember how Photoshop opened up each page in its own document? Well, we want to put them back together when we save the file.
Thankfully, it isn’t hard to do.
Go to File but instead of grabbing one of the save options, go down to Automate and choose PDF Presentation.
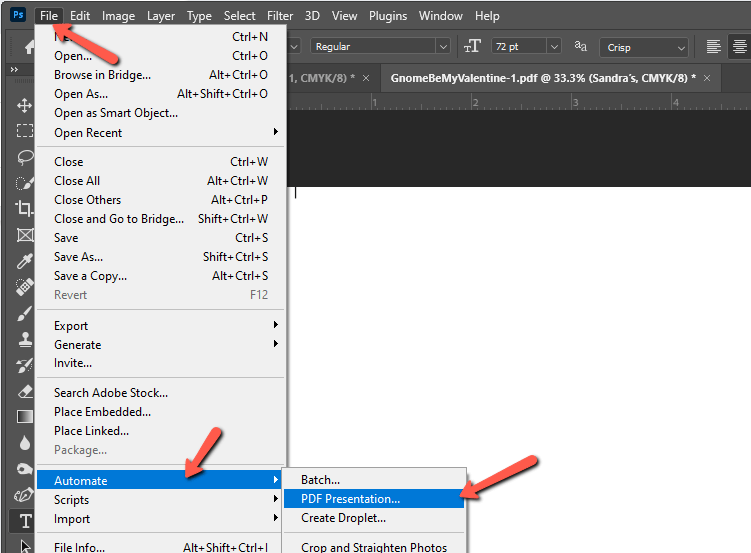
We want to save this as a Multi-Page document so make sure that button is checked. Click the Add Open Files box to bring all your open documents in Photoshop into the box.
You can reorder them if needed by clicking and dragging them up or down. The top file is first, and the bottom file is last.
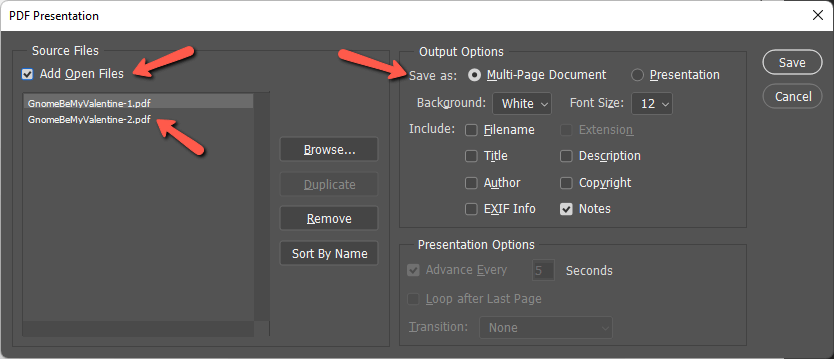
Check the other settings as needed. You’ll usually want a White background and good font size is 12. Press Save when ready.
Give your document a name and choose where you want to save it. Press Save again and you’ll be presented with one more list of settings.
Set the Adobe PDF Preset to High-Quality Print Modified. Set the Standard box to None and choose the Acrobat version you want your PDF to be compatible with. It’s a good idea to choose something in the middle so it will be compatible with older versions if you want versatility.
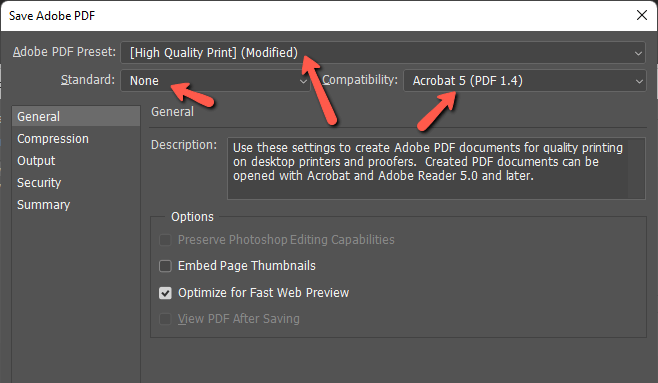
The description box allows you to embed a description in the PDF if desired.
On the left side, you can enter the Compression tab to change the PDF file size if you want to make it smaller. Output lets you adjust the color settings. And the Security tab lets you password-protect your PDF file.

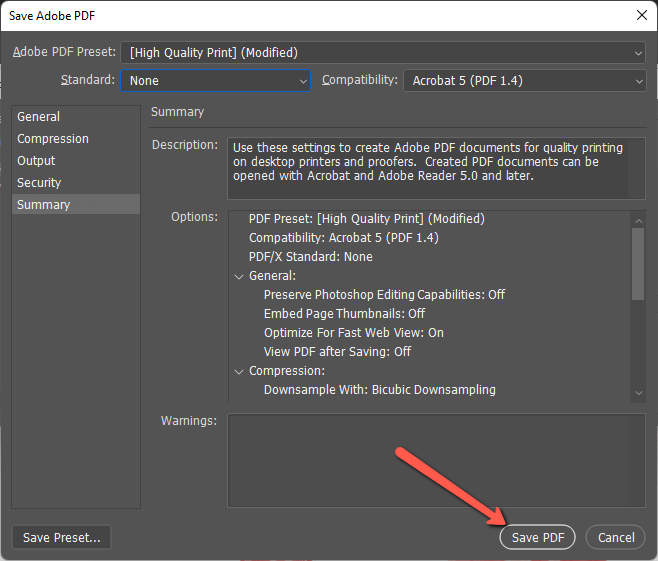
Finally, you can view all the settings you’ve chosen in the Summary tab. Once you’re all finished, press Save PDF.
And there you have it! While Photoshop isn’t necessarily the first choice for working with PDFs, it gets the job done when you need to make simple modifications.
Curious about working with other file types in Photoshop? Learn about saving as a PNG here!
About Cara Koch