Measuring a digital image can get tricky. After all, the same image can take up a vastly different amount of space on your screen depending on how far you have zoomed in.
Hey there! I’m Cara and as a professional photographer, I know that photo sizing can be tricky. However, it’s important to get it right, especially if you plan to print the image.
Furthermore, when creating designs and composites, elements have to be perfectly sized and positioned or the image won’t look right.
Thankfully, Photoshop offers us a handy feature to help with all of this. Come along as I show you how to use the Photoshop measure tool!
Note that the screenshots below are based on the Windows version of Photoshop CC, if you are using the Mac or another version, they can look different.
Make the Rulers Visible
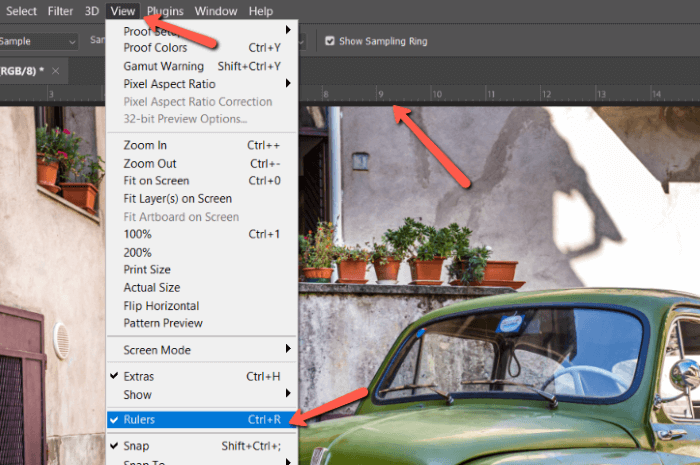
Photoshop offers built-in rulers that run along the top and left sides of the image. However, your rulers are likely hidden.
To make them visible go to View in the Menu bar and select Rulers. A checkmark next to the feature indicates that it is active. Notice the little ruler running across the top of my screen.
You can also access this feature through the keyboard shortcut Ctrl + R or Command + R.
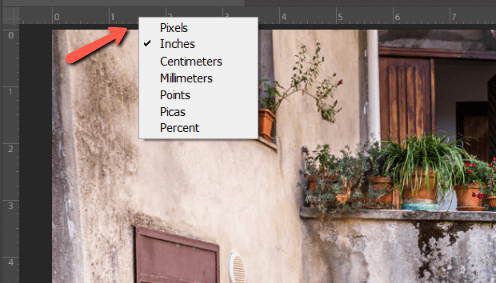
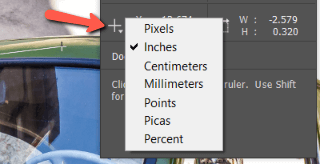
You have several options for the unit of measure you’d like to use. Right-click on the ruler to access the options. Right now, my rulers are measuring in inches.
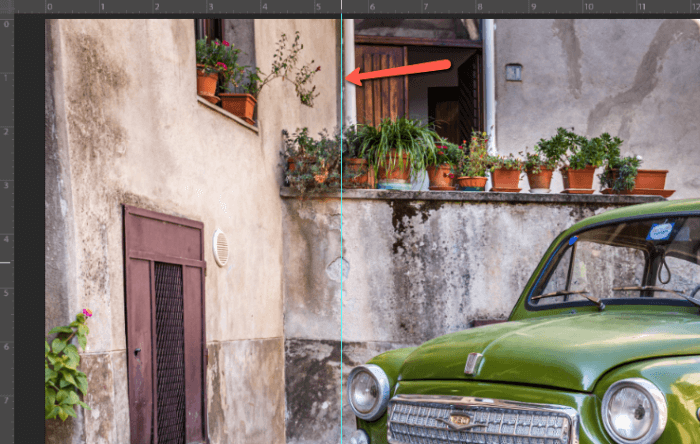
With this view, you can easily see the height and width of your image. You can also drop a guideline onto the image which allows you to line up objects, layers, etc within the image.
Measure Between Two Points
Of course, Photoshop doesn’t limit us to measuring only around the edges of the image. You can also measure objects, layers, etc within the image itself. For this, you’ll need the Ruler tool, not to be confused with the rulers we have already activated.
The Ruler tool will likely be hiding behind the Eyedropper tool on the toolbar. Right-click to open the family of tools and choose the Ruler tool.

Once the Ruler tool is on top, pressing the letter capital I on the keyboard will allow you to access the tool.
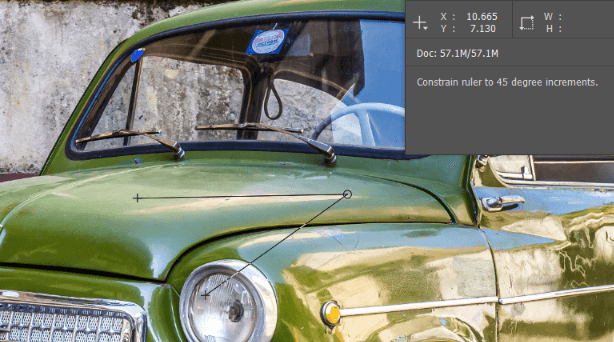
With the Ruler tool active, a miniature ruler will appear on your cursor and you can click and drag from one point to another to measure between two points in the image. Hold down Shift while dragging to limit the line to angles in 45-degree increments.

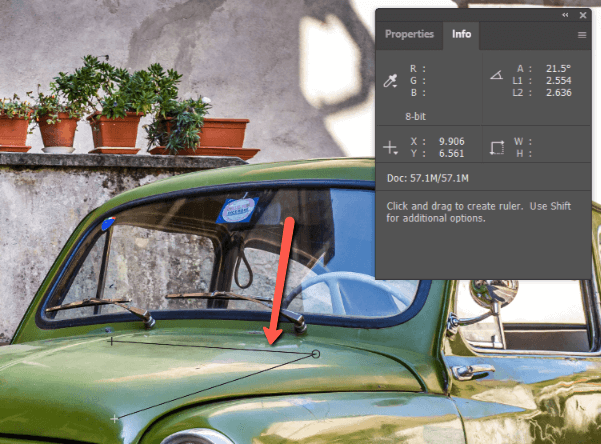
To modify the line, grab one of the endpoints and drag it to a new position. You can create a second line for measuring an angle. Hold down the Alt or Option key and click on one of the endpoints to drag out a second line.
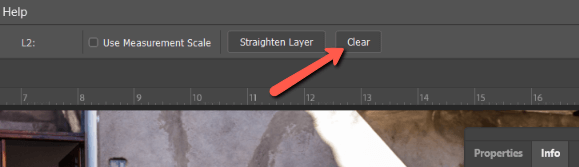
To remove a line, either click on it and drag it off the image or press Clear up in the Options bar.
Reading the Info Panel
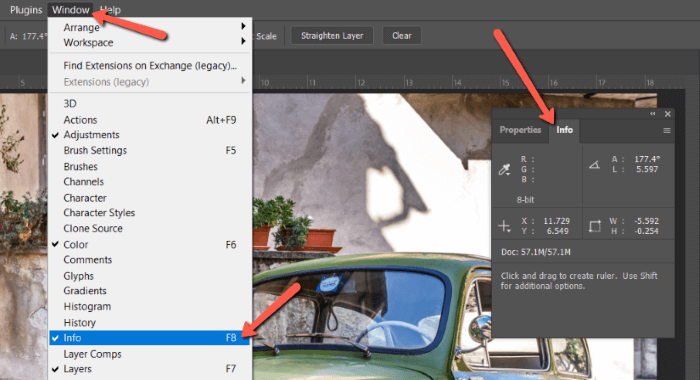
To see your measurements, you need to open the Info panel. If you can’t find it, go to Window and choose Info. You can also use the keyboard shortcut F8.
Understanding this panel isn’t quite self-explanatory. Let’s go over what everything means.
The A in the top right corner shows the angle of the line. The L indicates the length of it in whatever units of measurement you have chosen. You can change the units of measure by clicking on the plus sign next to the X and Y measurements.
The X and Y points indicate the position of the starting point. The W and H measurements show the distance to the second point along the X and Y axes. It’s a little confusing but with an explanation, it isn’t too hard to figure out.
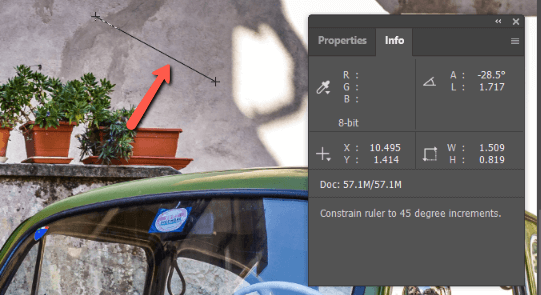
With two lines active for measuring an angle, the panel will look slightly different. The A is now measuring the angle between the two lines and the L1 and L2 measurements indicate the lengths of both lines.
Accurate measurements give you precise results when working with images in Photoshop. I don’t have to tell you how crucial it is to have precise results or your photos will look off.
Interested to learn more about other features of Photoshop? Check out how to use the color replacement tool here!
About Cara Koch