Guides in Photoshop are designed to help you quickly and neatly align objects, text, layers, etc. However, sometimes they can get in the way.
For example, once you’ve got your elements positioned, it might be nice to see what your project looks like without bright teal lines cutting through it!
Hey there! I’m Cara and occasionally during my work in Photoshop, the guides I’m using are also getting in the way. But Photoshop is amazing, so when the guides feature is interfering, you can simply toggle it off!
Let me show you how!
Note: the tutorials and screenshots below are from Photoshop CC for Windows, other versions can look different.
Table of Contents
How to Add Guides in Photoshop
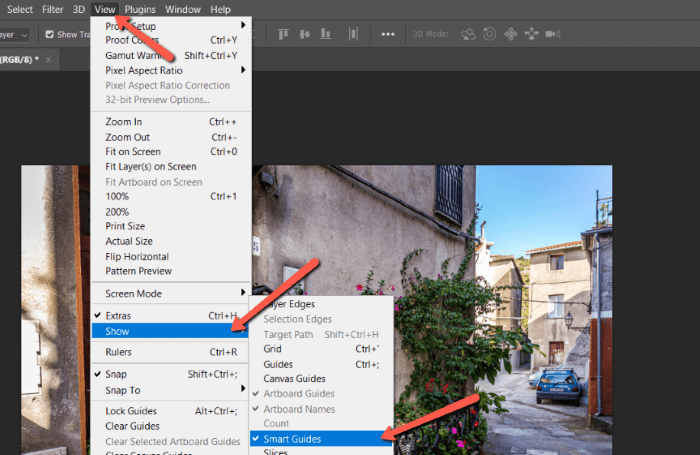
If you have Smart Guides activated, guides will appear as you move objects or selections around as Photoshop tries to help you align them. If you don’t want these guides to appear, you can turn off Smart Guides from the View menu.
Scroll down to Show and check the Smart Guides line. A checkmark next to the feature indicates it is active, no checkmark means inactive.
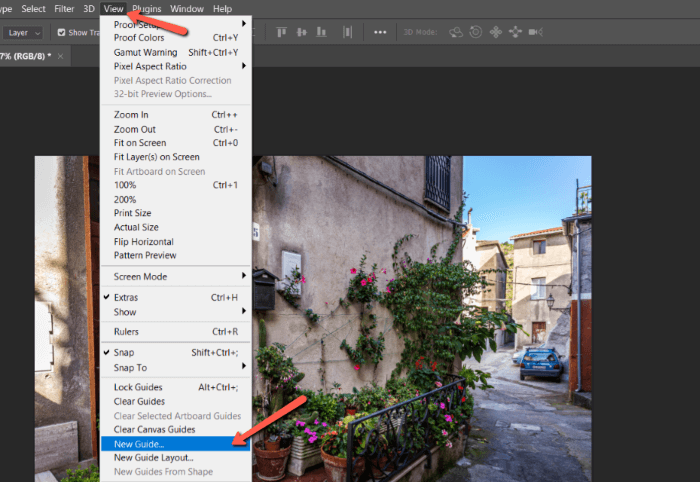
If you want to place guides at specific points in your project, you can manually add new guides. These guides stay on and don’t just appear when you’re moving something nearby. These are super helpful when designing a graphic and everything needs to be precisely lined up.
To add a new guide, go to View and choose New Guide.
In the box that opens, you can choose whether you want a horizontal or vertical guide. You can also pick how many inches from the left side you want the guide to be positioned.
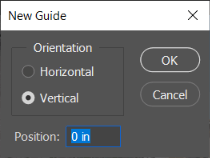
Click OK when ready. A teal-colored line will appear at the indicated position on your project.
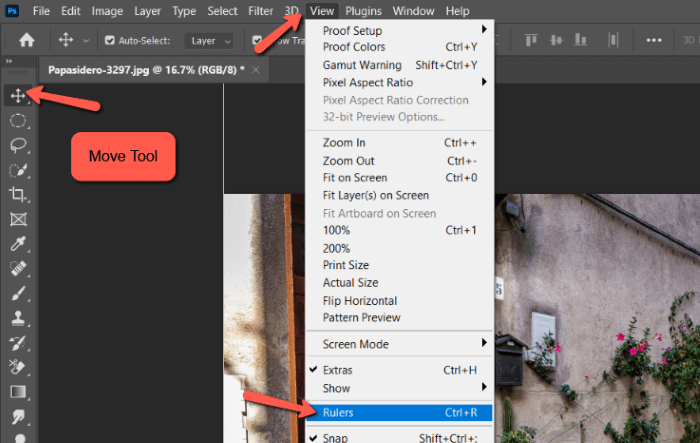
With the Move tool active, you can click and drag the line to reposition. If you want to measure better, press Ctrl + R (for Windows) or Command + R (for macOS) to activate the rulers. Alternatively, you can activate the rulers through the View menu.
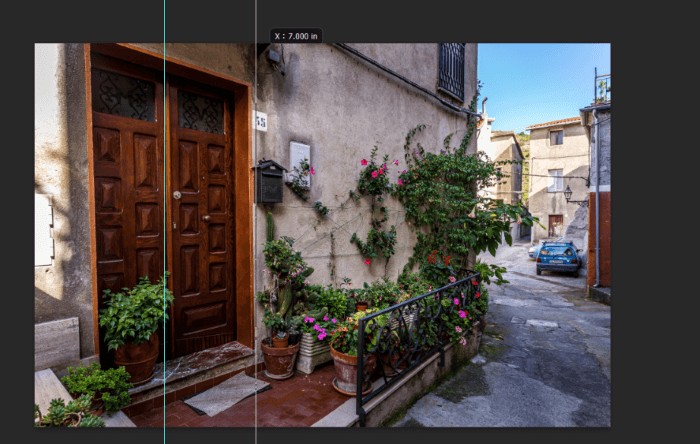
Click and drag the guide to reposition. Notice the tag pops up showing you the measurements in inches. Hold down the Shift key as you drag so the line will snap to the measurement lines on the ruler.
Hold down the ALT (for Windows) or Option (for macOS) key when clicking on the line to toggle between vertical and horizontal orientations.
How to Add Grids in Photoshop
If you just need a few lines, adding guides isn’t a big deal. But what if you need a lot of lines? Adding each one individually can get tedious. In that case, you can set up a grid or use a guide layout instead.
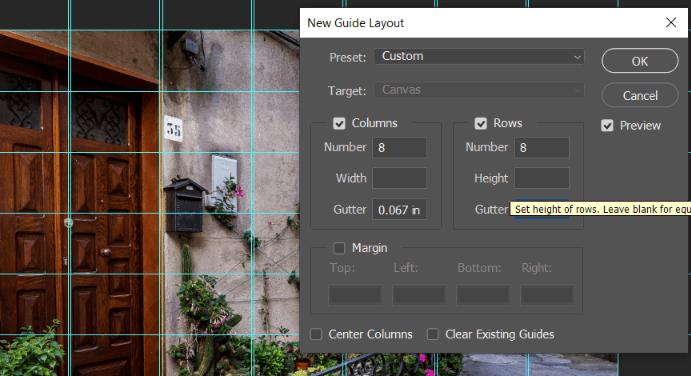
To add a layout, go to View and choose New Guide Layout.

In the box that opens, you can choose whether you want horizontal or vertical lines (or both). You can choose a set number of lines or a specific width between each line. You can even space the lines out from each other by adding a Gutter value.
It’s pretty nifty!
However, it’s also easy to see how all these lines can get distracting when working on a project. This is why learning to hide guides and guide layouts is important.
Hide Guides Photoshop Keyboard Shortcut
Hiding the guides quickly is a cinch. Press the keyboard shortcut Ctrl + ; or Command + ; to toggle the guides on and off.
Now you see them…
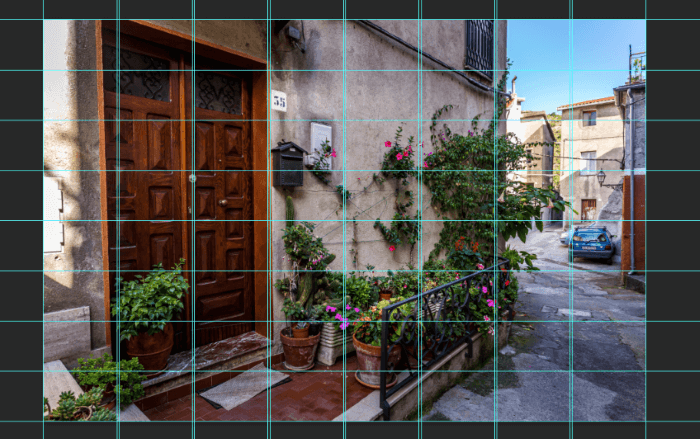
Now you don’t.

And if you want them back, all you have to do is press Ctrl + ; or Command + ; again.
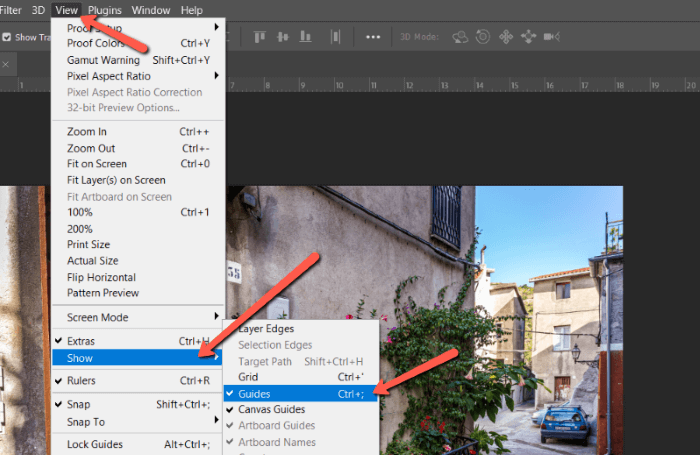
Another way to toggle them on and off is through the View menu. Hover over Show and choose Guides. A checkmark next to the option indicates the guides are active.
How to Delete Guides and Grids in Photoshop
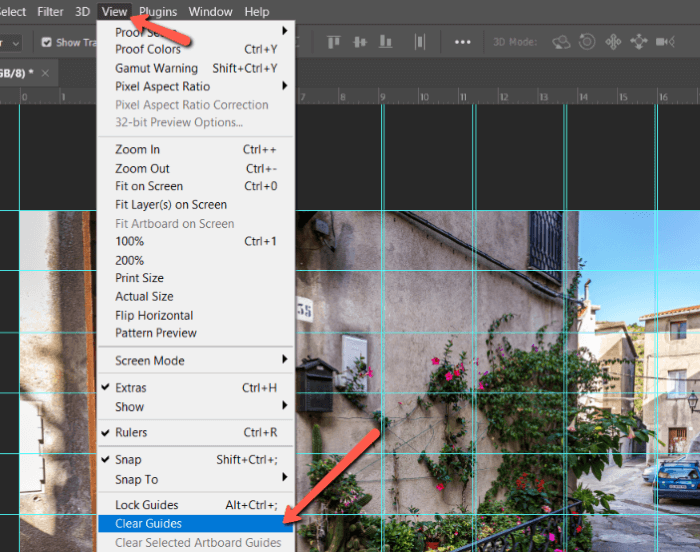
If you want to delete individual guides, click on the guide and drag it off the canvas. It will disappear for good. If you want to delete multiple guides or a guide layout go to View, and choose Clear Guides.
Guides are very handy for keeping your projects neat and keeping the elements perfectly lined up. But they can also interfere visually so these quick methods for toggling them on and off are fantastic!
Intrigued to learn more about Photoshop and all its wonders? Check out how to add patterns here!
About Cara Koch