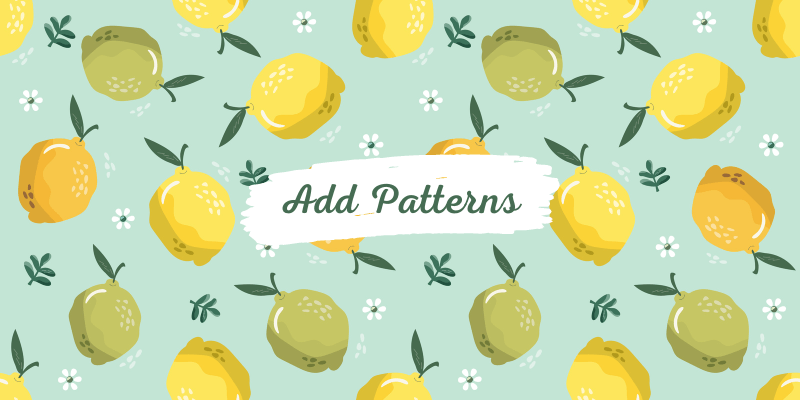
Patterns are a fun, quick way to dress up the background of your design. Plus, there are a plethora of free and paid patterns online that you can quickly download and use. This is a great timesaver instead of having to make your own pattern from scratch.
Hey there! I’m Cara and though I find it super fun to play around in Photoshop, I don’t have a ton of extra time. Using premade patterns is a great way to shortcut a bit of work on a particular project.
But to use them, you have to know how to add patterns in Photoshop. It’s easy, I promise, let me show you how!
Note that the screenshots below are based on Photoshop for Windows. Mac or other versions will look slightly different.
Table of Contents
Step 1: Download and Save
The first step is to find the pattern you like online and download the file. Make note of where you saved it so you can find it later.
For this example, I grabbed a glittery zigzag pattern set from Brusheezy.com. You’ll probably have to extract the pattern files as these downloads usually come in a zipped folder.
Step 2: Import the Pattern
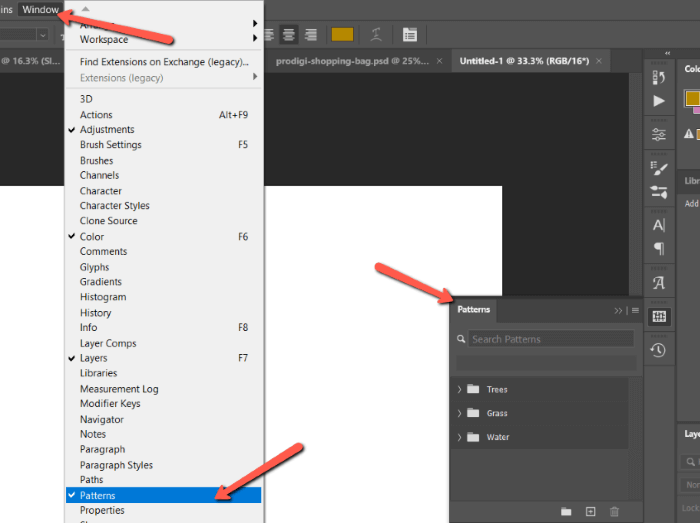
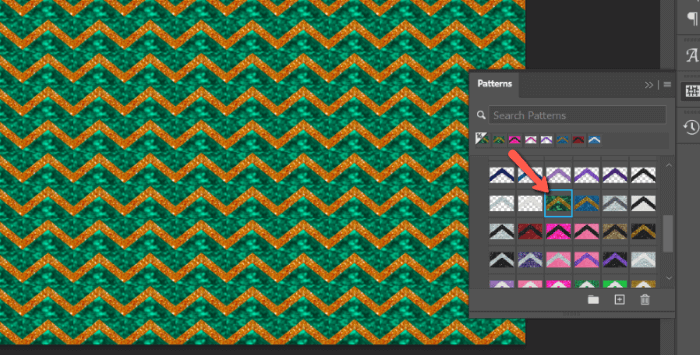
In Photoshop, go to Window, and click on Pattern to open the Patterns panel.
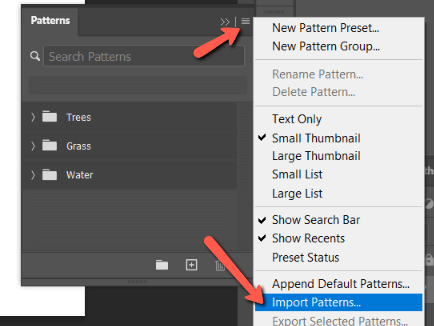
Click the three horizontal lines icon in the top right corner of the panel to open the flyout menu. Choose Import Patterns.
Navigate to wherever you saved the downloaded file and click Load. Patterns files are denoted with a .pat extension.
Note: if you don’t see the file, make sure that you extracted it correctly.
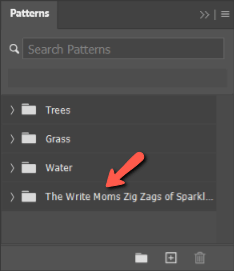
Once you click Load, the pattern should appear in the Patterns panel. Click the arrow to the left of the folder to open the folder and choose the pattern you want to use.
Step 3: Add the Pattern to Your Project
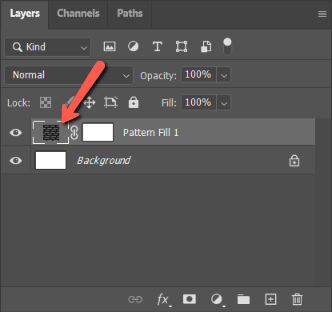
From there, simply grab the pattern you want, drag and drop it onto your canvas. Once the pattern is in place, you can just click on other patterns to preview them instead.
To adjust the pattern, double-click on the pattern layer thumbnail in the layers panel.
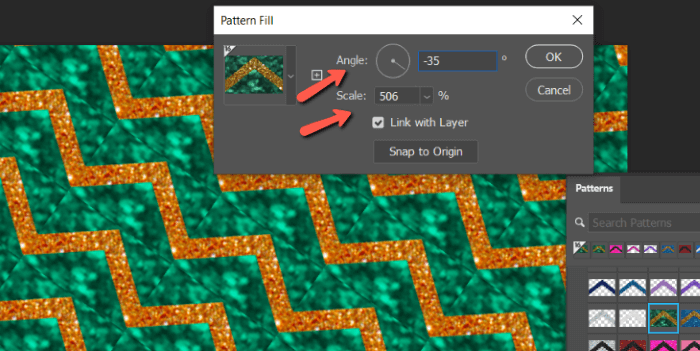
You’ll get this window where you can change the size and angle of the pattern to fit your liking.
Adding Patterns to Part of a Project
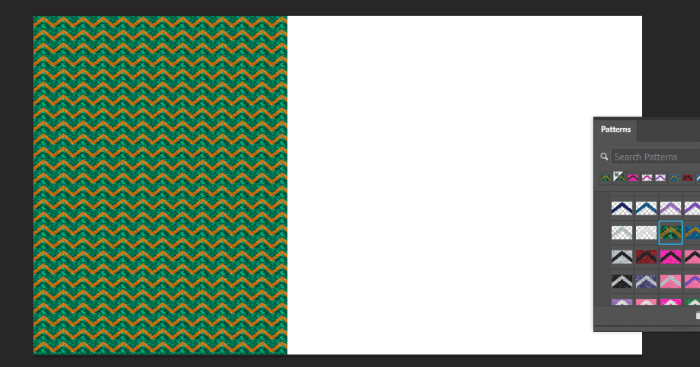
What if you want to add the pattern to only a part of your canvas? It’s simple! Create a selection where you want the pattern to go and drop the pattern inside.
As an example, I grabbed the Marquee tool near the top of the toolbar. Then I made a rectangular selection on one side of my canvas.
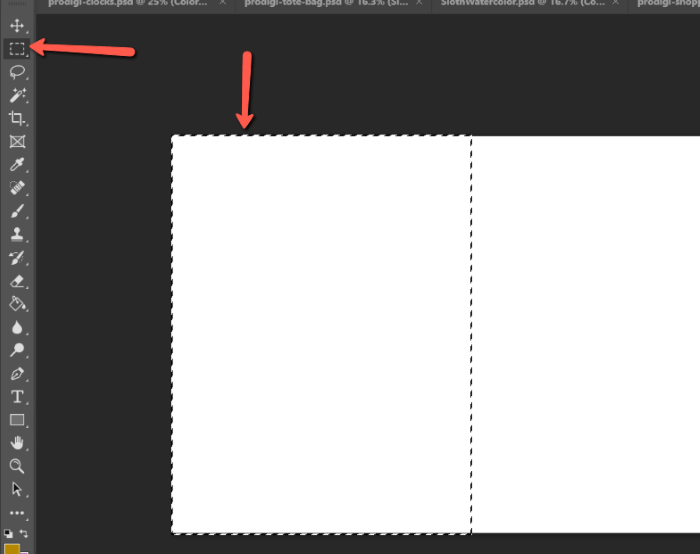
Now when I drag and drop the pattern onto my canvas, it will only fill the selected area.
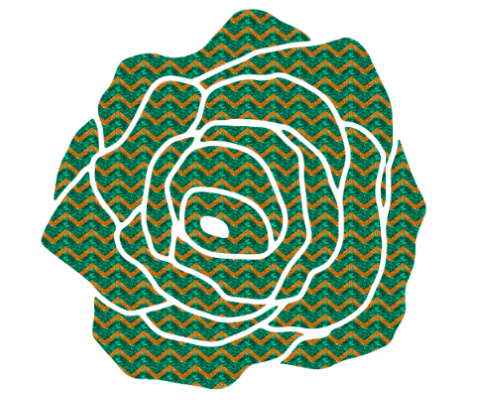
You can use this trick with any kind of selection, even something rather complex like this flower shape.
That’s it! Have fun with it, there’s a lot you can do!
Interested in creating your own patterns in Photoshop? That isn’t so difficult either. Check out our step-by-step tutorial on how to make your own pattern in Photoshop here!
About Cara Koch
Ajward
Your tutorial is very clear and gave me a good knowledge about adding patterns in Photoshop Thank you so much.