
That’s not quite right! Whether you’re designing a flyer, a graphic for social media, or creating a collage, the text is an important part of the overall look. This applies to the font used, color, size, as well as the actual words.
Hey there! I’m Cara and in my work as a photographer, I sometimes need to edit text in Photoshop. Perhaps I’m working with a template and need the text to match the mood of my project.
Come on! Let me show you how to edit text in Photoshop. It’s quite simple!
Table of Contents
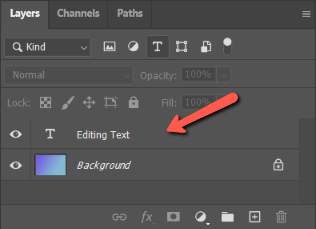
Step 1: Select the Text Layer
To edit text you need to tell Photoshop what you want to change. In my example, finding the text layer is simple because there are only two layers in my project.
However, if you’re working with a template that has a bunch of layers, it can be more complicated.
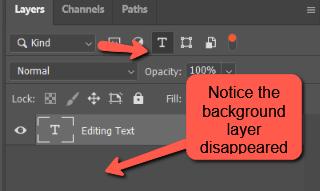
Press the icon that looks like a capital T at the top of the Layers panel. This will filter out other types of layers and show you only the text layers. This can be helpful if there are a lot of image, shape, fill, or other types of layers cluttering up the panel.
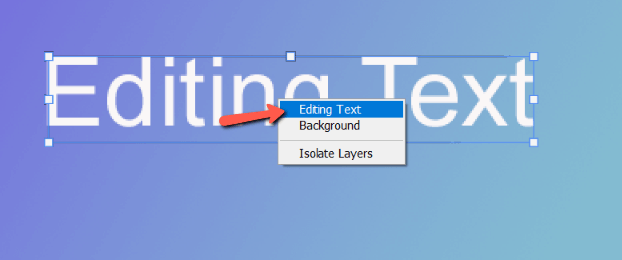
With the Move tool active, you can also right-click directly on the text you want to edit in the project. A list of layers will appear that coincide with where you clicked. You can choose the text layer from that list to select it.
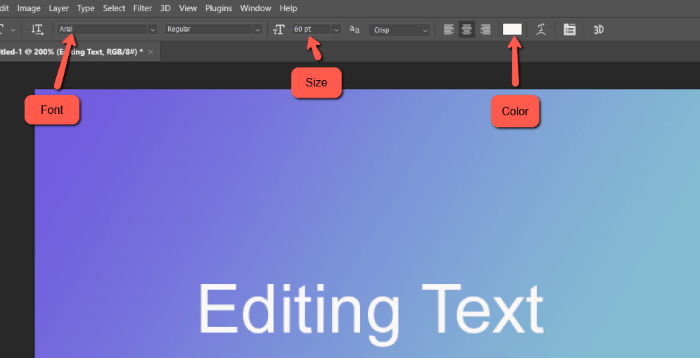
Step 2: Choose Font, Color, Size, Etc.
With the text layer selected, it won’t be obvious that you can make changes. However, you can change the font, color, size, etc using the Options bar.
Simply click on the box for the attribute that you want to change for a list of options.
Every change that you make will be reflected in the work area.
Step 3: Change the Letters
You can make all sorts of stylistic changes while the text layer is selected. However, you can’t change the letters of the text.
To do that, you need to directly select the text. Do this by double-clicking on the text layer thumbnail.
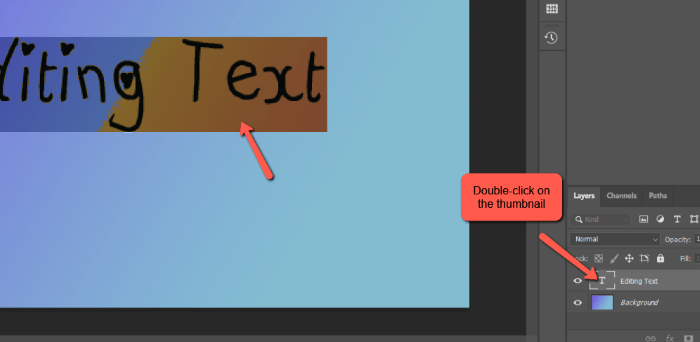
You’ll see a highlighted part appear around your text.
With the text highlighted, simply start writing on your keyboard to switch to new words.
Another method is to triple-click directly on the text. A double-click will highlight one word but the third click adds in all the other words.
Once you’re satisfied with the look of your project, press Enter, or Return.
Viola!
With these simple instructions, you can make adjustments to your own files or any Photoshop file that supports separate layers. There’s a lot you can do with this.
Want to learn more about Photoshop? We’ve got tons of great content! For example, check out our tutorial on how to cut out an image in Photoshop.
About Cara Koch