Photoshop isn’t really intended as a graphic design program, but there are plenty of reasons why you might need to create some arc text in Photoshop.
Whether you’re editing text within a photo, creating text for a photorealistic digital art piece, or some other reason I can’t even imagine, there are two main ways to blend your text in Photoshop: warping your text and placing your text along a curved path.
Both methods have their advantages and disadvantages, and they both have very different ways of creating curved text. Warping your text alters the actual letterforms themselves but creates some interesting shapes while typing along a curved path maintains the original shape of the letterforms but can also sometimes cause them to overlap.
Curving text with either method can negatively impact the readability and even the legibility of your text, so be sure to keep that in mind when you’re working on your edit. I think Method Two is a better choice, but there are probably some situations where warping your text instead is a better choice. Probably.
Table of Contents
Method 1: Warped Text
This method is probably the simpler of the two, although they’re both very easy to do.
First, switch to the Text tool and add some text. When you’re happy with the content, locate the Create warped text button in the options panel above the main image window (see highlighted area in the screenshot below).

Click the icon and Photoshop will open the Warp Text dialog box. In the Style dropdown menu, you’ll find a wide range of preset warps that can help you create curved text.
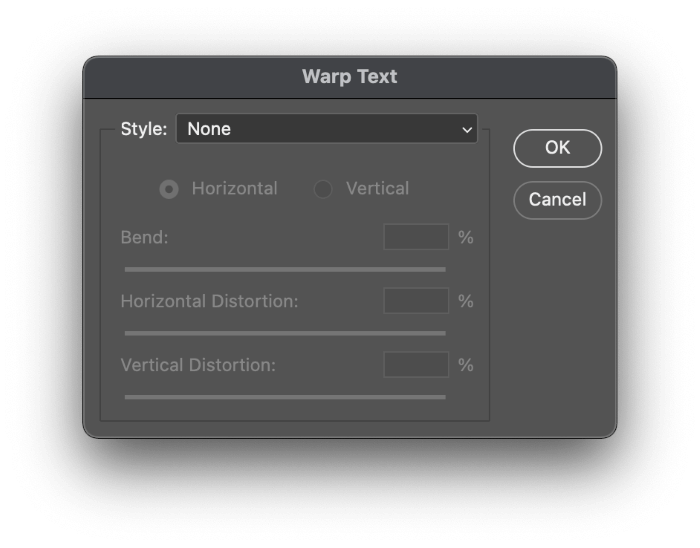
Perhaps the most useful warp preset is Arc, which creates a minimal amount of distortion in your letterforms, but you can take your pick among the options. I’m not sure why you’d ever want to create warped text in the shape of a fish, but if you need to, you can.
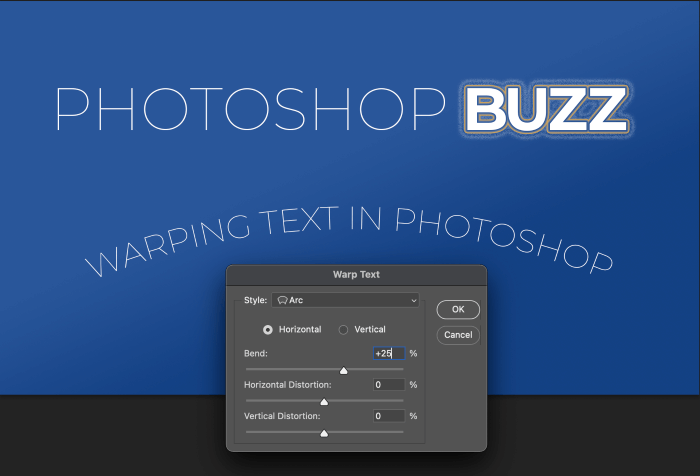
Adjust your settings as desired, click the OK button, and you’re already done!
Method 2: Text Along a Curved Path
If you want to create curved text without actually distorting the letterforms in your text, you’ll need to create a path first. Paths are actually vector objects that use mathematics instead of pixel dimensions to define their shapes.
There are several ways you can create a curved path in Photoshop, depending on the kind of shape you want. You can use the Pen Tool to create freeform curves by placing anchor points and using adjustment handles to control the angle of the curves, or you can use the Ellipse Tool to create your path instead.
Using The Pen Tool
To create a freeform curved path, switch to the Pen Tool using the toolbox or the keyboard shortcut P. Click anywhere in your image to set your first anchor point, then click again to create a line between those two points.
Clicking and dragging the mouse button to create the second point allows you to create a curve instead of a straight line, and you can adjust the anchor points and curvature later any time you want using the anchor points and curvature handles.

Using the Ellipse Tool
Creating text along a perfect circle is even easier using the Ellipse tool. All of Photoshop’s shape tools are nested in the same spot in the toolbox, and they all share the keyboard shortcut U. Pressing the shortcut repeatedly will cycle to the next tool in the set.
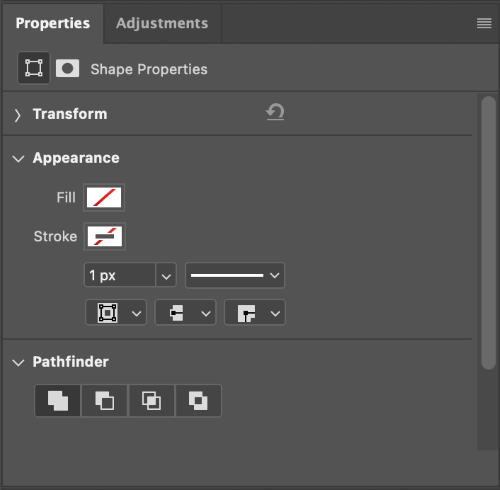
Before you draw your ellipse, it’s a good idea to change the Fill and Stroke color settings in the options panel to None (represented by a white box crossed with a red stripe) otherwise you’ll wind up drawing a visible vector shape over your image instead of an invisible vector path.

If you forget to do this before drawing your shape, you can always just remove the fill and stroke afterward in the same location. You can also modify these settings in the Appearance section of the Properties panel.
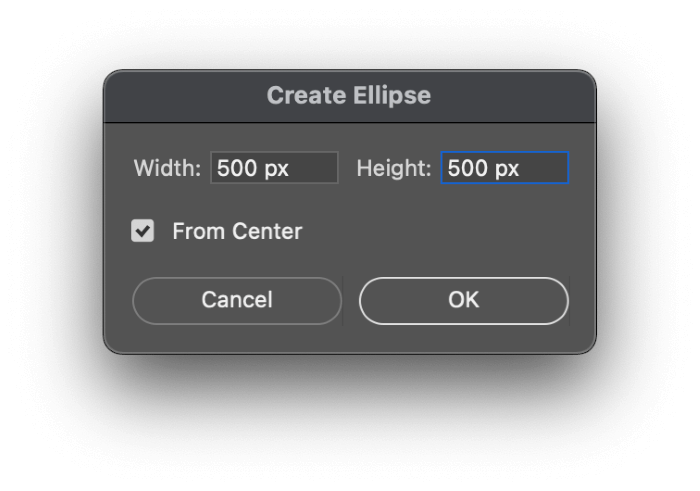
The Ellipse tool can be used in two ways: you can click and drag anywhere in your document to create your ellipse visually, or you can click once anywhere in the document to set the size of your ellipse using pixel values. Setting equal values for height and width will create a perfectly circular path.
Adding Text To Your Curve
Once you’ve created a curved vector path, you’re ready to add text to it. Switch to the Text tool using the toolbox or the keyboard shortcut T, and place your cursor over the vector path in your document. The cursor icon will change, indicating that you can place text along the path. Just click once anywhere on the path to start typing along it!
(Despite the new screenshot abilities of macOS Monterey, I still can’t seem to screenshot the cursor change, but you can’t miss it!)
The eagle-eyed among you probably noticed that Photoshop also creates several text anchors along the path. If you hold down the Command key while you click and drag those anchors, you can adjust the placement of your text within the path itself (use Ctrl instead of Command if you’re using Photoshop on a PC).
A Final Word
You now know the secrets of how to curve text in Photoshop! There are several other techniques you could use, but these two are the only methods I know of that preserve the editability of your text.
All the other options require you to rasterize your text first, which permanently converts the letterforms into pixel data instead of editable vector text.
Curved text is very useful in graphic design projects, but as I said in the beginning, Photoshop isn’t really intended as a design program. If you’re looking for even more specialized text layout options, you might want to consider using Adobe Illustrator for your project.
Do you have a better method for creating curved text in Photoshop that I didn’t mention? Let me know in the comments below and I’ll try it out!
About Thomas Boldt