Many of you probably already asked Google if knowing how to draw is a must for becoming a graphic designer. The answer is NO! What if one day you have to make a hand-drawn style design? The answer is still NO!
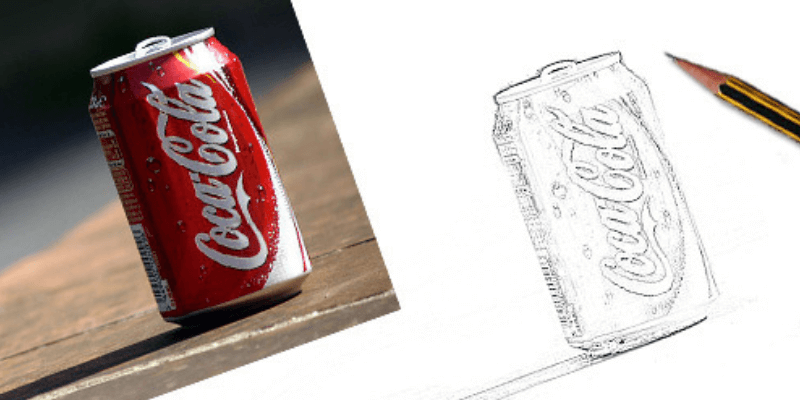
That’s right, you don’t have to sketch! You can turn a photo into a line drawing in Photoshop and trust me, it looks real!
I’ve been working as a graphic designer for nine years, and I’ve had clients that asked for chalkboard drawings, or simple illustration-style designs. And my solution was, Photoshop! Honestly, I could draw, but Photoshop “draws” faster and better. If I could save myself some time, why not?
In this article, you will learn how to turn a photo into a realistic pencil drawing easily along with some useful tips.
Keep reading!
Table of Contents
8 Steps to Turn a Photo into a Pencil Drawing in Photoshop
Whether you are making chalkboard art or a simple sketch from a photo, following the steps below will turn your photo into a realistic sketch.
Note: Screenshots are taken from Adobe Photoshop CC Mac version. Windows and other versions might look slightly different.
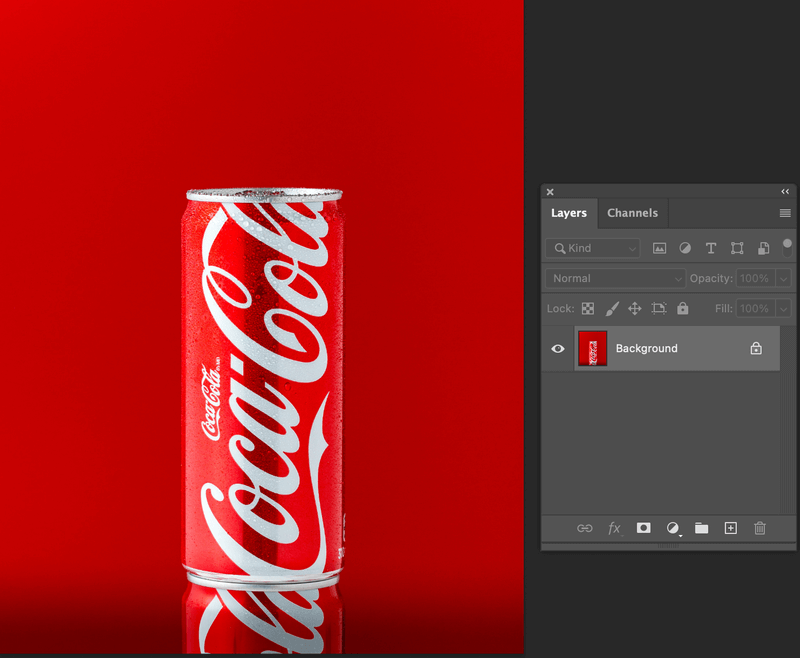
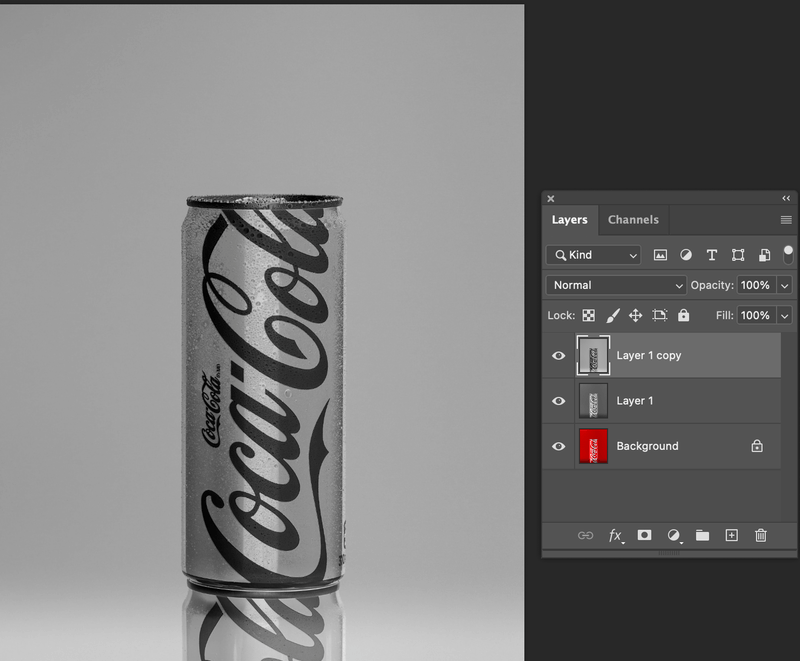
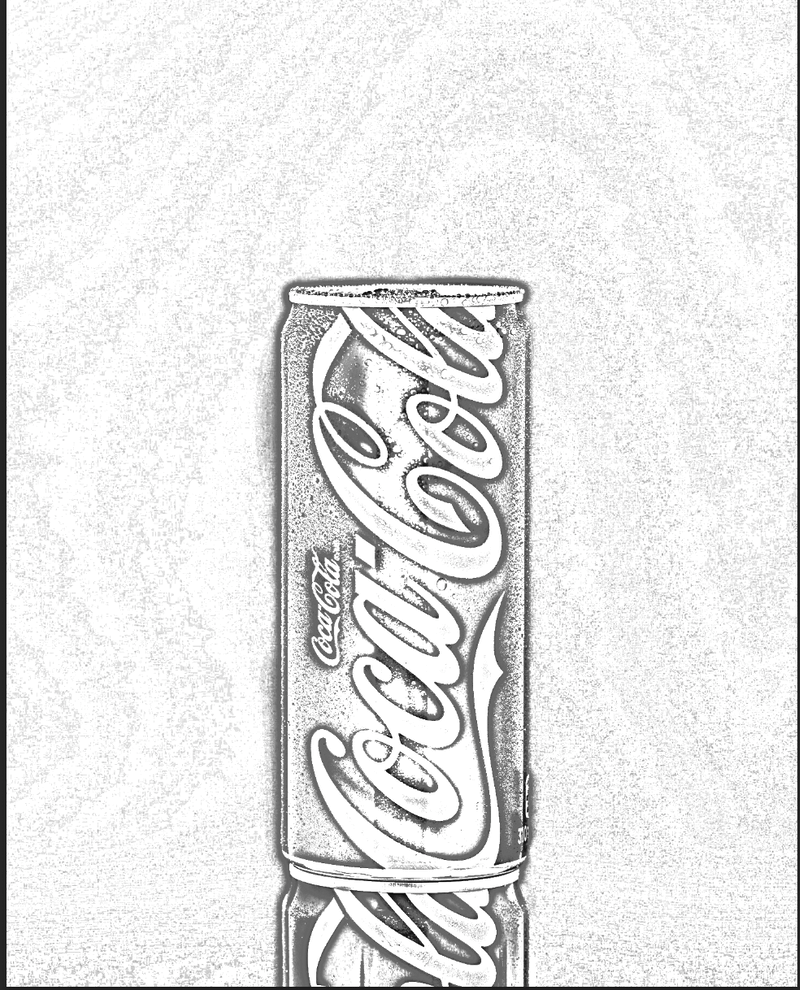
Step 1: Open the image you wish to change into a drawing in Photoshop. File > Open. For example, I’m going to make this Coca-Cola image a pencil sketch.
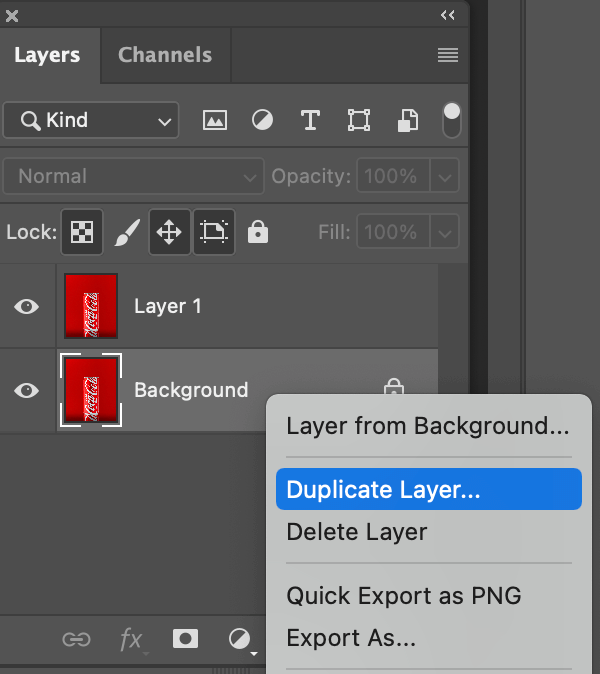
Step 2: Right-click on the image layer in the Layers panel, and select Duplicate Layer to make a copy of the image. Or use select the layer and use the keyboard shortcut Command (Ctrl for Windows) + J to duplicate the layer.
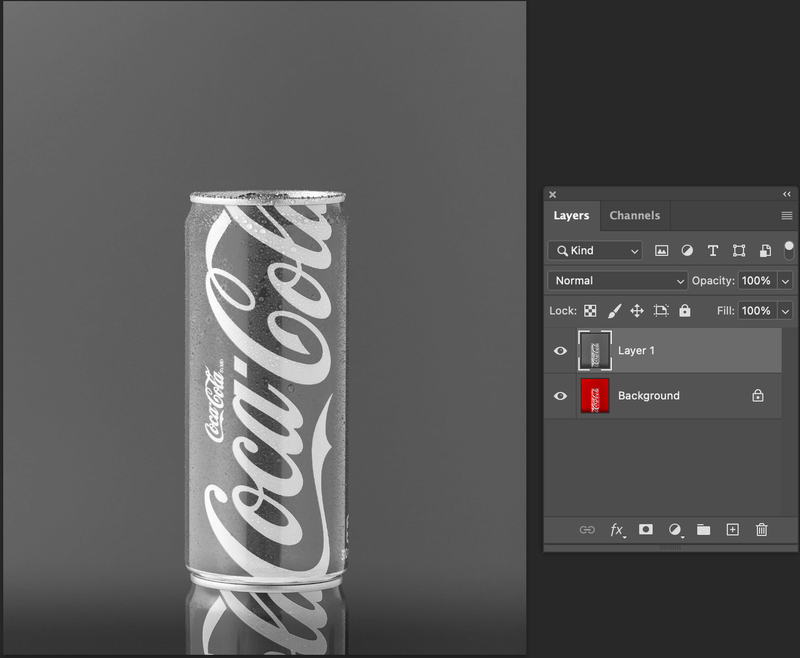
Step 3: With the new layer selected, go to the overhead menu Image > Adjustments > Desaturate or use the keyboard shortcuts Shift + Command (Ctrl for Windows) + U to desaturate the photo (Layer 1).
Step 4: Make a copy of the desaturated image. Use any methods you prefer to duplicate the layer.
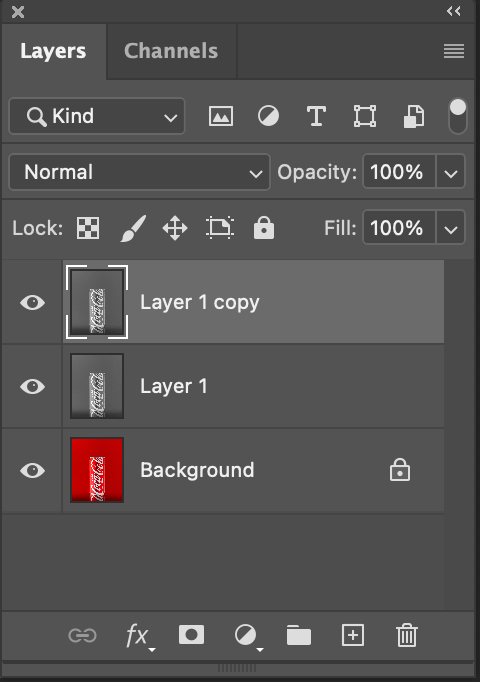
Step 5: Select the top duplicated layer and go to the overhead menu Image > Adjustments > Invert or hit Command / Ctrl + I to invert the image.
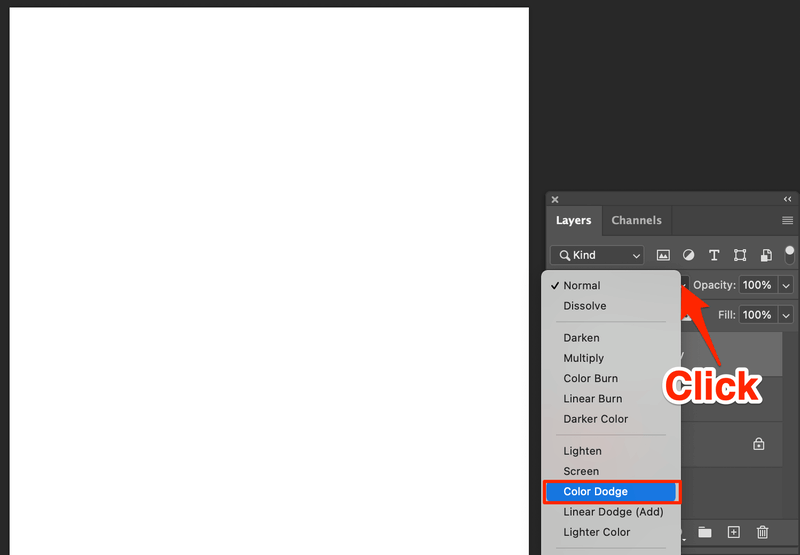
Step 6: On the same layer (the inverted layer) choose the blend mode Color Dodge from the Layers panel drop-down menu. You’ll see most of the image turn white.
Step 7: With the top layer selected, go to the overhead menu Filter > Blur > Gaussian Blur.
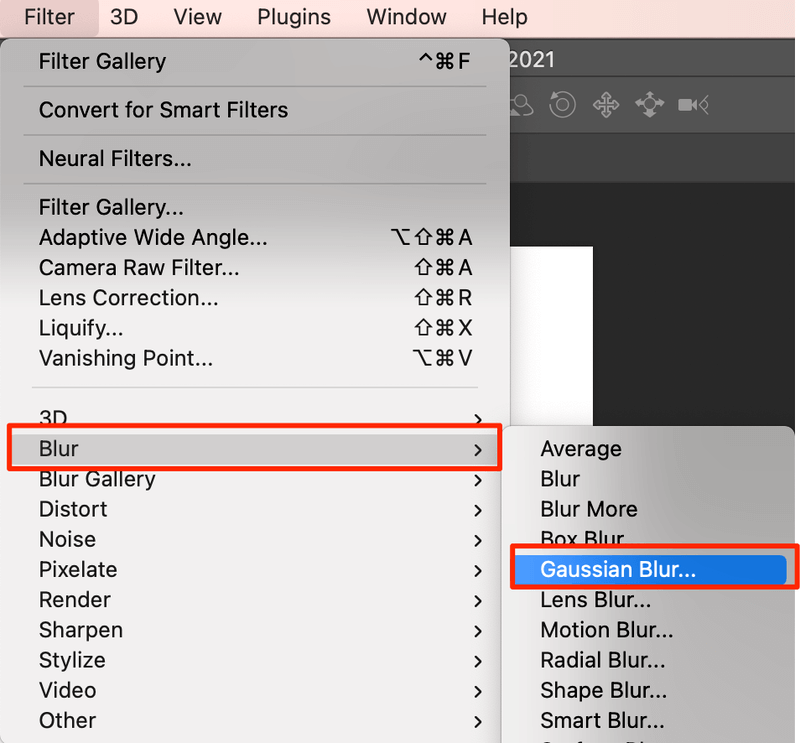
You will see this window pop up.
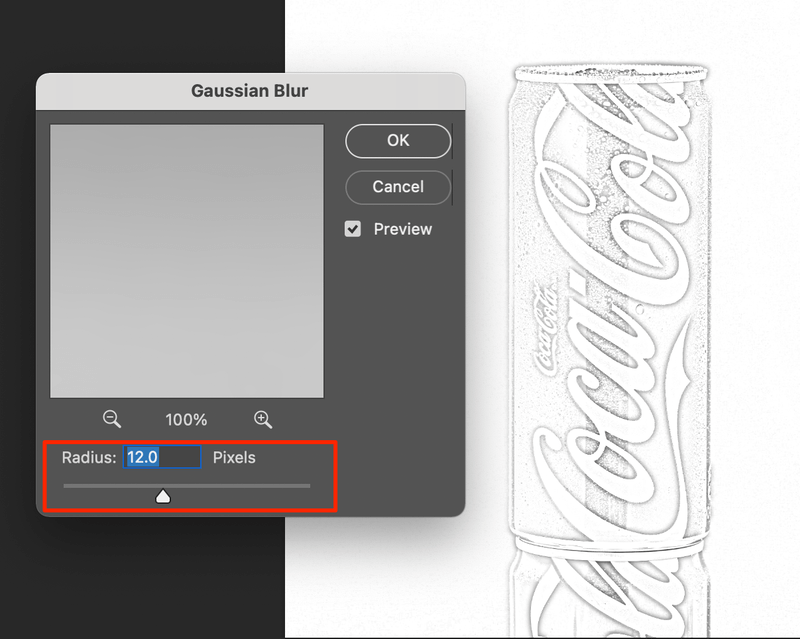
Step 8: Move the Radius slider to find the pencil effect that you want to create and click OK.
Tips: Check the Preview box to see how the effect looks as you adjust.
Additional Tips
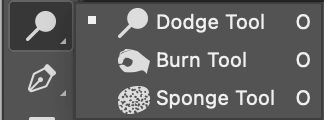
Missing something? Or too much noise in the background? You can clean up the image using the Dodge and Burn tools. The Dodge tool lightens the pencil marks, and the burn tool darkens them.
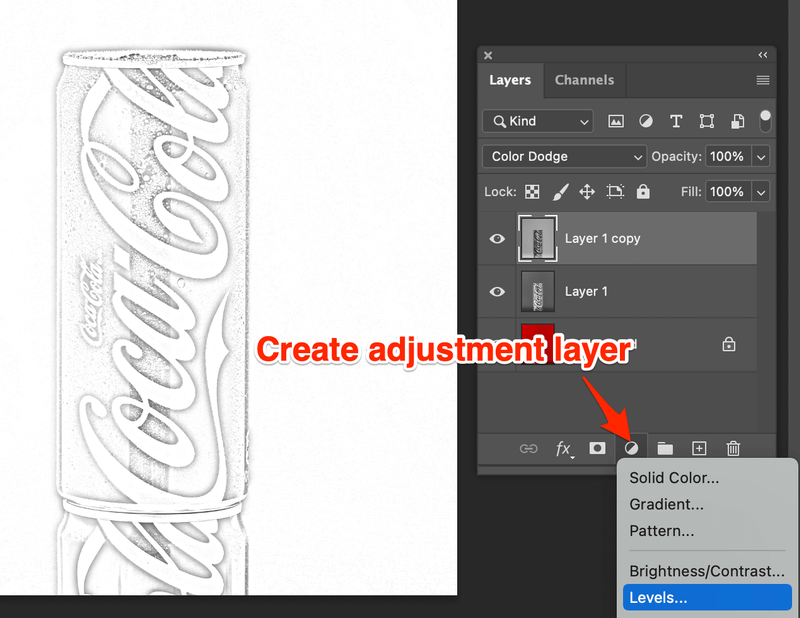
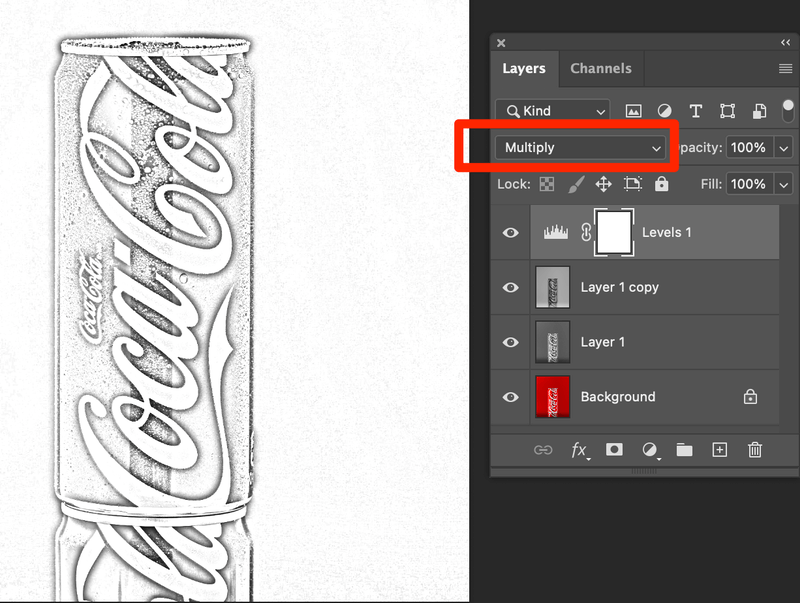
You can also add an adjustment layer to create a more sophisticated and realistic pencil mark effect. For example, you can adjust the Levels. Click on the Create new fill or adjustment layer icon and choose Levels.
Now you can move the slider to get the result that suits your photo (pencil drawing).
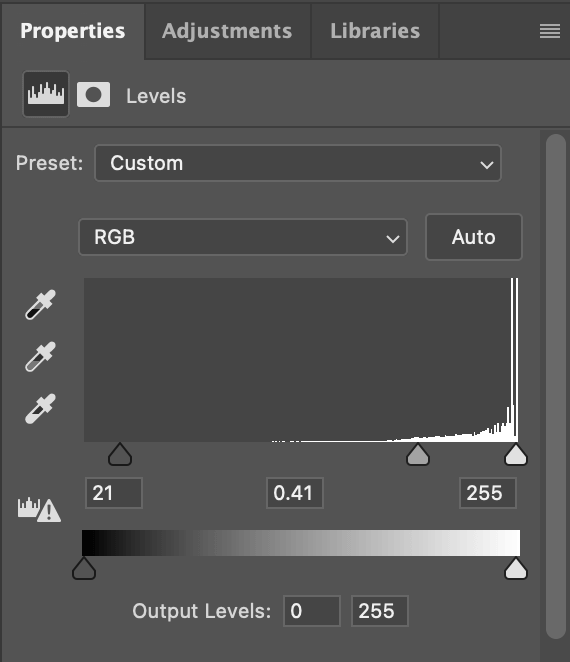
Select Multiply blend mode. You can see the pencil mark is heavier than before.
If you want to make other adjustments, simply find the Adjustments panel and make any adjustments you need.
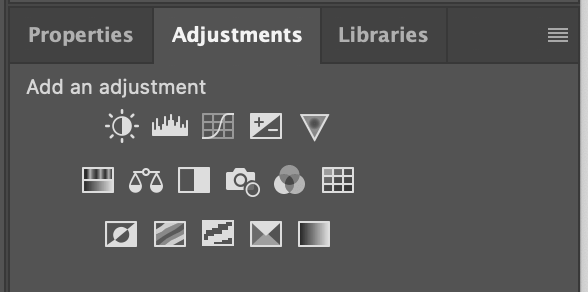
For example, if you want to make the pencil drawing look more like a sketch style, you can adjust the Curves to achieve this result.
Conclusion
The good news is, you don’t have to know how to draw to make a sketch! You can simply manipulate the image to make a realistic pencil drawing in Photoshop following the eight steps above. Hope you find my tutorials tips helpful 🙂
About June
Miles
Thank you so much. I am trying to laser etch an image into stainless steel and it must be an outline. You just saved me so much time.
Sarah
Your a life saver!! Is this adobe ps?
June
Yes adobe photoshop. I have created a downloadable action for Photoshop to create this effect if you are interested:
https://www.photoshopbuzz.com/free-photoshop-action/
Jill
This was working brilliantly until the end when I got to the part Filter> Blur> Guassian Blur. I was able to do all that but the picture remained white. I set it to 1.5 but nothing seemed to happen. Am I missing a step? Would love to be able to do this. Thanks
June
Hi Jill, if there isn’t a lot of contrast in your original picture, it may be that you need to set the Guassian Blur to a higher setting than 1.5, so you could try that. It is also important that you duplicate the layers in the early stages and have the different layers underneath as the top layer actually masks the layer behind it to create the picture, so also check that you have the correct sequence of layers in the layers palette before adding the guassian blur on the top layer. I hope that that helps.
deborah
oh wow this was so easy to do following your quick key command steps. Thanks so much!
helen
Brilliant! Is there any way to change to colour of the drawing, to say for example, give the effect of using a coloured pencil? thank u…
Lauren Cioffi
Hi there! I love this post!! I can’t wait to give this a try!!! I hope you don’t mind, but I have included this tutorial in a blog post: Top 10 photoshop tutorials, on my blog, “Cookies with Cronkite.” I have included a link to this post, a picture and a link to your blog homepage. Check it out.. please leave comments, I would LOVE your feed back!!
June
Hi Lauren, You are welcome to share the tutorial so long as you provide a link back to my post. Thanks for letting me know 🙂
Liz Czerewaty
Can i do this with Photoshop Elements? Thanks…
June
Hi Liz, the tutorial was written for regular Photoshop, but please try the steps in Elements and let us know how you get on. If anyone else has tried this in elements please let us know.
Uttam Manna
It was very easy, thank you very much.
Beth
This is fabulous! Now if I want to copy a portion of the original photo, do I need to flatten the layers?
June
Hi Beth, thanks for the comment. The original photo will still be in place at the bottom of the layers so you can select that layer and copy and paste from it, or just duplicate that layer and bring it to the top and erase a section to reveal the line drawing.. hope that helps.
Jacki
I’m using Photoshop Elements 8 and Step 6, “color dodge” doesn’t make my image mostly white, it does, however, invert the tones so what was once dark is now light and vice versa. The gaussian blur also does nothing but blur the color-dodged image. Any help for Elements 8 here?
June
If anyone uses Photoshop Elements and can help with the questions please use the comments below.
Asad
great tutorial, i like it 🙂
malcolm
Just tried this in Elements 9 and it worked perfectly. Not sure why PE8 doesn’t work.
June
Thanks for the feedback Malcolm 🙂
arome
hanna n co
thanks for the tutorials especially for us beginner. and if there are more tips please help us
June
Hi Arome, Thanks for your comment. Let me know in the comments if there is anything, in particular, you would like a tutorial about. Thanks.
Michell
Brilliant! Thanks for helping, I am a beginner too, used this on a pretty complex photo, had to ramp up the blur but I love it!
Thanks again!
Alfie
Thanks so much. Made my life easier.
Joe
thanks so much, greetings from Spain
kanagu
Thanks bro 🙂 It worked really well 🙂 🙂
Snap
Very simple and helpful. Thank you very much ^.^
Louise
The best step-by-step Photoshop instruction I have ever used – thank you so much.
Raphael Mensah
Thank you so much. it is so easy to follow. i ended making a huge poster for my wife.Please as helen asked above, Is there any way to change to colour of the drawing, to say for example, give the effect of using a coloured pencil? thank u…
Chris
Thanks a lot. This was great 🙂
Noelle
I’m using PS Elements 8. I’m trying to make a photo of a building look like a drawing. The result I have does not look like a pencil drawing at all. Rather it looks like a photo with color and some shadows removed. Increasing the Blur makes it look like a more grayscale picture. Is it me or the software?
Name *Shoaib
Can you tell us how to convert JPEG into watercolor painting
Alex
Never used photoshop before and I managed it. All apart from the dodge and burn tools as Im using laptop with limited mouse manoeuvrability.
Thanks!
June
Thanks for the feedback Alex, I’m glad you found it easy to follow since you’ve not used Photoshop before. Welcome to Photoshop 🙂
aat
many thanks!!! you help me a lot, from spain
June
Thanks for your comment aat 🙂
kileytoo
Hi there, thanks for this great tutorial and the follow-up to add colors. You can also colorize the image with a hue/saturation layer, anyway I think that a great thing to do before to add colors would be to modify the line drawing so that it shows the typical hatching of pencil and inks, you know those fine lines you use to fill-in dark areas or add shading… I’m gonna see if I can find out how to do that…
Lalith
Great June, though there are a few online photo conversions to sketch available, they never have the full image conversion, meaning the image result that they give is of either much less image size or does not give the required effect.
Anybody seeking to do the ‘pencil work’ manually, just follow June’s guidance.
Thanks again, dear June.
June
Hi Lalith, thanks for your lovely comments, much appreciated 🙂
Annette Payne
Thanks so much for making this so simple!!! Any other fun tips you want to share? 🙂
Majeur
What an amazing job. You’ve put this challenging task into simple steps that defines “user friendly” to a different level. Your awesome for your techniques you’ve created in teaching the rest of us. You are the “instructor” in this categor.
Merci a vous!
Majeur
Jefff
Which of the several versions of Photoshop has this feature? I do not want to buy a program, install it, and find I need something else.
Thank You,
Jeff
June
Hi Jeff, I can’t see any reason why this wouldn’t work in all main CS versions of Photoshop as all have layers, filters and layer properties used in the tutorial. You can always download a free Photoshop trial to test it in the version you are thinking of buying. (It won’t work in Photoshop lightroom).
Anuraag
Tutorial is good. But the image doesn’t looks like pencil sketch effect. Hope to see such more wonderful tutorials.
Sinha
It was a great experience! Loved doing it. Will appreciate such more tutorials. Pl provide links. It will certainly help me add value to our mag.
Vaasu
Thanks a lot. Amazing tutorial. Very easy to follow the steps. U r rocking….
Taff Lovesey
Brilliant – just what I needed.
My sincere thanks for this. Great job 🙂
Rheneas
Thanks for the tips. I just made a fabulous line drawing from a photo of my house!
Genifer
Thank you, this was a great help!!
Sue R
Thanks for your great tutorial. I am a first time user of Photoshop, I never had any contact with it until 2 hours ago and had to do a vector drawing turned out pretty good with practice I am sure I will get better.. one photo had a lot of reflection on glass and when I inverted it it didn’t all turn white and of course you could still make out the person who took the photo. is there a way of getting rid or lessening it?
Art Lover
Step 6 I mean about photo dodge can you look and find it for me, please.
Stewart
Very helpful. I will be exploring the site for more PS help and tricks.
joe balfour
thank you so much this has really helped me!!!! 🙂 🙂 🙂 🙂
Diana S. Zimmerman
This is awesome!!!
danyel
you are awsome, wonderful, great , thank you so much
Leon
BOOM! Thank you for the killer tutorial! Nailed it, was exactly what I needed. 🙂
Bishop
Do you at some point recombine the layers?
I have seen similar directions that had me merge down at some point.
June
No, you don’t have to combine the layers to create this effect although I have a tutorial that follows on from this where you do combine the layers to then colourize the line drawing. Please see: https://www.photoshopbuzz.com/coloured-pencil-effect/
Mike
Excellent tutorial. Thanks very much!
Hope
Just the tutorial I needed – thank you!
Séamus
This is fantastic! I’d been trying to get good results for days before stumbling across this tutorial. 2 minutes and it’s all done.
June
Thanks for your comments, it’s always nice to hear that my tutorials have helped 🙂
Mike S
Really great tutorial, thank you!
robin
could you make a tutorial like this only with gifs?
June
It depends on what you are trying to make but a simple way of making an animated gif with this effect would be to use this process on each frame. If you have many frames you could try using this action that I created, which will help to speed up the process: https://www.photoshopbuzz.com/free-photoshop-action/
Hammed Kola
good description, keep it up
Ruth
This is brilliant! Thank you so much. I’ve really been struggling! Now I have exactly the ‘drawing’ that I want – and it only took me a couple of minutes.
Corinne
Thanks! Great job explaining – it was pretty easy even for an inexperienced user (love PS but just don’t dedicate the time to it).
Thamizh
Wow it’s a simple and easy way to change the photos into sketches thanks for ur details. Keep continuing. Thank you..love you
Edil
How do I save the edited picture itself as a image in my computer?
June
You can save the image as it is as a layered .psd file. Or you can choose to flatten the image into 1 layer and save as a .jpg. Hope that helps.
Gail Daley
I have a MAC and I realize tutorials don’t always work on it the way they are supposed to, but I followed your directions exactly, and they worked up to a certain point, but I didn’t end up with a pencil drawing. Can you clarify exactly what you do with Color dodge and color burn when you combine them? The image never converted to black and white even though my controls said I was working with the inverted copy. Should I invert the inverted copy?
Louise
Thank you very much 🙂
Hoffmann
Thank you very much, it helps me a lot.
June
You’re welcome, Hoffmann!
Lance
THanks for the well-stated tutorial!
June
You’re welcome, Lance!