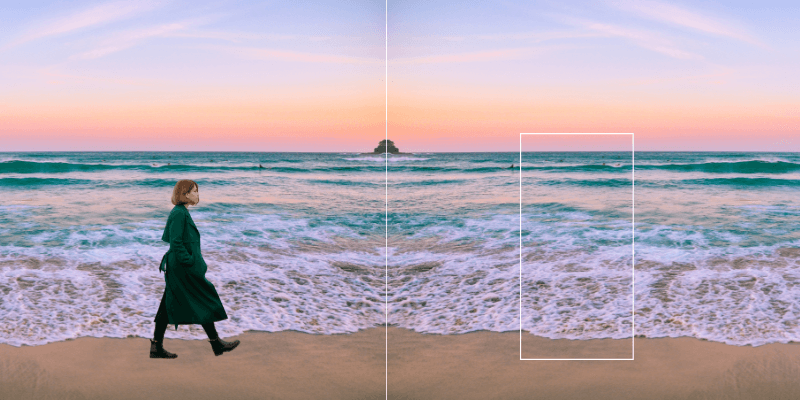
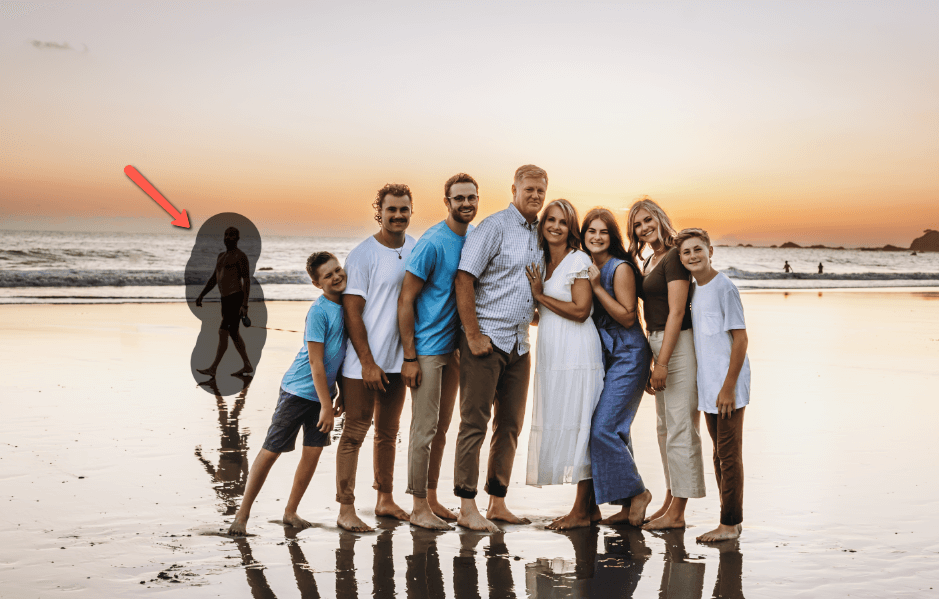
Got some random person photobombing your image? You might think you’ll either have to give up on that image or put up with the uninvited guest. With Photoshop, you don’t have to do either of those things because you can simply wipe them away!
Hello, I’m Cara! I shoot a lot of photo sessions on the beach, which means I sometimes end up with a bunch of people in the background of my images. It’s a little extra work to get rid of them, but definitely worth it!
And, thankfully, Photoshop makes this chore surprisingly easy and there are three different ways to remove someone/something from a photo. Let me show you how to do it!
Note: I use the Windows version of Photoshop. If you are using a Mac, the workspace will look slightly different from the screenshots displayed here.
Table of Contents
Method 1: Spot Healing Brush Tool
This method doesn’t always work right off the bat, but it’s so fast and easy that it’s usually the one I try first. And a lot of times, the tool nails it in one go and I’m off to the next project in two seconds flat!
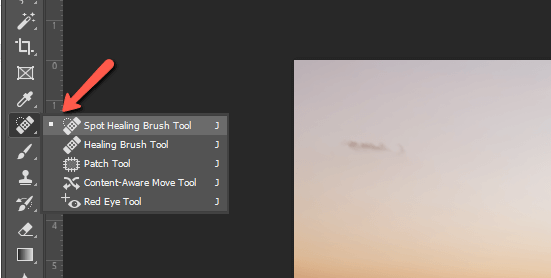
Open your image in Photoshop and press the J key on the keyboard to choose the Spot Healing Brush tool. Or select it from the toolbar on the left.
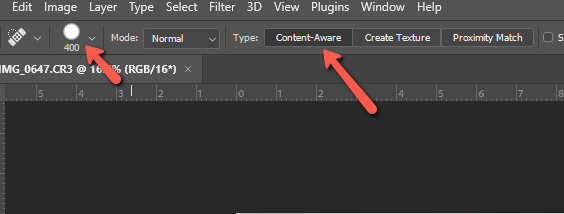
Make sure you’re in Content-Aware mode in the Options bar. Adjust the brush size and hardness as needed to work with your image. Remember you can adjust the size on the fly with the Bracket [ ] keys.
Then simply paint over the person you want to remove.
And watch them magically disappear!

Sometimes there may be slight incongruencies like the way these waves meet up here. It’s always a good idea to zoom in on the spot to check more closely. It will also be easier to work with it if you zoom in where you can see better.
Reduce the size of the tool and click on just that spot to smooth it out (or switch to the Clone Stamp tool if necessary to clean it up).
Once you’re all done, it looks like they were never there!

Method 2: Content-Aware Fill Tool
Next up is to use the Content-Aware Fill. This one is also a pretty quick fix, but gives you a bit more control than the Spot Healing tool.
Start by choosing the Object Selection Tool.
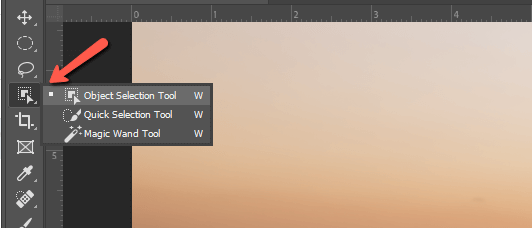
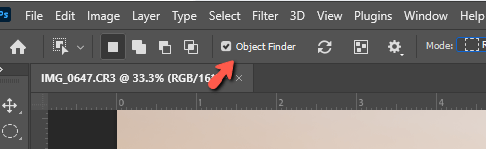
Make sure it is set to Object Finder in the Options bar.
Hover over the person you want to remove and you’ll see them turn blue.
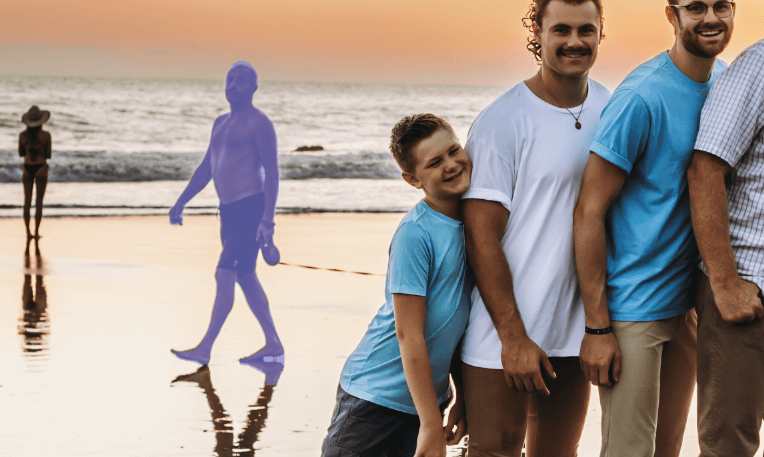
Click to make a selection.

Then go to Edit and choose Content-Aware Fill.

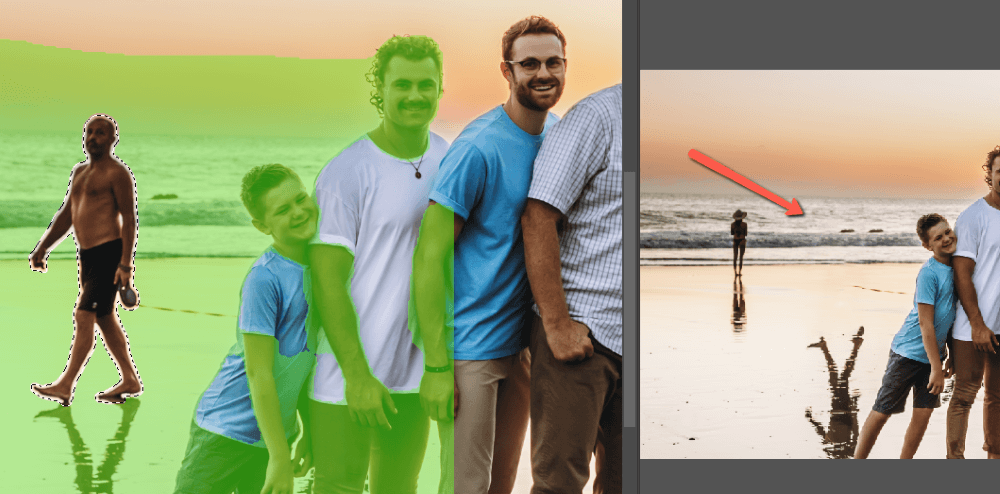
You’ll get this workspace where the green is showing you the sampling area Photoshop is going to use. On the right, you get a preview of the final result.
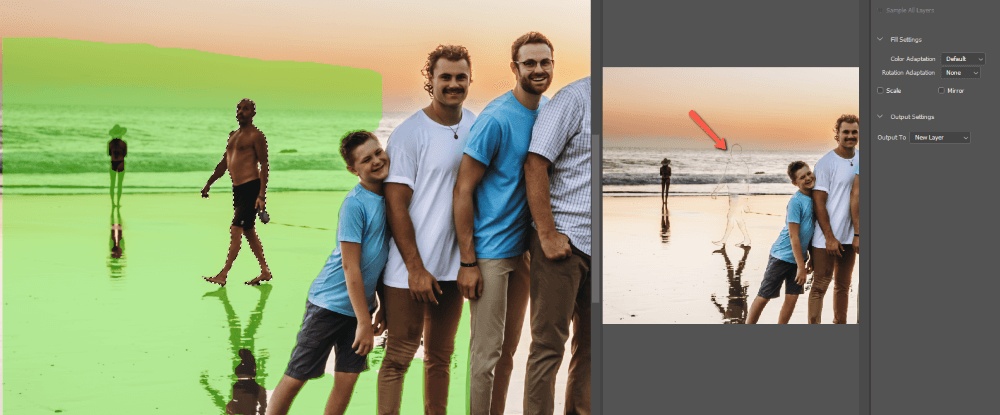
As you notice, we’ve run into a tiny problem. Because of shadows or whatnot, the Object Selection Tool ended up hugging the person too closely with the selection. There is a thin line around the person that wasn’t selected and won’t be wiped away.
Let me show you how to fix it if you run into a problem like this.
Cancel out of the Content-Aware Fill tool and go back to the normal workspace. Go to Select in the menu bar, hover over Modify, and choose Expand.
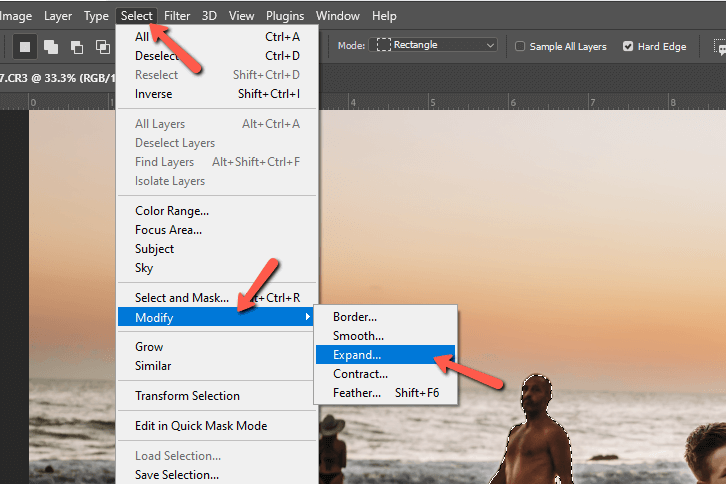
In the box that opens, choose how much the selection should expand by picking the number of pixels.

You’ll notice the selection gets slightly bigger. Now let’s go back to the Content-Aware Fill tool in the Edit menu.
Much better! There is still the matter of that repeating rock in the water but that is easily removed with a click of the Spot Healing Tool or Clone Stamp tool once we close out of here.
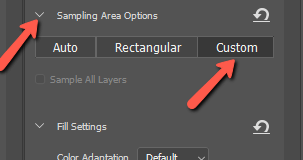
By the way, if you want to modify Photoshop’s sampling area, open the Sampling Area Options section. Set it to Custom, then paint on the image to highlight the areas you would like Photoshop to use for the replacement pixels.
Method 3: Clone Stamp Tool
The semi-automatic tools in Photoshop are really powerful, but they won’t work 100% of the time. Sometimes, you’re going to have to take matters into your own hands and remove that person manually.
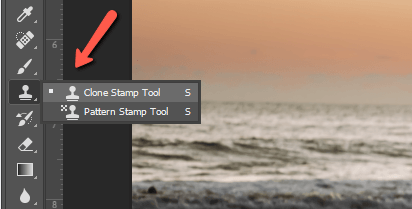
For this task, you’ll need the Clone Stamp Tool. Choose the tool and pick a size that will work for your image. Keep it small so you have more control over your work area, but don’t go so small that you make your job 14 times more time-consuming than it has to be.
Hold down the Alt or Option key and click the spot on the image where you want Photoshop to source the replacement pixels. Then start painting.

As you work, you can choose different source points, etc, whatever you need to make the changes look natural.
To get the coloring/lighting right, sometimes you’ll have to reduce the Flow and/or Opacity of the Clone Stamp tool to gently blend the areas together. Don’t forget to reduce the Hardness of your brush to help with smooth blending.
Once you’ve finished, sit back and look at your work. Wouldn’t you agree the results are worth it?
Before:

After:

What if you want to do the opposite and add someone to a picture? That’s totally possible too! Check out the tutorial here!
About Cara Koch