
What’s a great way to emphasize a certain phrase or concept in a design? You underline it! The viewer’s eye will naturally be drawn to this extra emphasis and designers use this to direct attention.
Hey there! My name is Cara and my love affair with Photoshop began many years ago when I first started as a photographer. Now, I manipulate images and create all sorts of designs in the program.
Underlining text in Photoshop is really easy and super effective as a design technique. However, it isn’t readily apparent at first. Let me show you how to do it.
Please note that the tutorials and screenshots below are based on Photoshop CC Windows, they might look slightly different if you are using the Mac or other versions.
Table of Contents
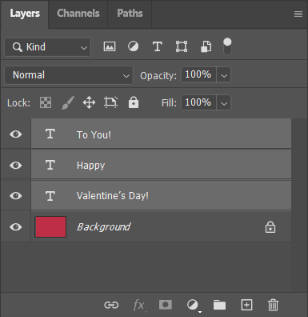
Step 1: Document and Text
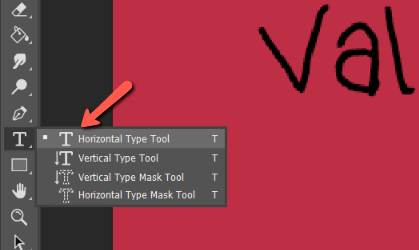
You’re going to need a Photoshop document with some text. Open up a document and add your text using the Horizontal Type tool.
Step 2: Open the Character Panel
The Options bar offers a few options for customizing the text such as font style, italics, and text warping. However, the underline option doesn’t appear here, which can be confusing. Where is it?
To find it, we need to open the Character panel. This panel offers various options for refining the look of your text, including underlining it.
The Character panel is usually hidden, but it’s easy to find. Go to Window in the menu bar and select Character. The panel will appear on the right side of your screen.
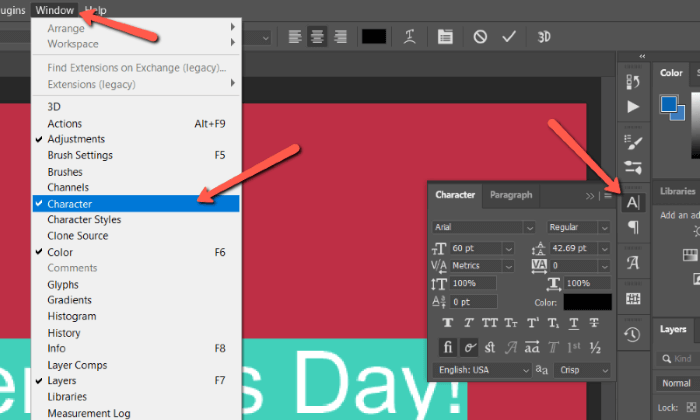
Alternatively, you can press the little Capital A icon with the vertical line next to it to open the panel.
Step 3: Choose the Text
Before you tell Photoshop to underline the text, you need to define what text you want to underline. If you are underlining all the text on a particular layer, you can simply select the layer in the layer’s panel.
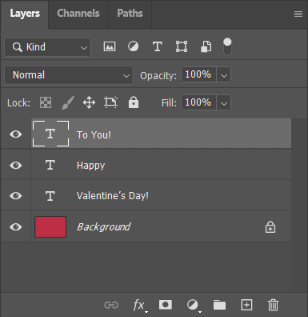
In this case, I would underline the words “To You!”
What if you want to underline only some of the words in a text box? Click and drag over the word(s) that you want to apply the effect to, in this case, the word “Day”.

Step 4: Underline the Text
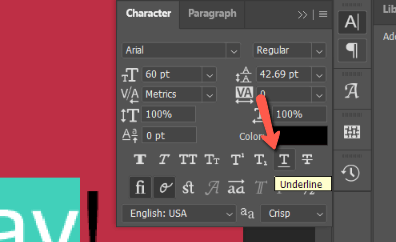
Once you have your text prepped, simply add the effect in the Character panel. The command appears as an icon amongst several other commands in the panel. Look for the icon that looks like a Capital T with a horizontal line underneath.
Press ESC to accept the changes when you’re happy.
Underlining Multiple Text Layers at Once
If you want to underline more than one text layer, you can do this with one command. Select all the layers with the text you want to underline.
Do this by clicking on each layer with the Ctrl or Command key pressed down. Or click the first layer in line, hold the Shift key, and click the last layer.
Once all the layers are selected, high the Underline command in the Character panel to change them all at once.
Enjoy the Emphasis
That’s all there is to it! Emphasize certain parts of your message quickly and easily with this simple but effective technique.
Eager to learn more? Check out our tutorial on how to create gradient text in Photoshop here!
About Cara Koch