In general, photographers always want more light. More light means we can up the shutter speed to reduce motion blur, lower the ISO to reduce noise, and close down the aperture to get more of the image in focus or a combo of all three.
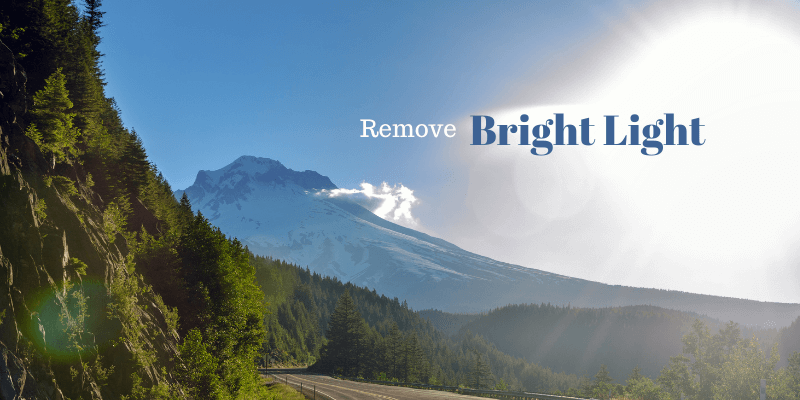
But sometimes, you have too much light in an image. Or perhaps too much light in one part of an image. For those instances, you need to know how to remove glare or bright light in Photoshop.
Hello! I’m Cara and that’s exactly what I’m here to show you today. Check out a few techniques here!
Note that the tutorial and screenshots below are from the Windows version of Photoshop CC. If you are on a Mac, they can be different.
Table of Contents
A Note About Removing Bright Lights
There are a few techniques you can use to tone down bright light in Photoshop. Which one you will use depends on the image and the type of light you want to remove.
You should also note that you can’t always remove bright lights completely. If the highlights are blown out, there are no details to recover. And if there isn’t the right information to use from another part of the image, it just won’t work.
However, you may be able to tone down the brightness with one of these techniques.
Method 1: Blend Mode Multiply
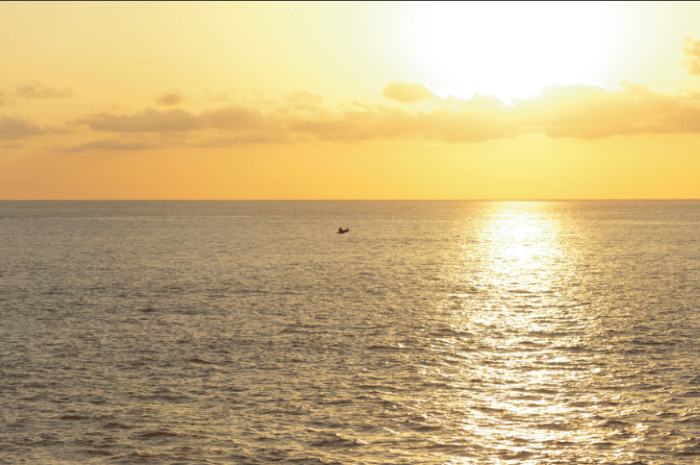
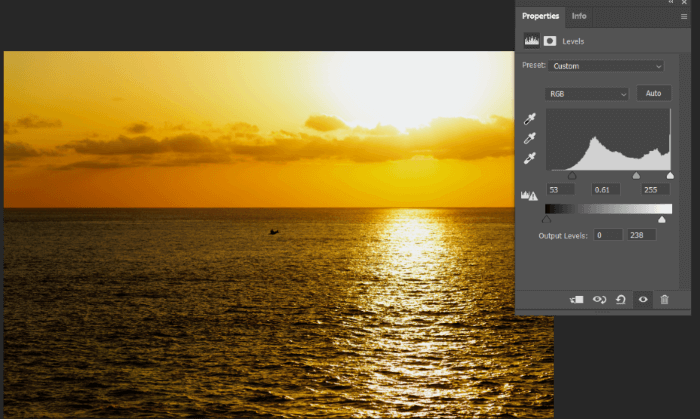
The first technique is quick and will work on images that have been slightly overexposed. For example, this image I took of a sunset near Jacó, Costa Rica is a little bright.
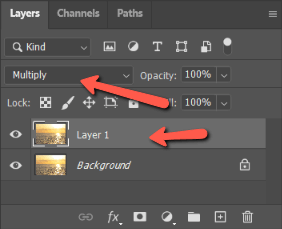
A simple way to tone it down is with the blend mode Multiply. Duplicate the layer by pressing Ctrl + J or Command + J. Change the blend mode on the second layer to Multiply.
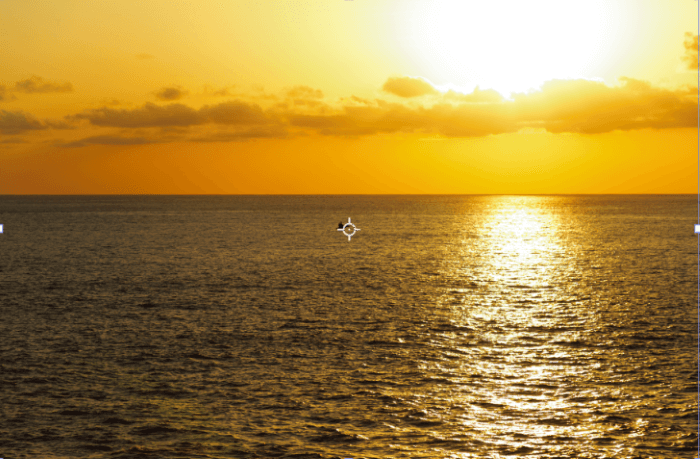
The blend mode darkens the image evenly. This one is too yellow now but the water has some depth and shadows that were lacking in the original image.
For some images, you can stop right here. For others, a different technique (or combination of techniques) is needed.
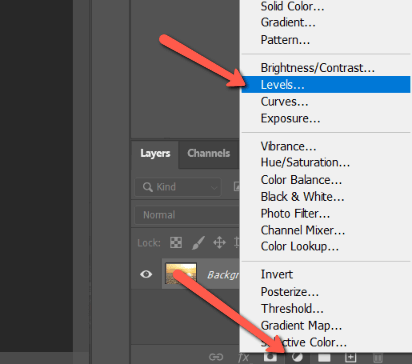
Method 2: Levels Adjustment Layer
Now let’s look at using a Levels adjustment layer. Hit the Adjustment layer icon at the bottom of the Layers panel. It looks like a half-filled circle. Choose Levels from the menu that opens.
In the box that opens, you can adjust the highlights, mid-tones, and shadows by dragging the sliders.
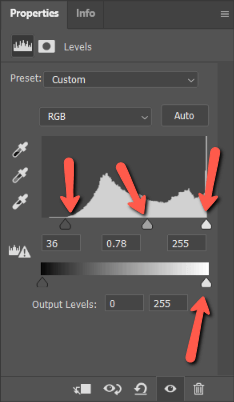
Play with them to see what looks best for your image.
Method 3: Camera Raw Filter
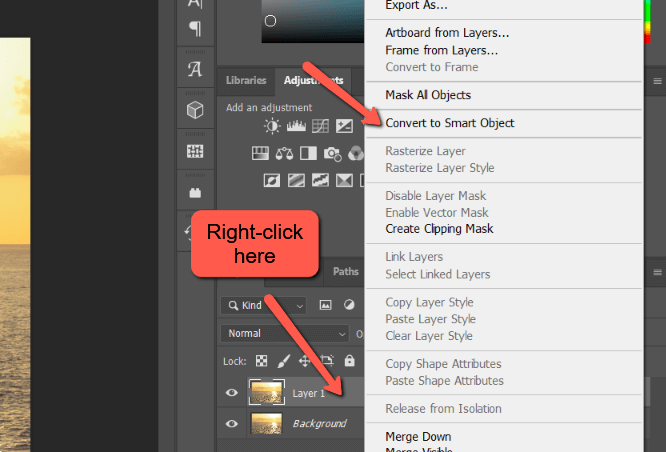
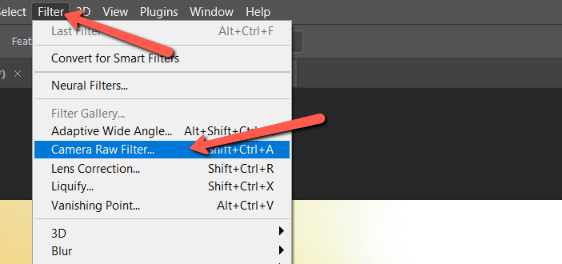
Another method you can try is to adjust the image with a Camera Raw filter. To be able to come back and make adjustments to the filter again later, let’s turn the copied layer into a smart object. Right-click on the layer and choose Convert to Smart Object from the menu.
Now go to Filter and choose Camera Raw Filter.
If you’ve used Lightroom, these panels will look familiar to you. To adjust the exposure, open the Basics panel and start by adjusting the Exposure. Bring up the Contrast a bit to intensify the shadows.
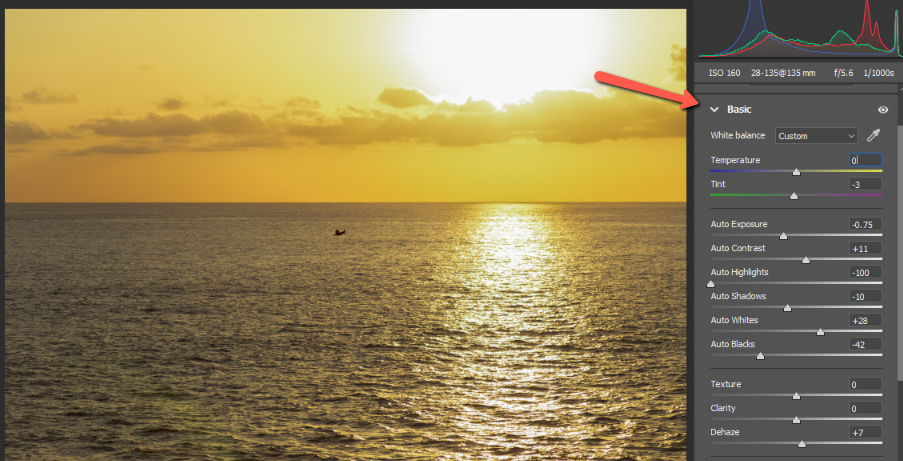
Then you can bring down the Highlights and probably the Shadows and the Blacks. Feel free to play around and figure out what works best for your image.
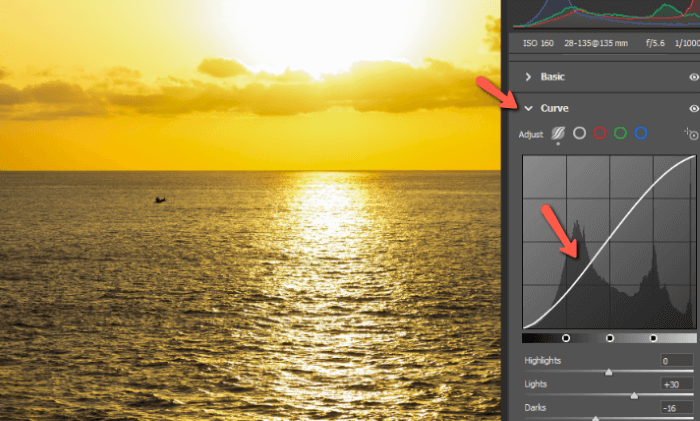
You can also open the Curve and adjust the highlights and shadows. Click on a point on the curve, pull up to brighten, and down to darken.
So far, we’ve talked about techniques that affect the entire photo. What about when you want to remove light from a face in Photoshop?

There are a couple of things you can do.
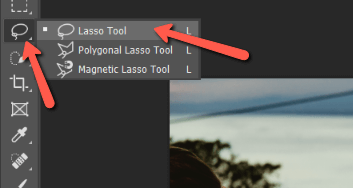
Method 4: Content-Aware Fill
Select the Lasso tool from the toolbar on the left or press L on the keyboard.
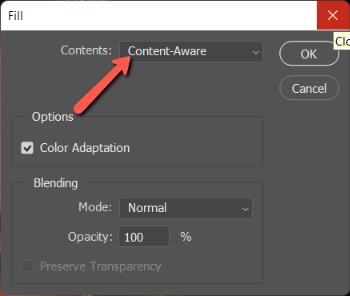
Draw around the bright spot you want to remove. Right-click within the selection and select Fill.
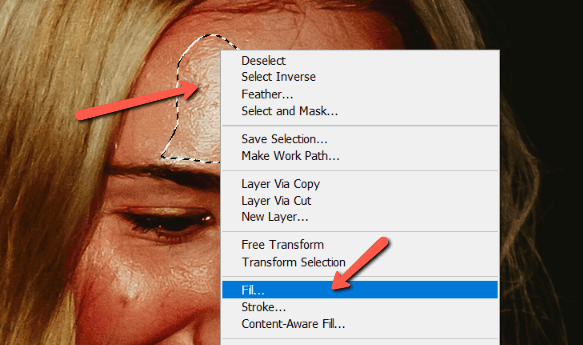
Make sure that the Contents box says Content-Aware. Then click OK.
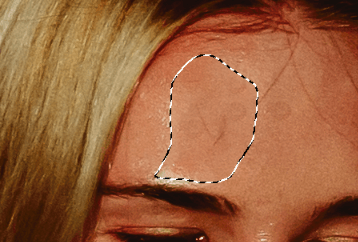
Photoshop then tries to fill in the area with the proper colored pixels from another part of the image. Sometimes it works great, other times it needs a little help.
In this image, there is a small part to touch up above her eyebrow and it will need a touch of blending, but the heavy lifting has been done.
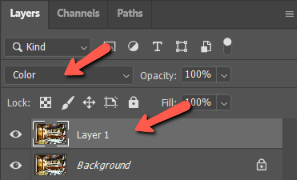
You can finish off with the Stamp tool. Use a soft brush with a low flow rate for better blending.
Method 4: Color Blend Mode to Minimize Glare
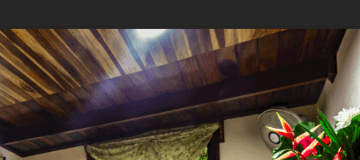
Sometimes, you might end up with a faint glare streaking through your image. This kind of stuff seems really tough to get rid of because the usual stamp tool or healing tools don’t work well.
With the right technique, you can minimize it, though it isn’t always possible to eliminate it altogether.
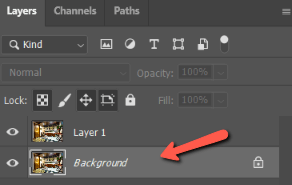
Duplicate the background layer with Ctrl + J or Command + J. Change the blend mode to Color.
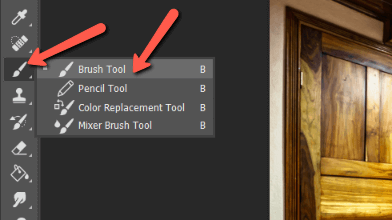
Open the brush tool by choosing it from the toolbar on the left or pressing B on the keyboard.
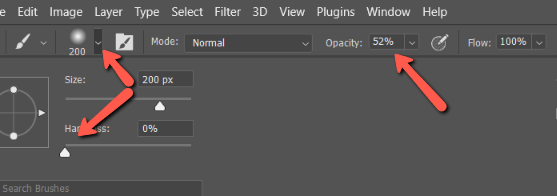
Set the brush to about 50% Opacity in the Options bar and bring down the Hardness.
Make sure the background layer is selected.
Then hold the Alt or Opt key and click anywhere in the image to select a color. Now, paint with your soft brush over the glare area.
The trick here is to choose the right color and not mess with it too much or it will get muddy. Depending on the image, you might not be able to completely eliminate the glare either. At least you can make it less noticeable.
What do you think? Did you learn something new?
You won’t always be able to eliminate bright lights from an image. However, with the right technique, you can minimize them enough to “save” an image.
Curious about other tricks in Photoshop? Check out our tutorial on how to remove unwanted objects from images!
About Cara Koch