
It’s always fun to create something visually interesting, right? Well, since we usually read left to right, what if we flipped the text to make it vertical in Photoshop?
Hey there, I’m Cara! It’s always fun to come up with attractive new designs and Photoshop gives us a lot of tools to work with. Making vertical text is eye-catching and intriguing and isn’t nearly as hard as you might expect. You just have to use it sparingly because reading vertical text isn’t the most natural for the Western human eye.
In this tutorial, I’ll show you three easy ways to make text vertical in Photoshop.
Note: I use the Windows version of Photoshop. If you are using a Mac, the workspace will look slightly different from the screenshots displayed here.
Table of Contents
Method 1: Vertical Type Tool
It’s so easy to write text vertically in Photoshop, there’s even a tool for it. Simply select the Vertical Type Tool from the toolbar on the left and add text.

Then, position your cursor in your project wherever you want to add the text. Click, and start writing.

However, there is an important consideration when writing vertically. We are trained to read left to right and reading vertically, while possible, can be a challenge.
In graphic design, you always want your text to be easy to read, otherwise, most people won’t make the effort. Thus, you must use vertical text with care.
It’s best to stick with easily readable fonts and single words. Watch what happens when we try to put additional words.

I put a space using the spacebar between “Write” and “here” but it doesn’t show up obviously at all that there are two words. What happens if we try using Enter or Return?

Photoshop moves the second word to a new line. But interestingly, it writes the second word behind the first word, which we would consider backward for reading. To get the words to appear left to right, you’d have to type them backward.
For example, “reading easy for here write” would show up like this:
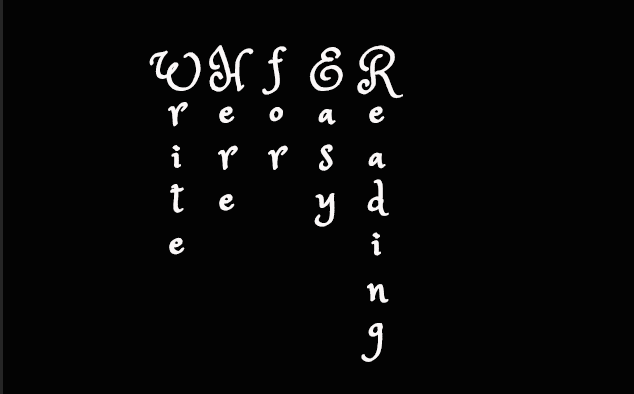
You can play with it to create interesting designs. Just be sure that you stick to something simple and choose fonts that don’t make the words even harder to read.
Method 2: Toggle the Text Type
There’s another way to access the vertical type option. This is useful if you’ve already written some text horizontally and would like to change the orientation.
There is a toggle button in the Options bar that allows you to switch the text orientation.

You can click it however many times you want and each time it will switch to whatever is not the current orientation. So:

Becomes:

With just the click of a button!
Method 3: Rotate the Text
There’s one more way to orient the text vertically, but this method won’t keep the individual letters’ orientation horizontal. You can rotate the text so that the word is going vertically and the letters are facing upward (or downward).
Let’s start with our text horizontally once more. Then press Ctrl + T or Command + T to activate the Transform Tool. Hover near a corner of the text box and you’ll see the cursor turn into a little double-headed 90-degree arrow. Click and drag to rotate the text.

To get it all the way vertical, keep going until you get to 90 degrees. Or you can write -90 degrees in the Angle box in the Options bar. If you want to rotate it the other way, write 90 degrees without the minus sign.

And that’s all there is to it! Creating vertical text in Photoshop is quite simple. When used well, the technique can add tremendous visual interest to whatever design you’re creating! Want to learn more about other text effects in Photoshop? Check out how to create gradient text here!
About Cara Koch