
Sometimes you need to add a little bling to your images. Whether you want to accent a shiny new car or add sparkle to the closeup of a wedding ring, starbursts are a fun way to do that.
Hey there, I’m Cara! I’m ready to show you another fun trick in Photoshop. As with many techniques, there is more than one way of creating starburst effects. And you’ll end up with a slightly different result each time.
So let’s look at a couple of methods for how to make a starburst effect in Photoshop. Then you can pick the one that works best for you!
Note: I use the Windows version of Photoshop. If you are using a Mac, the workspace will look slightly different from the screenshots displayed here.
Table of Contents
Method 1: Lens Flare Filter
You can just grab the Lens Flare filter from the Filter menu and slap it on your image. But if you want a little more control over the final look, there are a couple of other steps you should take first.
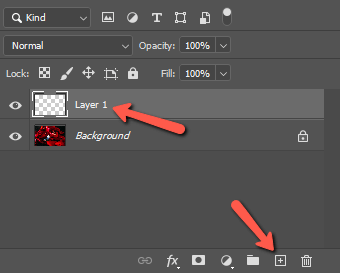
If you create the lens flare on the background layer, you won’t be able to move the flare around. Thus you have to get the positioning just right in the tiny little preview window. Make it moveable by clicking the new layer button in the layers panel to put the lens flare on its own layer.
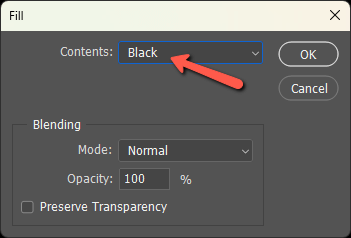
You won’t be able to use the flare filter with an empty layer, so let’s fill it with black. Press Shift + F5 to open the Fill menu, or select Fill from the Edit menu. Set the contents to Black and press OK.
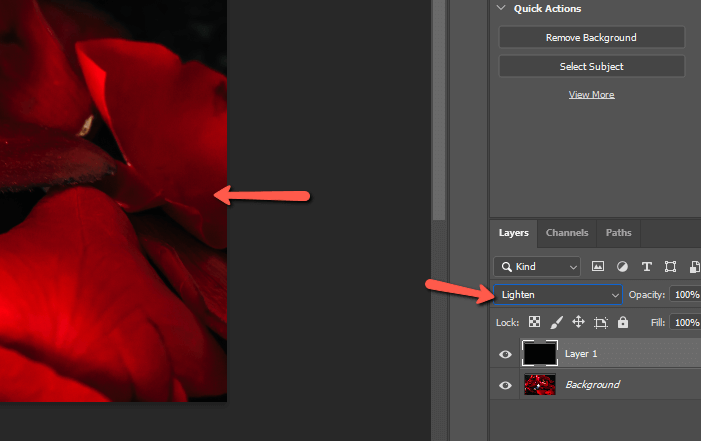
Now your image will be filled with black, but we don’t want that. Change the blend mode that says Normal in the Layers panel to Lighten. This blend mode only shows the light parts of the layer so this black layer will disappear.
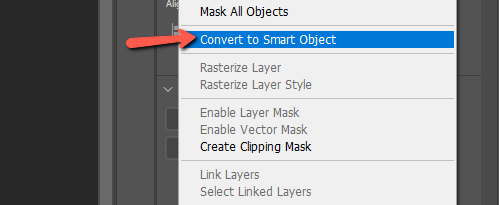
Let’s change this layer to a smart object. This allows us to reopen the filter and make changes.
Right-click on the layer and choose Convert to Smart Object.
Now we’re ready to add the Lens Flare. Go to Filter, hover over Render, and chose Lens Flare.
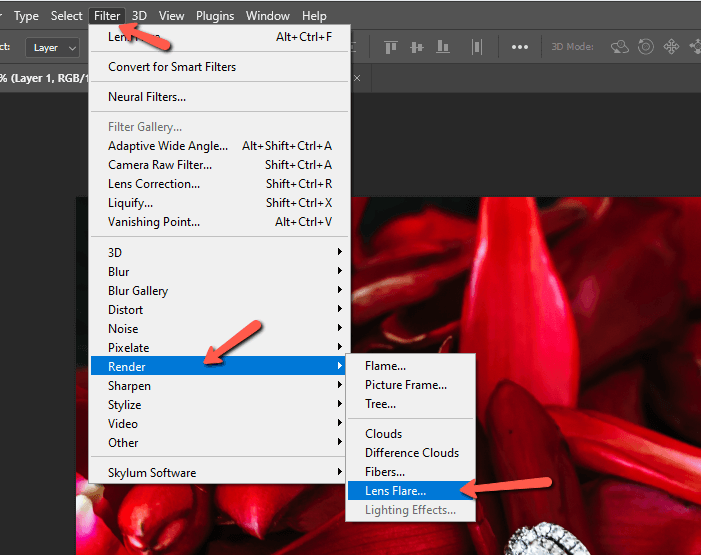
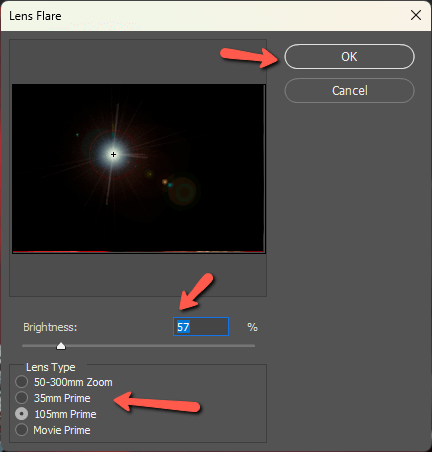
You don’t have much to control here. The Brightness makes the flare both brighter and bigger or smaller and darker. At the bottom, you can choose a couple of different lens types, which will give you a different flare look.
That’s it, so pick what you like and click OK. You can change the color of the lens flare using a Hue/Saturation filter and clipping it to the lens flare. But there isn’t much else you can do to modify your lens flare effect.
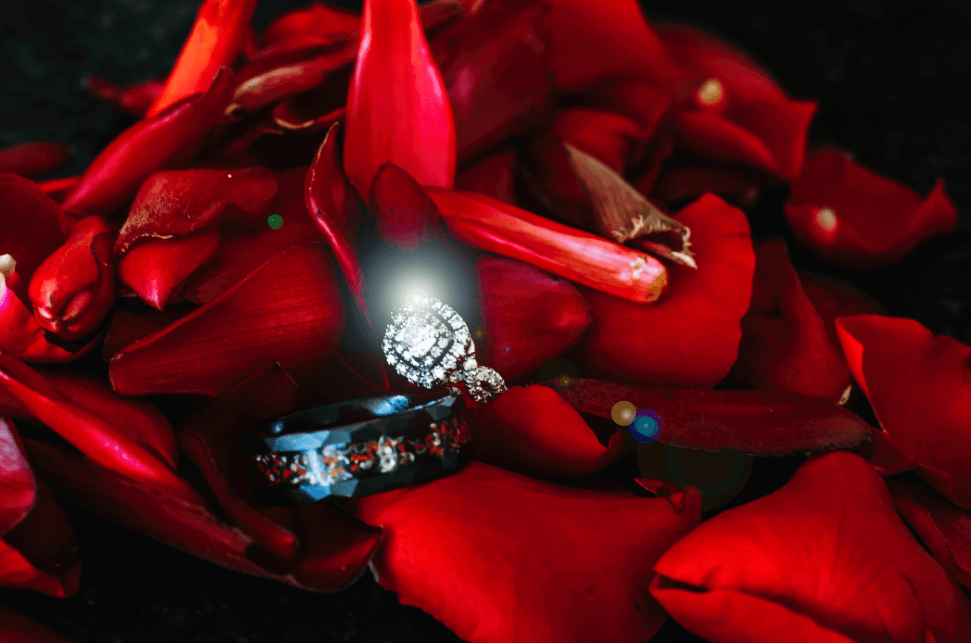
The lens flare looks more realistic when there is a strong light source entering the image at an angle. Let’s try a different technique for this image.
Method 2: Draw a Starburst
Don’t skip this part even if you think you can’t draw! I can’t draw to save my life, yet I still managed to create this starburst example for you. Let’s give it a try together.
Step 1: Create a Black Background
I’m going to draw a white starburst. To see it, we need a black background. So let’s add a new layer and fill it with black as we did in the previous example.
To keep the starburst separate from the black layer, add another empty layer on top before you start drawing. This is important for duplicating the effect later.
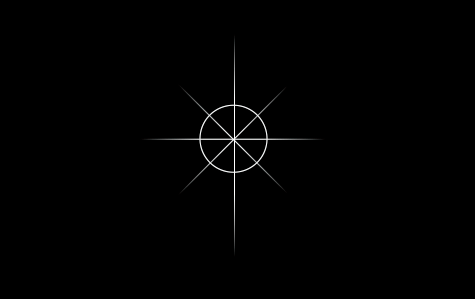
Step 2: Draw a Starburst Arm
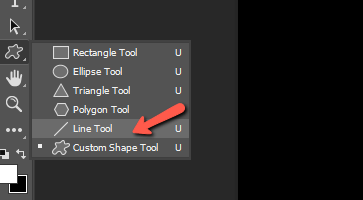
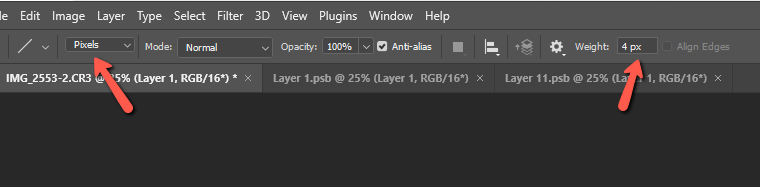
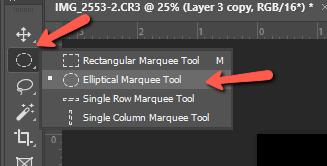
Choose the Line tool from the toolbar on the left. It may be hidden behind one of the other shape tools. Right-click on the shape tool to find it.
In the Options bar, set the mode to Pixels and choose an appropriate thickness for your line. I’m going to go with 4 pixels. To make your starburst legs thicker or thinner, just choose a larger or smaller number.
Then click and drag to draw a straight line. To keep your line perfectly vertical (or horizontal), hold Shift while drawing the line.
Step 3: Blur the Arm
To make this look more like a fuzzy starburst arm rather than a well-defined line, let’s use a motion blur filter. Go to Filter, hover over Blur, and choose Motion Blur.
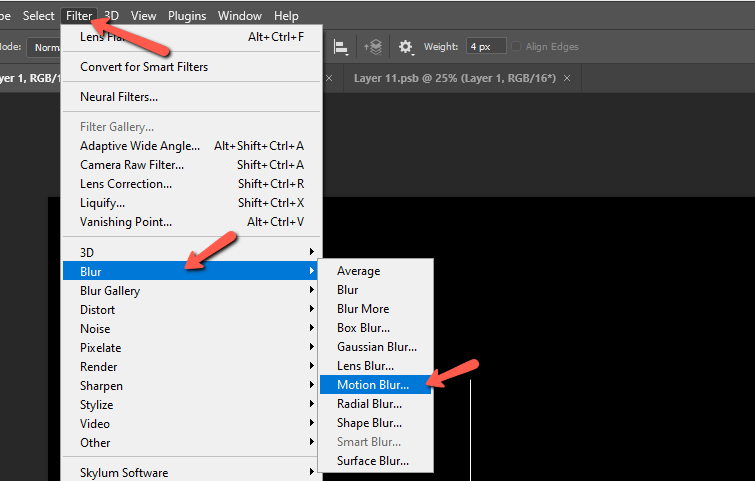
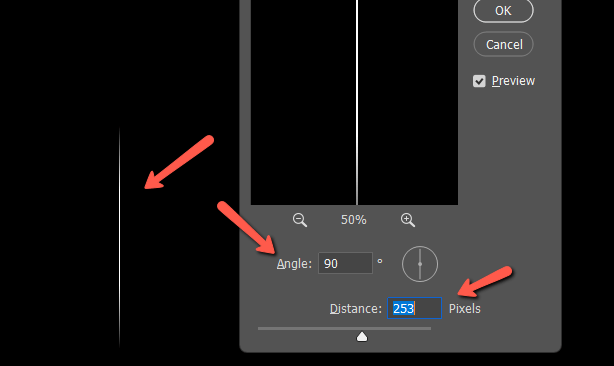
Make sure the Angle of the blur matches the angle of the line. Then drag the Distance up until the ends are tapered nicely with a starburst look. Press OK.
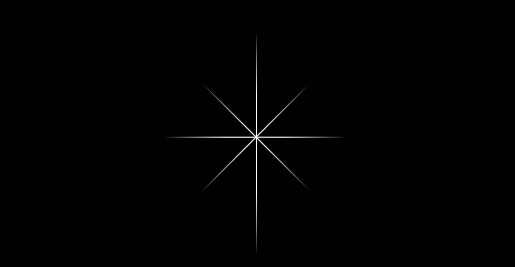
Step 4: Add More Starburst Arms
To make more starburst arms, press Ctrl + J or Command + J to copy the line to a new layer. Press Ctrl + T or Command + T to activate the Transform tool. Then you can rotate the new line to a new position.
Repeat as many times as needed to create the type of starburst you want. You’ll need 2 lines for a 4-point star, 3 lines for 6 points, and so on.
Step 5: Add a Flare
A bit of flare makes a nice finishing touch. To add this, create a new layer once more. Then select the Elliptical Marquee tool from the toolbar.
Make sure the Feather box in the Options bar is at 0 pixels.
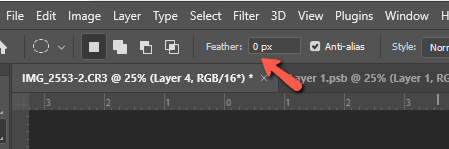
Then draw a selection around your starburst.

Go to Edit and choose Stroke.
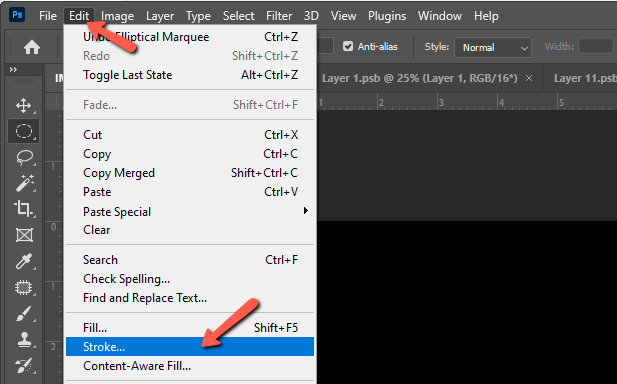
Choose a width that matches your starburst arms, 4 pixels in my case. Press OK then Ctrl + D or Command + D to deselect the selection.
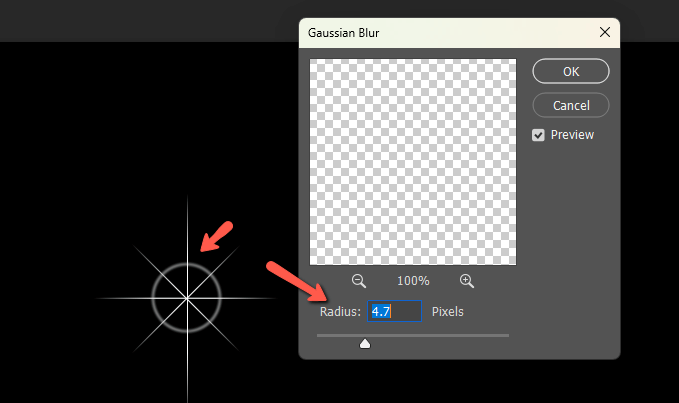
To blur the line like the others, go to Filter, Blur, and choose Gaussian Blur.
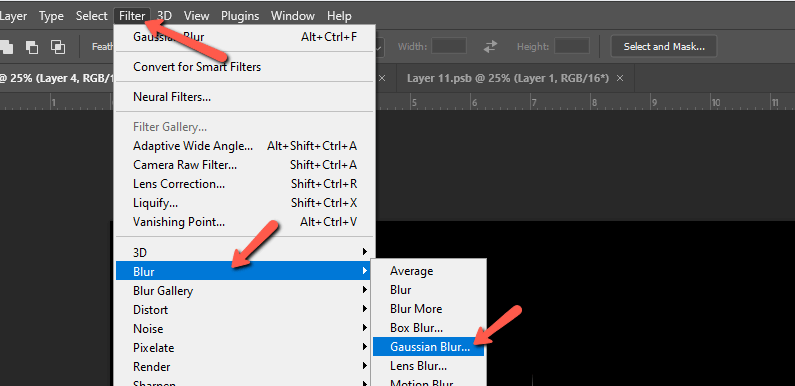
Pick a Radius that matches and press OK.
The flare seems too strong to me, so I will turn down the Opacity of the layer.
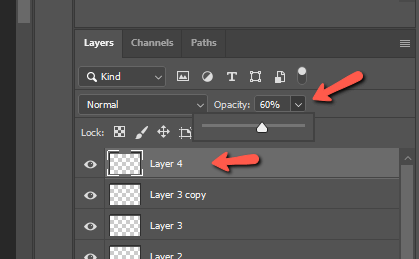
I also added a second smaller circle in the center. I made this one 20 pixels and blurred it with the Gaussian blur to get the hazy circle. I also brought the layer’s opacity down.
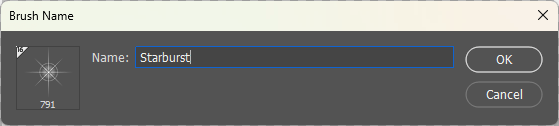
Step 6: Flatten the Starburst and Turn it into a Brush
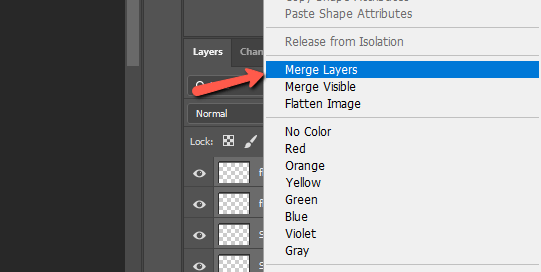
To avoid going into all this trouble again, let’s turn this starburst into a brush. To do this we need to get all the pieces of the starburst onto one layer. Select all the layers by holding Shift while clicking on the first and last layers.

Right-click and choose Merge Layers.
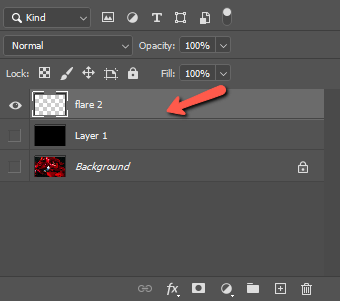
At this point, you can also turn off or delete the black layer. Turn off the background image for a moment as well. We need the starburst by itself on a transparent canvas to make the brush preset.
Then press Ctrl + I or Command + I to invert the colors.
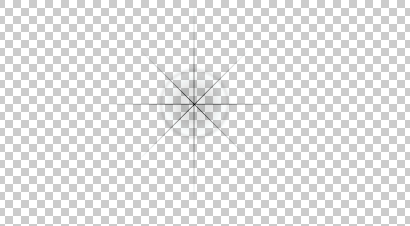
Go to Edit and choose Define Brush Preset.
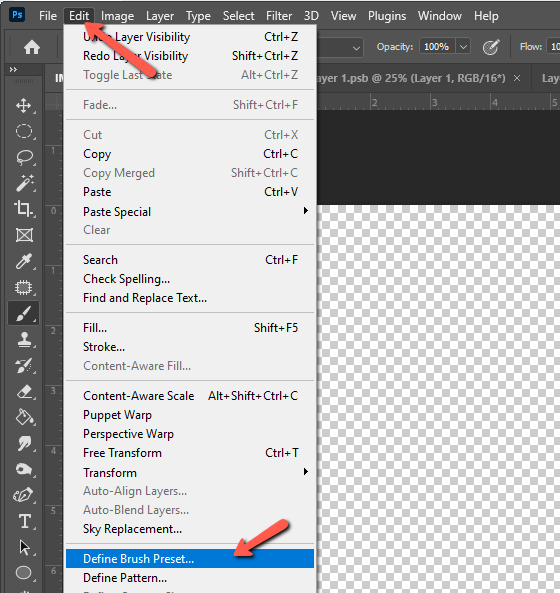
Photoshop will pop up with a preview of your starburst as a brush and you can name it whatever you please. Press OK.
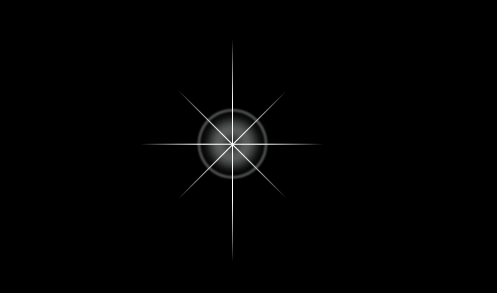
Now, you’ll be able to use your starburst as a brush, adding it with whatever opacity, color, size, etc works for your image.
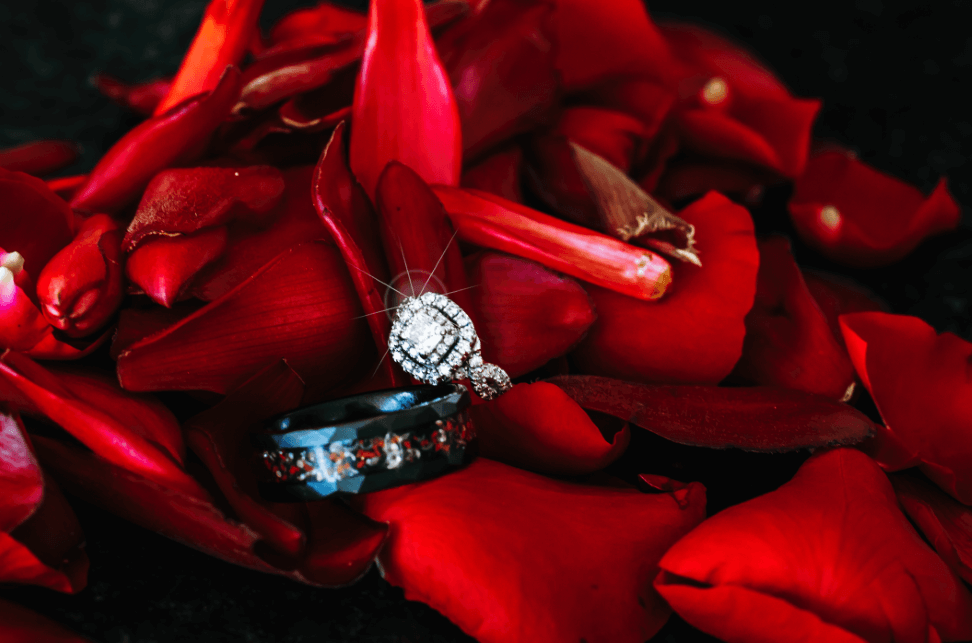
Shiny! Isn’t it fun all the amazing stuff you can do in Photoshop? Check out the surprisingly easy methods of adding fire to images here!
About Cara Koch