
What’s the first thing you think of when you hear the word slice? If you’re like me, pizza pops to the forefront of your mind. However, slices in Photoshop are something a little different.
Hello! I’m Cara and while I do enjoy a basil-laden slice of Margherita, photo slices in Photoshop are just as fun in a different way.
Now, when you slice your image in Photoshop, you could then export the slices and save each image individually. Or you could save some time and do things the easy way like I’ll show you here.
Check it out!
Note: The tutorials and screenshots below are from Photoshop CC for Windows, other versions can look different.
Step 1: Slicing Up Your Image
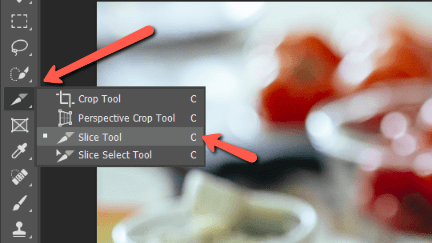
Start by selecting the Slice tool so you can slice your image. You’ll probably find it hiding behind the Crop tool. Right-click on the Crop tool and select the slice tool from the menu that appears.
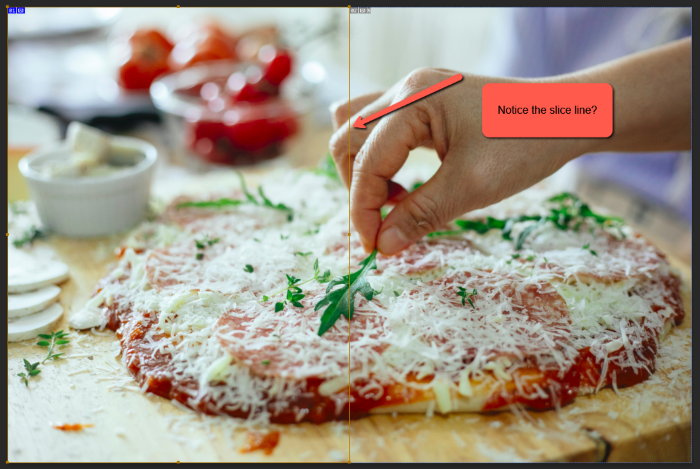
With the slice tool active, simply click and drag over the area of the image you would like to slice. To slice this apt and delicious-looking pizza image in half, I’ll click and drag, making sure to line up my slice with the center guideline that appears.
Tip: You can center objects using guides.
Step 2: Name Your Slices
To distinguish each slice of your image, double-click somewhere within the slice. In the box that opens, choose a name. I’ll go with the incredibly original name Slice 1.
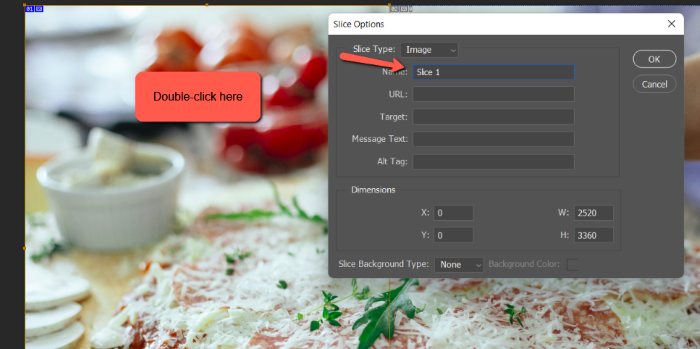
Do the same thing for the other slice(s). Keep in mind that whatever name you choose here will become the file name when we export.
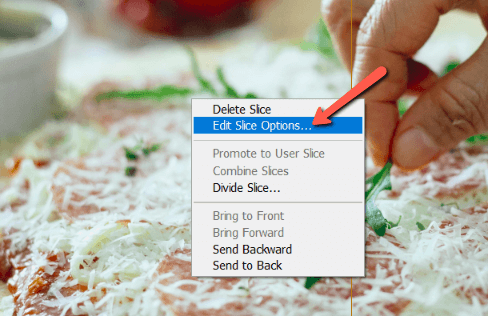
If double-clicking doesn’t work, right-click within the slice instead. Choose Edit Slice Options from the menu that appears. Then you’ll end up at the same box where you can change the name.
Step 3: Export Your Slices
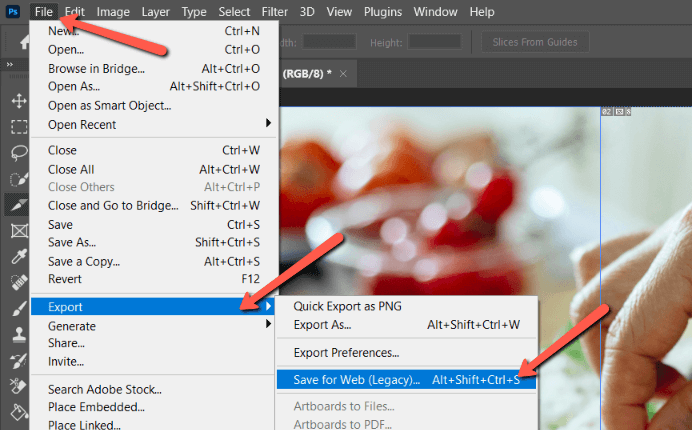
To save and export them all in one fell swoop, let’s use the Save for Web command. You’ll find it under File, hover over Export, and choose Save for Web.
In the box that opens, you’ll need to make a couple of changes. First, choose the file type you would like to save as on the right. Here I selected JPEG.
If you want to export certain slices, you’ll have to choose the Slice Select tool on the left. Then click on the slices you want to export. Hold down the Shift key to select multiple.
Keep in mind you may have to zoom out the image to see the separate slices depending on your image size.
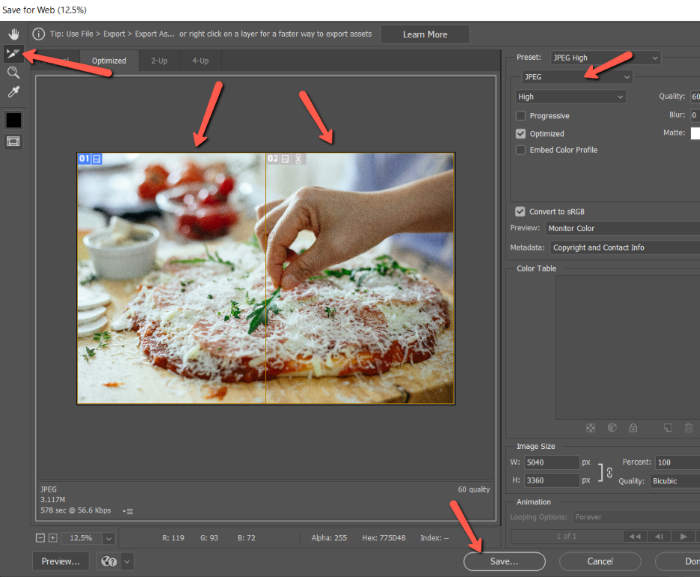
If you want to export all the slices, don’t worry about selecting anything. When you click Save, you’ll see a Slices box at the bottom of the dialog box. Make sure All Slices are set to export them all.
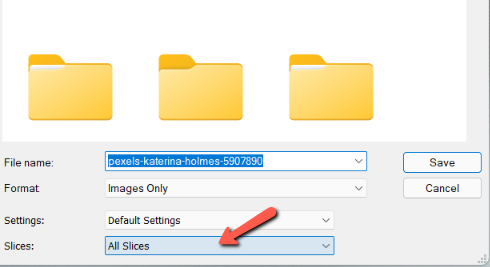
Choose where you want to save the images and click Save again.
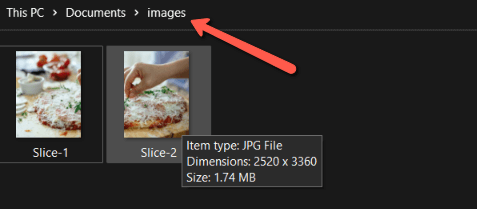
Photoshop will automatically create a folder named Images and save your slices there. So much easier than having to save each slice of your image individually!
Excited to learn more useful tricks with the Slice tool in Photoshop? Check out how to print a large image on multiple pages here!
About Cara Koch
Eugeny
Hello! how can Slices be saved without using Save for Web because it has a limit of 8000px and my image is larger than 16000px?
June
Hi Eugeny, you can try to manually slice the image, put them in different documents and export them separately, but sure, it’ll take more time and effort
Dimas Prayuda
Hi Cara, hope u doing well, anyway great content and narration
Photoshop beginner here!, just wanna ask, I made a long landscape canvas and then sliced it into many slides. But when I finished slicing it and exported it as your tutorial, I wondered, if the image would be reduced, what do u think? do you have a way to make 10 slides of Instagram feed in 1 project file? lemme know, thank u
June
Hi Dimas,
When you export your slices, all the images should be in the same file.