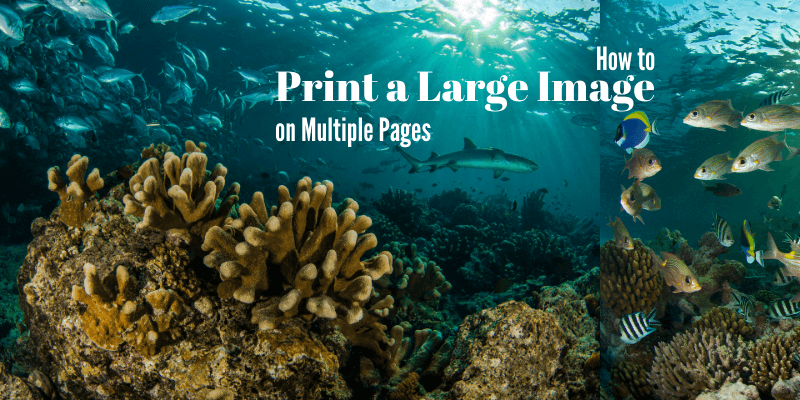
Did you know you can print a single image on more than one sheet of paper? This is how you can print posters and images at home without a large format printer.
Hey there! I’m Cara, and as a professional photographer, sometimes it’s nice to see what my images will look like big and in print. But I don’t always need professional-quality printing when I’m just playing around.
Are you in the same boat? Let me show you how to set it up in Photoshop so you can print a large image on multiple pages on your home printer!
Table of Contents
Step 1: Open a Large Document
First, you have to make sure the image is the right size. Open a new document by going to File in the menu bar and clicking on New. Alternatively, hit Ctrl + N or Command + N on the keyboard.

Choose a custom size and input the size you want on the right side of the panel.
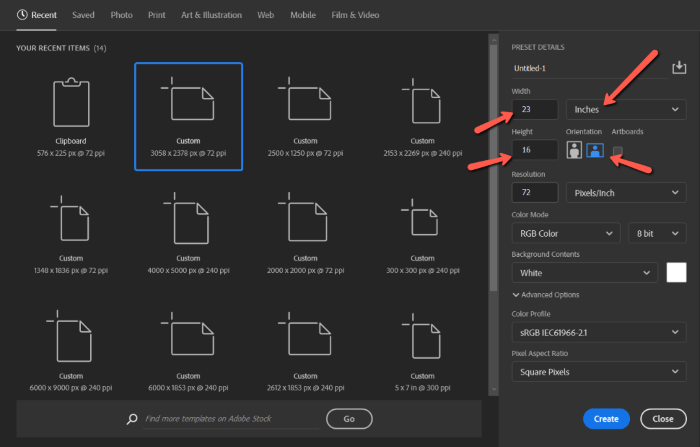
For this example, we’ll set up to print the image onto 4 sheets of paper. Change the size unit in the dropdown menu from pixels to inches.
Then input the width and height that you want for your project. We’ll do 23 inches wide by 16 inches tall, which is four sheets of paper 2 x 2 in landscape mode.
Click Create when you’re happy with the dimensions.
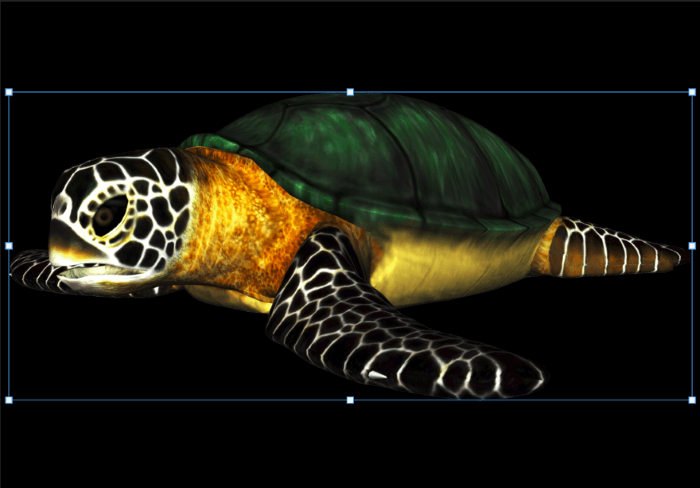
For this example, I turned the background black and added this turtle to the image.
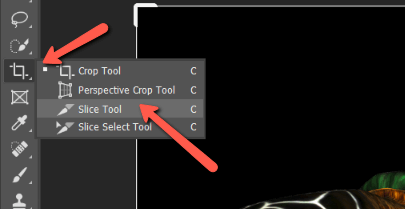
Step 2: Open the Slice Tool
Now we need to tell Photoshop how to divide the image and which parts to print on different pages. Let’s do this with the Slice Tool.
Select the Slice Tool from the toolbar on the left. In the default layout, it’s on the same menu as the Crop Tool. Right-click on the crop tool to reveal the slice tool and choose it.
Right-click within the image and select Divide Slice.

In the window that opens, you have the option to divide it vertically or horizontally and how many times you want to slice it.
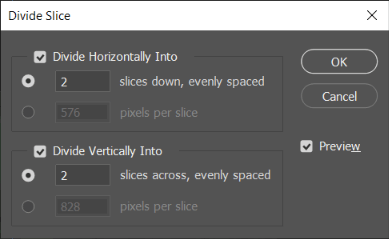
Click the checkboxes to activate divisions both vertically and horizontally. To cut into 4 sheets of paper we need to slice the image once each way so we end up with 2 sides. You can also choose how wide each slice should be in pixels.
Click OK when you’re happy with your selections.
Step 3: Save the Image
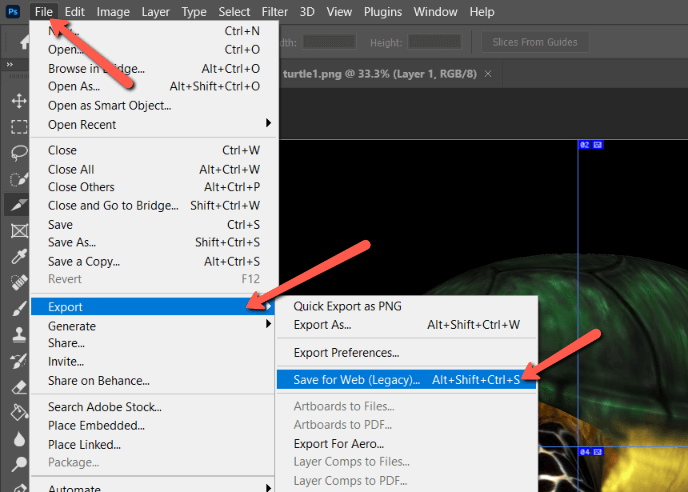
You’ll see a thin blue line appear where the image will be sliced. Go to File in the menu bar, hover over Export, and choose Save for Web. Alternatively, you can hit Alt + Shift + Ctrl + S or Option + Shift + Command + S to save/export the sliced image.
Since we’re printing an image, set the preset to JPEG. To get the best quality for your print, choose Maximum. Click Save.
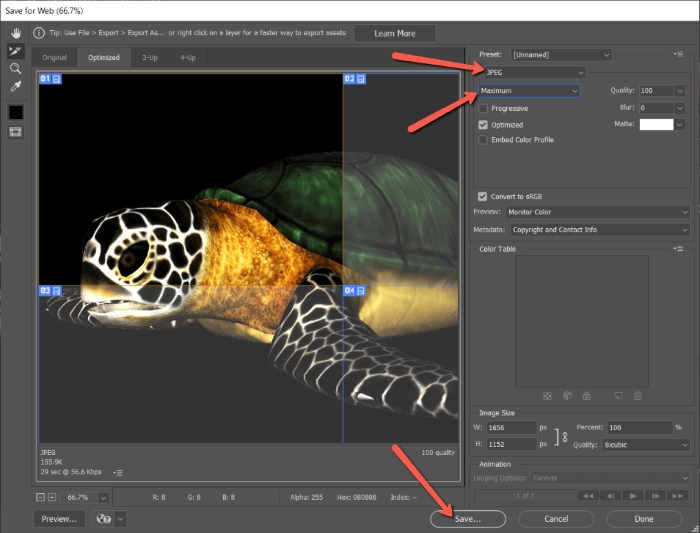
Choose the file location where you would like to save the images. Click Save again.
Browse to where you saved the images. You’ll see that the image has been divided into four images.

Step 4: Print Your Image
Now you can simply select your images and print them as usual. Printers won’t usually print all the way to the edge so you’ll have to trim the excess with a paper cutter or scissors. Then you can put the pieces together and mount them for display if that is your purpose.
Pretty neat trick, right?!
Interested to learn more tricks you can do in Photoshop? Check out other tutorials on Photoshop Buzz such as how to use masks in Photoshop!
About Cara Koch
Christine
Dear Cara,
To tell you thank you is an understatement! I looked at many other places to figure out how to divide a photo/artwork, and it was so confusing! But this well-written post has been amazing! I have been able to complete a big project for church!
Thank you for SAVING THE DAY!
I’m sending a prayer to God on your behalf. May you find peace and joy through His perfect love,
Christine